This thick-crust pizza dough recipe uses Italian 00 flour and just 5 ingredients plus an Italian technique to make a chewy, hand-stretched pizza that's crispy on the bottom with a soft, airy interior. Only 15 minutes of hands-on work. Same base dough as my 00 flour thin-crust pizza dough recipe, but shaped thicker and cooked slightly longer for that pillowy, satisfying bite.


Here in Italy, thick-crust pizza (aka hand-tossed pizza) is the typical pizza found most often in pizzerias everywhere. While there are plenty of regional pizza styles, you can most often expect to find this version no matter where you are in the country.
It's more common than thin, although some thin-crust pizzas have recently started to emerge as a new style. Also, to be clear, this Italian hand-stretched pizza has nothing whatsoever to do with American deep-dish pan pizza (which I also love when it's made well and I'll be sharing my recipe for that soon 😉).
This Italian thick-crust pizza is light, airy, fragrant, and incredibly easy to digest. No stodgy, bready, hard-to-swallow crust that feels like it won't go down. No siree! The difference comes down to fermentation, flour type, and yeast, and I explain all three below.
In this post, you'll also find side-by-side comparison photos of this same thick-crust pizza baked in my regular home oven vs my Ooni Volt 12 Electric Pizza Oven. Both produce excellent results!

If you enjoy this recipe, you might also enjoy my crispy thin-crust 00 flour pizza dough, easy homemade pizza sauce, or check out my ultimate guide for the Best Pizza Toppings and Doughs before you get started.
Jump to:
- How to Make Thick Crust Pizza Video (00 Flour)
- Why This Thick-Crust Pizza Dough Recipe Works
- Why You'll Love This Recipe
- Why Italian Pizza Dough Is Lighter and Easier to Digest
- Why 00 Flour Makes Better Thick-Crust Pizza than All-Purpose
- Can I Substitute All-Purpose or Bread Flour for 00 Flour?
- What Makes This Dough Thick Instead of Thin?
- What to Expect: Thick-Crust Pizza Dough Timeline
- Ingredients for Thick-Crust 00 Flour Pizza Dough
- How to Make Thick-Crust Pizza Dough Step-by-Step (Using 00 Flour)
- How Thick Should Pizza Crust Be?
- Why Oven Temperature Matters More for Thick-Crust Pizza
- Best Baking Surfaces for Thick-Crust Pizza
- Serving Suggestions for Thick-Crust Pizza
- Equipment
- How to Store Thick-Crust Pizza Dough (Make-Ahead Options)
- How to Reheat Leftover Pizza
- More Uses for This Pizza Dough
- Top Tips for Perfect Thick-Crust Pizza
- FAQ
- Looking For More Easy Pizza Recipes?
- 📖 Recipe
- Food Safety

How to Make Thick Crust Pizza Video (00 Flour)
Why This Thick-Crust Pizza Dough Recipe Works
Most easy thick-crust pizza recipes use all-purpose flour and a quick rise, which leads to a dense, bready crust that I (and Luca, a native Italian) find disappointing to say the least. Bread flour makes a great thick-crust pizza, too, but this version has a character all its own.
The secret is Italian 00 flour with a proper fermentation schedule. Those two things combined create a thick-crust pizza that's light and airy with a tender, delicate crumb you won't get from American all-purpose flours.
Using 00 flour for thick-crust pizza might sound unusual, but it's what makes this version special and an authentic Italian pizza dough. You can learn more about what 00 flour is and why it makes the best pizza dough in my 00 flour thin-crust post.
The only technique difference from my thin-crust version is how you shape it. Instead of rolling the dough out thin with a rolling pin, you hand-stretch it a little thicker and create a "cornice" (the Italian term for the puffy raised rim around the edge).
What Is Thick-Crust Pizza?
Thick-crust pizza is a hand-stretched pizza dough shaped to about ¼ inch thick before baking, creating a soft, chewy interior with a crispy bottom. It's different from deep-dish or pan pizza, which are pressed into oiled pans and baked inside them.
Thick-crust pizza is stretched by hand and baked directly on a pizza stone, steel, or baking sheet, giving it a lighter crumb and a more open texture. In Italy, it's just called pizza!
Why You'll Love This Recipe
- Same easy 5-ingredient dough as my popular thin-crust 00 flour recipe, just hand-stretched and thicker and baked a bit longer.
- Light, airy, and easy to digest just the way real Italians here in Italy make it. Proper fermentation with 00 flour means this thick crust is never dense, stodgy, or hard to swallow. The best versions stay soft and pleasant even after the pizza cools.
- Chewy, pillowy interior with a crispy golden bottom. Hand-stretching (no rolling pin) preserves the air bubbles for that perfect thick pizaa exture.
- 10-12 minutes of hands-on work to mix and knead. A stand mixer cuts it to about 8 minutes.
- Make it same-day or cold ferment 1-3 days for a deeper, more complex flavor. Cold fermentation also improves digestibility (a key factor for Italians when considering how good a pizza is).
- Works in any home oven, even my European Whirlpool oven that maxes out at 482°F/250°C. Also works in toaster ovens, but it looks and tastes even better when baked in a pizza oven like my Ooni Volt 12 electric oven.
What Does Italian Thick-Crust Pizza Actually Look Like in Italy?
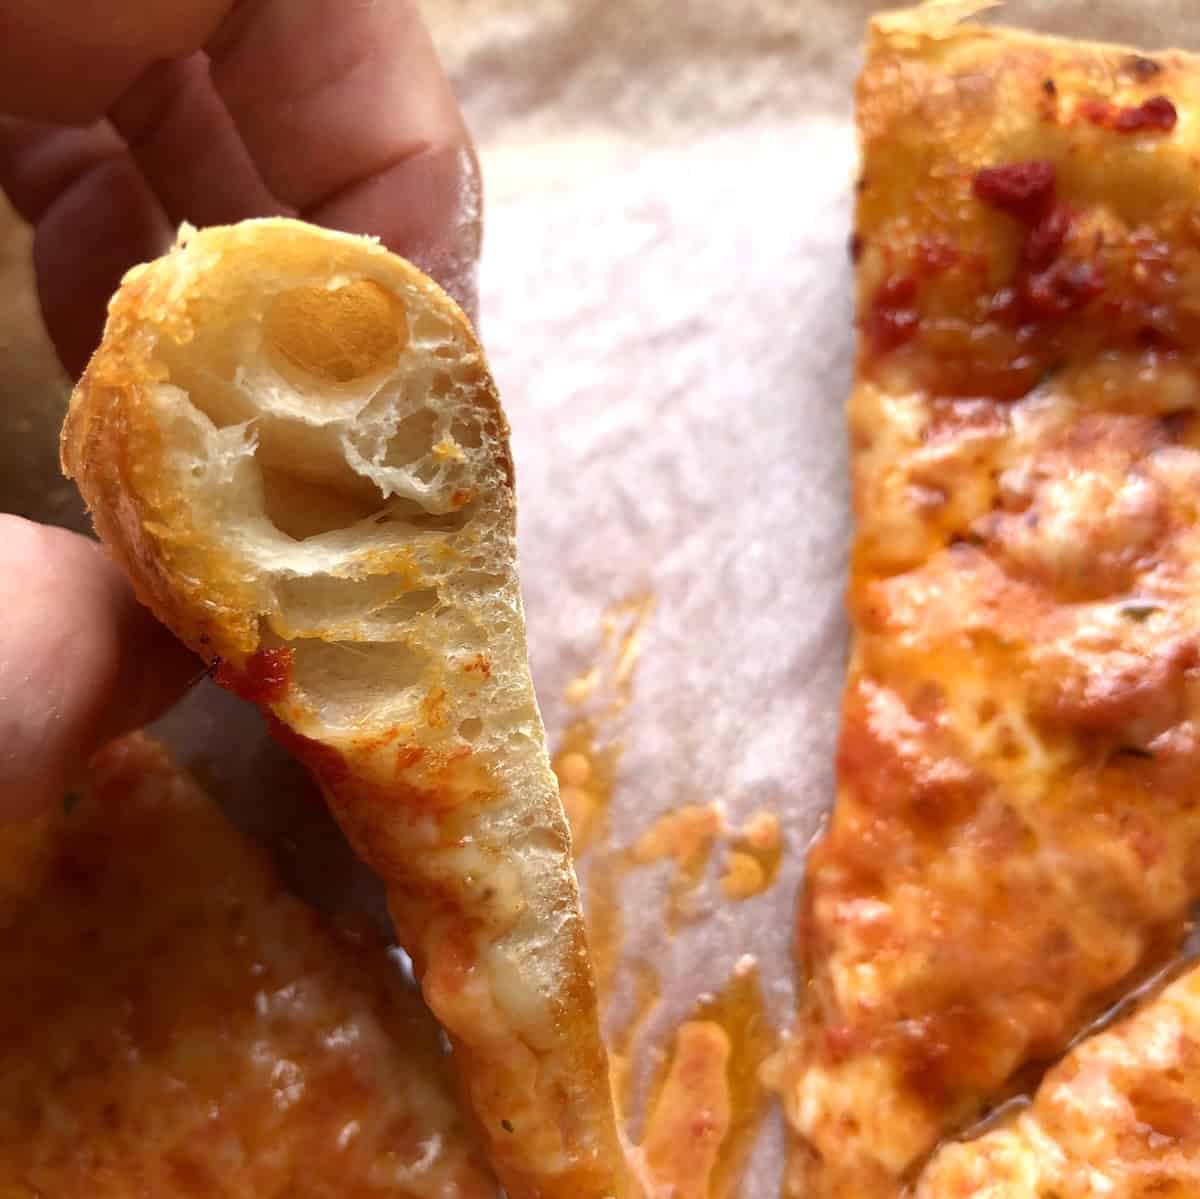
Italian thick-crust pizza (see photos below) doesn't have a thick bottom crust. The base is actually quite thin, sometimes thin enough that you need a knife and fork to eat it.
What makes it "thick" is the cornice (pronounced "kor-NEE-cheh"), the outer rim, which puffs up into an airy, light pillow during baking. The best pizzerias in Italy proudly boast their 24-hour or 48-hour "impasto a lievitazione lenta" or "lunga lievitazione" (slow-risen dough), and that long fermentation is part of what helps create the open, bubbly cornice you see in the photos below.


Thick-Crust Pizza vs Deep-Dish and Pan Pizza
Thick-crust pizza is hand-stretched and baked directly on a pizza stone, steel, or baking sheet. The dough is shaped by hand (never a rolling pin), topped immediately with sauce and toppings, and baked. It's never shaped and then given time to rise again (a third time) before being topped.


Deep-dish and pan pizzas↑ (photographed above) are pressed into oiled pans (similar to foccacia dough) and baked inside them, which essentially fries the bottom crust in oil. The dough ingredients are often different, too, since American pan pizza dough typically contains more oil and sometimes milk or milk powder to create that soft, bready texture.
This recipe is for hand-stretched thick-crust pizza, the Italian kind.

Why Italian Pizza Dough Is Lighter and Easier to Digest
If you've ever eaten thick-crust pizza that felt heavy, bready, and hard to swallow, the problem wasn't the thickness. It was three things working against you: the flour, the fermentation, and your oven temperature.
Most American-style pizzerias often make and use their dough the same day, with a quick rise and too much commercial yeast. That alone can create a dense crust. But commercial pizza ovens also run at 600°F-700°F+ (315°F-370°C+), which produces dramatic oven spring and shortens the cook time that regular home ovens simply can't replicate.
So when you combine a same-day, quick-rise dough with a home oven that maxes out at 475-500°F, you get the worst of both worlds: dense, under-risen crust without the heat to compensate.
This recipe fixes what you can control at home. Soft wheat Italian 00 flour produces a more tender crumb than American hard wheat flours. A long, slow fermentation (lievitazione lunga) breaks down starches and proteins so the crust is lighter and easier to digest. And, a fully preheated oven and baking surface (more on this in the baking section below) maximize the oven spring you get.
In Italy, the best pizzerias give their dough 24 to 72 hours of slow fermentation. The result is pizza that's elastico, morbido e digeribile - elastic, soft, and digestible. Some use a natural mother starter (lievito madre), but the key principle is the same: time does what shortcuts can't.
This recipe gives you that Italian approach at home. A same-day thick-crust dough with a 2 to 3-hour rise (if you're in an absolute hurry) that produces a noticeably lighter crust. But cold fermenting in the fridge for 1-3 days is the money spot! The difference is remarkable. More flavor, more air, and so easy to eat you barely notice you've had five slices.
Why Does Fermentation Make Pizza Dough Easier to Digest?
During fermentation, yeast feeds on the flour's carbohydrates, producing carbon dioxide (which creates air pockets) and organic acids. Those acids, along with enzymes naturally present in the flour, break down gluten and complex starches into simpler compounds your body processes more easily.
A study published in the journal Nutrients found that pizza dough fermented for 48 hours had the highest protein digestibility scores and the lowest predicted glycemic index compared to quick-rise methods. This is why properly fermented pizza feels light, not heavy.
The Italians knew slow fermentation was the best way, even before there was any science to back it up! Slow fermentation is also what makes Jim Lahey's no-knead pizza dough work.
Why 00 Flour Makes Better Thick-Crust Pizza than All-Purpose
A lot of thick-crust pizza recipes call for all-purpose flour, which works but produces a denser, breadier result. If all-purpose is all you have and 00 flour is too expensive or not available, bread flour is actually a much better alternative.
Its higher protein content (12-14%) develops stronger gluten, which creates bigger air pockets and a chewier crust. I have a dedicated bread flour pizza dough recipe on the site that makes fantastic thick-crust pizza, too.
But 00 flour is a different animal entirely. It's milled from soft Italian wheat (grano tenero) to an ultra-fine, almost powdery texture with no bran or germ. That finer grind creates a smoother, more elastic dough that stretches beautifully by hand and bakes into a more tender crumb.
For thick-crust pizza specifically, 00 flour keeps the crust light even when it's thick. All-purpose flour, with its coarser grind and most often a harder wheat base, tends to produce a heavier result. Bread flour gets you closer, but the texture is different. Bread flour gives you a satisfying chew with larger, more open air pockets. 00 flour gives you a more delicate, tender interior.
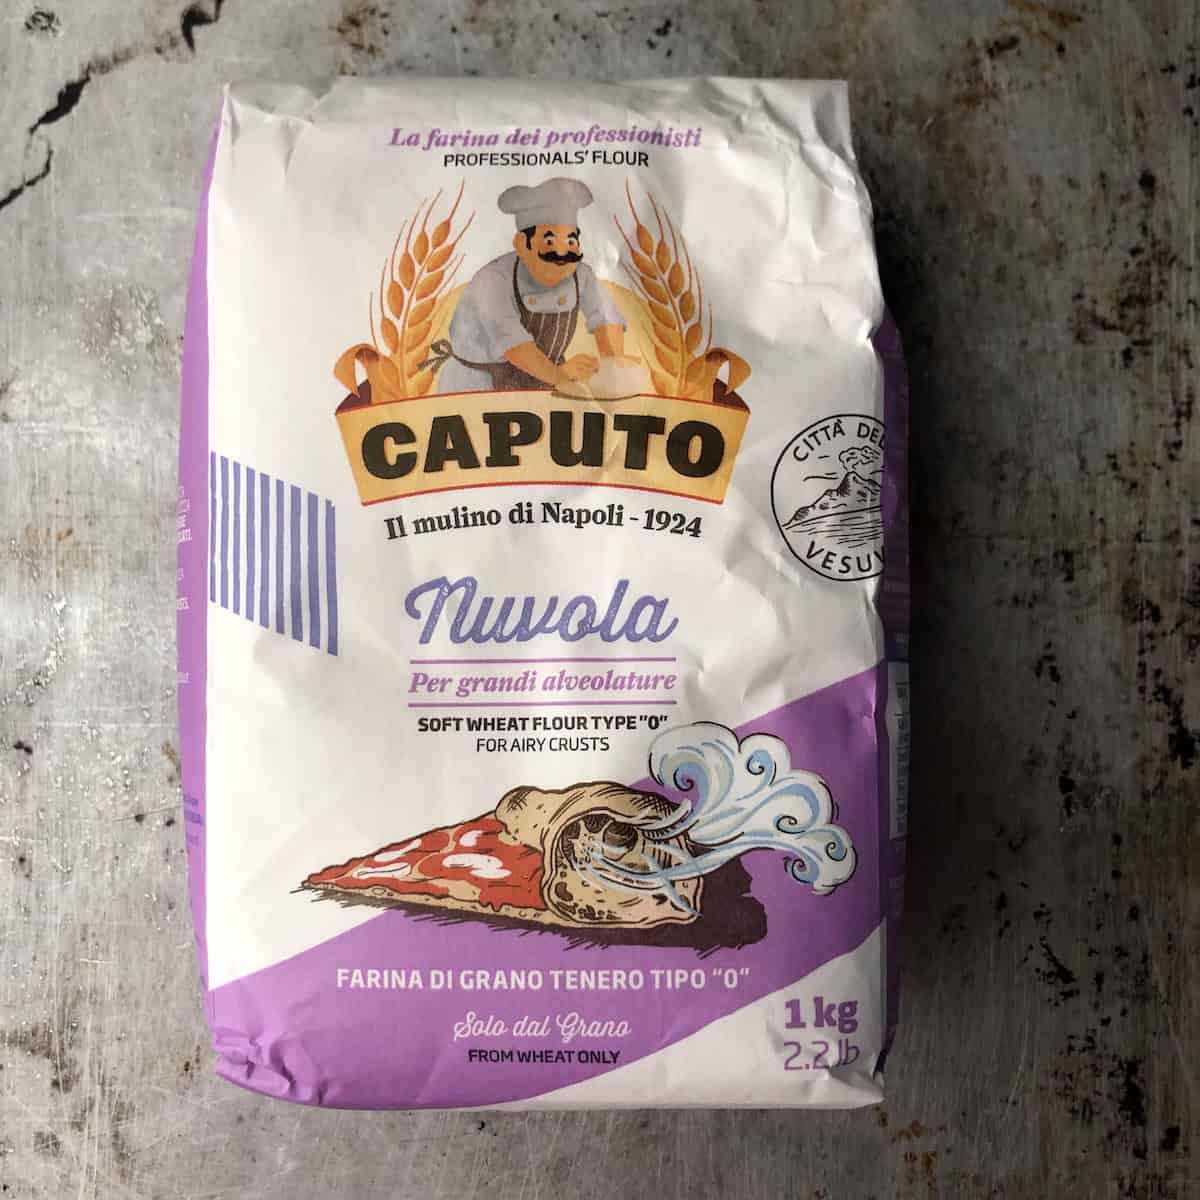
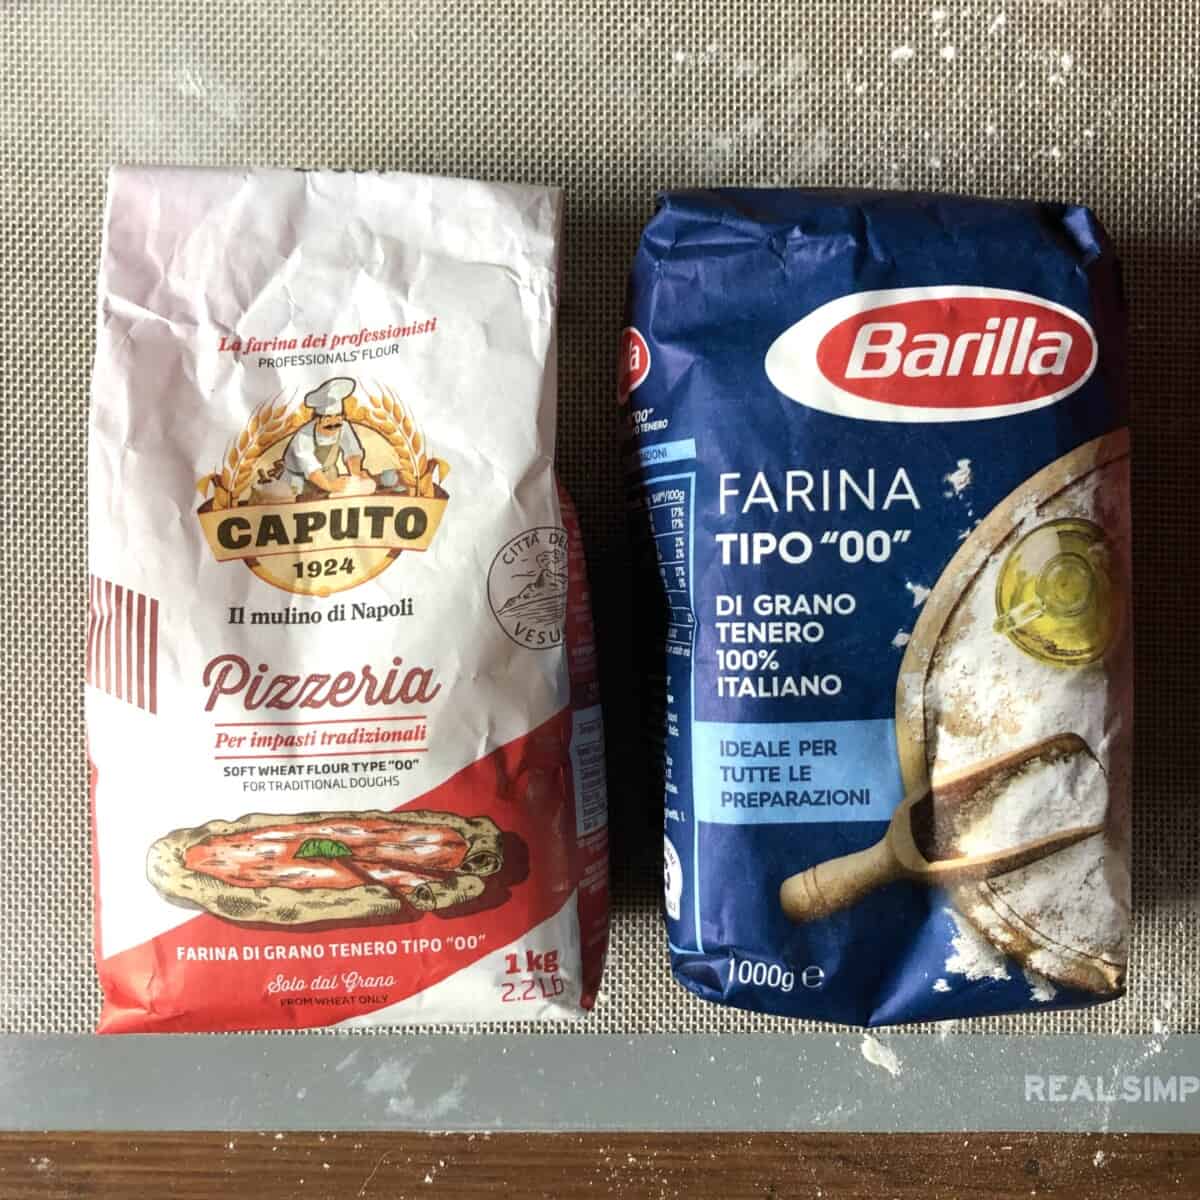
I've used Barilla 00 flour (11% protein), Caputo Pizzeria flour (12.5% protein), and Caputo Nuvola flour (12.5% protein), all for this same recipe. They're widely available here in Italy and increasingly easy to find online or in American grocery stores.
For a deep dive on the different types of 00 flour and how the Italian grading system works, check out my 00 flour thin-crust pizza dough post.
↑Ventricina Pizza baked in my Ooni Volt 12 Electric Pizza Oven @ 662°F (350°C).
Can I Substitute All-Purpose or Bread Flour for 00 Flour?
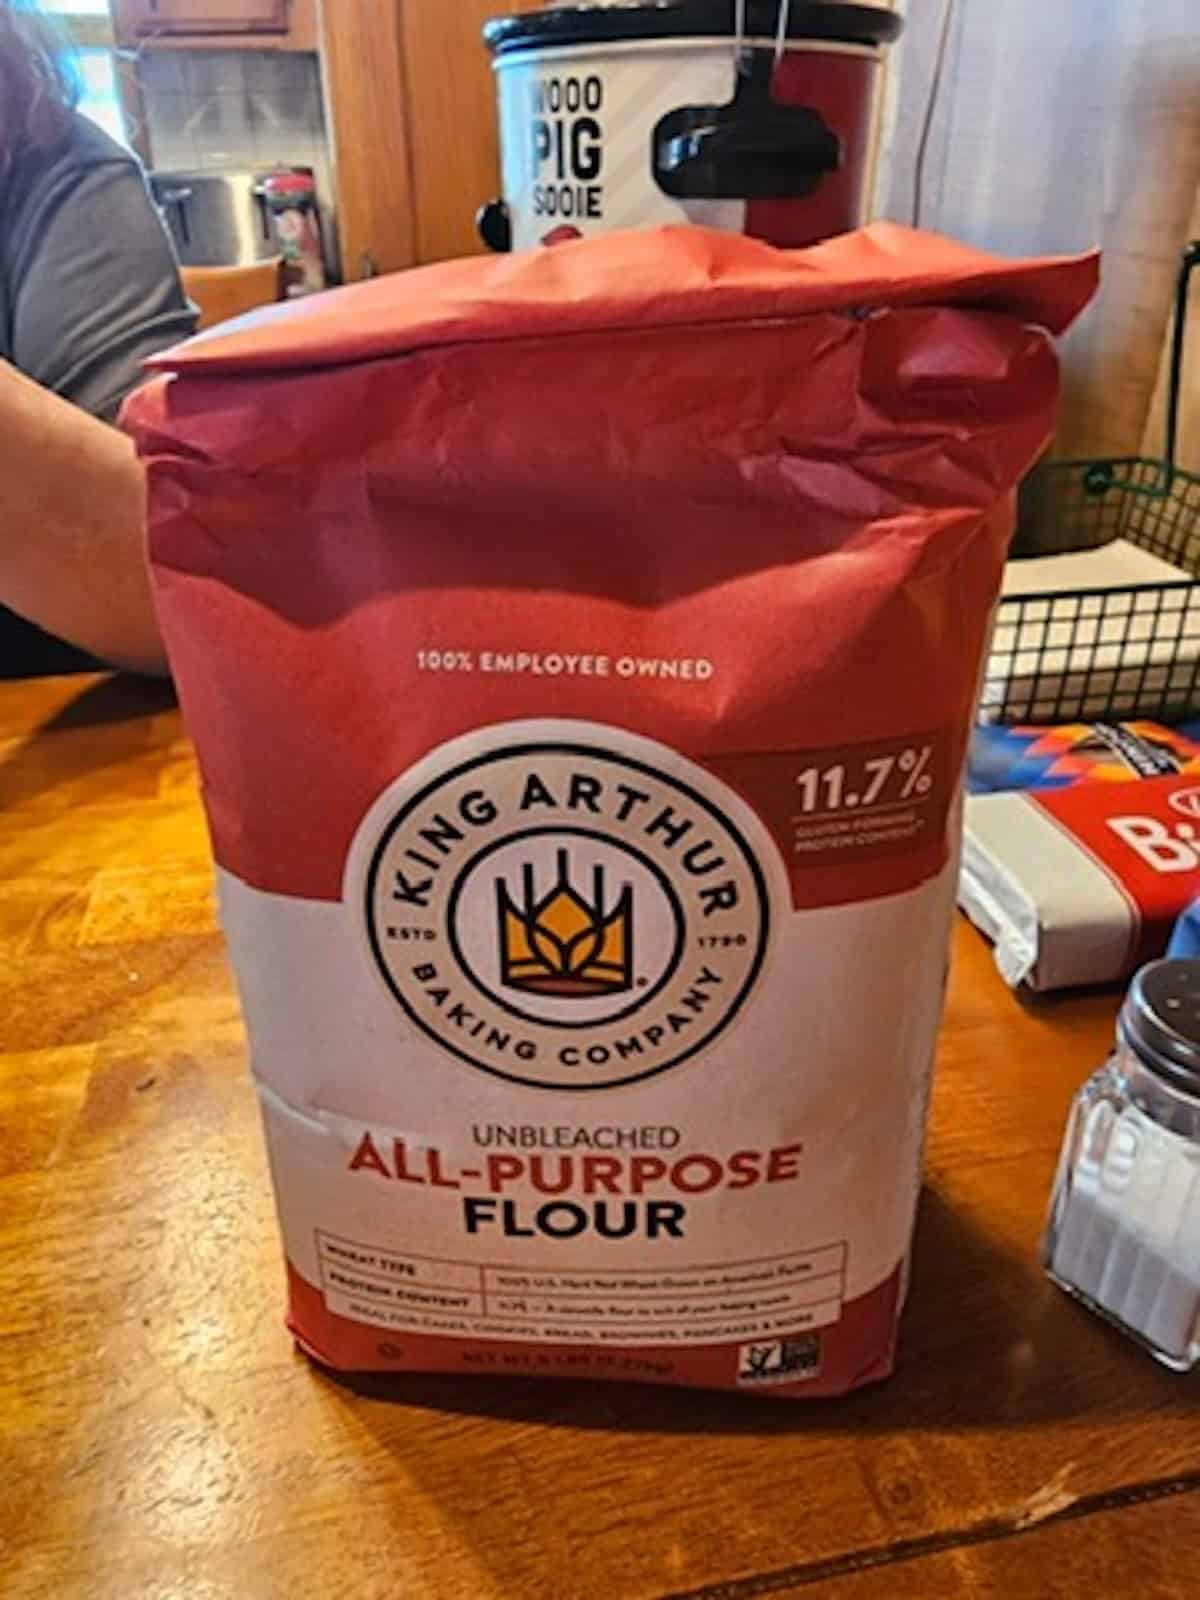
Yes, but the results will be different, and with thick-crust pizza, the flour choice is more noticeable than with thin crust. A high-quality all-purpose flour like King Arthur Unbleached or Hecker's (both around 11.7% protein) will work for a denser crust.
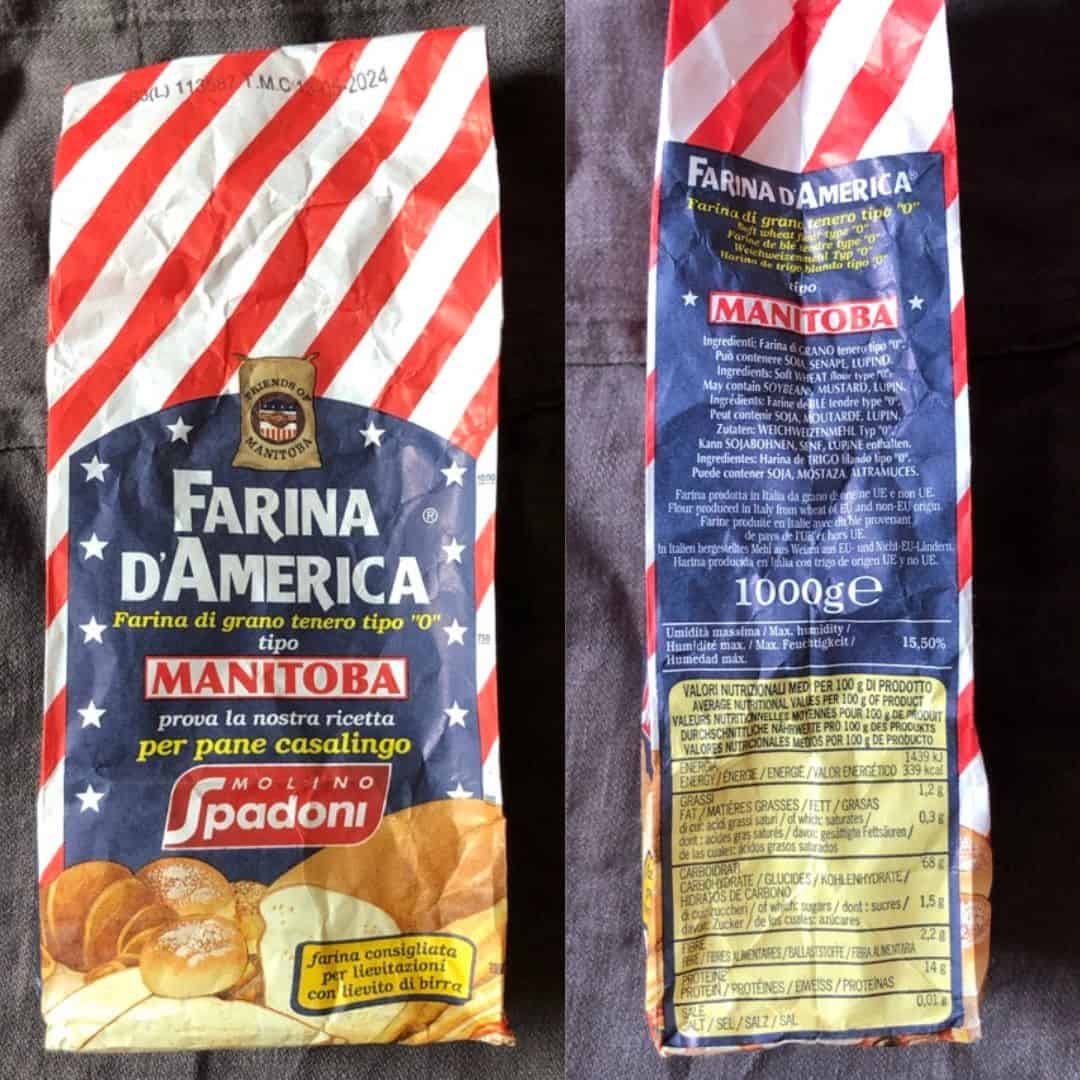
Bread flour (called "farina Manitoba" in Italy) is the better swap. Try my dedicated bread flour pizza dough recipe for the best results.
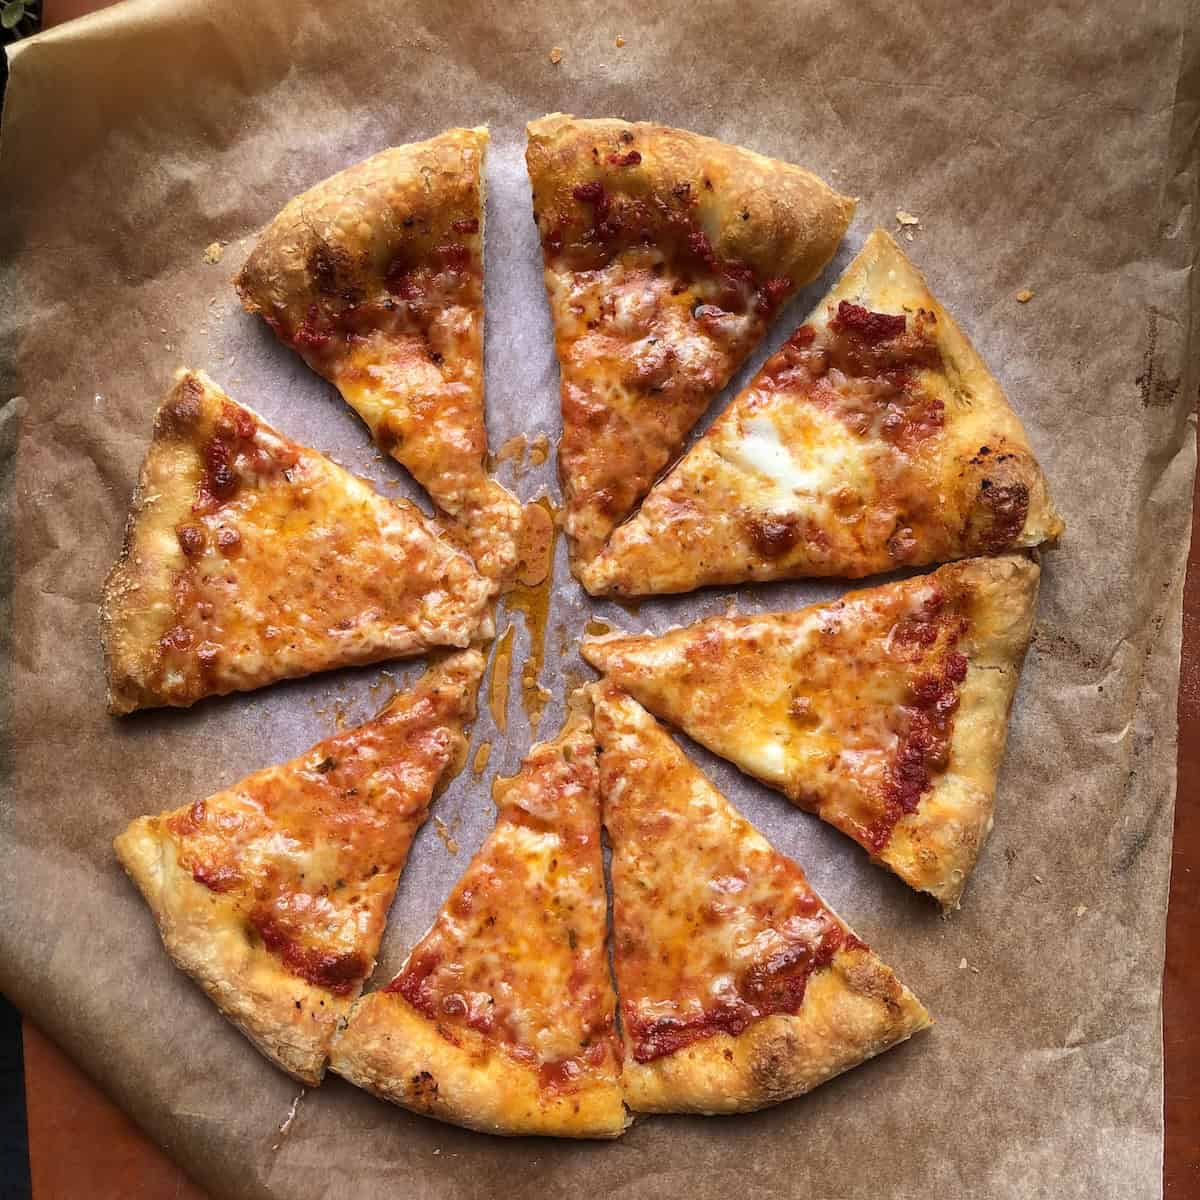
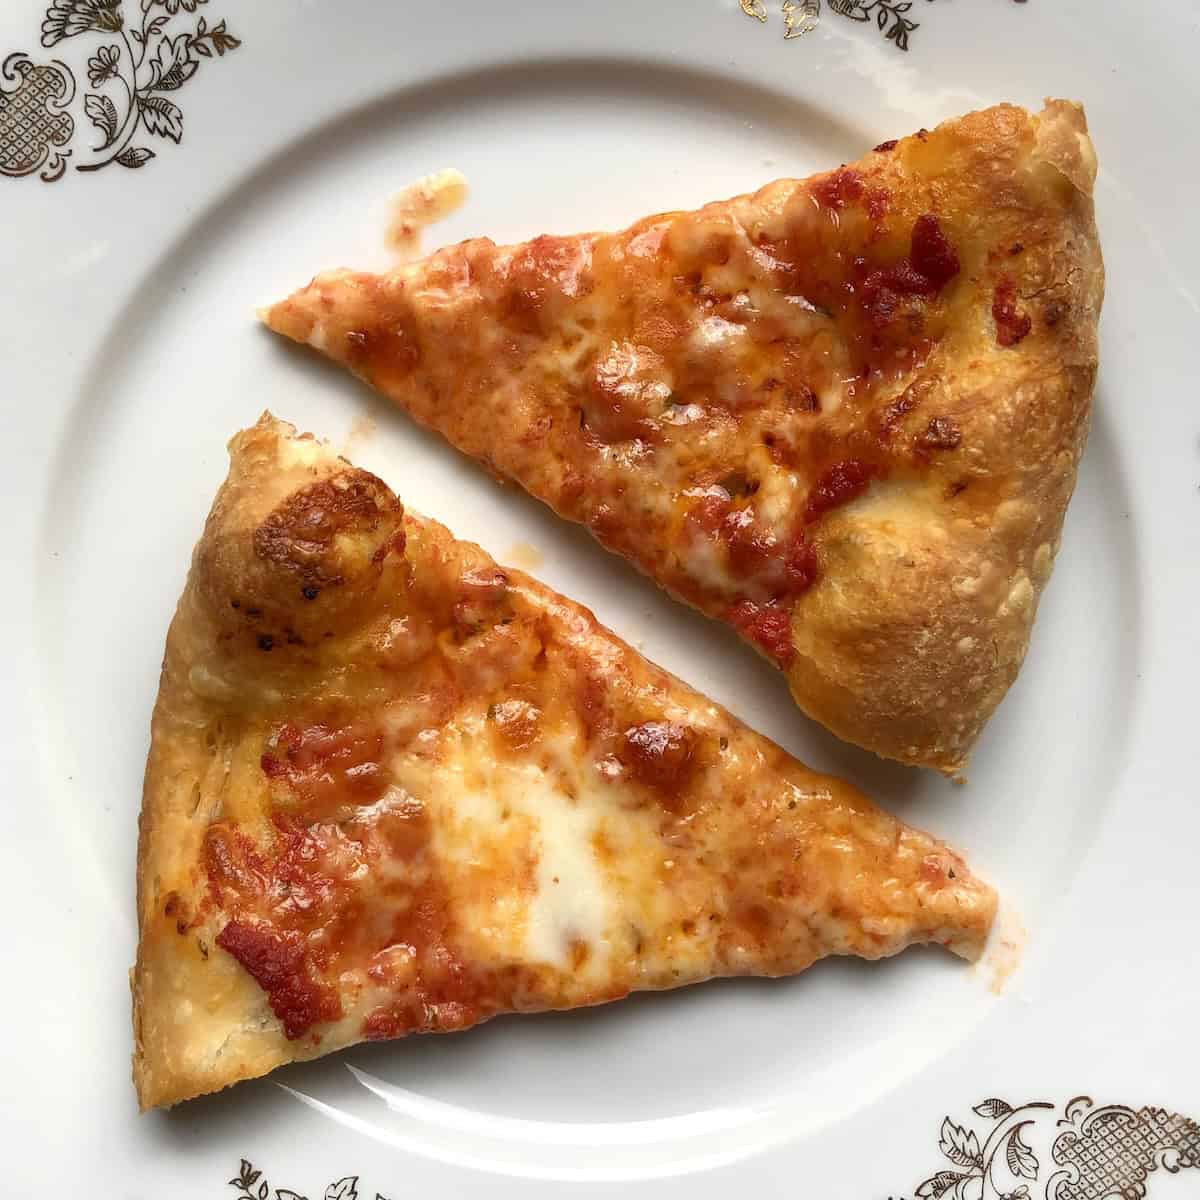
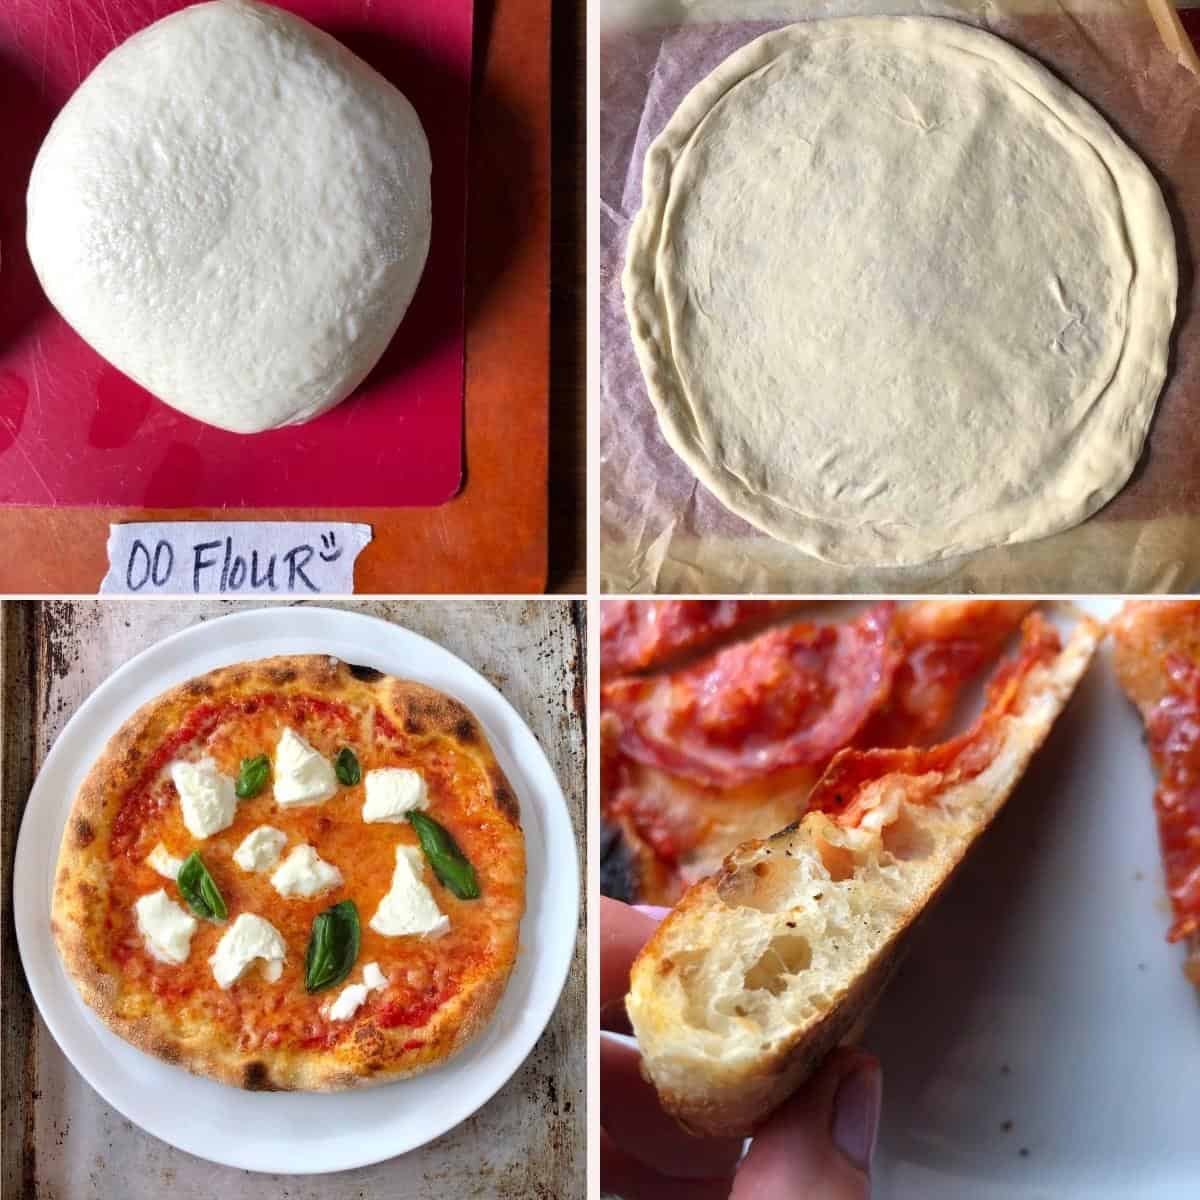
The photo below shows the same thick-crust pizza margherita made with 00 flour (left) and bread flour (right), so you can see the difference for yourself.
The photo below shows the same thick-crust pizza margherita made with 00 flour and bread flour, so you can see the difference for yourself. Both pizzas were baked on the same day in my regular home oven at 482°F/250°C.


What Makes This Dough Thick Instead of Thin?

As I mentioned above, this is the same recipe as my thin-crust 00 flour pizza dough (left photo above). The difference is only in how you handle the dough.
Hand-stretch the dough thicker (about ¼ inch or a little more) instead of rolling it out super thin. Always use your hands, never a rolling pin. A rolling pin pushes out the air bubbles that took hours to develop.
Then add your pizza sauce, toppings, and bake!


What to Expect: Thick-Crust Pizza Dough Timeline
Don't let the 2 ½ to 3-hour timeline fool you. Your hands-on time is only about 15 minutes, plus the 10 minutes or so you'll spend shaping and topping the pizza. The rest is completely hands-off while the dough does all the work for you, developing the flavor, texture, and digestibility that quick-rise "30-minute pizza dough" recipes simply can't deliver.
Those 30-minute recipes exist, but they skip the fermentation times that makes pizza dough actually taste good. The overpowering yeasty flavor from a quick-rise crust is sort of like deglazing a pasta sauce with wine, but not allowing the alcohol to cook off before adding the tomatoes. You taste the raw ingredient instead of the depth it was supposed to create.
Fermentation transforms yeast flavor the same way heat transforms wine. It just needs time. This pizza dough gives you better results with less effort because time is doing the heavy lifting, not you.
Same-Day Thick-Crust Pizza Schedule
Allow for about 3.5 to 4 hours between when you begin mixing the pizza dough ingredients and when you want to be sitting down eating pizza.
- 5 minutes to measure and mix the ingredients
- 10-12 minutes to knead (by hand or stand mixer)
- 90 minutes for the first rise *in colder kitchens, it may take up to 2 hours to double in size
- 30 minutes for the second rise (as formed dough balls)
- 5-8 minutes to hand-stretch, sauce, and top each pizza
- 10-14 minutes to bake (depending on oven temperature)
Cold Ferment Option (Best Flavor and Digestibility)
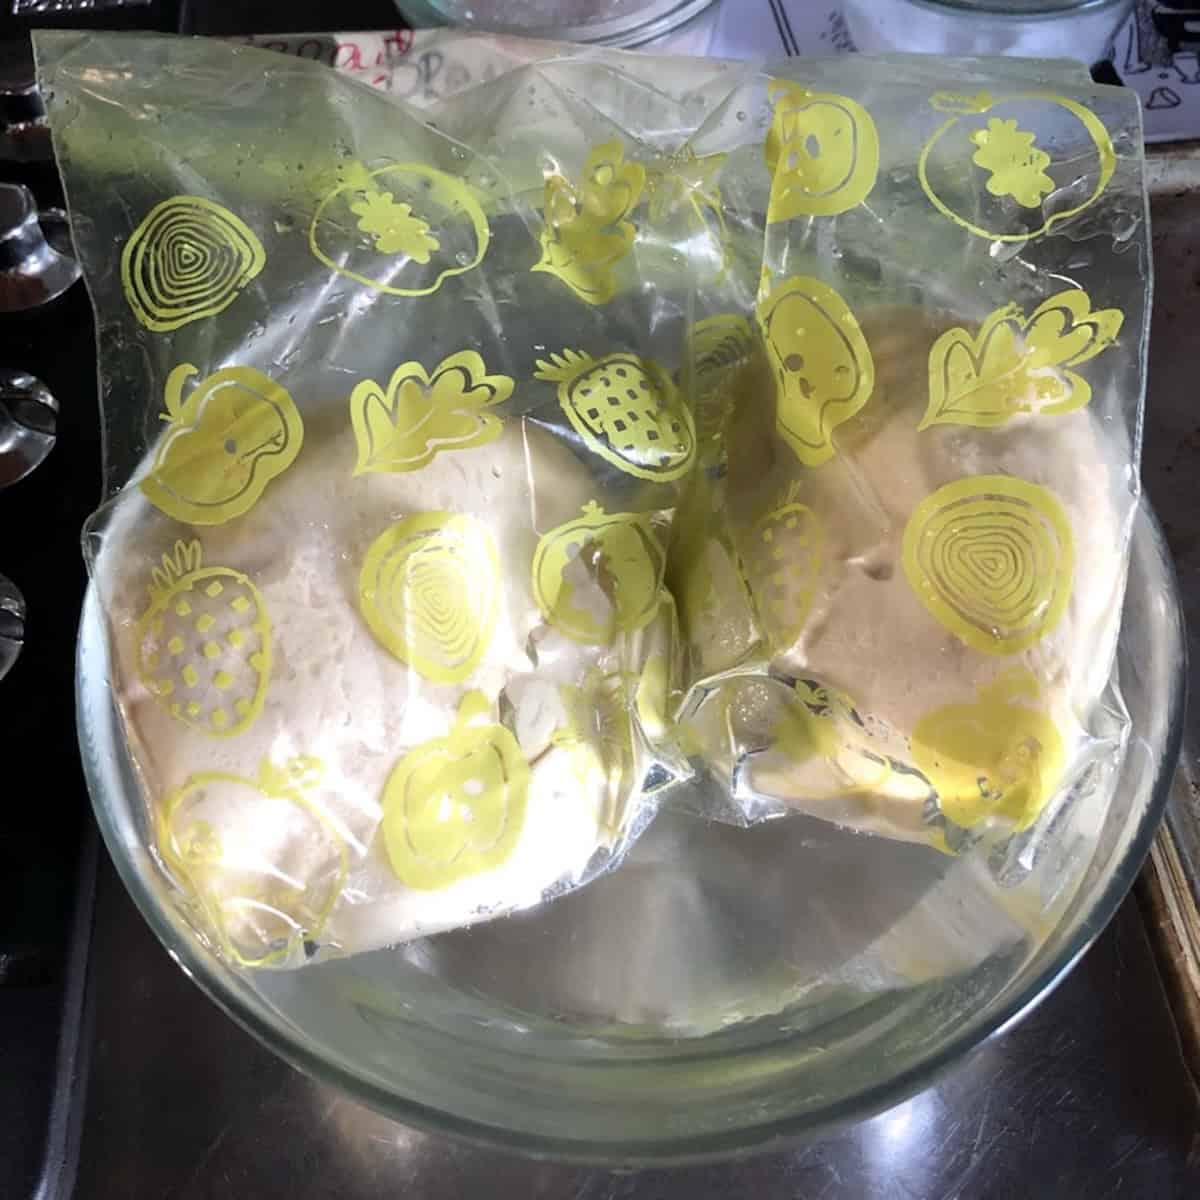
For the best results, make the dough the night before. After the first rise, portion into dough balls, place in lightly oiled ziptop bags with the air removed, and refrigerate for 1-3 days.
The cold slows the yeast down but doesn't stop it, giving you a more complex flavor and a lighter, more digestible crust.
Pull the dough out of the fridge about 1-2 hours before you plan to bake, which allows it come to room temperature before you begin stretching your dough.
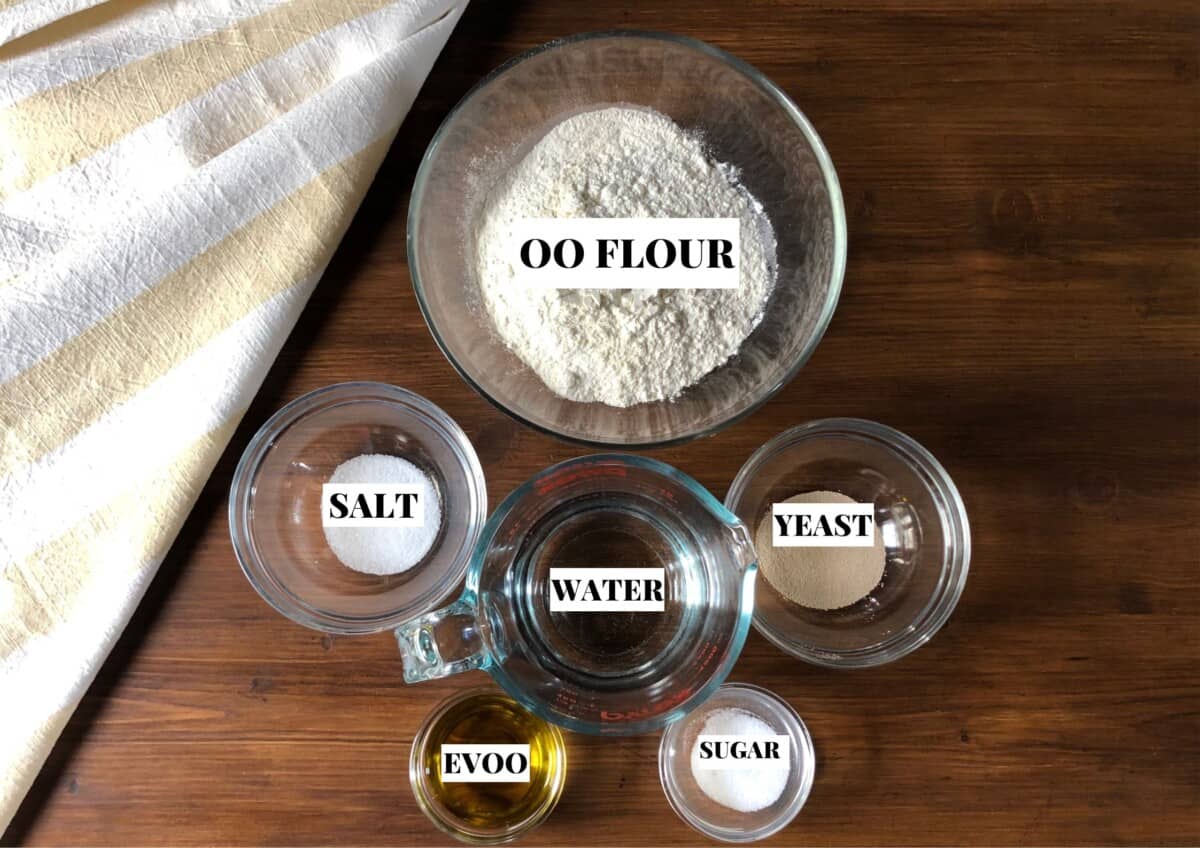
Ingredients for Thick-Crust 00 Flour Pizza Dough
Thick-crust pizza with just 5 ingredients plus water. Here's what you'll need and why each one matters.
- Italian 00 flour (12.5% protein is best, but even 11% will work) creates a tender, elastic dough that's easy to hand-stretch and bakes into a light, airy thick crust. I use Caputo 00 Pizzeria flour or Caputo Nuvola as the gold standard, but Barilla 00 "per tutti preparazione" also works for this recipe.
- Instant yeast (SAF or Red Star) goes directly into the dry ingredients with no blooming required, saving about 10 minutes. You can substitute active dry yeast; see recipe card notes for how to bloom the yeast.
- Warm water between 110-115°F (43-46°C) activates the yeast. If you don't have a thermometer, it should feel like warm bath water, not hot. Yeast dies above 130°F (54°C).
- Salt (Diamond Crystal Kosher or fine sea salt) strengthens the gluten network, controls fermentation speed, and adds flavor. Don't skip it unless you're on a low-sodium diet. If using sea salt or table salt, reduce the amount called for.
- Sugar (optional, 2 teaspoons) helps the crust brown more evenly in a home oven where temperatures typically only reach between 475°F-500°F. You can substitute honey or omit it entirely if you have dietary restrictions.
- Extra virgin olive oil keeps the dough softer and more tender during the longer bake times necessary for thick-crust pizza to bake in regular home ovens. Any neutral oil works here, but EVOO is healthier.
See recipe card for quantities.
How to Make Thick-Crust Pizza Dough Step-by-Step (Using 00 Flour)
Here's how to make this easy thick-crust pizza dough from start to finish. Full recipe instructions and the video are in the recipe card below.
Step 1. Mix the Dough
Whisk together the dry ingredients (flour, yeast, sugar, and salt), then add the olive oil and about half of the warm water. Mix until a shaggy dough forms, adding more water as needed. I typically use right at 250g/8.5 fl oz, but this varies depending on flour absorption and humidity.
You can do this entirely by hand in one bowl, or use a stand mixer with the dough hook.


Step 2. Knead the Dough (10-12 Minutes by Hand, or about 8 Minutes Stand Mixer)
Knead until the dough is smooth, elastic, and slightly tacky but not sticky. By hand, this takes around 10-12 minutes. In a Kitchenaid or other stand mixer with the dough hook, about 8 minutes on #2 medium speed.


Step 3. First Rise (90 Minutes)
Place the dough into a lightly oiled bowl, cover tightly, and set aside in a warm spot for about 90 minutes, or until doubled in size. In colder months, turn your oven light on and place a small bowl of hot water on the bottom rack to create a warm, humid environment for the dough to rise.


Step 4. Deflate and Form the Dough Balls
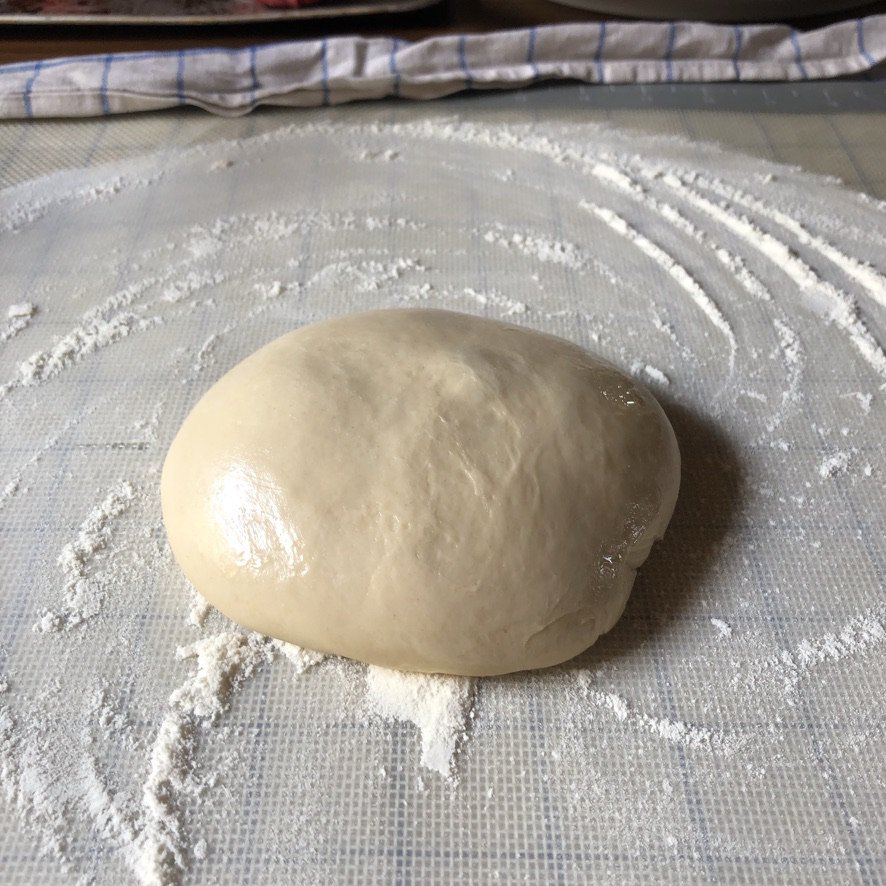
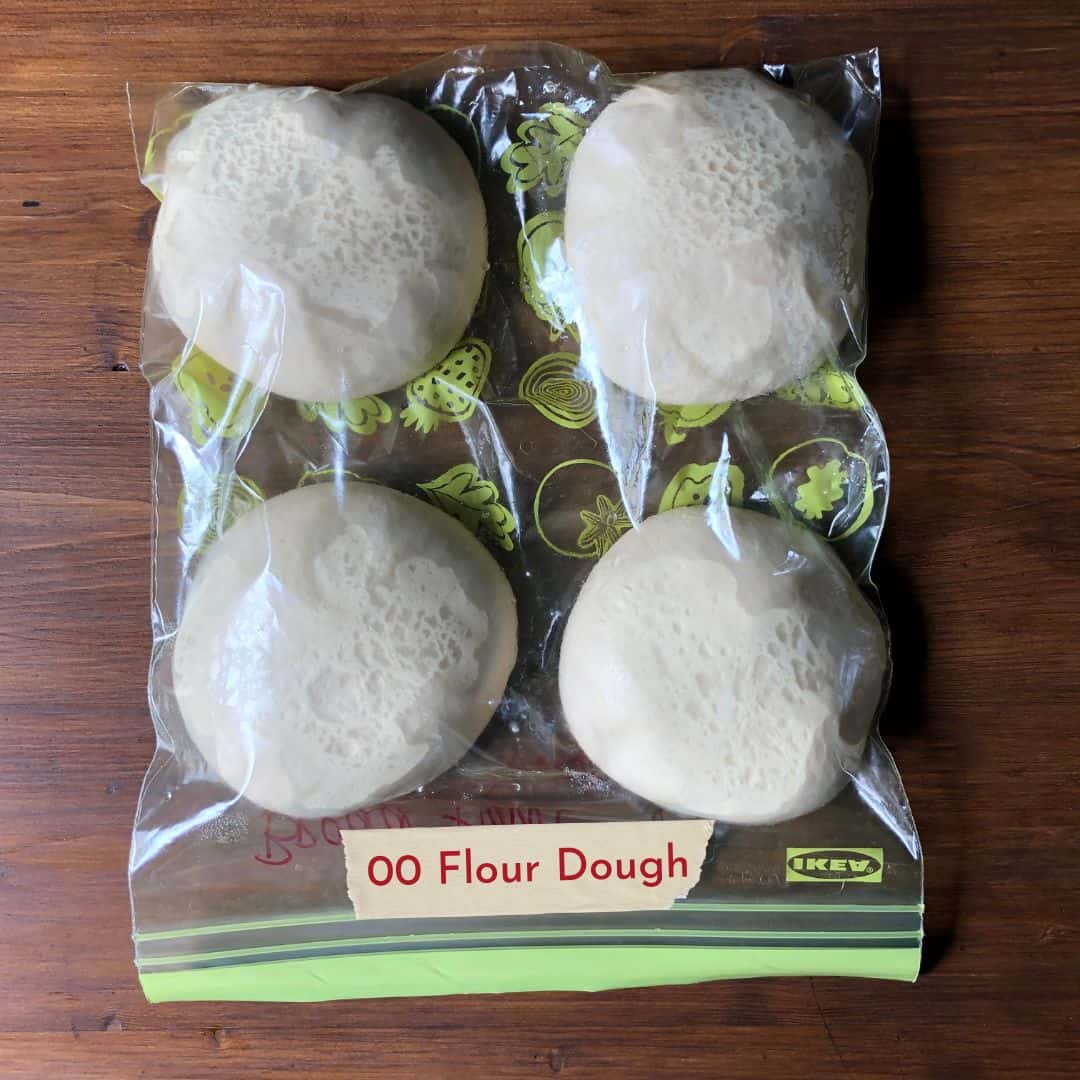
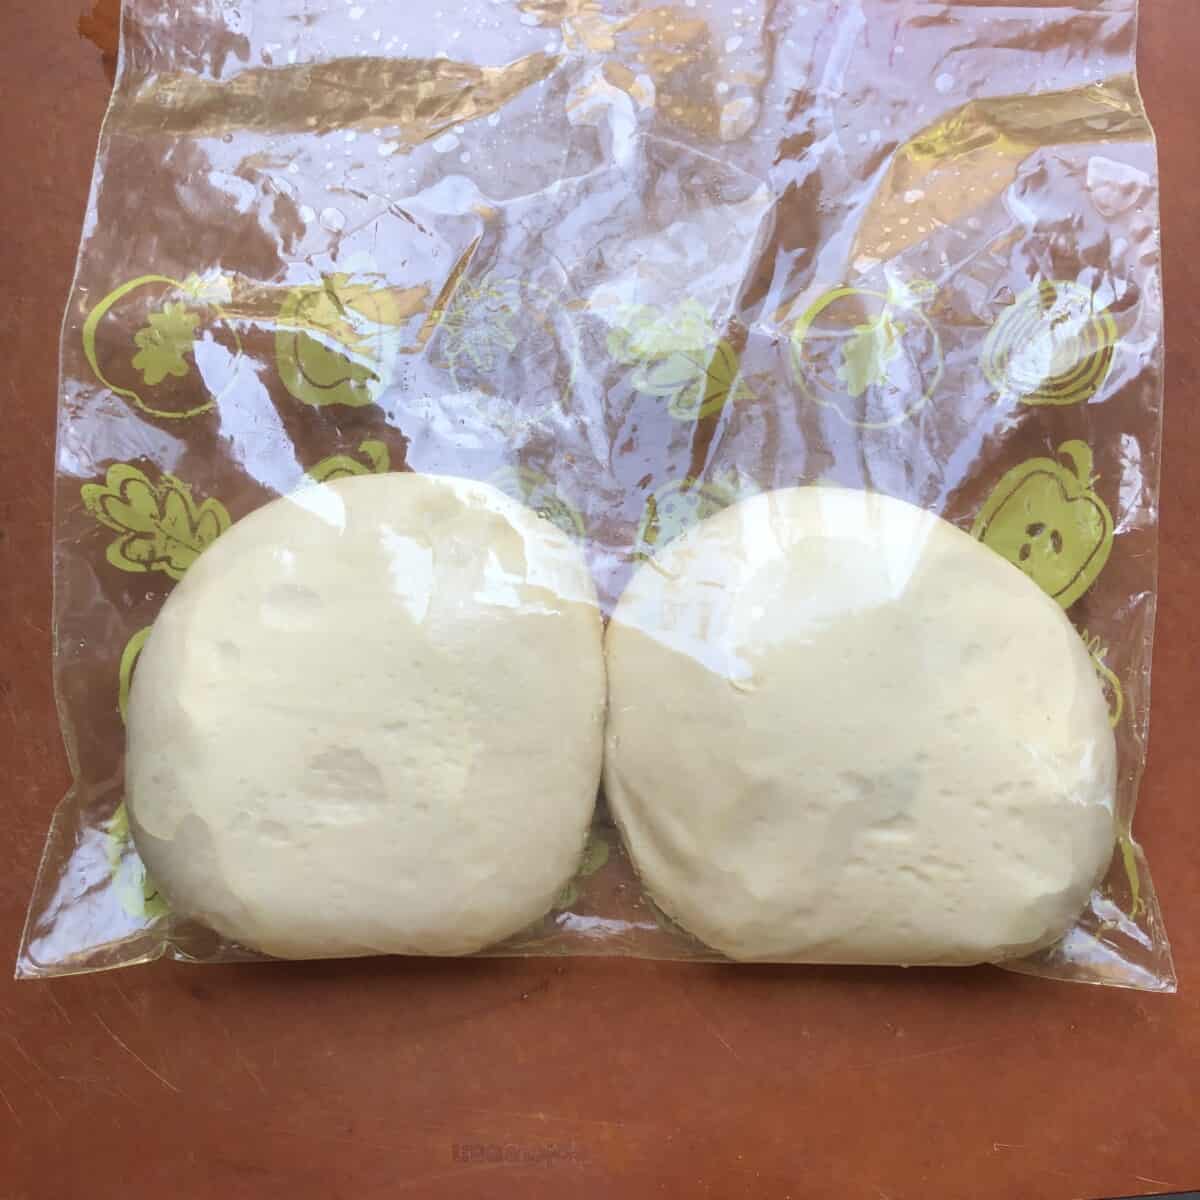
Punch down the dough to release the air and divide it into 4 equal pieces. Fold and then roll each piece into a smooth, uniform ball.
Place them on a lightly oiled baking pan and brush with a little oil, then cover with cling film. Or place them on a lightly floured pan, dust with flour, and cover with a clean lint-free kitchen towel.


Step 5. Second Rise (30 Minutes)
Let the covered dough balls rise for about 30 minutes more in a warm environment. You'll know they're ready when they become puffy-looking, noticeably lighter-looking, and have a sheen or slight glossy look.
Step 6. Hand-Stretch the Pizza Dough
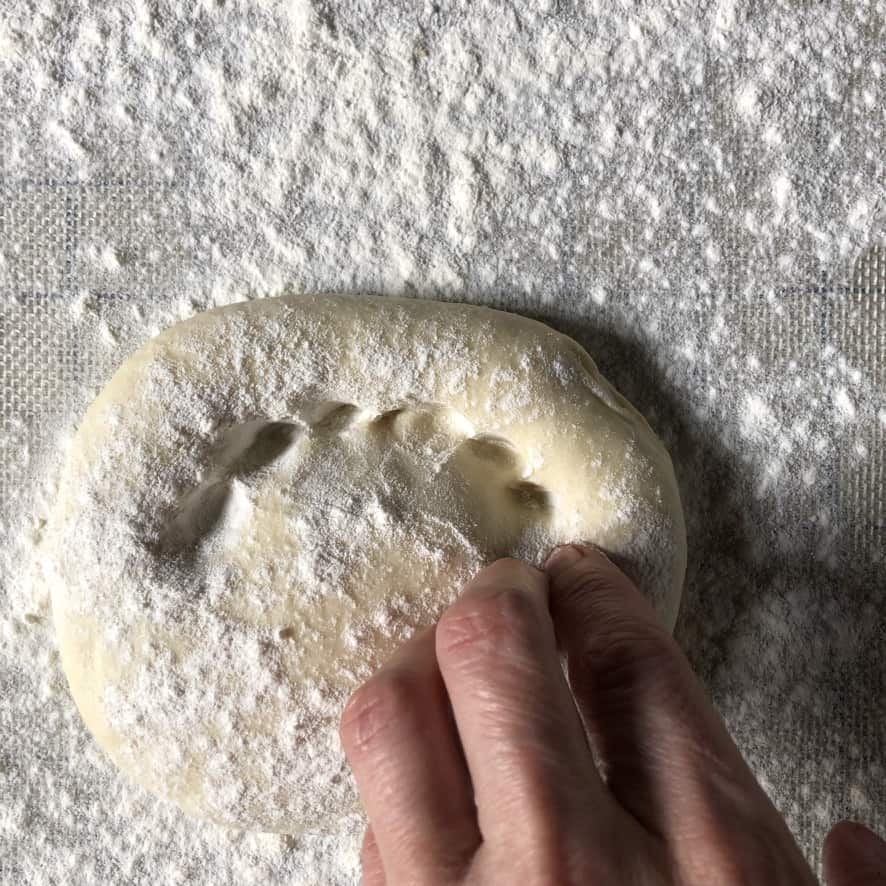
Place a dough ball onto a lightly floured surface. Using lightly floured fingers, press a 1-inch border around the edge. This will become your cornice (the puffy outer rim or crust).
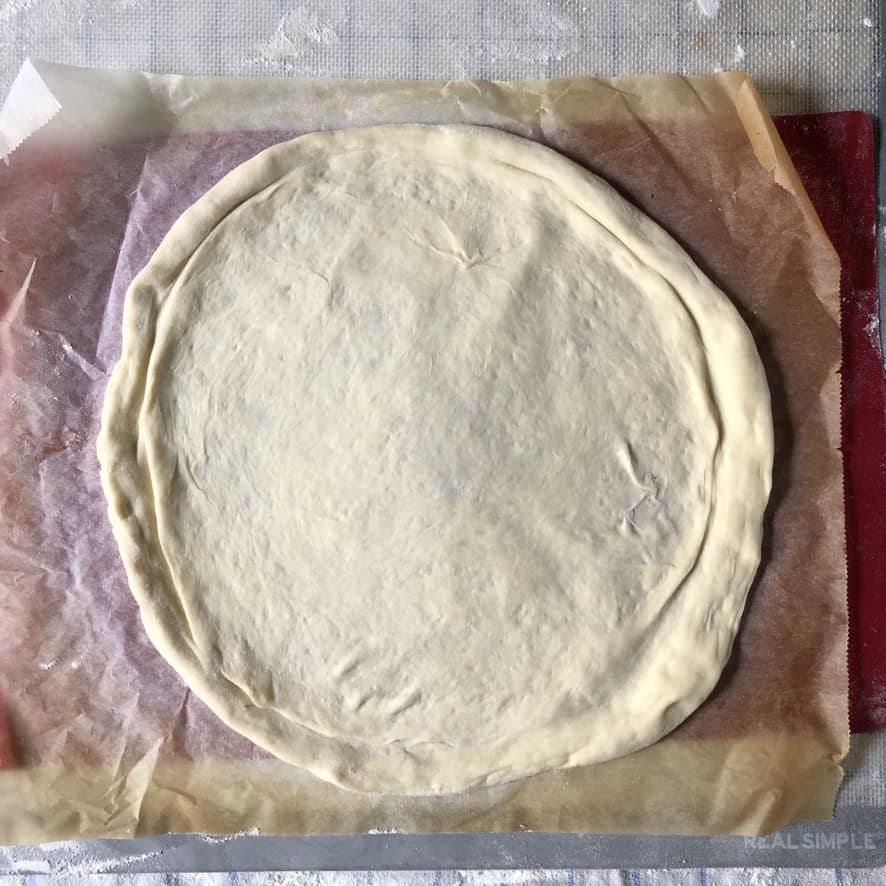
Flip it over and press down gently on the center of the dough only, being careful not to deflate that outer rim you just created. Then start stretching the dough by hand, turning it as you go to stretch each side evenly, until it's about 10-11 inches in diameter for a standard thick-crust pizza.
Transfer the shaped dough to a semolina or cornmeal-dusted pizza peel (or to a clean piece of parchment paper if you don't have a pizza peel).


Step 7. Top and Bake the Pizza
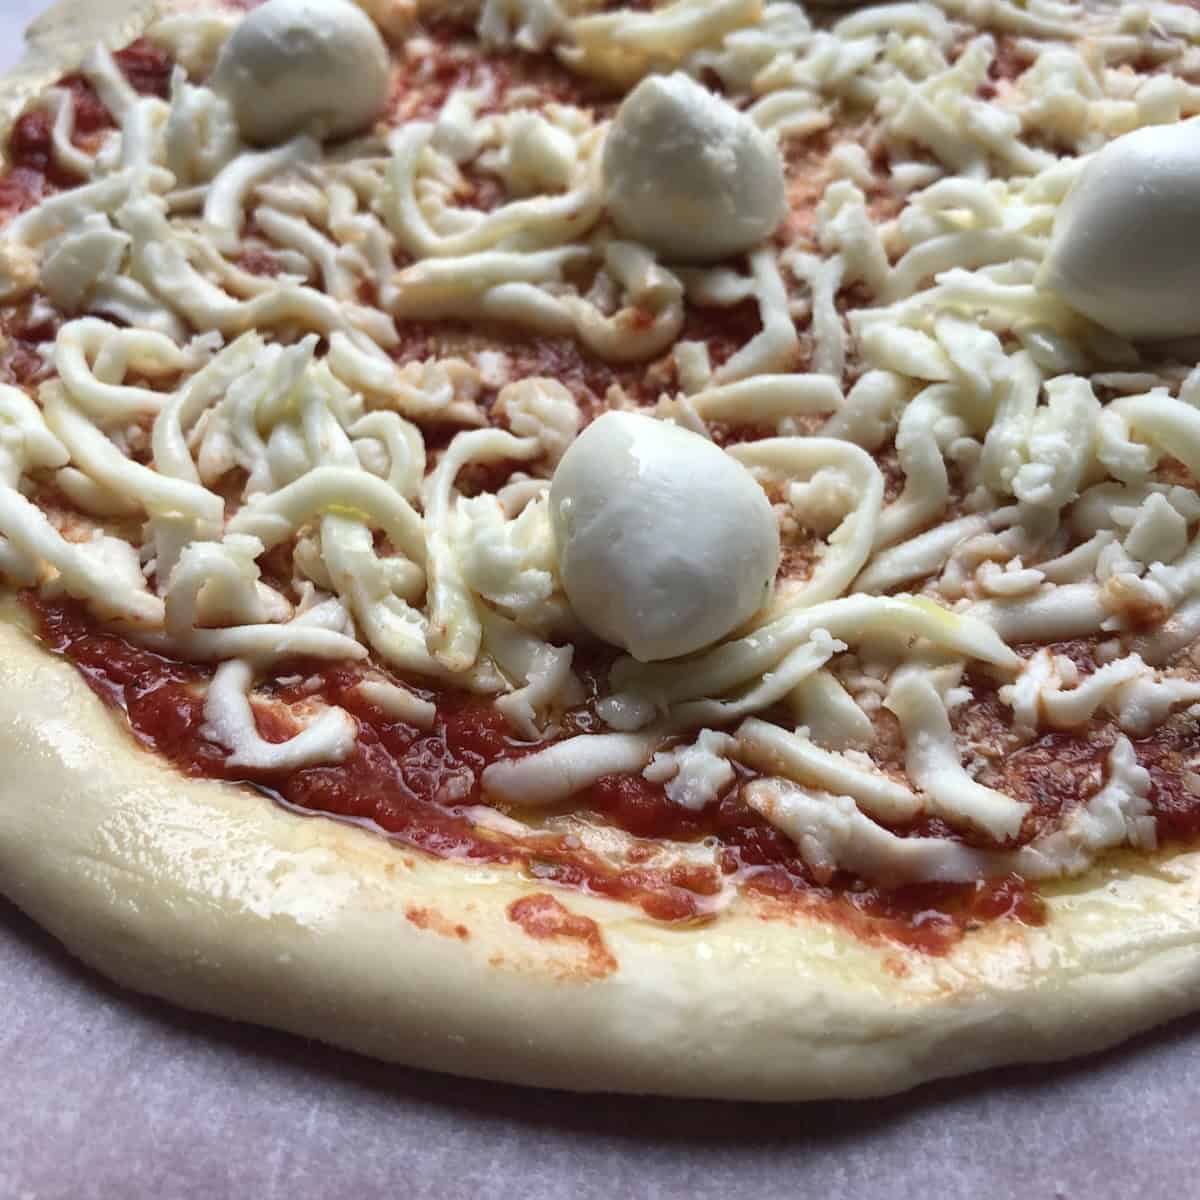
Place the formed dough onto a semolina (or cornmeal) dusted pizza peel. Top the pizza immediately with hand-crushed San Marzano DOP tomatoes, or your favorite homemade pizza sauce, Grana Padano, mozzarella, and your chosen toppings. Drizzle the topped pizza with a little extra virgin olive oil in a #6 pattern like Italian pizziaoli.
Bake for 10-14 minutes in an oven preheated for at least 30 minutes (even better for 1 hour) at the highest temperature your oven can reach. I explain precisel why temperature matters so much for thick-crust pizza in the next section.


Find detailed instructions in the recipe card below.
How Thick Should Pizza Crust Be?

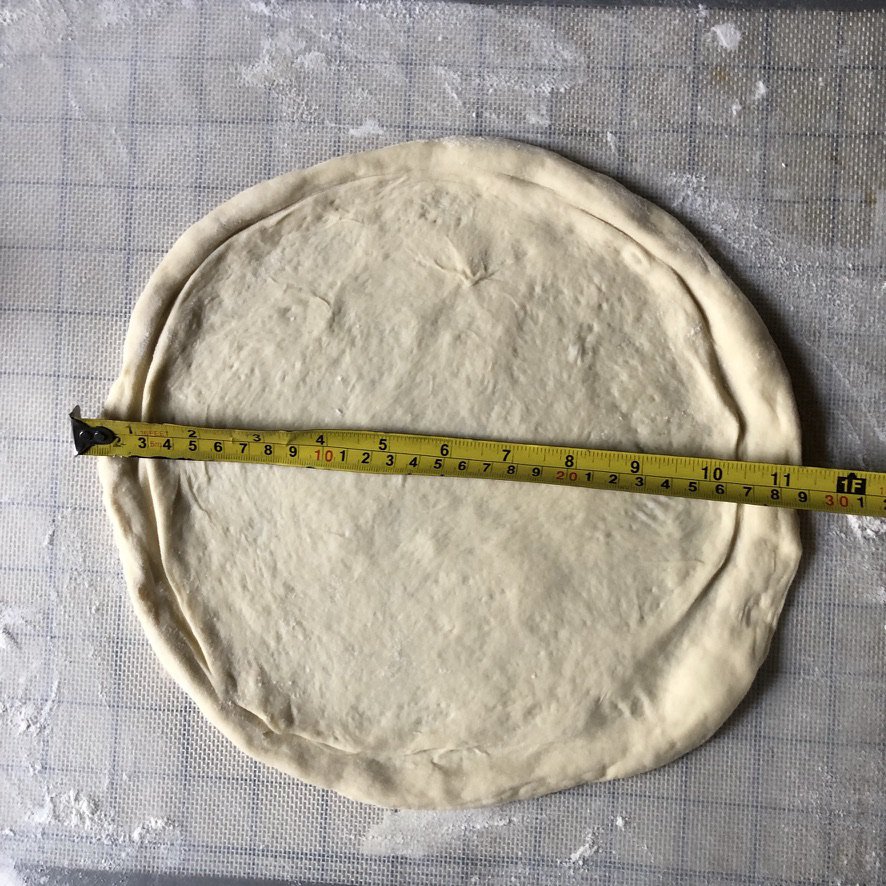
That's entirely up to you! The smaller the diameter you stretch the dough, the thicker the pizza and the puffier the cornice will be. Experiment with your dough!
The photos above show you the range. Beginning with 9.5-inch, 11-inch, and a full 12-inch pizza.
Why Oven Temperature Matters More for Thick-Crust Pizza
Oven temperature affects all pizza, but it affects thick-crust pizza the most. Here's why.
What Is Oven Spring?
Oven spring is what happens during the first few minutes after pizza hits the hot oven/stone/steel. The yeast feels the burst of heat and speeds up its fermentation one last time, releasing as much carbon dioxide as it can before it dies.
That final burst of gas inflates the air pockets in the dough, making the crust puff up. The hotter the oven, the more dramatic the oven spring. This is why pizzeria pizza, with its 700-900°F ovens, has that incredibly light, blistered, airy crust.
For thick-crust pizza, oven spring matters even more than for thin crust. A thin crust pizza is already rolled so thin that the air pocket structure is minimal. But a thick crust has more dough and more potential air pockets to inflate. Higher heat means those pockets expand more, giving you a lighter, airier result.

What to Expect at Different Oven Temperatures
All of the thick-crust pizza margherita photos in this post were baked in my regular European home oven at 482°F/250°C. The result is a crust that's still plenty airy, light, and delicious. It's just not as dramatically puffed and will never be as tender as what you'd get from hight heat commercial or home pizza oven. Here's what to expect depending on your equipment:
Home oven at 450-475°F (230-245°C): Bake for 12-14 minutes. You'll get a pretty decent thick-crust pizza with a crispy bottom and soft interior. The cornice won't puff as dramatically, but it will still be light and pleasant.
Higher Temperature Home oven at 482-550°F (250-288°C): Bake for 8-12 minutes. Better oven spring, puffier cornice, lighter crumb. *482°F/250°C is the temperature I used for the photos in this post, but it cooks up even better at 500-550°F, which I've done in my sister's 500°F oven.


Pizza oven at 662°F-700°F+ (350°-370°C+) (BEST RESULTS): Bake for 3-6 minutes. Maximum oven spring, fluffy cornice, blistered crust, the lightest possible crumb. This is what Italian pizzerias achieve.
Toaster oven: Bake at max temperature for 12-14 minutes. Works surprisingly well for individual-sized thick-crust pizzas.
NOTE: No matter which oven type you use, preheat it for at least 30 minutes (45 minutes to 1 hour is even better) with your pizza stone, steel, or baking surface inside. That preheated surface is what gives you a crispy bottom crust.
Skipping the preheat is one of the most common reasons for a soggy, undercooked bottom and overall poorly-textured pizza. Plus, you have to cook it even longer, which makes the crust tougher.

Best Baking Surfaces for Thick-Crust Pizza
What you bake the pizza on matters almost as much as oven temperature. A properly preheated baking surface is the difference between a crispy bottom crust and a soggy one.
Pizza stone or pizza steel: Best results. Preheat for 1 hour for best results, but no less than 30 minutes at your oven's maximum temperature.
13.25 or 15" Cast iron skillet (flipped upside down): My favorite pizza stone substitute. The heavy cast iron holds heat beautifully.
13.25 or 15" Cast iron skillet (used right side up): This reader-tested method from our comment section🤗 is awesome! She preheats her very large cast iron skillet in the oven, tops her pizza on parchment paper, and transfers the entire pizza with parchment under it right into the skillet. This is a great method for those with large skillets.
Heavy-duty sheet pan or oven grill pan: Works great if it's all you've got. Use the heaviest gauge pan you have so the pan doesn't warp at high heat while your pizza is baking.
For a detailed breakdown with photos of each baking surface option, check out my comprehensive baking surfaces section in my 00 flour thin-crust post.
Don't Have a Pizza Peel? Use Parchment Paper
I don't use a pizza peel most of the time because kitchen storage is limited. Shape the dough directly on a piece of parchment paper, top it, then slide the whole thing (parchment and all) onto your preheated stone or steel. It works perfectly.
Serving Suggestions for Thick-Crust Pizza
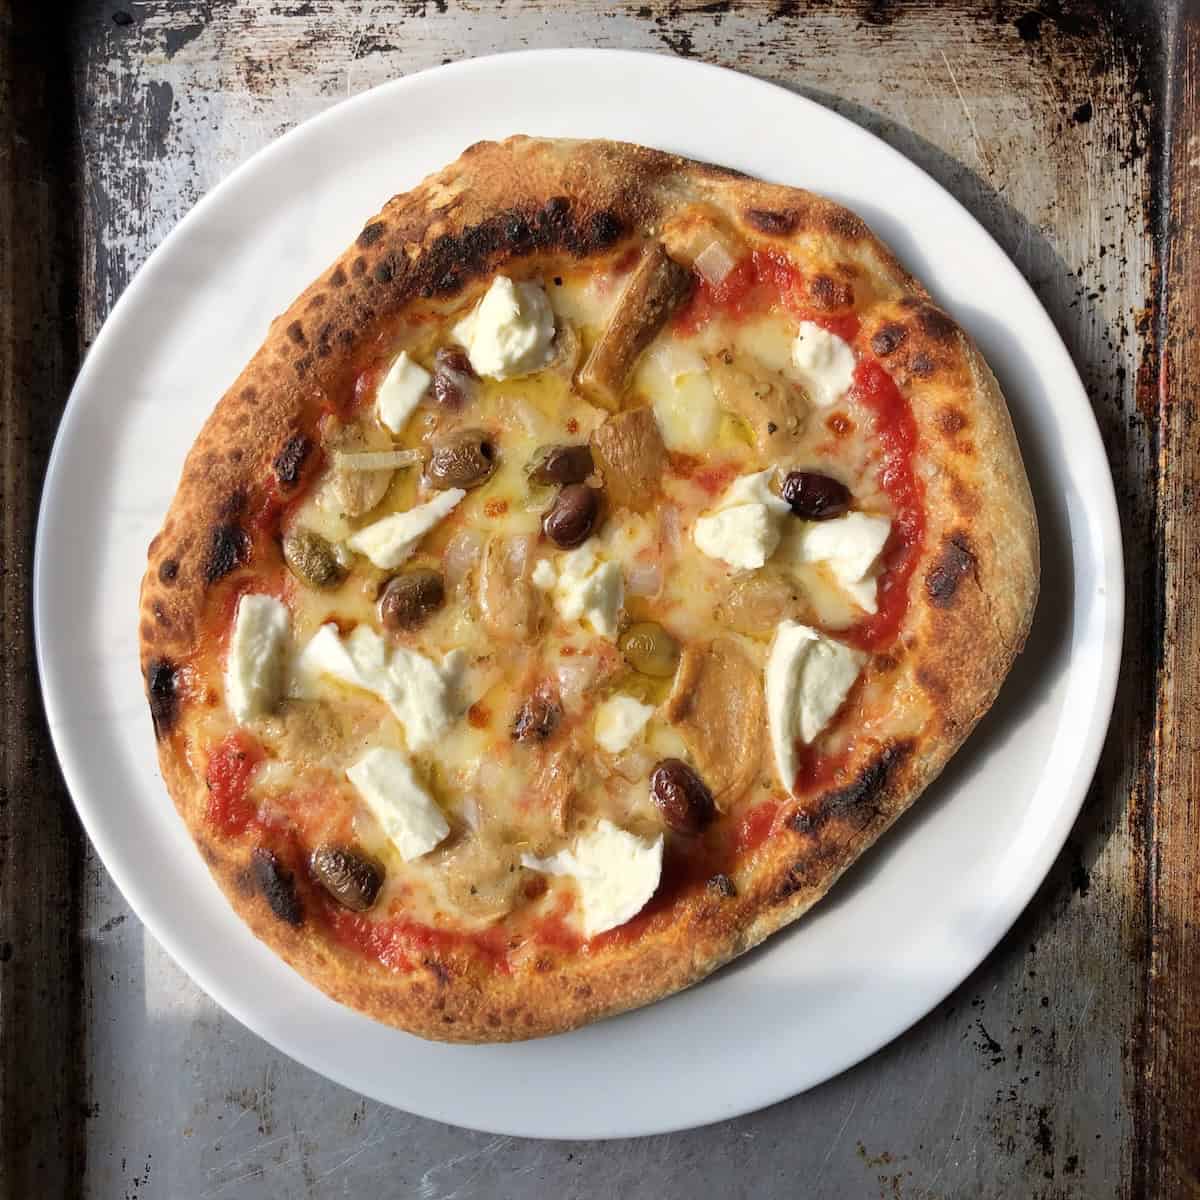
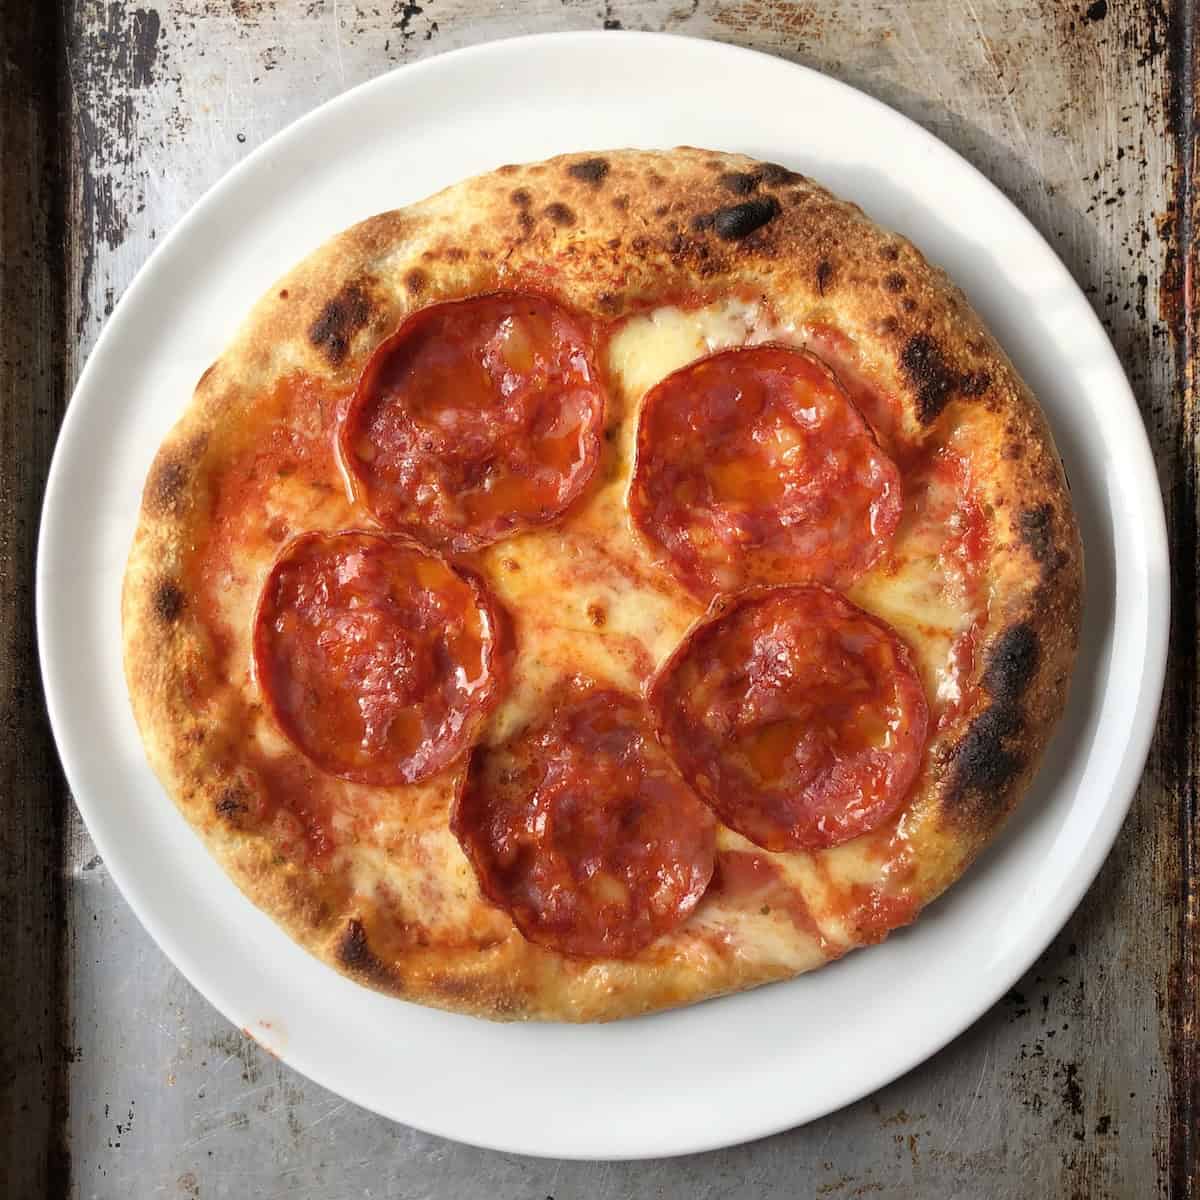
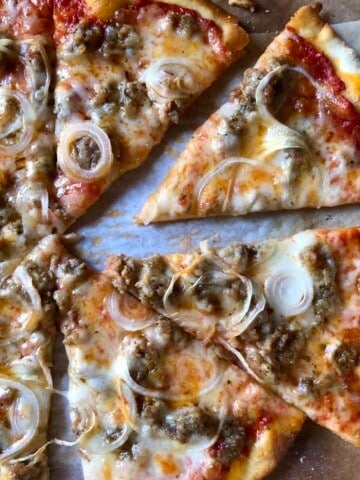
The thick-crust pizza margherita (aka margherita pizza) you see in the photos throughout this post is one of the simplest and best ways to serve this dough: San Marzano DOP tomatoes, (or your favorite pizza sauce), a little salt, whole milk or part-skim grated mozzarella, a sprinkle of grated, aged Grana Padano (my extra flavor trick), fresh buffalo mozzarella, and a drizzle of extra virgin olive oil.
An important rule for thick-crust pizza: don't overload it with toppings. Too much sauce or too many wet toppings will make the crust soggy because it takes longer to bake through. Use about ¼ to ⅓ cup of sauce per 11-12-inch pizza, and slice all vegetables paper-thin so they cook evenly and quickly.
For all of our favorite pizza topping combinations with photos, check out the Ultimate Pizza Toppings and Dough Guide.

Equipment
- Large mixing bowl for combining ingredients and the first rise
- Stand mixer with dough hook (optional) for bringing the dough together. For a single batch (480g flour), switch to hand kneading once the bowl is clean.
- Pizza stone, pizza steel, or heavy baking surface preheated for at least 30 minutes. An upside-down cast iron skillet or heavy-gauge sheet pan works great as a substitute.
- Parchment paper for easy transfer to the oven without a pizza peel
- Pizza oven (optional, but game-changing). I use the Ooni Volt 12 electric pizza oven at 662°F/350°C for 5-6 minutes. Comparison photos coming soon.
NOTE: If you're making a single batch (using 480g of flour), the stand mixer is great for bringing the ingredients together. But once the bowl sides are clean and the actual kneading begins, I recommend switching to hand kneading.
With this relatively small amount of dough, it tends to climb up the dough hook, and you'll constantly be stopping the machine to pull it back down. It's faster and less frustrating to just knead by hand at that point.
Plus, feeling the dough with your hands teaches you to recognize when it's ready. That tactile experience is how you develop an instinct for dough point, which makes you a better pizza maker over time.
How to Store Thick-Crust Pizza Dough (Make-Ahead Options)
This dough is perfect for making ahead. In fact, it gets better with time.
Refrigerate for 1-3 Days (Best Flavor)
After the first rise, portion into dough balls, place in lightly oiled containers or bags, and refrigerate. The cold ferment develops deeper flavor and a lighter, more digestible crust. Pull the dough out 1-2 hours before baking to bring it to room temperature.
Freeze for Up to 3 Months

After the dough balls have completed their first rise, place them into a lightly oiled large freezer bag. Space them apart, squeeze out all the air, and seal.
There are no negative effects from freezing this pizza dough. Go ahead and double the recipe so you always have dough ready for pizza night.
How to Thaw Frozen Pizza Dough
Three ways, from fastest to slowest:
- Hot water method (fastest): Place the sealed bag in a bowl of hot tap water. Flip after 20 minutes. After 40 minutes total, let the dough rest on the counter for another 30-45 minutes before stretching.
- Overnight in the fridge: Move from freezer to fridge the night before. Let it sit on the counter for 45 minutes to 1 hour before stretching.
- Counter thaw: Leave the sealed bag on the counter for about 8 hours until room temperature.
How to Temper Refrigerated Pizza Dough
If your dough has been in the fridge, let it come to room temperature before shaping. This takes about 1-2 hours on the counter.
Cold dough won't stretch properly. It'll spring back and resist you. Give it time to relax and warm up, and it'll stretch easily by hand.

How to Reheat Leftover Pizza
Four methods from quickest to best results. For detailed instructions with photos, see the reheating section in my 00 flour thin-crust post.
- Microwave (emergency only, can make the crust chewy and tough)
- Oven broiler (fast, crispy top)
- Regular preheated oven at 375°F/190°C (best all-around and for larger quantities, 8-10 minutes)
- Skillet on the stovetop (crispy bottom, melty top if you cover it with a lid as it heats)
More Uses for This Pizza Dough
This dough isn't just for pizza. You can use it to make calzone, stromboli, garlic breadsticks, garlic knots, homemade pepperoni hot pockets, and sausage pizza rolls.
Top Tips for Perfect Thick-Crust Pizza
- Preheat your oven and baking surface for at least 30 minutes. This is the single most important step for a crispy bottom crust. Skipping the preheat is the #1 reason for soggy pizza.
- Bake at the highest temperature your oven allows. Higher heat means better oven spring, a puffier cornice, and a lighter crust. Even the difference between 450°F and 500°F is noticeable.
- Always hand-stretch, never use a rolling pin. A rolling pin pushes out the air bubbles that took hours to develop. Your hands preserve them.
- Don't overload with toppings. Thick-crust pizza takes longer to bake, so excess moisture from too much sauce or wet vegetables will make it soggy. Less is more.
- Cold ferment when you can. Even one night in the fridge transforms the flavor and texture of this dough. Plan ahead when possible.
FAQ
No, you don't have to add sugar to pizza dough, but here's why you should! Adding sugar to pizza dough helps the crust brown more evenly in a home oven (with lower temperatures than standard commerical or home pizza ovens, but you can omit it entirely if you have dietary restrictions. The only difference is a slightly paler, less visually pleasing pizza crust. To see photos comparing pizza dough with and without sugar, check out my 00 Flour Thin-Crust Pizza Dough post.
Yes. Dissolve active dry yeast in the warm water first and let it sit for 5-10 minutes until foamy before adding to the dry ingredients. See the recipe card notes for details. I prefer to use instant yeast because it's what we use in professional kitchens and you don't have to wait around on it to bloom.
If your dough feels excessively sticky after kneading and is sticking to your hands, it likely needs a little more flour. Add a teaspoon or two at a time until it no longer sticks to your hands. Don't add too much flour, though! Continue kneading to incorporate the flour. 00 flour absorbs less water than American all-purpose flour because it's milled from softer wheat, so if you're substituting AP flour, you may need to adjust.
The most common reason is that your yeast is old and no longer active, or your water was too hot and killed the yeast. Water above 130°F/54°C will kill yeast instantly. Use warm water between 110-115°F/43-46°C. Always check that your yeast hasn't expired and keep it in a cool, dry place like in a glass jar in the refrigerator or freezer so it lasts longer.
Thick-crust pizza is hand-stretched and baked directly on a stone or baking surface. Deep-dish pizza is pressed into an oiled pan and baked inside it, which fries the bottom in oil. The dough recipes are often completely different, too (see above for photo comparisons). This recipe is for hand-stretched thick-crust pizza.
Yes, both work well for mixing and kneading. Use the dough cycle on a bread machine. In a food processor, pulse until the dough comes together, then let the machine run for about 60 seconds to knead. I would still hand-knead the food processor pizza dough on the counter for at least 6-7 minutes, though, for best results. Because nothing compares to hand kneading. Either way, you still need to let the dough rise properly after.
The dough should be smooth, elastic, and slightly tacky but not sticky. It should spring back slowly when you poke it with a finger. If you want to learn more about recognizing the proper dough point, which helps you understand when any yeast dough has been properly kneaded, see my 00 Flour Thin Crust Pizza Dough post, specifically the dough point section with video.
Looking For More Easy Pizza Recipes?
Below are a few of our favorite pizza recipes including thin-crust 00 flour pizza, bread flour pizza, whole wheat pizza, regional Italian fried pizza from Abruzzo, and more.
- Best Pizza Topping Ideas, 30+ Combinations (With REAL Photos)
- Easy Homemade Pizza Sauce Recipe (With Video)
- Best 00 Flour Pizza Dough Recipe (Thin-Crust, 5 Ingredients)
- Best Bread Flour Pizza Dough Recipe (5 Ingredients)
- Best Whole Wheat Pizza Dough Recipe (For Thin Crust Pizza)
- Best 20-Minute Thin and Crispy St. Louis-Style Pizza (No-Yeast )
- Easy 20-Minute Thin & Crispy St. Louis-Style Whole Wheat Pizza
- 20-Minute Valentine's Day Heart-Shaped Pizza


Let's Get Started!
Made this Recipe? We'd love for you to rate ⭐️ it and tell us how it went for you!
Print📖 Recipe

Thick-Crust Pizza (Fluffy 00 Flour Pizza Dough Recipe)
- Total Time: 2 hours 25 minutes
- Yield: Four 12-inch Thick Crust Pizzas
- Diet: Vegan
Description
This homemade thick-crust pizza is fluffy, chewy, and crispy on the bottom, not dense or bready like many thick-crust pizza recipes. Made with Italian 00 flour and just 5 ingredients, this thick-crust pizza dough recipe is so easy your kids can help. It uses the same base as our favorite 00 flour thin crust pizza dough recipe, shaped thicker for a soft, airy interior you won't believe came from a home oven. Watch the quick video see how simple it is!
Ingredients
For the Dough
- 480g 00 Italian flour (about 4 cups)*
- 300g warm water (between 110°F-115°F) (10 ⅝ fluid ounces)
- 2 teaspoons Red Star Platinum instant yeast (9g) (sub active dry yeast)*
- 2 teaspoons sugar (9g) (sub honey or pure maple syrup)
- 2 teaspoons kosher salt (8g)
- 2 tablespoons extra virgin olive oil (30g) (sub other vegetable oil)*
For Working the Dough
- 2 teaspoons extra virgin olive oil (for oiling the dough bowl and dough balls)
- 1 tablespoon of 00 flour (for incorporating into the dough while kneading it)
Toppings
- ¼ to ⅓ cup pizza sauce per pizza
- 1 cup to 1 ⅓ cups shredded mozzarella cheese
- 2 tablespoons grated Grana Padano (sub Parmesan or Parmigiano-Reggiano)
- toppings of your choice
- 1 teaspoon extra-virgin olive oil (for drizzling over the top of assembled pizza before baking)
Instructions
- Combine dry ingredients. Whisk together the flour, instant yeast, sugar, and salt in a large bowl. Add the olive oil and about half of the warm water. Mix until a shaggy dough forms, adding more water as needed until you can form a ball that's not wet or sticking to your fingers. You may not need all the water, or you may need a touch more, depending on your flour and humidity. If using active dry yeast, see notes below.
- Knead the dough. Knead on a lightly floured surface for 10 to 12 minutes by hand (or 8 minutes in a stand mixer on medium #2 speed on my Kitchenaid) until smooth, elastic, and slightly tacky. Sprinkle a little flour as needed to prevent sticking, but avoid adding too much, or the dough will become dry. Even a tacky dough becomes less sticky after proper kneading for several minutes.
- First rise. Place the dough in a lightly oiled bowl, cover tightly, and let rise in a warm spot for about 90 minutes or until doubled in size.
- Portion the dough and second rise. Punch down the dough and divide into 4 equal pieces. Shape each into a smooth ball by folding under and rolling on the countertop to seal the bottom. Place on a lightly oiled pan, brush with oil, and cover with sustainable cling film. Let rise 30 minutes until visibly puffy and more airy-looking with a slight sheen.
- Preheat the oven. While the dough balls are on their second rise, preheat your oven to its highest setting with a pizza stone or baking steel inside. Allow at least 30 minutes to preheat (1 hour is even better).
- Create the crust. Place a dough ball on a lightly floured surface. Press a 1-inch border around the edge to form the cornice (the raised outer crust). Flip and press gently on the center only, being careful not to deflate the rim. Hand-stretch to about 10 to 11 inches, turning and pressing as you go for even thickness. Do not use a rolling pin. Transfer to a semolina-dusted peel or parchment paper.
- Assemble and bake. Top with sauce (about ¼ to ⅓ cup), Grana Padano, mozzarella, and toppings of choice. Drizzle with olive oil. Bake 10 to 14 minutes until the crust is golden, cheese is bubbly, and the bottom is crisp. At 450-475°F, expect closer to 14 minutes. At 500-550°F, closer to 10.
Notes
Active Dry Yeast: If using active dry yeast instead of instant yeast, dissolve it in the warm water with the sugar first. Let it sit for 5 to 10 minutes until foamy before adding it to the flour mixture.
Cold Ferment for Better Flavor: You can cold ferment at two different stages. Option 1: After kneading, place the whole dough in a lightly oiled airtight container and refrigerate for 24 to 72 hours. Remove, divide into balls, and let them come to room temperature for 60 to 90 minutes before shaping and proceed with instructions. Option 2: Complete the first rise and shape the dough into balls, then place them in an oiled ziptop bag, remove the air, and refrigerate for 24 to 72 hours. Remove and let them come to room temperature for 60 to 90 minutes before shaping. Either method works. The longer the cold ferment, the more flavor and digestibility you get. See the main post for more details.
For Baking in Ooni Volt 12 Electric Pizza Oven/Outdoor Pizza Oven: If baking in an Ooni Volt 12 or similar countertop or outdoor pizza oven, preheat to 662°F (350°C). Bake for 5 to 6 minutes, turning the pizza as needed for even browning.
Sugar is Optional: The small amount of sugar feeds the yeast and helps with overall color and browning, but you can leave it out if you have dietary restrictions. The dough will still rise, just a little more slowly, and won't have the same golden brown color.
Don't Overload the Toppings: Thick-crust pizza needs less topping than you think. Overloading prevents the center from baking through and makes the crust soggy. Less is more, as you'll see in my Ultimate Guide to Pizza Toppings and Doughs post.
Flour Substitutions: This recipe is written for Italian 00 flour. Bread flour is a great alternative that produces a chewier crust with larger air pockets. All-purpose flour will work in a pinch, but will give you a denser result. Do not substitute self-rising flour.
- Prep Time: 15 minutes
- Rise or Proofing Time: 120 minutes
- Cook Time: 10 minutes
- Category: Pizza
- Method: Baked
- Cuisine: Italian
Nutrition
- Serving Size: 1 (12-inch) Pizza
- Calories: 505
- Sugar: 2g
- Sodium: 485mg
- Fat: 9g
- Saturated Fat: 1.5g
- Unsaturated Fat: 7,5g
- Trans Fat: 0g
- Carbohydrates: 92g
- Fiber: 3g
- Protein: 14g
- Cholesterol: 0g
Food Safety
- Always wash your hands thoroughly before and after handling raw dough.
- Do not taste raw pizza dough. Raw flour can contain harmful bacteria.
- Store leftover pizza in the refrigerator within 2 hours of baking.
- Reheat leftover pizza to an internal temperature of 165°F/74°C.
- Refrigerated pizza dough should be used within 3 days. Frozen dough within 3 months.

Adrienne P. says
I've tested plenty of pizza doughs over the years and this is the one I'm keeping! I had no idea that the 'digestibility of pizza dough' was even a thing. I just knew some of my doughs weren't good (or easy to swallow sometimes🤣). Your pizza dough guide helped a lot, and now I'm making the best pizza of my life🍕. My husband and kids thank you🙏.
Kelly says
Thanks, Adrienne! Before moving to Italy, I had no idea about pizza dough digestibility thing either😉. But it matters more than just about any other single thing in pizza-making along with oven temps. Glad you're enjoying it! Be on the lookout for my Neapolitan pizza dough🤗.
Zippy_do-Dah says
Made this using a scale and did everything by the book and it's the best thick crust pizza we've ever made!💪🔥😻 I'm curious to try your whole wheat pizza dough next. If it's half as good as this one, we'll take turns with the doughs.
Kelly says
That's awesome to hear, Zippy_do_Dah🤗! Definitely try out my whole wheat crust (for thick or thin pizza). It has maybe even a better flavor than 00-flour and slightly different texture of course (slightly less chewy), but super delicious all the same. We enjoy it because it really does taste great and we know it's a little healthier for us too. If you try it, let me know what you think about it❤️.
Ember says
This is hands-down the best pizza crust I've ever made! The 00 flour investment pays off in amazing texture and flavor. I got my oven as hot as it would go (500f) but I imagine the rise would be even better if I had a pizza oven with higher temps. Thanks for taking the guesswork out of making homemade pizza 🍕!
Heathco says
This is the dough I make when we want a chewy, thick-crust pizza with crispy edges. Italian 00 flour made all the difference. It gives you perfect texture you can't get with regular all-purpose. Friday night pizza has become a lot more affordable. Thank you for your recipe.
Kelly says
Heathco, it's comments like yours that make me the happiest. First, because you all enjoyed it, but also because it's saving your family money while also being healthier than ordering out❤️. A win-win-win!