If you love thin-crust pizza, are trying to eat just a little bit healthier, and have just about zero time to make it from scratch, this no-yeast St. Louis-Style whole wheat pizza recipe is for you.
Whether you're just really busy or trying to eat a few less refined carbs, this is the perfect quick and easy whole wheat pizza recipe. It's great anytime, but it especially makes a perfect summer pizza!
Forget the too-hard, too-dry, too-dense homemade whole wheat pizza you've been making. From your first thought of, "Pizza sounds good", to actually sitting down and eating these ooey-gooey crispy squares it takes just 20 minutes from start to finish (really!).
If you love this healthier whole wheat pizza dough, try my delicious and easy yeasted whole wheat pizza dough, or my other St. Louis Style pizza dough using all-purpose or 00 flour (or head straight to my Ultimate Pizza Doughs and Pizza Toppings recipe post for the full homemade pizza guide experience)!
Jump to:
- Why We Love This St. Louis Style Pizza Recipe?
- What is St. Louis Style Pizza?
- Homemade Whole Wheat St. Louis Style Pizza Ingredients
- How to Make Whole Wheat St. Louis-Style Pizza
- How to Safely Get a Pizza Into the Oven Without a Pizza Peel
- How to Shape Your Pizza Dough & Make it Prettier
- Whole Wheat St. Louis-Style Pizza: Top Tips for Extra Crispy Thin Crust
- 3 Examples of St. Louis-Style Pizza (All-Purpose, 00-Flour, 100% Whole Wheat)
- More Easy Pizza Recipes
- Easy Side-Dishes & Desserts to Pair with Homemade St. Louis-Style Whole Wheat Pizza
- 📖 Recipe

Why We Love This St. Louis Style Pizza Recipe?
- Using premium ingredients is better for you and is still less expensive than takeout
- Using whole wheat flour adds even more flavor to the crust
- Ready in less time than it takes to order out for pizza delivery
- No weird preservatives or ingredients in this pizza recipe
- Kids and adults both love this easy pizza recipe
- There's no yeast in the dough so there's technically no resting or rising time needed (although, I like to let the dough rest for 10-15 minutes to make it easier to roll out).

What is St. Louis Style Pizza?
By all accounts, most of the "authentic" St. Louis-style recipes online have evolved from Imo's, a mom-and-pop pizza joint in St. Louis with over 90 locations in and around the city.
A true St. Louis-style pizza is made without yeast and has a crispy cracker-like crust and uses provolo cheese. Check out the St. Louis-Style original recipe post over here for more information if you're interested.


Homemade Whole Wheat St. Louis Style Pizza Ingredients
All you need to make this delicious Whole Wheat St. Louis-style pizza is flour, salt, baking powder, olive oil, water, and golden syrup (or corn syrup). I use Lyle's Golden Syrup but you can substitute it with light corn syrup, honey, or even maple syrup instead.
Its purpose in the dough is to help with the browning of the crust and add moisture to the dough giving it a tender, finer crumb. But again, it's not totally necessary. If you don't have any of these syrups, just omit this ingredient from the recipe altogether and add sugar if desired.
This is a versatile pizza crust that can be made with just about any type of flour. I've used Italian 00 flour, all-purpose flour, bread flour, and this 100% whole wheat flour (see comparison photos below) and it always tastes great.
For the dough:
- whole wheat flour (sub "00" or all-purpose flour)
- salt
- baking powder
- extra virgin olive oil
- Lyle's Golden Syrup (sub maple syrup, brown rice syrup, or light corn syrup)
- water
For the sauce and toppings:
- canned tomatoes plus a pinch of salt (or your favorite homemade pizza sauce)
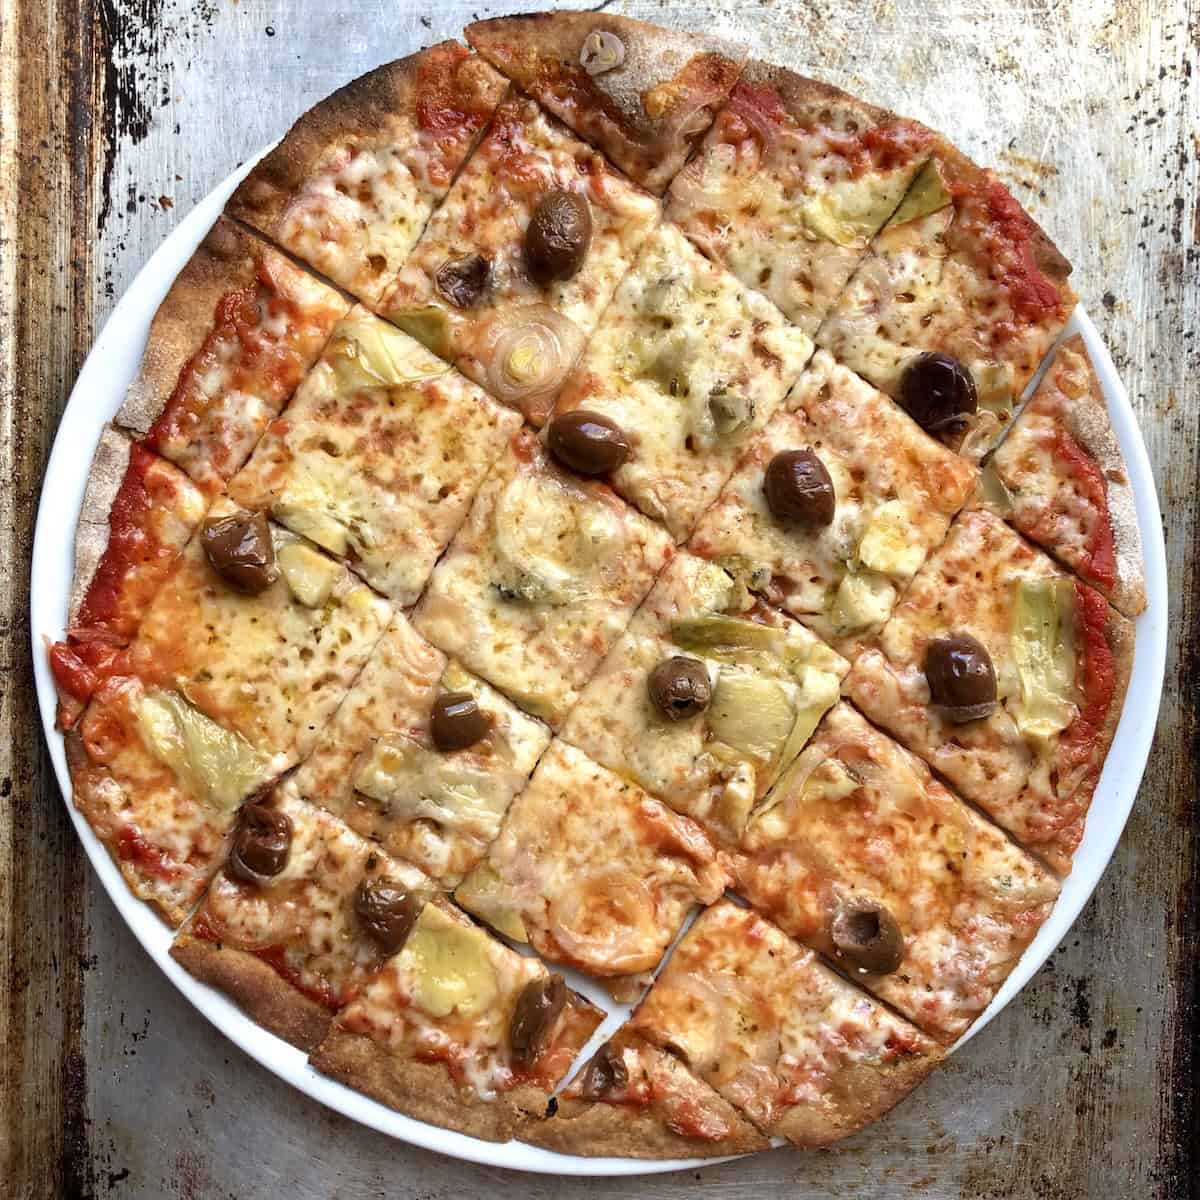
- fresh mozzarella, mozzarella balls, or provolo (or your favorite shredded cheese)
- sliced veggies and/or preferred meat toppings
- dried or fresh oregano (or Italian herb blend)
- grated Parmigiano-Reggiano or Parmesan cheese
- salt


How to Make Whole Wheat St. Louis-Style Pizza
For extra crispy St. Louis style whole wheat no yeast pizza, preheat your baking pan or stone (instructions with photos below). For best results, I highly recommend this method - but if you're short on time, place rolled dough directly on a lightly oiled room temperature pan, add sauce and toppings, then bake 10-15 minutes until crispy and cheese melts.
Step 1: Preheat the oven to 500°F/260°C and the baking sheet or pizza stone.


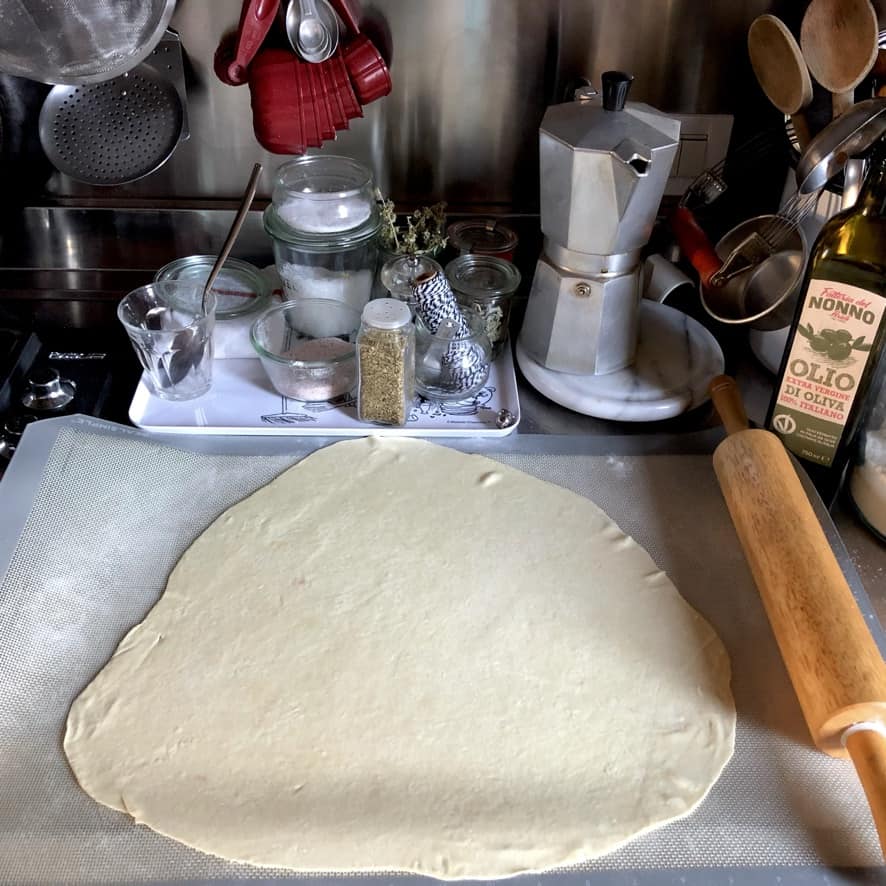
Step 2: Mix the dry ingredients and whisk to combine. Add the wet ingredients and combine everything until you have a shaggy dough; let the dough rest for 10 minutes if you have time, otherwise start rolling it out immediately!
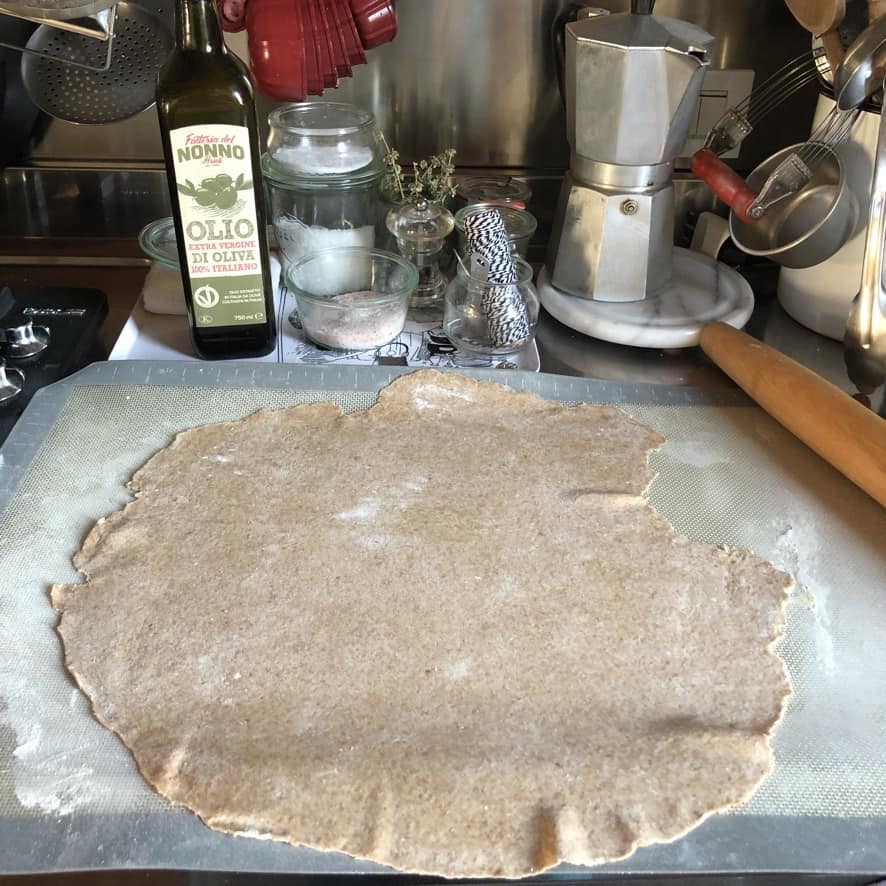
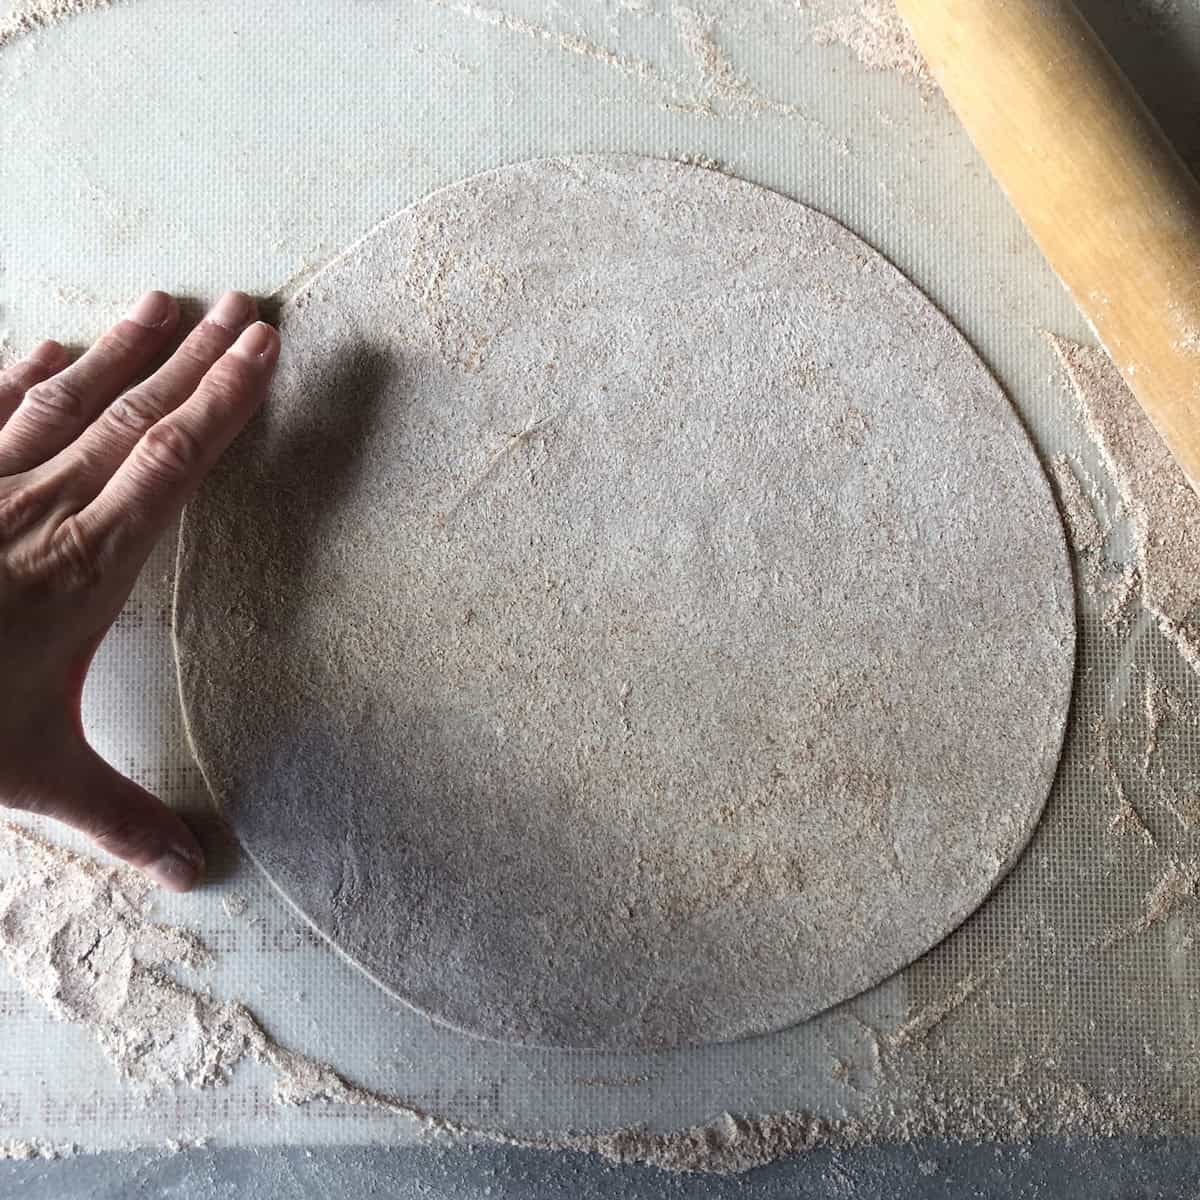
Step 3: Roll out the dough to fit on your pizza peel, OR if you don't have a pizza peel, use my DIY method of transferring the dough to a piece of parchment paper (as seen above).
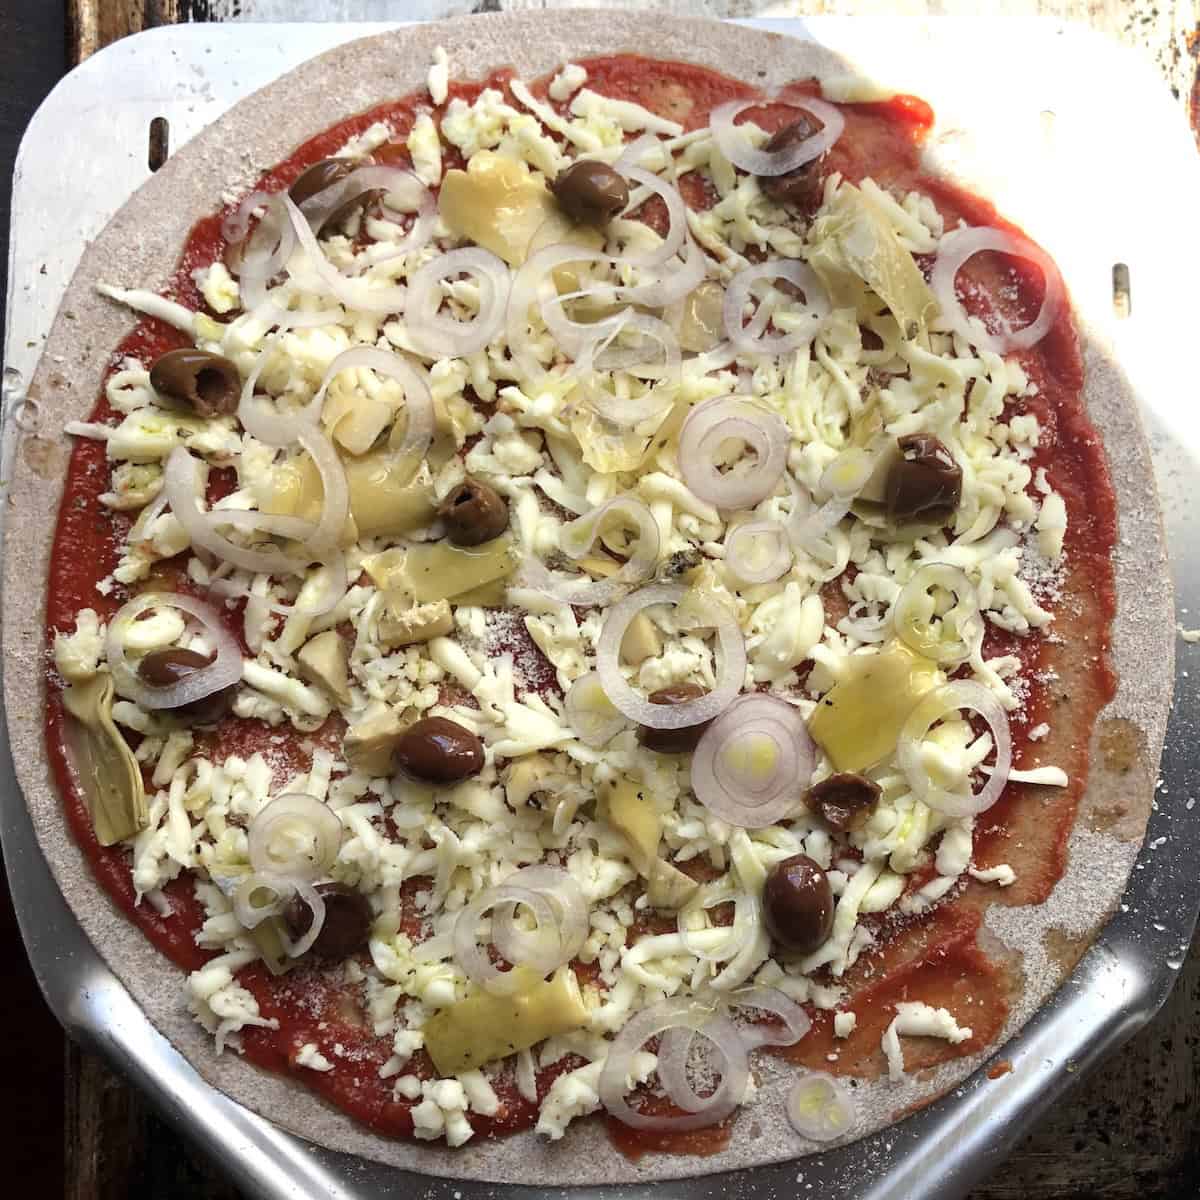
Step 4: Top the pizza with your favorite sauce, and pizza toppings. At this point, you can use your pizza wheel to cut a more perfect circle, rectangle or other shape.
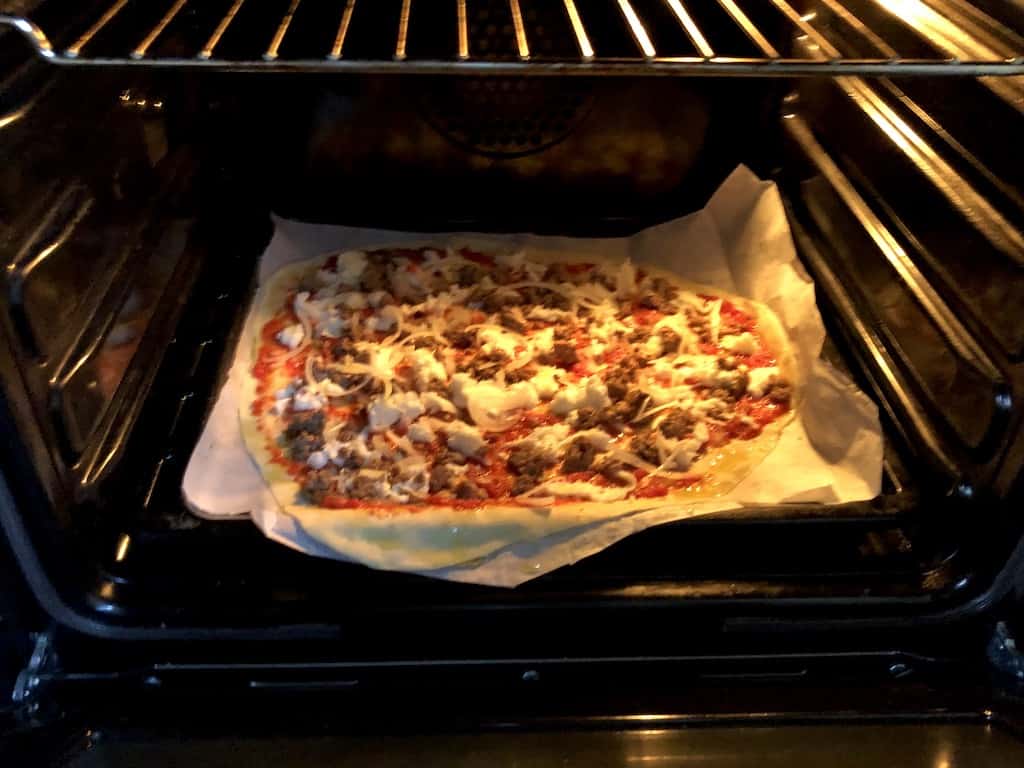
Step 5: Transfer the pizza off of the pizza peel onto the stone/steel OR if you don't have a pizza peel, transfer the entire sheet of parchment paper onto the a preheated stone/steel/oven grill pan. Bake the pizza for 8-10 minutes, or until golden brown! (*see below photos of this process)
Find the full instructions in the recipe card!

How to Safely Get a Pizza Into the Oven Without a Pizza Peel
In the photos directly above below, you can see I've used the shallow grill pan (that came with my oven) as my pizza baking pan. I allow the pan to preheat on the oven "floor" where I get the most heat.
By using an oiled piece of parchment paper under the raw rolled-out dough, I'm able to add sauce and toppings to this super-thin crust and still be able to easily transport it to the hot oven (using a cutting board underneath for support).
Working quickly, open the oven door and gently slide the piece of parchment paper with the pizza on it right onto the hot baking pan or stone. After about 10 minutes I have a super delicious pizza to eat.

How to Shape Your Pizza Dough & Make it Prettier
If you want to make a shaped pizza (like this Valentine's Day Heart-Shaped Pizza below) use your pizza cutter to cut the desired shape. You can use it simply to make a more perfect circle, rectangle, or fun shape you want!


Whole Wheat St. Louis-Style Pizza: Top Tips for Extra Crispy Thin Crust
Getting Maximum Crispiness Without a Pizza Stone
Key principle: Preheat your baking surface to start cooking the bottom crust immediately. Without a pizza stone's refractory heat, a hot cookie sheet or baking pan creates the same effect.
Oven Setup for Best Results
Preheat your baking sheet in the oven while it heats. For ovens that heat from bottom and top, place a grill pan on the oven floor for maximum heat. If your oven only heats from the top, position the baking tray in the upper third since heat rises.
The Parchment Paper Transfer Method
This technique safely transfers thin crust pizza to hot baking sheets without tears or burns:
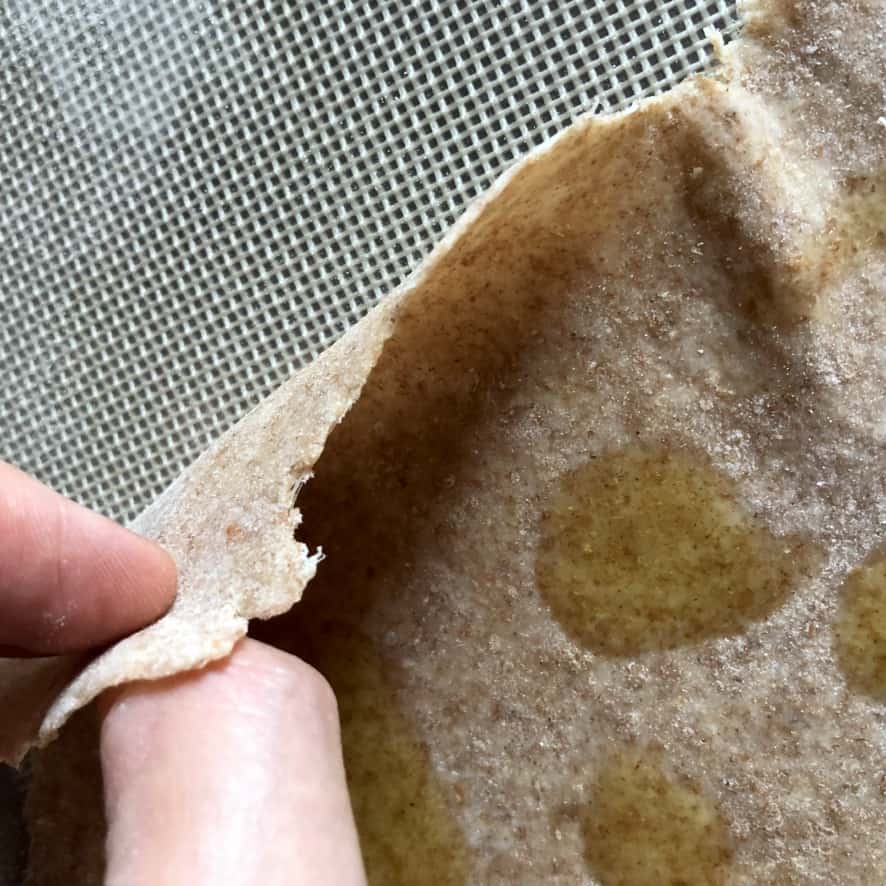
Step 1: Oil the Dough
- Roll dough to ⅛ inch thick on a non-stick mat or parchment paper
- Drizzle lightly with extra virgin olive oil and spread evenly
- This oiled side becomes the bottom, creating direct contact with the hot pan for extra crispness
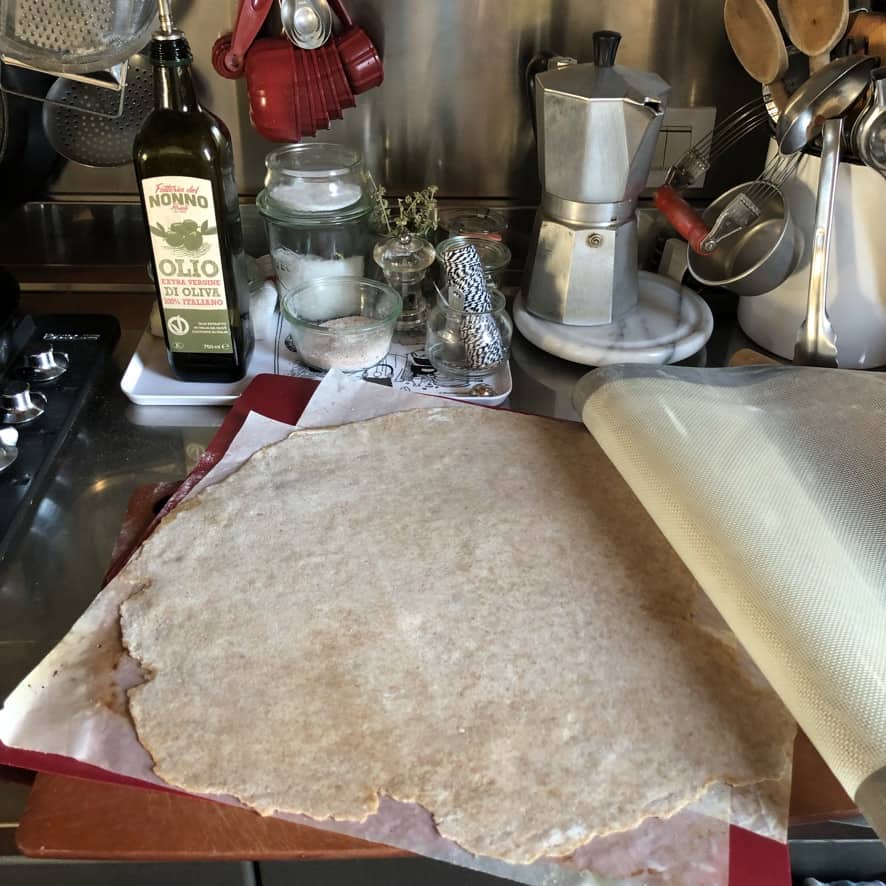
Step 2: Add Parchment Paper
- Place parchment paper over oiled dough, pressing gently to adhere
- Use parchment slightly larger than the dough for easy handling
- The oil acts as "glue" to keep parchment in place
Step 3: Flip and Support
- Place flimsy cutting boards or plastic placemats on top of parchment
- Flip everything over including the non-stick mat
- Remove the mat, leaving oiled dough on parchment paper
Step 4: Add Support and Top
- Slide cutting boards under the parchment for support during topping
- Add sauce, cheese, and toppings while dough sits on supported parchment
Step 5: Transfer to Oven
- Hold pizza securely on cutting boards with one hand
- Open oven with other hand and get close to hot baking sheet
- Pull parchment paper with pizza directly onto hot pan
- Remove cutting board support
This method delivers crispy St. Louis-style thin crust pizza without requiring a pizza stone or peel.
*If you don't want to use the above techniques for a super crispy crust, skip them. Instead, simply roll out the dough, add it to a lightly oiled (room temperature) baking pan then add sauce, and toppings, and bake as directed or a few minutes longer to achieve a crispy crust.


3 Examples of St. Louis-Style Pizza (All-Purpose, 00-Flour, 100% Whole Wheat)
All-purpose and bread flour both make a somewhat shaggy dough compared to softer, smoother Italian 00 flour dough (seen in middle photos). But even this very shaggy whole wheat dough creates an excellent pizza crust with a little extra flavor. Luca's favorite is the regular all-purpose dough and mine is the whole wheat but we love both. Try out different flour options or combinations to see what you like best.


More Easy Pizza Recipes
- Best Pizza Topping Ideas, 30+ Combinations (With REAL Photos)
- Easy Homemade Pizza Sauce Recipe (With Video)
- Thick-Crust Pizza (Fluffy 00 Flour Pizza Dough Recipe)
- Best Bread Flour Pizza Dough Recipe (5 Ingredients)
- Best Whole Wheat Pizza Dough Recipe (For Thin Crust Pizza)
- Best 20-Minute Thin and Crispy St. Louis-Style Pizza (No-Yeast )
- Best 00 Flour Pizza Dough Recipe (Thin-Crust, 5 Ingredients)
- 20-Minute Valentine's Day Heart-Shaped Pizza


Easy Side-Dishes & Desserts to Pair with Homemade St. Louis-Style Whole Wheat Pizza
Depending on how hungry you are, or how many people you're serving, here are a few tasty recipes that make any pizza night even better.
- Lemon-Tomato Vinaigrette (Easy Summer Vinaigrette Recipe)
- How to Make Italian Caprese Salad (l'insalata Caprese)
- Greek Salad (Easy 15-Minute Salad With Video)
- Plum Caprese Salad (with Buffalo Mozzarella)
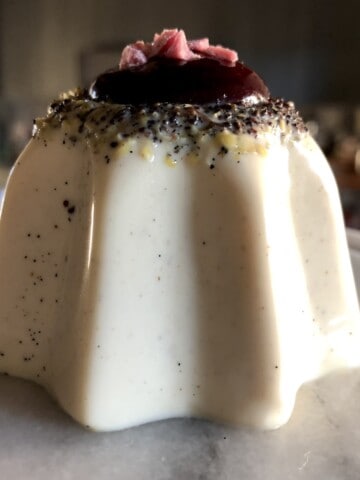
- Velvety White Chocolate Vanilla Bean Panna Cotta
- Strawberry Crostata (Italian Crostata di Marmellata di Fragole)
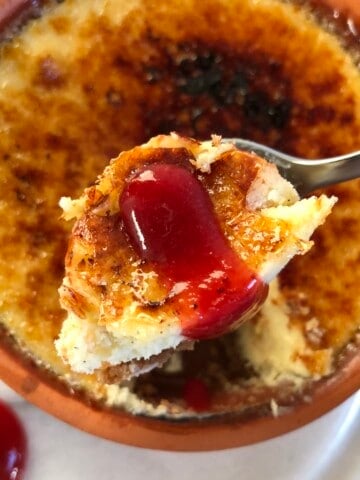
- White Chocolate Creme Brûlée Cheesecake w/Biscoff Cookie Crust
- Fudgey Biscoff Brownies w/Cornflake Crunch
- A Better Key Lime Pie with Biscoff Cookie Crust
- Classic Cheesecake w/Biscoff Cookie Crust (+ Mini Option)
- Whole Wheat Chocolate Chip Cookies (One Bowl, No-Mixer)
- Bakery Style Pan-Banging Chocolate Chip Cookies


Let's get started!
Print📖 Recipe

20-Minute St. Louis-Style Whole Wheat Pizza (No Yeast)
- Total Time: 20 minutes
- Yield: 2 servings
Description
If you love thin-crust pizza but have just about zero time for cooking it from scratch and you're trying to eat just a bit healthier, this St. Louis-Style whole wheat pizza recipe is for you. Whether you're just really busy or trying to eat a few less refined carbs, this is the perfect quick and easy homemade whole wheat pizza recipe. Forget the hard and dry homemade pizza you've been making. From your first thought of, "Pizza sounds good", to actually sitting down and eating these ooey-gooey crispy squares it takes just 20 minutes from start to finish (really).
Ingredients
For the dough
- 1 ¼ cups whole wheat flour (160g) (sub "00" or all-purpose flour)
- ½ teaspoon kosher or sea salt (3g)
- ½ teaspoon baking powder (1g)
- 1 tablespoon extra virgin olive oil (15g)
- 1 teaspoon Lyle's Golden Syrup (7g) (sub maple syrup, brown rice syrup, or light corn syrup)
- up to ½ cup lukewarm water (118g)
For the sauce and toppings
- ⅔ cup finely chopped canned tomatoes (150g)(sub favorite pizza sauce)
- 2 fresh balls of mozzarella (about 7 ounces) (200g) (sub favorite shredded cheese)
- sliced veggies and/or any meat toppings, to taste
- dried or fresh oregano (or another Italian herb blend)
- grated Parmigiano-Reggiano or Parmesan cheese
- salt to taste
Instructions
1. Preheat the oven to 500°F/260°C.
- For the preheated baking pan method: Place a baking pan in the hottest location (oven floor for most ovens) and preheat while you prepare the dough.
- For the pizza peel/stone method: Preheat the pizza stone or steel in the oven. Dust pizza peel generously with semolina flour.
- For room temperature pan method (not recommended for best results): Lightly oil a baking pan and leave on the counter while preparing the dough.
2. Mix the dry ingredients. In a large mixing bowl, whisk together flour, salt, and baking powder.
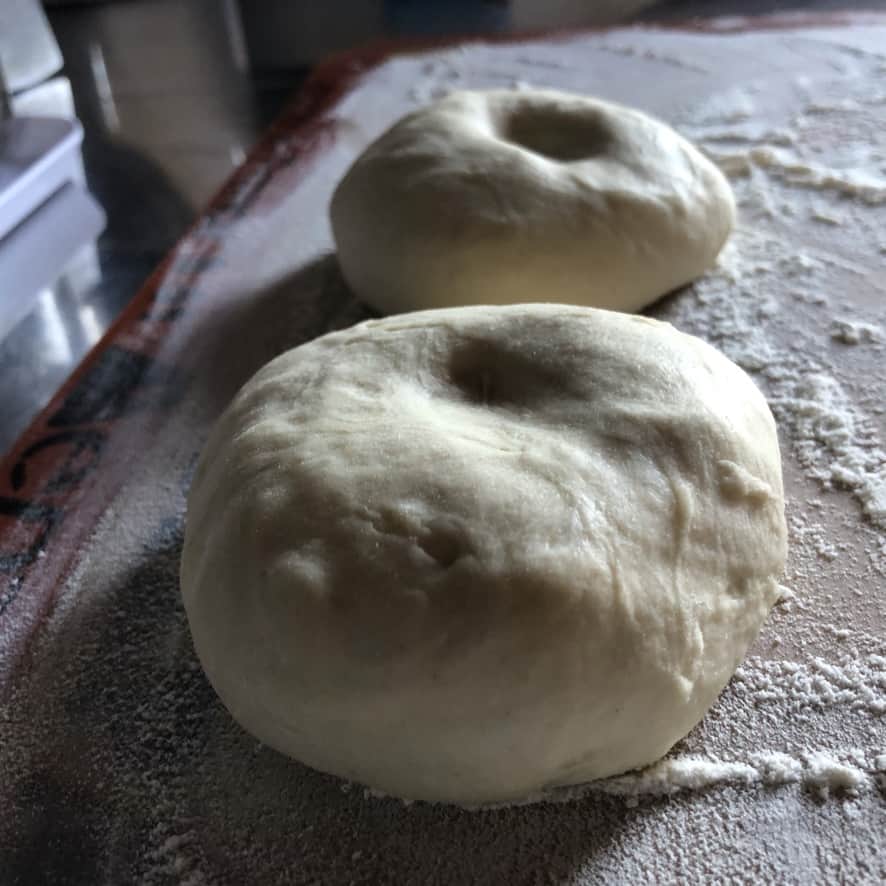
3. Add the wet ingredients. Add olive oil, syrup, and half of the water to the flour mixture, stirring using your hands. Add remaining water 1 tablespoon at a time just until the dough comes together-it should be soft but not wet or sticky. Note: You may not need all water depending on flour humidity. Divide dough in half. For easier rolling, cover and rest the dough 10 minutes.
4. Roll out the dough. On a lightly floured non-stick mat, roll dough ⅛ inch thick for one large pizza or divide for two smaller pizzas. Helpful Hint: Without a non-stick mat, roll between lightly oiled parchment paper, then remove the top sheet, and proceed to Step 5.
5. Choose your pizza-to-oven-transfer method:
- Using a pizza peel: Place rolled dough directly on a semolina-dusted peel and proceed to step 6.
- No Pizza Peel? Use parchment paper: Brush the dough with olive oil and spread it evenly. Cover with parchment paper (slightly larger than dough). Place a cutting board on top, flip it over, and remove the non-stick mat. Now, you're left with a rolled-out pizza dough on an oiled piece of parchment paper that you can now top.
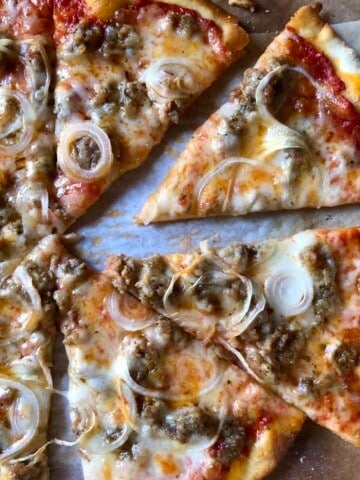
6. Top the pizza. Spread ⅓ cup pizza sauce evenly. Season with salt, oregano, and Parmesan. Add mozzarella and desired toppings. Finish with a drizzle of olive oil.
7. Bake the pizza:
- Pizza peel method: Slide the pizza from the peel onto the preheated stone/steel. Bake for 10 minutes or until golden brown and crispy.
- Baking pan method: Place a cutting board under the parchment paper with the assembled pizza on it to help transport it. Then carefully, slide the entire parchment paper (with the pizza), directly onto the hot baking pan. Bake in the hottest part of your oven (for me this is my oven floor) for 6-7 minutes until the cheese bubbles and the edges crisp. Then move the pan to the middle-top rack for 4-5 minutes to finish cooking. Cool briefly before cutting into squares. Enjoy!
Notes
If you don't have a pizza stone or pizza peel (or if you only have a small stovetop oven), there are a couple of techniques you can use to ensure a crispy pizza crust. In the absence of a pizza stone (which uses refractory heat to cook), it's important to ensure the surface that your pizza will bake on (i.e. a cookie sheet, etc.) gets really hot before you add the pizza to it. This helps the crust to start cooking on the bottom immediately. So, preheat the oven/stone/steel or baking pan while you're making and rolling out the dough!
Pizza peel users: Dust peel generously with semolina to prevent sticking
Baking pan users: Parchment paper method prevents tearing when transferring thin dough
Dough thickness is crucial-⅛ inch ensures proper St. Louis-style crispiness
Find all the other tips (with photos) in the main post!
- Prep Time: 10 minutes
- Cook Time: 10 minutes
- Category: Pizza
- Method: Oven Bake
- Cuisine: American
Nutrition
- Serving Size: 1 pizza

Tyler Y. says
Perfect pizza for people who don't like thick, bready crusts! Thin, crispy, and ready in minutes:)
Jennie says
I just made this crust for the first time and we absolutely loved it! It has an amazing amount of flavor and the texture of the crust is perfect. It was really easy to get it super thin and yet still able to move it around without issue. I used my big aerated pizza pan and it worked great. My husband is sitting across the room as I type this going on about how we should make this pizza a weekly thing. 🥰 Thank you!
Kelly says
Jennie! Reading your review made me SO happy! We feel the same way about this pizza...plus it's so much healthier and less expensive than ordering out. We were a "white flour" house growing up, but some of my favorite pizza doughs (yeasted and non-yeasted like this one) as an adult are made with whole wheat because of the delicious flavor it lends to the crust!❤️ Thanks for trying the recipe and for telling us how it went!🤗
Sarah says
Perfect whole wheat pizza dough! I didn't realize how good it would be, but we were out of yeast and wanted pizza so I gave it a try! I followed the recipe to the letter and preheated our stone for 45 minutes at 500F. Not a typical "healthy" tasting whole wheat pizza dough and it was ready so fast! We'll be making this again and not just when I'm out of yeast😉.
Leila says
Thanks for this delicious pizza! I was out of yeast and found this recipe and my family loved it.
Really crispy crust (I was impatient and put the first one in before the stone had preheated for the full 30-45 minutes...and it wasn't as crispy as the next ones).
Definitely preheat the full amount of time! I'll be sneaking this recipe in regularly especially when I don't feel like making reg pizza dough..it's a keeper!
Lori from Baltimore says
This was absolutely perfect. I have never been able to finesse a thin crust whole wheat pizza, but this was it!
Kelly says
Lori, I'm so happy you made the pizza and loved it! The whole wheat has a lot of great flavor that our family enjoys:) Thanks for making the recipe and for letting others know it worked out well for you😊.