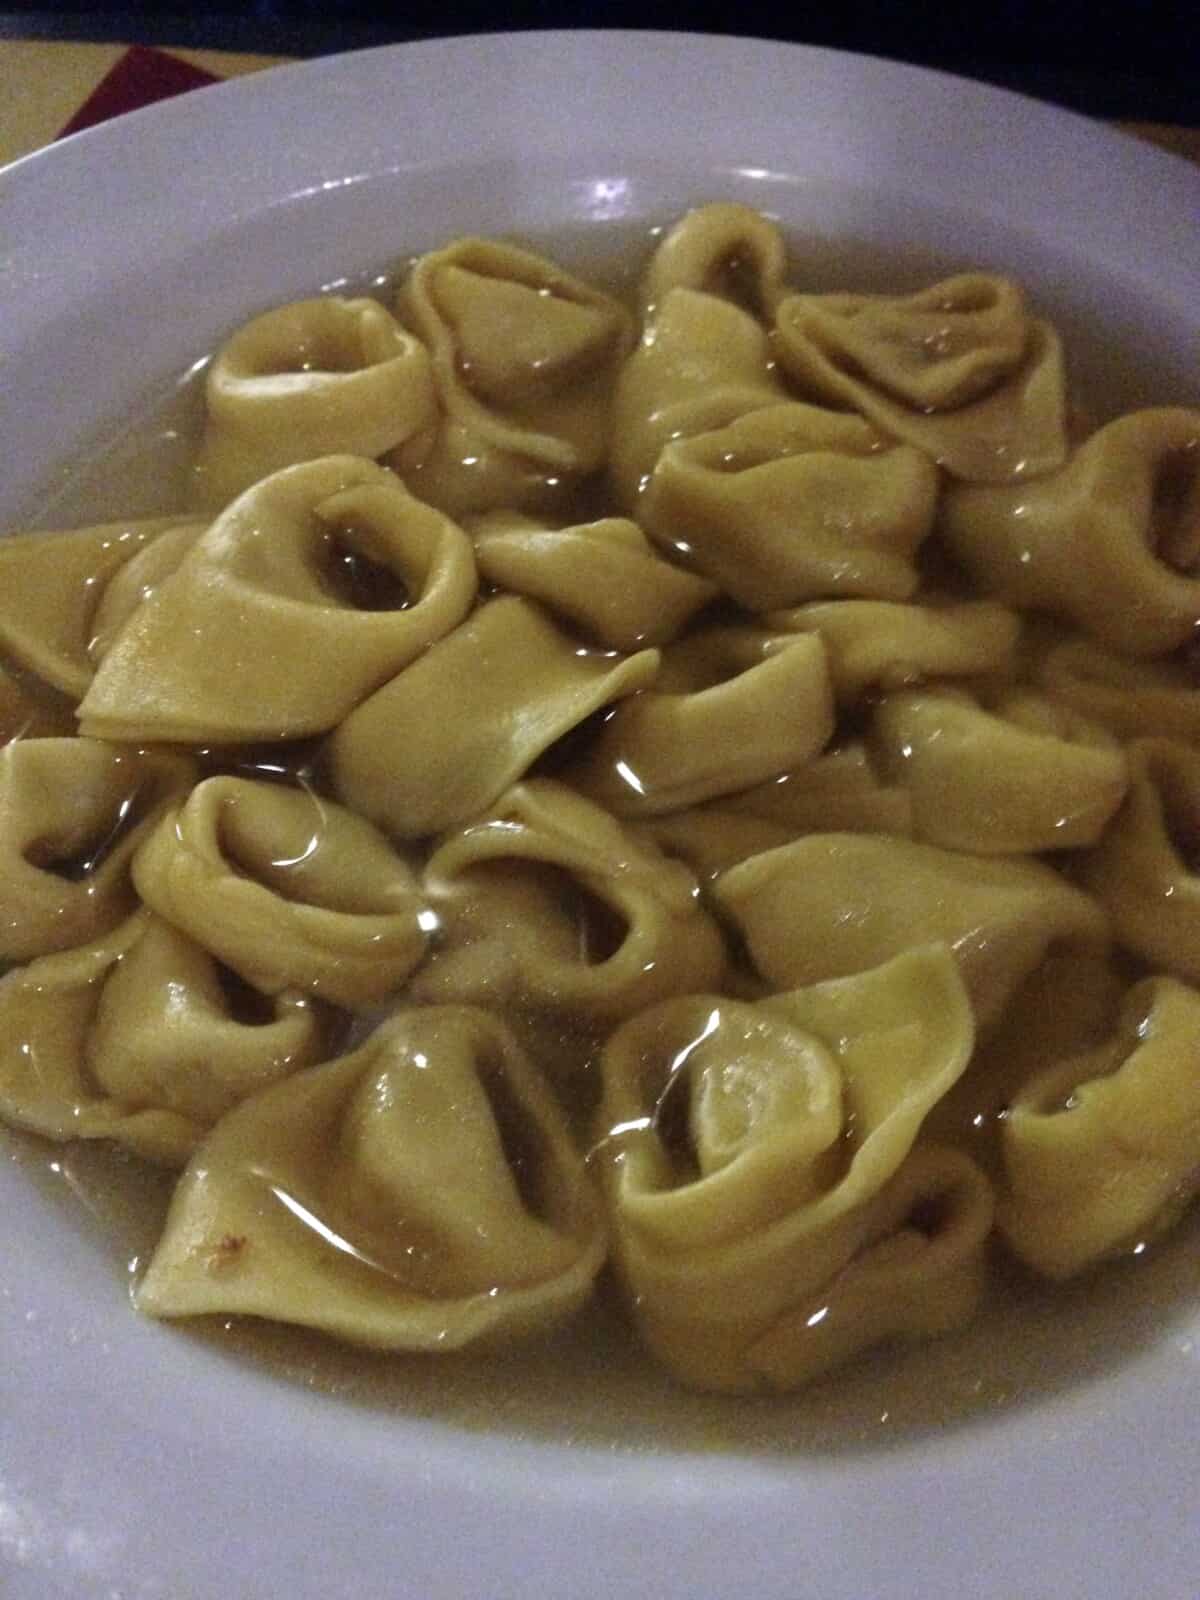
This homemade tortellini recipe is 100% made from scratch and way easier to prepare than you think (especially filling and folding them). "Tortellini in brodo" or little meat and cheese stuffed pasta cooked in homemade meat broth is one of Bologna Italy's most iconic pasta dishes along with Bolognese ragù, and lasagna Bolognese.
You'll need to set aside ample time to prepare them, but they're worth it! This traditional Emilian tortellini consists of 3 components: fresh egg pasta, pork and Parmigiano-Reggiano cheese filling, and homemade Italian meat broth (brodo).

Why This Recipe Works
In this post, you'll learn how to make the official "tortellini in brodo" recipe (tortellini soup) just as Italians living in the Emilia-Romagna region (home to Bologna, Modena, Parma, Reggio-Emilia, etc.) have been making for generations. And just for kicks, I've included its somewhat shady history down below.
Tortellini in Brodo is one of my favorite pasta dishes to eat, and I've been fortunate to have enjoyed more than my fair share of them in Bologna, Modena, Parma, and Ferrara. And I can attest to how specific (and delicious) the authentic preparation of this dish is.
There are proportional variations used in the ingredients, and sometimes garlic and rosemary are added to flavor the filling, but genuine tortellini in brodo never wavers from its authentic base recipe, and if it does, it's given a different name.

Jump to:
- Why This Recipe Works
- What to Expect With this Tortellini Recipe
- Why We Love This Italian Tortellini Recipe
- Authentic Homemade Tortellini Soup Ingredients (Tortellini in Brodo)
- How to Make Authentic Tortellini From Scratch
- How to Make Homemade Tortellini Step-by-Step Recipe Photos
- Tortellini vs. Tortelli vs. Tortelloni: Size & Thickness Guide
- How to Fold Homemade Tortellini
- How to Store Tortellini
- The City of Bologna, Italy's Official Registered Tortellini Recipe
- More Easy Italian Pasta Recipes to Try
- Let's get started!
- 📖 Recipe
- World's Smallest Tortellini Sets Guinness World Record
The tortellini recipe in this post is authentic and is like what you'll enjoy in restaurants and trattorias across Northern Italy.
Unlike many of the tortellini in brodo recipes you'll find online (even from some very well-known food sites) claiming to be "tortellini in brodo", they're often not authentic or even close to the real deal - even if they still taste good!
But if what you're looking for is a trusted recipe from right here in Italy, this is it (and you'll be happy to know, it's still customizable)! In fact, if you want to try to beat the now-famous Guiness Book of World Record's "smallest tortellino" in the world, go for it!

Above and below, you can see real photos of fresh tortellini for sale in Bologna and what we bought to take home. This will give you a better idea of what authentic tortellini should look like.


What to Expect With this Tortellini Recipe
If the recipe is not some form of the official tortellini recipe from the "Confraternita del Tortellino" (The Brotherhood of Tortellino), it may be super delicious, but it's not official 'tortellini in brodo'.
So to call it that (when it doesn't reflect the actual dish) would be a disgrace to the hundreds of years artisans have been making and perfecting it (including the famous "rezdôra" (women pasta makers of this region) who keep the tradition alive today).
That said, I also wholeheartedly believe in tweaking recipes and making up all kinds of tasty new dishes based on your own tastes.
So, if you're like me, go for it, just please be kind to the Italians who invented it, and give the dish a fun new name♡.

Why We Love This Italian Tortellini Recipe
- All 3 components of this classic Italian pasta are authentic and simple to make
- It's homemade and we know exactly what's in it (and not in it - no fillers!)
- It's a traditional Italian pasta recipe from Bologna, Italy
- It's quick - tortellini filling takes just a few minutes to prepare
- Fresh egg pasta is simple to make and tastes way better than anything from a box
- Homemade tortellini is a great make-ahead and freeze recipe
- Homemade Italian meat broth (brodo) is incredibly easy and tastes amazing


Authentic Homemade Tortellini Soup Ingredients (Tortellini in Brodo)
I recommend splurging on the best quality Italian ingredients you can afford because the success of this recipe depends on good ingredients.
I also recommend scaling down the recipe to ¼ or ½ of the original recipe in order to try it out first without making a huge investment in the ingredients.
This way, you can taste it and then play around with the ingredient proportions and adjust them if desired before making a much larger batch that you can freeze or serve to a large crowd.
There is so much debate amongst Italians about whether tortellini filling should be made using raw pork or cooked pork.
And while every family has their own die-hard preference and recipe with slightly different proportions of these tried and true ingredients, the foundation is always upheld and honored for an authentic dish.
After having made tortellini with leaner pork loin and also with the fattier tender neck and shoulder cuts, I definitely prefer to use the cooked pork neck or shoulder because it produces a more tender filling.
But of course, this is up to you, and why you should try making tortellini both ways.
Egg Pasta (pasta fresca all'uovo)
Check out the full recipe with tips and techniques for foolproof success here!
- Italian 00 Flour or unbleached all-purpose flour
- eggs
Tortellini Filling
- pork (shoulder, neck, or loin)
- Prosciutto di Parma (sub high-quality San Daniele or other prosciutto crudo)
- Mortadella di Bologna (sub-high-quality Italian Mortadella from another region)
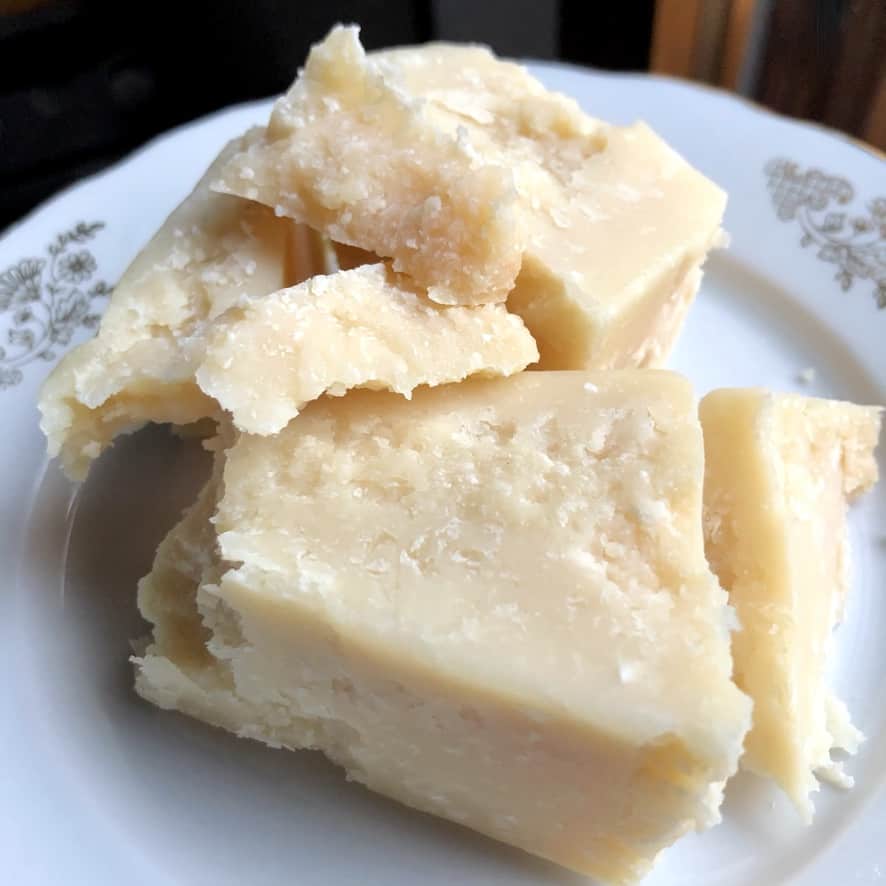
- 25 to 30-month Parmigiano-Reggiano cheese (sub high-quality Grana Padano DOP)
- unsalted butter
- fresh rosemary
- garlic
- freshly grated whole nutmeg
- salt
- black pepper (optional)
- egg
Tortellin Broth (Brodo)
- beef (like short rib, brisket, etc.)
- capon (or free range or regular chicken)
- onion
- carrot
- celery
- salt
- ½ inch piece of whole cinnamon stick (optional but highly recommended)
- rind of Parmigiano-Reggiano cheese (optional but highly recommended)
FYI, homemade traditional tortellini filling often has a slightly more "rustic" texture than that of the super smooth commercial tortellini filling found at the grocery store, as those often include bread crumbs (soaked in milk) to help with texture.

How to Make Authentic Tortellini From Scratch
I've outlined below how to make tortellini filling using the cooked pork method, but have added the instructions for how to make the raw pork filling in the recipe card notes. This way, you can decide which recipe you want to make.
COOKED TORTELLINI FILLING
Tortellini filling can be made up to 2 days in advance and refrigerated or even frozen for up to 1 month.
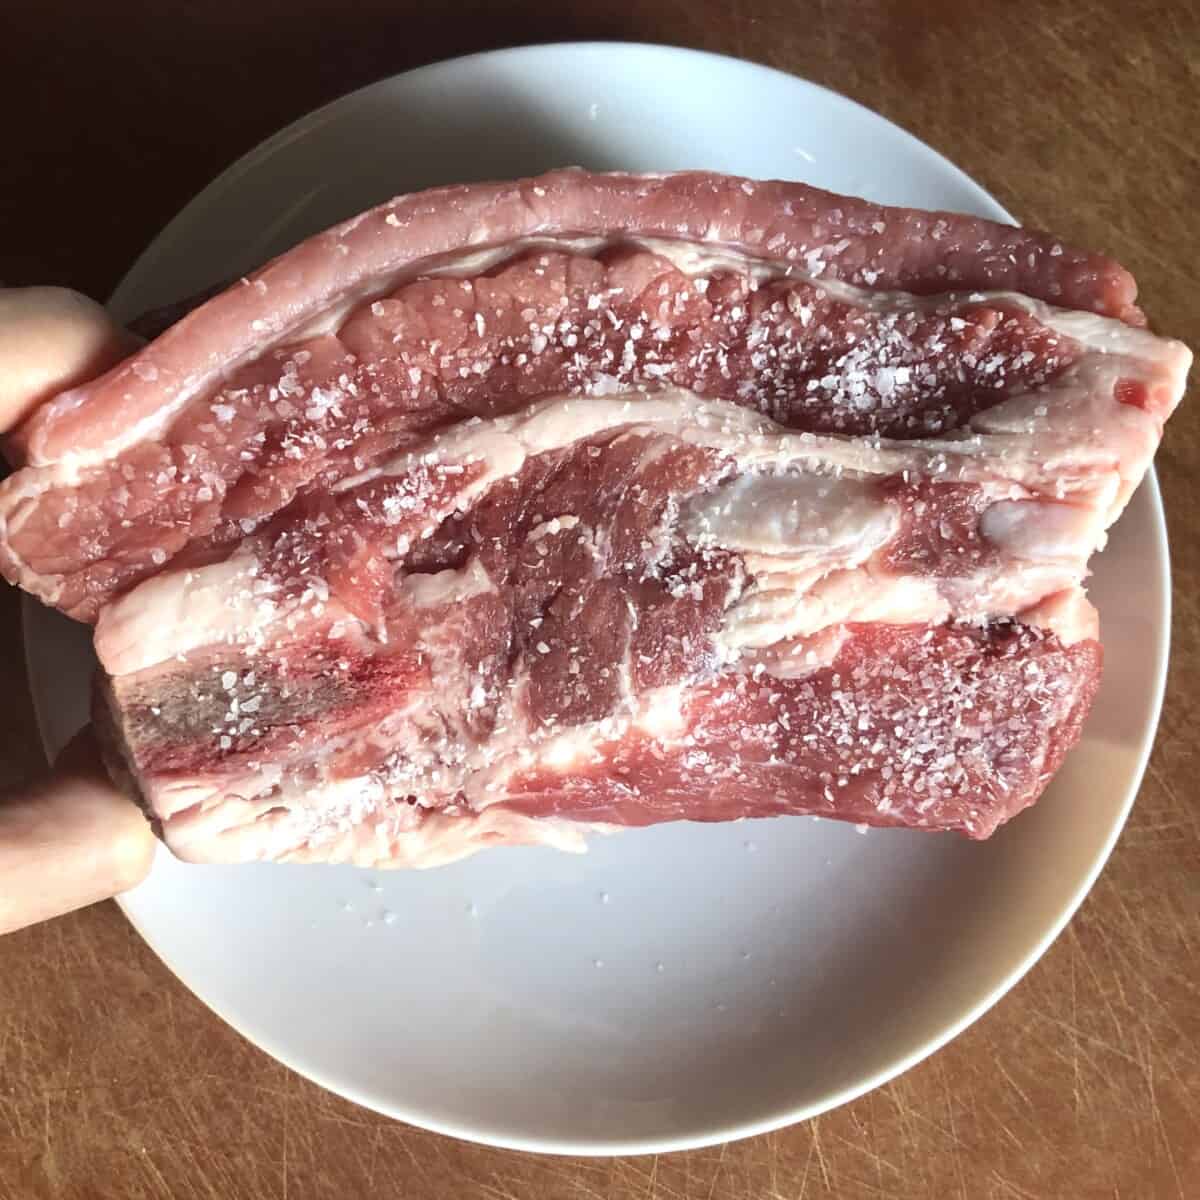
Step 1. Season the raw pork. Season the pork (shoulder, neck, or loin) with salt (and black pepper if desired) and place the rosemary and smashed garlic directly on top. Cover it and refrigerate overnight to allow the flavors to permeate the pork.
Step 2. Make the COOKED PORK FILLING. Remove the pork from the refrigerator and chop it into cubes. Place the rosemary, garlic, and 2 ½ tablespoons of butter in a skillet and sauté the herbs over medium-high heat for a few minutes until the garlic and rosemary are both toasted and golden brown but not burnt.
Reduce the heat to medium and add the pork and sauté just until the meat is cooked through. Turn off the heat and remove the mixture to a plate and allow it to cool, then remove the garlic and rosemary, setting them aside (do not discard the rosemary).
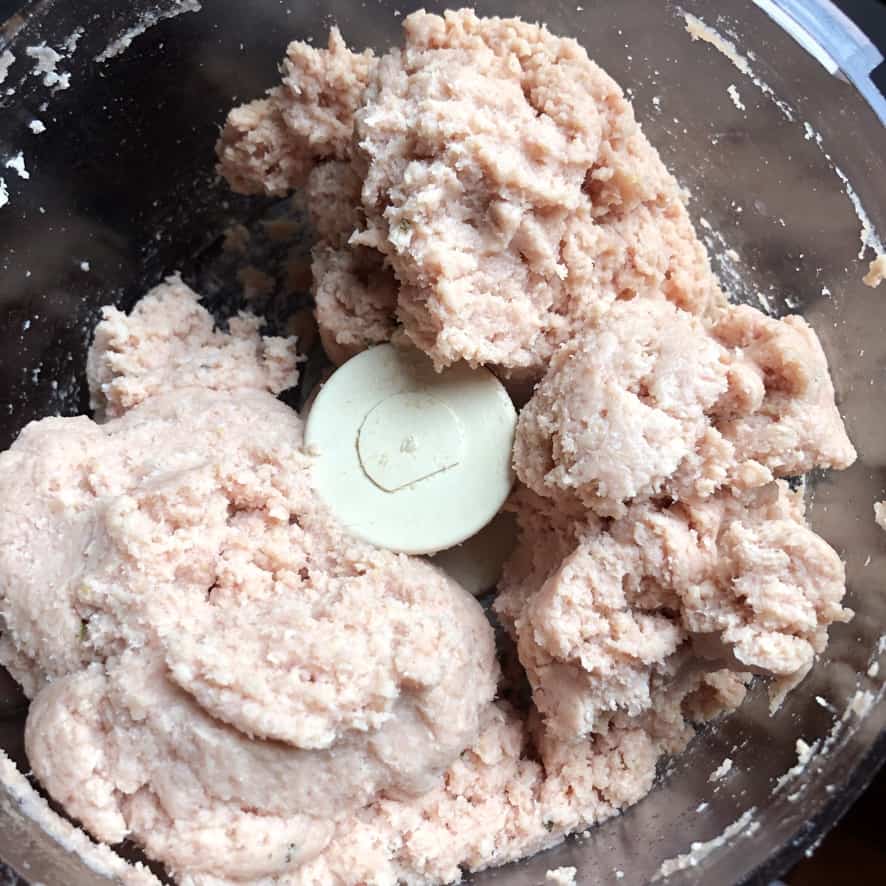
Step. 3 Process the meat filling. Add the prosciutto and mortadella to the bowl of a food processor and process to a fine paste. Add the cooked pork, along with the flavored butter, to the prosciutto and mortadella mixture, and process until smooth.
Add one egg, a good pinch of salt, and about ½ of the crispy rosemary (or more or less to taste), and process until the mixture is smooth and no whole rosemary pieces remain. *Adding the rosemary is not traditional, but we enjoy the flavor.
Add the grated Parmigiano cheese and freshly grated nutmeg to taste and process the mixture for about 5 minutes, or until it becomes one cohesive mixture. The filling will be sturdy (easily pinchable).
If desired, you may add 2 to 4 tablespoons of broth to the mixture to help loosen it up a bit, but this is optional.
Step 4. Taste test the filling. Heat the skillet back up and cook a small piece of filling so you can taste and adjust seasonings if needed, adding more salt, nutmeg, or rosemary.
Step 5. Rest the filling for 24 hours. Massage the mixture with your hands for a couple of minutes, wrap it in an airtight container, and refrigerate it for 24 hours (or at least overnight).

FOR THE PASTA FRESCA (FRESH EGG PASTA)
Pasta can be made up to 1 day in advance and refrigerated.
Head over to my Fresh Egg Pasta Dough post for the full recipe, including step-by-step instructions, photos, and top tips and techniques for perfect egg pasta.
- Make the dough and allow it to rest for 30 minutes or until you're ready to roll and fill the tortellini.
- When ready to fill the tortellini, roll out the dough thinly and cut into small 1 ¼-inch (3cmx3cm) squares of pasta.

FOR THE TORTELLINI BROTH
Tortellini broth can be made up to 3 days in advance and refrigerated or frozen for up to 3 months ahead.
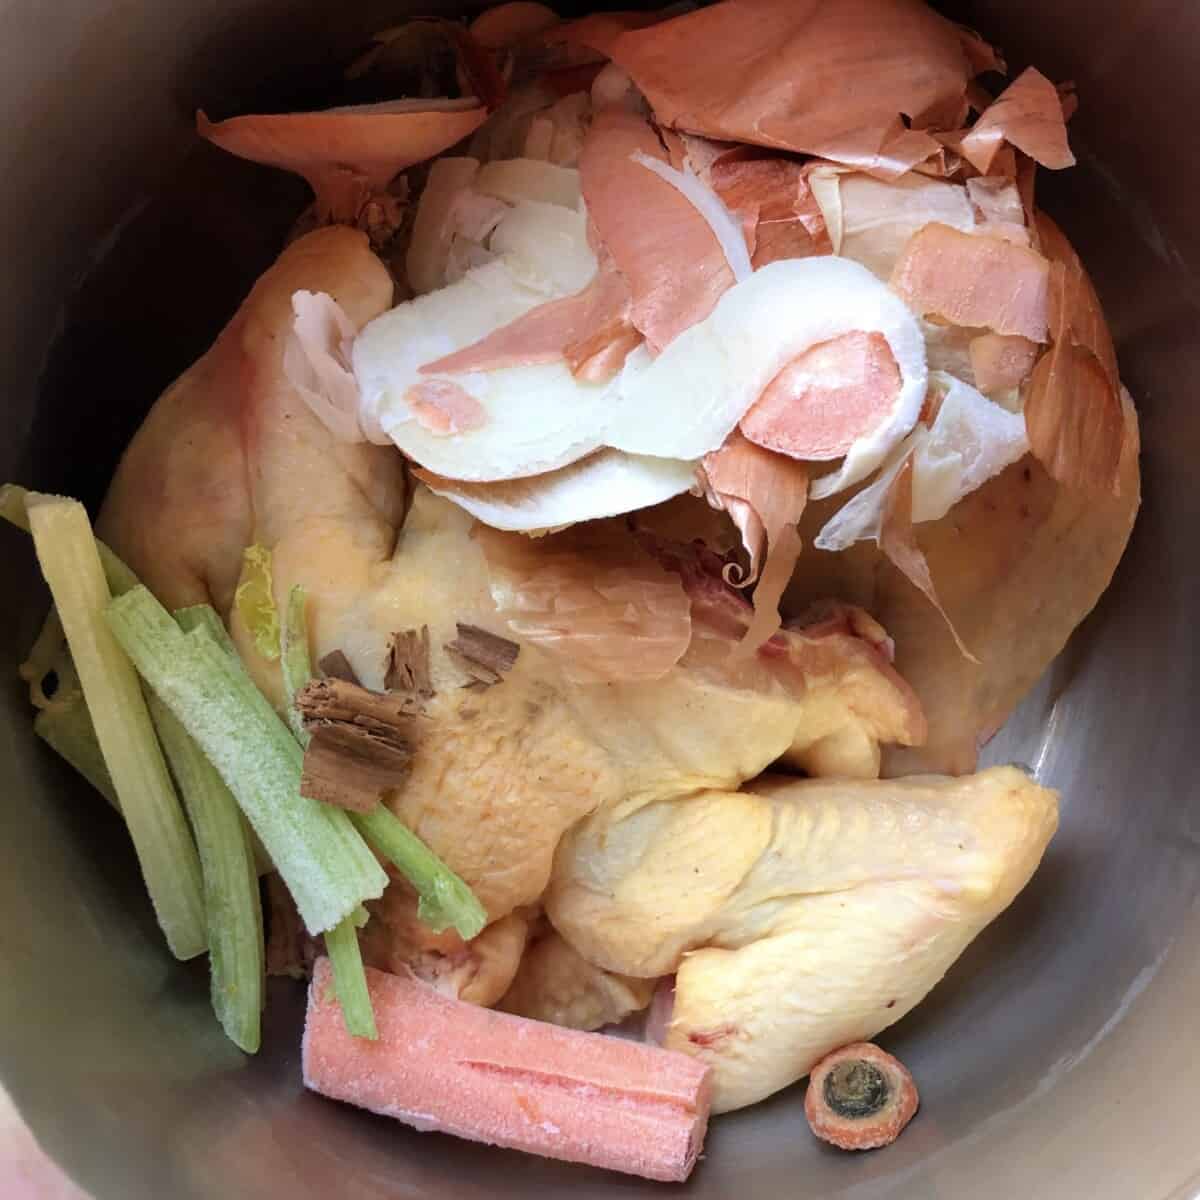
- Add all of the broth ingredients to a pressure cooker, close the lid, and bring it to high pressure. Once high pressure is reached, cook the broth for 45 minutes and allow for a natural release (which will give you a clear broth).
- Strain the solids, reserving the meat for another use, and pour the broth back into the pot and season with salt to taste (and skim off any fat if desired).
*Alternatively, you may add all of the ingredients to a large stock pot or dutch oven, bring it to a boil, cover, reduce it to a simmer, and cook for 3 hours.
How to Make Homemade Tortellini Step-by-Step Recipe Photos
For the Egg Pasta (pasta fresca all'uovo)


COOKED PORK Tortellini Filling Step-by-Step Photos (our preferred tortellini filling)


RAW PORK Tortellini Filling Step-by-Step Photos


Homemade Tortellini Broth Step-by-Step Photos]


How to Assemble and Cook Tortellini Step-by-Step Photos]


The History and Origin of Italian Tortellini
Authentic Italian tortellini comes from the Emilia-Romagna region of Italy (just an hour and a half from where we live in NE Italy).
This region is home to cities like Modena, Bologna, Parma, Reggio-Emilia, and Ferrara, to name a few. And tortellini in brodo is a must-try if you travel to this part of Italy -- it's so delicious!
Modena and Bologna (which are just about 23 miles apart) both lay claim to having invented tortellini. This dish is celebrated annually with a contest in which 5 chefs from each city compete to take home the ultimate prize for the best homemade tortellini.
No matter which of these cities produced the first fresh-filled pasta, we know stuffed tortellini has been enjoyed in some form in this part of Italy since at least the 12th century and was traditionally served for Christmas dinner (and still is even nowadays).
Although back then, the ingredients were usually made from leftovers and lower-quality ingredients (called "cucina povera" or "poor kitchen" cooking).

What is Tortellini (aka Tortellini in Brodo or Tortellini Soup)?
The modern form of tortellini (plural form of "tortellino") that we enjoy today is small filled pasta squares that have been folded and sealed in the shape of a navel (belly button).
There are varying sizes of these filled pastas, including the smallest tortellini, then the medium-sized tortelli, and the largest size tortelloni.
Traditional tortellini should officially use a square of pasta that is only 1.25 x 1.25 inches (3cm x 3cm) and 6/10mm thin, weighing a total of only 5 grams each.
Or you can make tortelli (the slightly larger version of tortellini), which involves less filling and folding.
Traditional Emilia-Romagna tortellini consists of 3 components: fresh egg pasta, the meat and cheese filling, and the "brodo" (or broth) which are all described in detail below.
How Tortellini Got Its Shape
There are also two different stories of the exact origin of how the shape of tortellini was created. And this is where the "shady part" that I mentioned early comes in. Both versions of the story take place at the Inn of Corona in Castelfranco Emilia (about halfway between Modena and Bologna).
The first story says the innkeeper was peeping through a keyhole to peer at a young Noble's daughter (Lucrezia Borgia) while she undressed (which is decidedly creepy). He was apparently so "inspired" by the sight that he went back to his kitchen and produced the tortellini in the shape of her navel.
The second story (probably reimagined to make the origin story sound way less creepy) says that tortellini was instead modeled after the goddess of love, Venus's navel.
It's said she appeared with Mars and Bacchus at the Corona Inn, and when the innkeeper saw her navel, he was compelled to create the pasta to commemorate her beauty.
Ok, so Peeping-Tom tortellini history aside, this is really delicious pasta.
It wasn't until 1570 that the tortellini as we think of it today was recorded by Pope Pio V's personal chef.
And even this version used a dough that contains no eggs, but instead butter, flour, sugar, salt, rosewater, and warm water (yet somehow still looks just like regular egg pasta).
The filling consisted of capon breast (a castrated rooster that's been fattened up for cooking), beef marrow, ricotta cheese, eggs, sugar, cinnamon, cloves, nutmeg, saffron, currants, mint, marjoram, and cooked in capon and beef broth.
The long list of spices and ingredients would have shown any guests of the Pope that he had the financial means to afford such luxurious and expensive ingredients (basically a medieval form of keeping up with the Joneses).
Nowadays, you will find the famous "rezdôra" (women of Emilia-Romagna who roll out tortellini dough manually) who are still passing down the tradition and art of tortellini-making to the next generations. While the men usually take care of filling the tortellini.
You'll find filled pasta similar to tortellini in other areas throughout Italy, like Anolini and Capelletti, but they have different fillings and are made from dough rounds instead of squares.

Traditional Tortellini Filling Ingredients
There are two ways to prepare traditional tortellini filling (one version uses cooked pork loin and the other version uses raw pork loin) -- see photos of both fillings above.
Some say using raw pork in tortellini filling is both easier to digest and juicier, but I actually prefer using the cooked pork filling because it's softer (plus, you're not working with raw pork which is a bonus).
I'm providing recipes for both raw pork tortellini filling and cooked pork tortellini filling in this post so you can use the one you prefer.
Traditional Italian tortellini filling ingredients:
- ground pork loin (or pork shoulder or pork neck) (perfumed with garlic, rosemary, salt, and pepper in the refrigerator for 2 days)
- 24-36 Month Prosciutto di Parma (cured ham from Parma, Italy)
- Mortadella from Bologna (without pistachios), but I've made it using mortadella di Bologna with pistachios and without, and both are delicious)
- Parmigiano-Reggiano cheese (30-month aged is best, but use what you have access to)
- butter, fresh rosemary, and garlic to flavor the pork (the authentic recipe removes the rosemary before blending the pork so if you choose not to, make sure they are blended until no sharp pieces remain, or you risk puncturing the filled pasta dough
- freshly grated nutmeg (never the pre-ground kind because it just doesn't taste the same)
- egg to bind it all together
Once the filling is made, the mixture is left for 24 hours to allow the flavors to meld together before filling the tortellini.
I've made it before when I allowed the filling to rest for just 3 hours and also overnight before filling them, and the flavor is still ok.
But planning ahead and resting the filling for the full 24 hours is essential for the best flavor!


Traditional Egg Pasta for Tortellini
Tortellini filling is wrapped in fresh egg pasta (pasta fresca) made simply with 00 flour and eggs (no salt and no water). You can also make it using semolina flour.
Authentic vs. Practical Thickness Of Tortellini Pasta
The Official Bologna Recipe: The traditional tortellini recipe registered by the "Dotta Confraternita del Tortellino" (Brotherhood of the Tortellino) with the Bologna Chamber of Commerce on December 7, 1974, specifies that authentic Bolognese tortellini should be rolled to a thickness of 6/10 mm (0.6mm). This corresponds to Atlas Marcato setting #9 (0.8mm) or even thinner if rolling by hand.
Why Most Modern Recipes Use Thicker Pasta: The ultra-thin 0.6mm dough used in traditional Bologna tortellini is extremely delicate and difficult to work with-it tears easily and requires advanced pasta-making skills.
For this reason, most contemporary Italian cooking sources and home cooks recommend the more practical thickness of 1-1.5mm (settings #6-8), which still produces delicious, tender tortellini while being much more forgiving for home cooks.
My Recommendation: If you're making filled pasta for the first time, start with setting #6 (1.5mm). As you gain confidence and skill, you can gradually work your way to thinner settings. The thinner the pasta, the more delicate and authentic it becomes-but also the more challenging to work with!
Tortellini vs. Tortelli vs. Tortelloni: Size & Thickness Guide
| Type | Square Size | Thickness (Practical) | Atlas Marcato Setting | Classic Fillings | How to Serve |
|---|---|---|---|---|---|
| Tortellini (smallest) | 3-4 cm (1.2-1.6") | 1-1.5mm (paper-thin) | #6 to #8 #6 = 1.5mm #7 = 1.33mm #8 = 1.0mm | Pork loin, prosciutto, mortadella, Parmigiano-Reggiano, nutmeg | In broth (tortellini in brodo) for Christmas; also with cream sauce |
| Tortelli (medium) | 5-6 cm (2-2.4") | 1-1.5mm | #6 to #7 #6 = 1.5mm #7 = 1.33mm | Pumpkin (tortelli di zucca); ricotta and greens; potato | Butter and sage; simple tomato sauce |
| Tortelloni (largest) | 6-7 cm (2.4-2.8") | 1-1.33mm | #6 to #7 #6 = 1.5mm #7 = 1.33mm | Ricotta and spinach; ricotta and herbs; cheese blend | Butter and sage; light tomato or cream sauce (too large for broth) |
Atlas Marcato 150 Pasta Machine Thickness Reference:
- Setting #0: 4.0mm (thickest - for initial sheeting)
- Setting #1: 3.5mm
- Setting #2: 3.2mm
- Setting #3: 2.8mm
- Setting #4: 2.5mm
- Setting #5: 2.0mm
- Setting #6: 1.5mm (recommended for most filled pasta)
- Setting #7: 1.33mm (thinner filled pasta)
- Setting #8: 1.0mm (thinnest for delicate tortellini)
- Setting #9: 0.8mm (angel hair/capellini)
Tortellini Hand-Rolling Tip: If rolling by hand without a pasta machine, aim for dough thin enough that you can see the shadow of your hand through it when held up to the light. This typically equals about 1-1.5mm thickness.
Why Thickness Matters: Filled pasta uses two layers of dough (when you fold and seal), so starting with dough that's too thick will result in heavy, doughy pasta that doesn't cook evenly. The 1-1.5mm range ensures your tortellini, tortelli, or tortelloni will be tender and delicate with the perfect pasta-to-filling ratio.
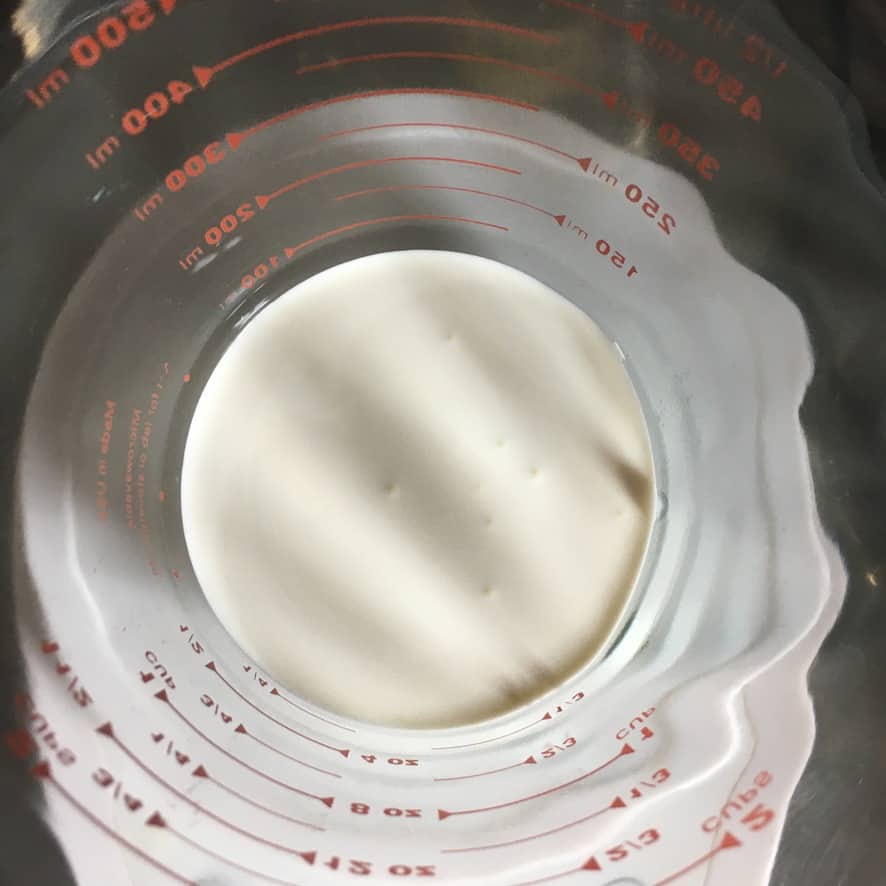
Traditional Tortellini Meat Broth (Brodo)
Traditional Modenese and Bolognese tortellini broth ("brodo" in Italian) is made using beef (such as brisket or short rib), capon (a castrated rooster fattened up for cooking), but you can use a free-range or regular chicken, plus onion, carrot, celery, and salt.
I highly recommend making a homemade broth for this recipe and saving the boxed stuff for another recipe.
If you're going through the process of making tortellini from scratch, you want a broth that's worthy of it and elevates this luxurious dish even more!
A true homemade Italian meat broth is not only super easy to make (especially in a pressure cooker), but it's essential for true tortellini in brodo. And it's incredibly delicious!
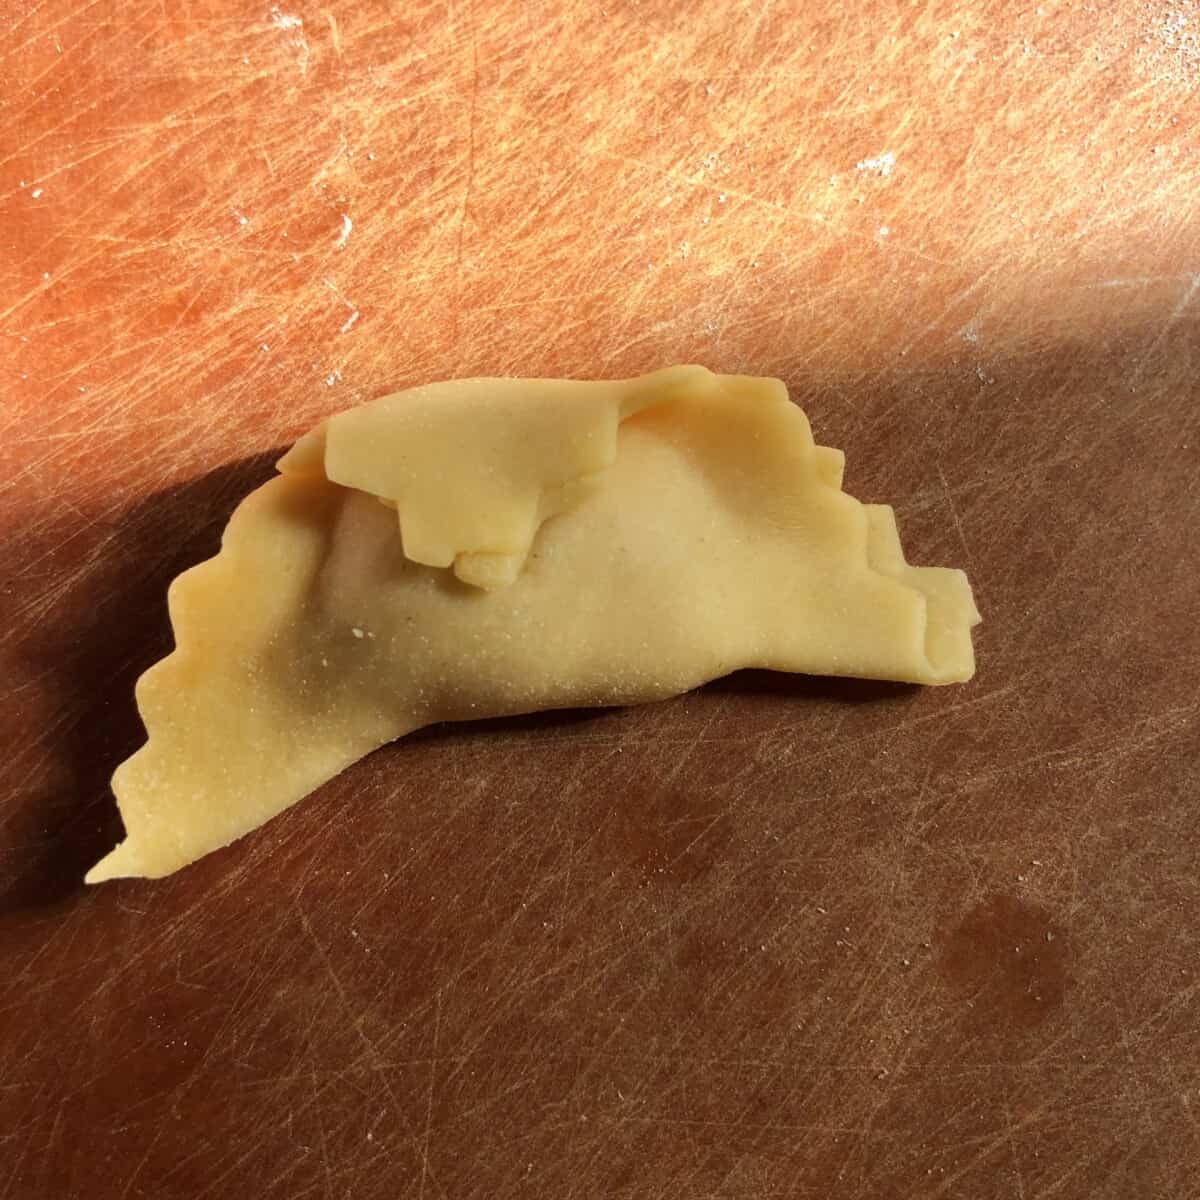
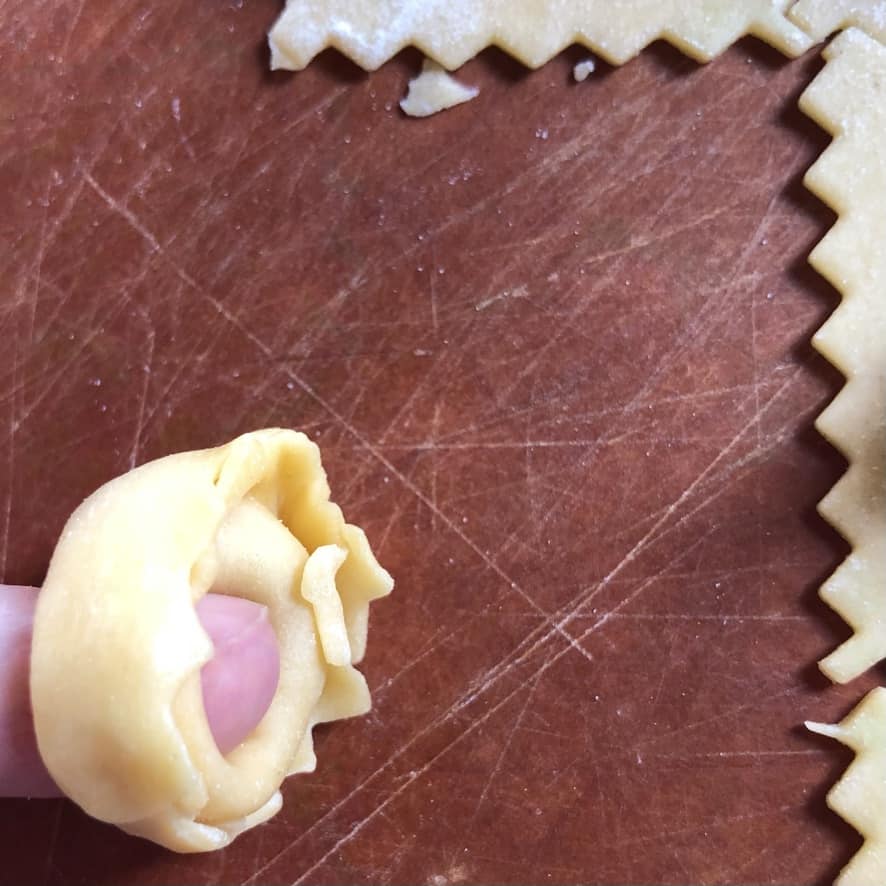
How to Fold Homemade Tortellini
Folding tortellini is actually super easy! When I first learned how to do it, I was so surprised by how un-messy the whole process was.
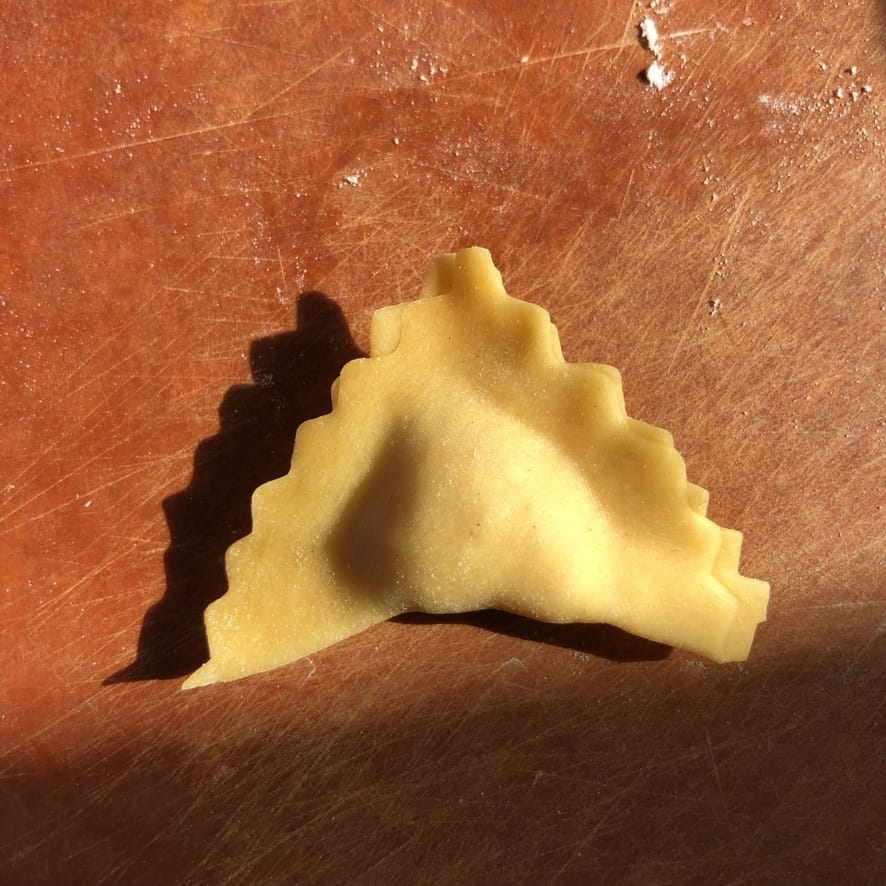
Above, you can see the steps for how to shape homemade tortellini: Add a dot of filling to the center of the square, fold the dough over the filling, bringing the two tips together to form a triangle.
Then press out any air around the filling because air bubbles can cause the pasta to burst open while cooking. Fold the top tip down, and fold the two bottom angles together until they meet and overlap them around your finger, creating a "hole".

How to Store Tortellini
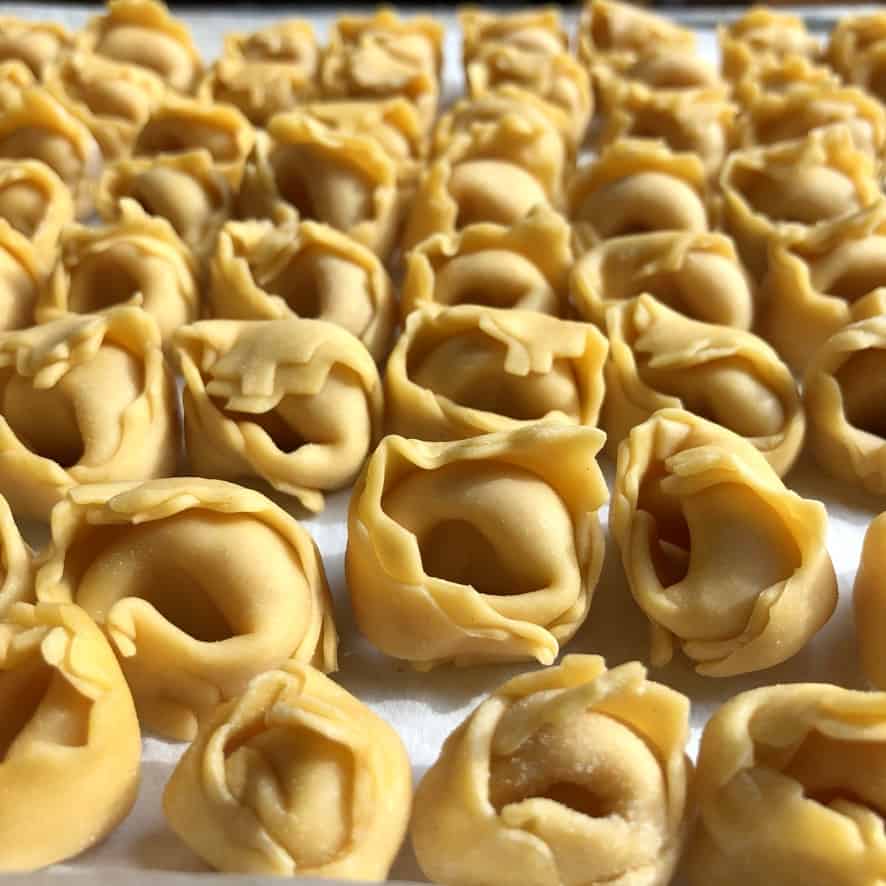
Making a large batch of homemade tortellini is a great way to have a wholesome dinner ready in 15 minutes or less, even on the busiest weeknights. You can refrigerate or freeze homemade tortellini, depending on when you plan to cook them. Below are two ways to store tortellini:

Refrigerate Homemade Tortellini:
After you've filled the tortellini, allow them to air dry for 15 minutes or until they are dry on the outside and do not stick together when they touch.
Place the parchment-lined tray filled with tortellini in the refrigerator without covering them (which could cause condensation and ruin them) for:
-up to 5 days for tortellini made with cooked pork filling
-up to 2 days for tortellini made with raw pork filling

Freeze Homemade Tortellini:
After you've filled the tortellini, allow them to air dry for 15 minutes or until they are dry on the outside and do not stick together when they touch.
Place the parchment-lined tray filled with tortellini into the freezer until they are frozen (about 30 minutes or even up to 1 hour).
Place frozen tortellini into an airtight container or freezer bag for up to 3 months. Cook frozen tortellini from frozen (DO NOT THAW frozen tortellini which would cause the pasta to break and tear).
When you're ready to cook frozen tortellini, add them to boiling meat broth and cook until al dente doneness and cooked through (up to 5 minutes for a raw pork filling and just 3 to 4 minutes for a cooked pork filling).

How to Eat and Cook Leftover Tortellini
Most Italian families (including mine) don't cook more tortellini than is expected to be eaten at any particular meal.
However, sometimes when there's a large gathering at Christmas or Easter where lots of other dishes are served, leftover tortellini will be removed from the broth (so it doesn't turn to mush), cooled, and refrigerated.
Tortellini can be reheated in heavy cream seasoned with a little salt, pepper, and nutmeg, with a large handful of grated Parmigiano cheese tossed in at the end, creating an easy tortellini Parmigiano cream sauce.
Just know most Emilians would frown on this preparation because they believe the cream takes away from the flavor of the filling.
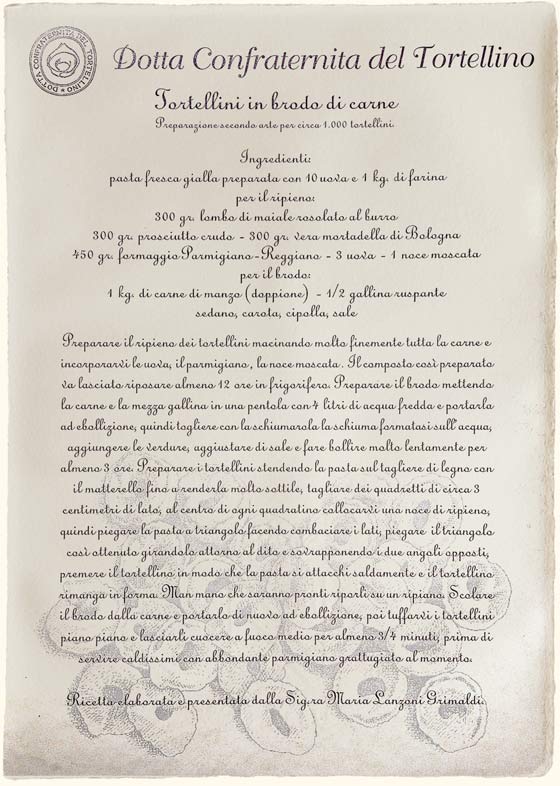
The City of Bologna, Italy's Official Registered Tortellini Recipe
If you're up for making 1000 baby (5g each) tortellini, here's the official Bolognese recipe below, courtesy of the Dotta Confraternita del Tortellino in Bologna, Italy.
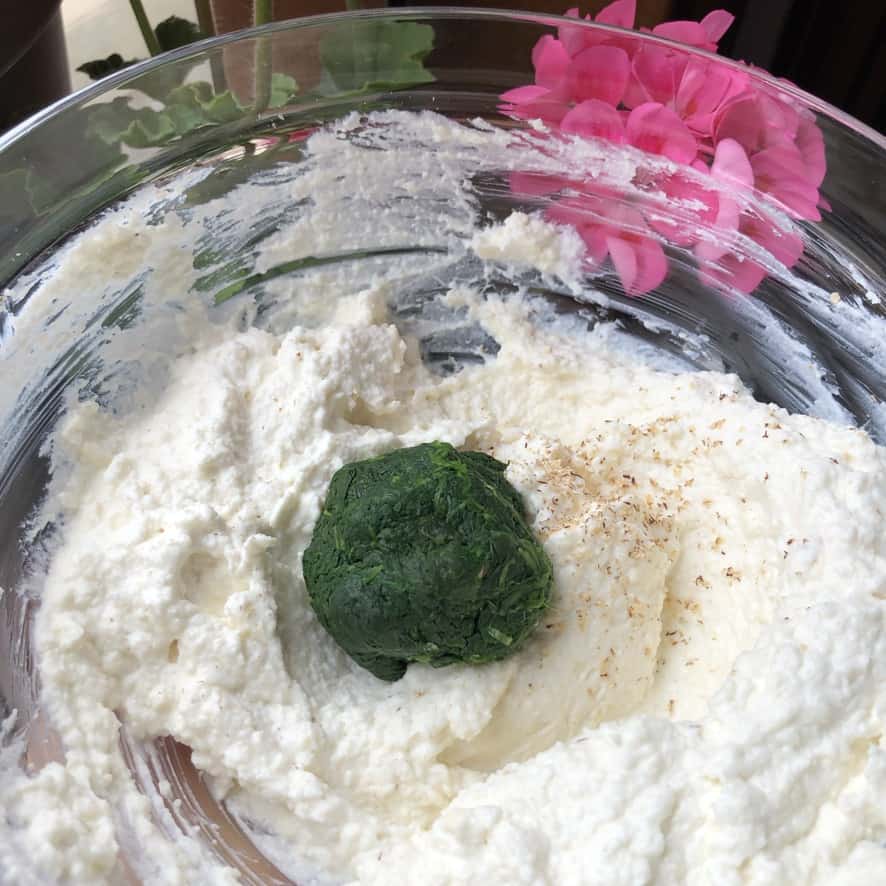
Other Popular Tortellini Fillings
Other popular fillings for stuffed tortellini are spinach and ricotta, pork with chicken and Grana Padano, Speck di Asiago and mozzarella, etc.
I've even eaten donkey meat tortellini here in the north, where donkey meat is a specialty (tortellini d'assino), and it's delicious!
Much like ravioli, you can stuff tortellini with pretty much anything you like, but the ultimate tortellini recipe that Italians hold in the highest esteem comes from the Emilia Romagna region, where it originates and is always served in brodo (broth).

More Easy Italian Pasta Recipes to Try
If you love pasta as much as we do, here are a few of our tried and true family favorites to also try.


- Classic Lasagna Bolognese (authentic Italian recipe)
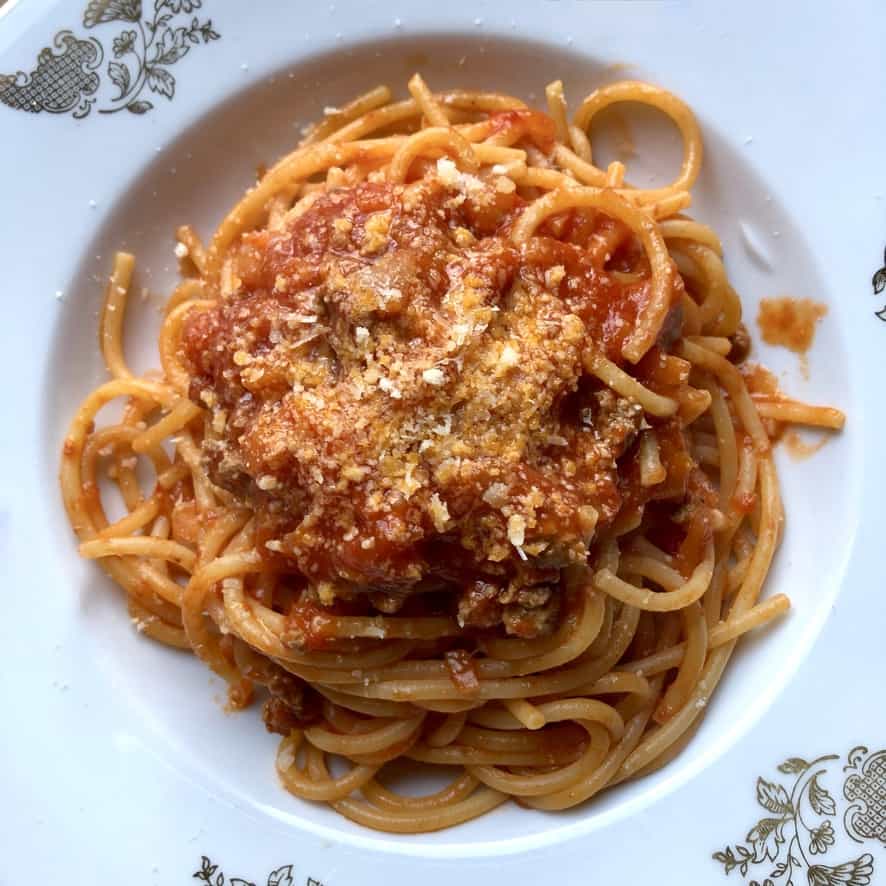
- The Best Homemade Spaghetti Sauce with Beef (Spaghetti con Ragù)
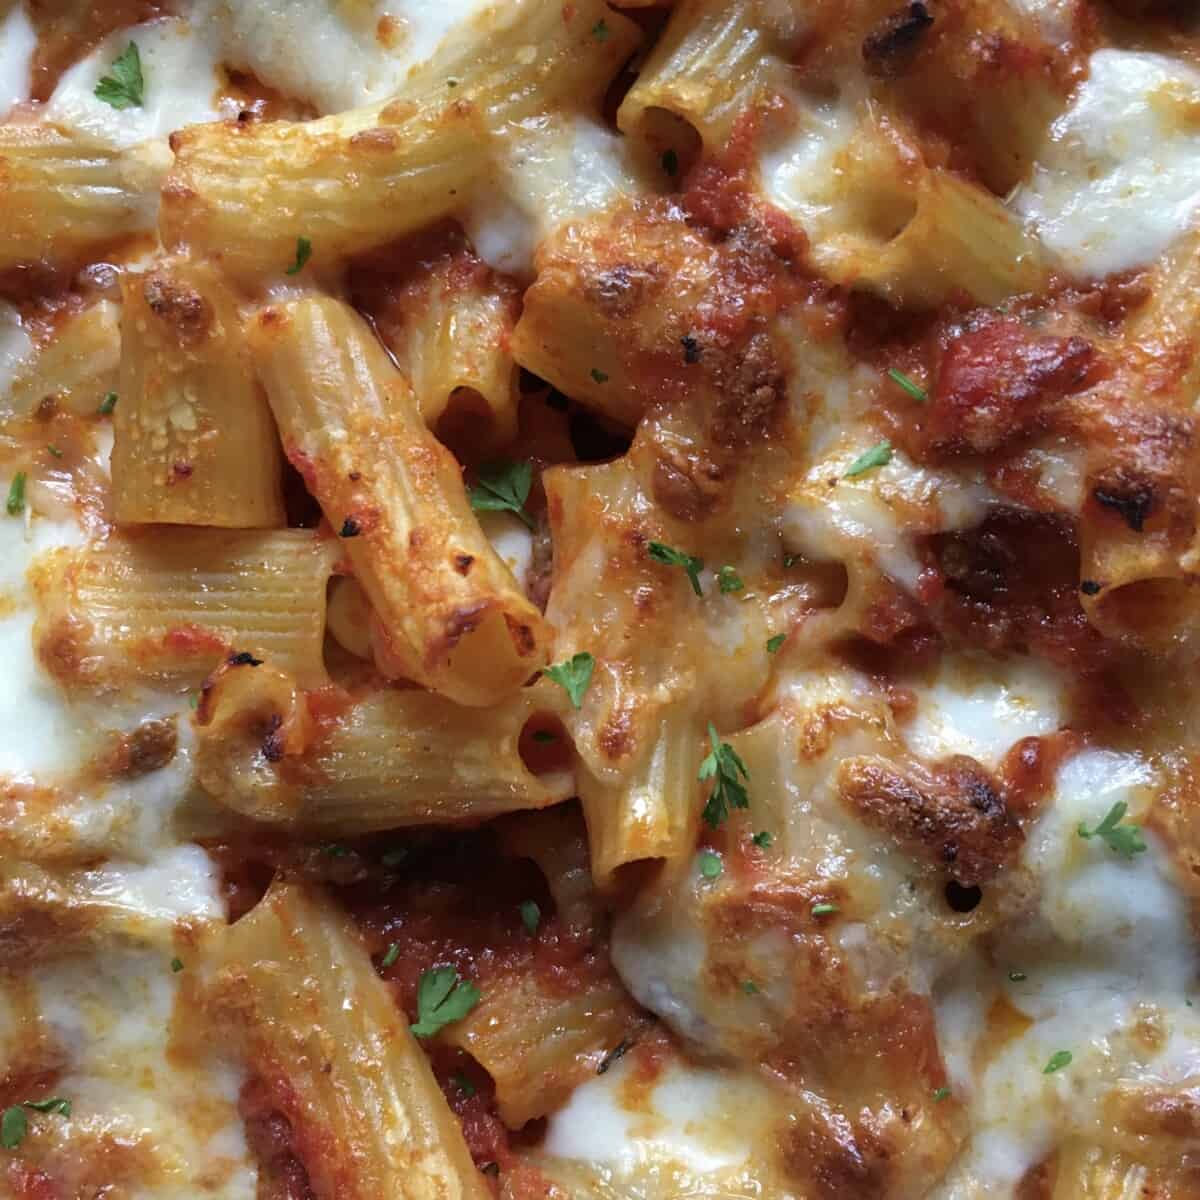
- Baked Ziti with Ragù (from Scratch)
- Asparagus & Prosciutto Cotto (Ham) Lasagna (w/Asparagus Bechamel)
- Abruzzese Almost-Bolognese (Lasagna al Ragù w/Porcini Béchamel)
- Italian Prosciutto Cotto and Mozzarella Lasagna (Lasagne con Prosciutto Cotto e Mozzarella)
- Mama A's Eggplant & Zucchini Parmigiana (Pinterest & Food52 Golden Recipe Grand Prize Winner)
Let's get started!
Print📖 Recipe

Authentic Italian Tortellini Soup (Made From Scratch)
- Total Time: 1 hour 50 minutes
- Yield: 16 Servings (about 240 medium-sized tortellini) or 2 ½ pounds
Description
This authentic homemade tortellini recipe from Bologna, Italy makes the most delicious meat and cheese-filled pasta! While making tortellini from scratch takes time, it's straightforward and much easier than you might think (especially filling and folding them!).
Best of all, you'll be rewarded with "Tortellini in brodo" - delicate comforting pasta pillows swimming in an aromatic broth. This is one of Bologna's most treasured dishes alongside Bolognese ragù, and lasagna Bolognese.
This traditional Emilian tortellini consists of three components: fresh egg pasta, pork and Parmigiano-Reggiano filling, and rich homemade meat broth (brodo).
Below you'll find our family's preferred filling recipe using a traditional cooked pork filling, which I've found gives us the best flavor and texture. You'll find the RAW pork filling variation in the recipe notes below.
Ingredients
For the Egg Pasta (pasta fresca)
- 14 ounces Italian 00 Flour (about 4 scant cups of flour) (400g)
- 4 large eggs (200g)
For the Tortellini Filling
- 3 ½ ounces raw pork (preferably shoulder or neck) (or pork loin) (100g)
- 6 ounces Prosciutto di Parma (175g) (sub high-quality San Daniele or other prosciutto crudo)
- 6 ounces Mortadella di Bologna (175g) (sub-high-quality Italian Mortadella from another region)
- 7 ounces Parmigiano-Reggiano cheese (preferably 25 or 30-month), finely grated (225g) (sub high-quality Grana Padano DOP)
- 2 ½ tablespoons unsalted butter (40g)
- 1 sprig of fresh rosemary
- 3 fresh garlic cloves, smashed
- 1 large egg (50g)
- freshly grated whole nutmeg, to taste (about 20 to 30 quick bursts on a Microplane)
- salt, to taste
- black pepper, to taste (optional)
For the Tortellini Broth (Brodo di Tortellini)
- 1 pound of beef preferably bone-in or with added bones (short rib, brisket, or flank)
- ¼ of an Italian capon (or free-range or regular chicken)
- 1 medium onion, halved
- 1 medium carrot, quartered
- ½ rib of celery, halved
- 1 teaspoon kosher salt, plus more for seasoning(4g)
- ½ inch piece of whole cinnamon stick (not traditional but Mama Anna's secret Italian ingredient - highly recommended)
- rind of Parmigiano-Reggiano cheese (not traditional but highly recommended)
- 1 gallon of water (5 liters)
To Serve the Tortellini
- freshly grated Parmigiano-Reggiano (optional
FYI, homemade tortellini filling has a slightly more "rustic" texture than that of the super smooth commercial tortellini filling found at the grocery store as those often include bread crumbs (usually soaked in milk) to help with texture.
Instructions
FOR THE COOKED PORK TORTELLINI FILLING (can be made up to 2 days in advance and refrigerated or even frozen for up to 1 month)
Step 1. Season the raw pork. Season the pork (shoulder, neck, or loin) with salt (and black pepper if desired) and place the rosemary and smashed garlic directly on top. Cover it and refrigerate overnight to allow the flavors to permeate the pork.
Step 2. Make the COOKED PORK FILLING. Remove the pork from the refrigerator and chop it into cubes. Place the rosemary, garlic, and 2 ½ tablespoons of butter in a skillet and sauté the herbs over medium-high heat for a few minutes until the garlic and rosemary are both toasted and golden brown but not burnt.
Reduce the heat to medium and add the pork and sauté just until the meat is cooked through. Turn off the heat and remove the mixture to a plate and allow it to cool, then remove the garlic and rosemary, setting them aside (do not discard the rosemary).
Step. 3 Process the meat filling. Add the prosciutto and mortadella to the bowl of a food processor and process to a fine paste. Add the cooked pork, along with the flavored butter, to the prosciutto and mortadella mixture, and process until smooth.
Add the egg, a good pinch of salt, and about ½ of the crispy rosemary if using (or more or less to taste), and process until the mixture is smooth and no whole rosemary pieces remain. *Adding the rosemary is not traditional, but we enjoy the flavor.
Add the grated Parmigiano cheese and freshly grated nutmeg to taste and process the mixture for about 5 minutes, or until it becomes one cohesive mixture. The filling will be sturdy (easily pinchable).
If desired, you may add 2 to 4 tablespoons of broth to the mixture to help loosen it up a bit, but this is optional.
Step 4. Taste test the filling. Heat the skillet back up and cook a small piece of filling so you can taste and adjust seasonings if needed adding more salt, nutmeg, or rosemary.
Step 5. Rest the filling for 24 hours. Massage the mixture with your hands for a couple of minutes, wrap it in an airtight container, and refrigerate it for 24 hours (or at least overnight).
FOR THE PASTA FRESCA (FRESH EGG PASTA) (can be made 1 day in advance and refrigerated) Click here for full recipe details
Step 1. Make the pasta dough.
Step 2. Knead the dough.
Step 3. Rest the dough.
Step 4. Roll out the dough to #6 or #7 on the Marcato Atlas pasta machine, or to your preferred thickness.
Step 5. Cut the pasta squares and fill tortellini. Working with one of the 4 pieces of dough at a time (keep the remaining dough covered so it doesn't dry out), cut 1 ¼-inch (3cm) squares of pasta (or larger if desired) and add about ¼ teaspoon of filling to the middle of each square (the filling should be about the size of a pea for authentic tortellini).
Fold each tortellini into a triangle, press out any air around the filling, fold the tip of the triangle down, bring the two other points together, overlapping them to create the typical tortellini shape, and press firmly to seal.
Place filled tortellini onto a baking tray lined with parchment paper while you finish filling and shaping the rest. Allow the filled tortellini to rest at room temperature for 15 minutes or so before cooking or pop them into the freezer.
Once completely frozen, place them into an airtight container or freezer bag until ready to cook. Cook the tortellini in the broth until al dente (about 2-3 minutes), or until they float to the top, or until they've reached your desired doneness. Cook frozen tortellini for 1 extra minute.
FOR THE BROTH (can be made up to 3 days in advance and refrigerated or even frozen for up to 3 months)
Step 1. Make the tortellini broth. Add all of the broth ingredients to a pressure cooker, close the lid, and bring it to high pressure. Once high pressure is reached, cook the broth for 45 minutes and allow for a natural release (which will give you a clear broth). Strain the solids reserving the meat for another use and pour the broth back into the pot and season with salt to taste (and skim off any fat if desired).
*Alternatively, you may add all of the ingredients to a large stock pot or dutch oven, bring it to a boil, cover, reduce it to a simmer and cook for 3 hours.
Notes
- I highly recommend using a scale and the gram measurements provided to make the pasta dough and the tortellini filling if you have one.
- When folding the tortellini, be sure to press out any air around the filling before folding and shaping it because air bubbles can cause the pasta to burst while cooking.
- If using a Mortadella with peppercorns in it be sure to remove them all and discard them. You may also remove the pistachios if the mortadella contains them (since this is not "authentic"), but I never bother.
- Tortellini filling can be made up to 2 days in advance and kept in the refrigerator uncovered, or frozen for up to one month.
HOW TO MAKE RAW PORK TORTELLINI FILLING:
Step 1. Season the raw pork. Season the pork (shoulder, neck, or loin) with salt (and black pepper if desired) and place the rosemary and smashed garlic directly on top. Cover it and refrigerate overnight to allow the flavors to permeate the pork.
Step 2. Make the RAW pork filling. Remove the pork from the refrigerator and add the rosemary, garlic, and 2 ½ tablespoons of butter to a skillet.
Sauté the herbs over medium-high heat for a few minutes until the garlic and rosemary are both toasted and golden brown but not burnt.
Turn off the heat and allow the mixture to cool then remove the garlic and rosemary and set aside.
Add the prosciutto and mortadella to the bowl of a food processor and process to a fine paste. Grind the raw pork (shoulder, neck, or loin) using the Kitchen Aid food grinder attachment, or other food grinder and add it to the prosciutto and mortadella mixture, and process until smooth.
*Alternatively, add chopped raw pork directly to the bowl of the food processor with the ground prosciutto and mortadella and process until a smooth paste-like consistency is reached.
Continue with the remaining instructions for the cooked pork filling as they are the same steps after you've reached this point.
- Prep Time: 1 hour 46 minutes
- Cook Time: 4 minutes
- Category: Pasta
- Method: Stovetop
- Cuisine: Italian
Nutrition
- Serving Size: 15 tortellini
World's Smallest Tortellini Sets Guinness World Record
Bologna just made history with the world's smallest tortellino, measuring less than 5 millimeters and weighing just 0.03 grams. Created by Campagna Amica's chefs for Guinness World Record Day, this tiny tortellino contains the same traditional filling as full-sized tortellini-roast pork loin, prosciutto crudo, mortadella, Parmigiano Reggiano, eggs, and nutmeg-following the official recipe registered with Bologna's Chamber of Commerce.
This record celebrates Bologna's position as Italy's culinary capital and proves that whether you're making record-breaking miniature tortellini or traditional homemade tortellini in brodo like this recipe, the authentic filling recipe remains the same.


Brett says
Finally found a real from-scratch tortellini recipe! Most online just use store-bought pasta. Spent Sunday making these and the homemade broth - absolutely worth it. Never been to Italy but this makes me want to go. I'm eyeing your ramen broth and homemade noodles next:)
Kelly says
Thanks, Brett!🤗 I love that you enjoyed them! Definitely come to Italy if you ever get the chance:) There's plenty of amazing pasta you'll enjoy! Till then, keep making your own from scratch😉.
Diedra K. says
Amazing recipe!
Kelly says
Glad you enjoyed it, Diedra! Appreciate your feedback❤️.
Bella_bee says
These were some work, but the pasta was perfect and they taste like the tortellini we had in Bologna a few years ago!🤗 I can't believe I make them from scratch. I used the cooked pork filling and made them a little smaller than yours. I was honestly surprised by how easy they were to fill. Highly recommend this recipe for anyone looking for real tortellini!
Kelly says
Bella this makes me so happy! I love that you've actually tried real tortellini in Bologna and loved this recipe❤️. That's a humbling compliment:)