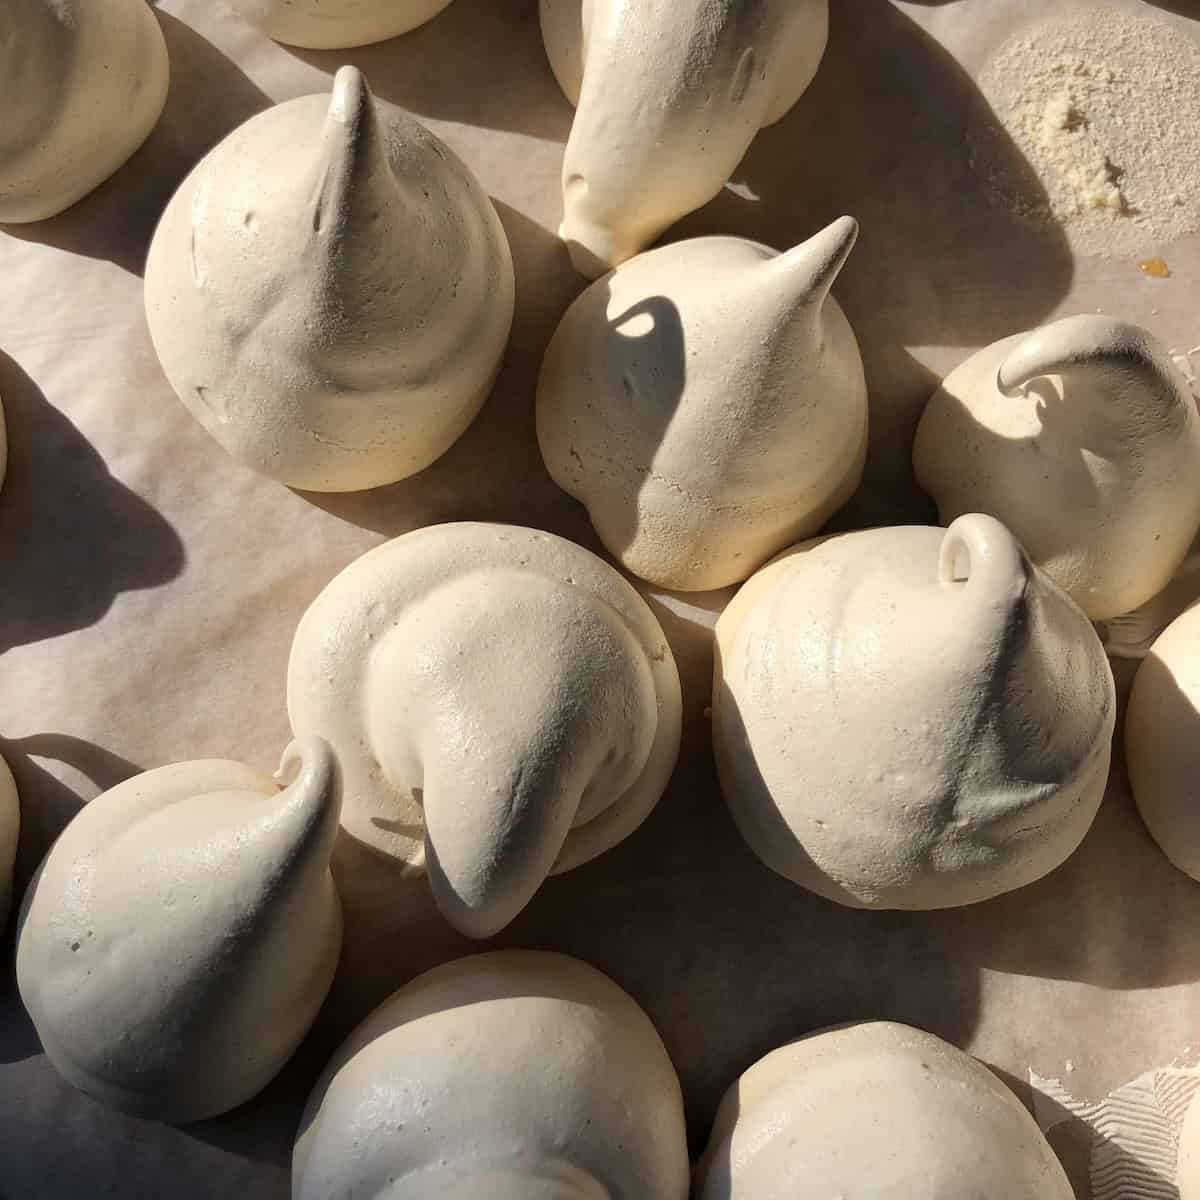
Who Ya Gonna Call (when you're looking for the best Halloween dessert recipe ever)? These adorable ghost meringue cookies make any Halloween dessert a little bit spooky and more fun!
Light, airy, and naturally gluten-free, these crispy meringue ghosts have a satisfying crunch that literally melt in your mouth.

These feather-light, crunchy meringue cookies taste incredible all by themselves, but they also make the perfect dessert topper for cheesecakes, taste amazing floating on top of hot cocoa, or served alongside a scoop of ice cream.
Plus, you can make them ahead of time-they store beautifully for up to two weeks!
This easy meringue recipe is so versatile, you can use it to make meringue pie crusts, Halloween pavlova, or even to top off your next spooky coconut cream pie, triple coconut cream pie, or lemon meringue pie.
If you love this recipe, you might also enjoy my easy (super adorable) Ghost Marshmallows or use this recipe to make homemade meringue bones for a complete spooky dessert spread.
Jump to:
- Why You'll Love These Ghost Meringue Cookies
- What Are Meringue Cookies?
- Types of Meringue: French, Swiss, and Italian
- Ghost Meringues Ingredients
- How to Make Halloween Ghost Meringues Step-by-Step With Photos
- Substitutions
- Variations (How to Customize Meringues)
- How to Store Meringues at Room Temperature or in the Freezer
- Dietary Modifications: Sugar-Free, Vegan, and Low-Carb Options
- Equipment
- Storage
- Serving
- Top Tips For Perfect Meringue Cookies Every Time (Even on a Rainy Day)
- Homemade vs Store-Bought Meringue Cookies
- FAQ: Troubleshooting Common Meringue Problems
- Perfect Piping Techniques for Ghost Shapes and Meringue Kisses
- More Easy Halloween & Fall Recipes
- 📖 Recipe
- Why These Ghost Meringues Are Perfect for Halloween Parties
- The Secret to Crispy Meringue Cookies
- Using This Meringue Recipe Year-Round
- Food Safety

Why You'll Love These Ghost Meringue Cookies
- Ridiculously adorable - Perfect for Halloween parties and guaranteed to make everyone smile
- Naturally gluten-free and low-calorie meringues - A guilt-free Halloween treat everyone can enjoy
- Incredibly easy to make - Just 7 basic ingredients and simple piping techniques
- Amazing texture - Crispy and melt in your mouth (or baked 1 hour less for soft gooey centers)
- Fun activity for kids - Children absolutely love helping draw the spooky faces
- Make-ahead friendly - Store for up to 2 weeks, perfect for Halloween party planning
- Budget-friendly - Simple ingredients you likely have on hand
- Versatile meringue recipe - Use this same base for pavlovas, meringue pie crusts, Christmas tree meringues, Easter nest cookies, pumpkins, flat ghosts, mummies, witches' hats, you name it!

What Are Meringue Cookies?
Meringue cookies are a light, airy confection made from whipped egg whites and sugar that are baked low and slow until crisp.
Dating back to the 17th century, meringues are beloved for their delicate texture-crunchy on the outside with a soft, marshmallow-like interior or baked a bit longer (like this recipe) and crispy throughout.
These ghost-shaped meringues are a festive twist on the classic French meringue cookie, perfect for Halloween celebrations! They're also known as meringue kisses when piped into smaller, kiss-shaped mounds.


Types of Meringue: French, Swiss, and Italian
There are three main types of meringue, each with distinct characteristics. This recipe uses French meringue-the easiest and most common method for making meringue cookies.
French Meringue (used in this recipe): The simplest method where granulated sugar is gradually beaten into room temperature egg whites. French meringue cookies are crispy, light, and perfect for shapes like ghosts, Christmas trees, or meringue kisses. This is the best meringue cookie recipe for beginners!
Swiss Meringue: Egg whites and sugar are heated together over a double boiler while whisking, then whipped until cool. Swiss meringue cookies have a slightly denser, more stable texture and silky-smooth finish. They're excellent for piping intricate designs and hold up better in humid weather.
Italian Meringue: Hot sugar syrup is poured into whipping egg whites, creating the most stable meringue. Italian meringue cookies are typically used for buttercream frosting and pie toppings rather than cookies, though they can be baked into very stable shapes.

Ghost Meringues Ingredients
- Superfine or granulated sugar - Superfine (also called baker's sugar or caster sugar) dissolves more easily, but regular granulated sugar works well too. If using Sugar in the Raw® (turbinado) or Demerara sugar, you'll need to process them in a food processor first to make the crystals smaller so they'll dissolve in the egg whites. Do not use brown sugar, which has moisture in it.
- Confectioner's sugar - Adds extra sweetness and helps stabilize the meringue
- Egg whites - Must be at room temperature for maximum volume; separate carefully to avoid any yolk.
- Cream of tartar - The secret ingredient that stabilizes egg whites and prevents collapse
- Salt - Enhances flavor and acts as an additional stabilizer
- Pure vanilla extract - Or swap with almond, orange, strawberry, rum, peppermint, or lemon extract for flavor variations
- Black food-safe marker (what I used) or decorating icing gel - For drawing adorable ghost faces
See recipe card for quantities.

How to Make Halloween Ghost Meringues Step-by-Step With Photos
I like to call these little ghostbuster meringues because they're so adorable! And easier to make than you might think.
Step 1. Prep your workspace. Preheat oven to 250°F/120°C and line a cookie sheet with parchment paper. Make sure your mixing bowl and whisk attachment are completely clean and grease-free-even a tiny bit of oil can prevent egg whites from reaching stiff peaks.


Step 2. Combine dry ingredients. In a small bowl, whisk together the superfine sugar, confectioner's sugar, and cornstarch. Set aside.


Step 3. Whip the egg whites. Separate your room temperature eggs carefully (no yolk!). Using a handheld mixer (or stand mixer fitted with the whisk attachment), beat the egg whites and cream of tartar on low speed until foamy (about 2 minutes). Add the salt and slowly increase the speed.


Step 4. Add sugar gradually. When the egg whites have doubled in volume and turned opaque, start slowly sprinkling in the sugar mixture one tablespoon at a time over 4-5 minutes while continuing to beat. This gradual addition ensures the sugar fully dissolves.

Step 5. Beat to stiff peaks. Continue beating on high speed until the meringue is glossy and holds stiff peaks. The meringue is ready when you can turn the whisk upside down and the peak stands straight up without drooping. Fold in the vanilla extract gently.

Step 6. Pipe the ghost shapes. Transfer the meringue to a piping bag fitted with a large round tip (Ateco 809 (what I've used) or Wilton #1A works perfectly).
Pipe ghost shapes by holding the bag perpendicular to the parchment paper, squeezing with even pressure to create 2-inch tall mounds. Release pressure and pull straight up to create a little point on top of each ghost's head.
Step 7. Bake low and slow. Bake for 30 minutes at 250°F/120°C, then reduce temperature to 225°F/105°C and bake for 2 hours. Turn off the oven, crack the door open slightly, and let the meringues cool for 30 minutes. This prevents cracking. Remove to a cooling rack to finish cooling completely.

Step 8. Decorate your ghosts. Once completely cool, use an edible marker or black decorating gel to draw two eyes and a mouth on each ghost. Get creative-make some happy ghosts, some mean ghosts, a few surprised ghosts, and some spooky ghosts!
Hint: Understanding Stiff Peaks
Stiff peaks are crucial for successful meringue cookies! When you lift the whisk from the bowl, the meringue should stand straight up in a peak without drooping or curling over. If it flops over, keep beating.
The mixture should look thick, glossy, and almost like marshmallow fluff. When you rub a small amount between your fingers, it should feel completely smooth-any grittiness means the sugar hasn't fully dissolved yet.
Substitutions
- Cream of tartar - Substitute ¼ teaspoon lemon juice or white vinegar per egg white if you don't have cream of tartar on hand.
- Superfine sugar - Make your own by processing granulated, turbinado, or demerara sugar in a food processor for 30 seconds or until fine, or simply use plain granulated sugar (just add it extra slowly to ensure it dissolves).
- Vanilla extract - Swap with almond extract (½ teaspoon), peppermint oil (⅛ teaspoon), orange extract (¼ teaspoon), lemon extract (½ teaspoon), or strawberry extract (¼ teaspoon) to make peppermint meringues or any other of these desired flavors.
- Food markers (food-safe markers) - If you don't have food-safe coloring markers, use melted dark chocolate or chocolate chips applied with a small paintbrush or toothpick to baked meringues, or add dots of black decorating gel. Alternatively, you can adhere black sesame seeds onto the unbaked meringues using a toothpick.
- Whole eggs - Substitute regular egg whites with pasteurized egg whites from a carton if you prefer
- Standard conversions are as follows:
- 1 large egg white = approximately 2 tablespoons (approximately 30ml or 30-33 grams)
- 6 large egg whites (what's needed for this meringue recipe) = 12 tablespoons = or ¾ cup (180ml)
- Standard conversions are as follows:


Variations (How to Customize Meringues)
Playing with the flavor and texture of meringues is fun and can change the entire dessert experience. Use any of the options below to replace the pure vanilla extract in the recipe.
- Chocolate ghost meringues - Add 2 tablespoons cocoa powder to the sugar mixture for chocolate meringue ghosts
- Colored ghosts - Add a drop or two of natural food coloring (or black sesame paste) before piping for pastel-colored ghosts
- Meringue bones - Pipe bone shapes for a complete Halloween skeleton spread
- Halloween pavlova - Pipe a large nest shape and fill with bloody berry sauce, and candy eyeballs with a side of whipped cream and seasonal berries
- Halloween spider web meringue cookies - Pipe meringue into spider webs, dust with black and orange sanding sugar, and bake
- Peppermint meringues - Replace vanilla with ⅛ teaspoon peppermint oil/extract (or more to taste) for refreshing mint meringue cookies
- Lemon meringue cookies - Add ½ teaspoon lemon extract (I personally don't use chemical food coloring, but you may add a few drops for a yellow color or use a few dashes of turmeric powder for a safe, natural yellow food coloring alternative)
- Chocolate chip meringue cookies - Fold in ½ cup mini chocolate chips after reaching stiff peaks
- Christmas tree meringues - Add natural green food coloring and pipe in cone shapes using a star tip, then decorate with candies or red gel for ornaments
- Meringue kiss cookies - Pipe into smaller kiss shapes using the same technique, perfect for any occasion, and for topping desserts.
- Easter nest meringues - Pipe in nest shapes and fill with candy eggs
- Easter egg meringues - Pipe in easter egg shapes and draw designs using food-safe markers
- Easter bunny meringues - Pipe in bunny face & ears shapes, use jelly beans for the eyes and nose, and color the whiskers in using food-safe markers
- Valentine's heart meringues - Pipe heart shapes and add natural pink or red food coloring
- Almond meringue cookies - Replace vanilla with ½ or 1 teaspoon almond extract and fold in ½ cup toasted sliced almonds
- Orange meringue cookies - Add ½ teaspoon orange extract and orange food coloring
- Coconut meringue cookies - Add ¼ to ½ teaspoon coconut extract + ½ cup unsweetened dehydrated coconut flakes
- Strawberry meringue cookies - Use ¼ to ½ teaspoon strawberry extract and a drop or a pinch of natural pink food coloring
- Nut meringue cookies - Add 1 cup toasted, chopped nuts like almonds, hazelnuts, pecans, or pistachios

How to Store Meringues at Room Temperature or in the Freezer
Once meringues have completely cooled, they can be stored in airtight containers at room temperature for up to a couple of weeks.
If your home is really humid, you may want to place meringues in a freezer bag first and then into an airtight glass jar or plastic container.
If you're freezing meringues, place them into an airtight container layered with parchment paper for 1-3 months.
Thaw meringues at room temperature, and be sure to check that the condensation doesn't come into contact with the cookies.
Do not store meringue cookies in the fridge because it will make them very soft and sticky.

Dietary Modifications: Sugar-Free, Vegan, and Low-Carb Options
Traditional meringue cookies are naturally gluten-free and low in calories. While I don't use artificial sweeteners myself and prefer natural alternatives, you can customize this recipe to fit your dietary needs-that's the wonderful flexibility of home cooking!
Sugar-Free Meringue Cookies
To make sugar-free meringue cookies, replace the granulated sugar with powdered erythritol or monk fruit sweetener in a 1:1 ratio. Use powdered versions rather than granular for the best results. Note that sugar-free meringues may not get quite as crispy as traditional versions and may have a slightly different texture. These sugar-free meringue cookies work wonderfully for diabetic-friendly or low-sugar diets.
Vegan Meringue Cookies (Aquafaba Meringues)
For vegan meringue cookies, replace egg whites with aquafaba (the liquid from canned chickpeas). Use 1 cup + 2 tablespoons (270ml) aquafaba in place of 6 egg whites. Whip the aquafaba with cream of tartar until foamy, then gradually add sugar just like traditional meringue. Vegan meringue cookies take slightly longer to reach stiff peaks (8-10 minutes) but work beautifully for vegan Halloween treats!
Low-Carb Meringue Cookies (Keto-Friendly)
Low-carb meringue cookies are perfect for keto diets! Use powdered allulose or erythritol as the sweetener.
These keto-friendly meringues have approximately 1-2g net carbs per cookie, depending on the size you make each cookie and the sweetener used. They're an ideal keto dessert option for Halloween parties.
Equipment
- Stand mixer or hand mixer - A stand mixer makes things easier, but a hand mixer works great
- Large mixing bowl - Must be completely clean and grease-free (stainless steel or glass, never plastic bowls, which, even when clean, can hold onto residual oil)
- Piping bag and tips - Can use a reusable (my preference for cleaner oceans and waterways:), or a disposable piping bag, or a large zip-top bag with the corner snipped off
- Large round piping tip - Ateco 809 or Wilton #1A round tip is perfect for ghost shapes and meringue kisses
- Star piping tip - Optional, for Christmas tree meringues or decorative swirls
- Baking sheets - Two half-sheet pans lined with parchment paper or silicone baking mats
- Parchment paper or silicone baking mats - Essential for easy removal
- Food-safe marker or decorating gel - For drawing ghost faces
- Toothpick or Small paintbrush - If using melted chocolate for decorating (optional)
- Oven thermometer - Highly recommended ONLY if your oven has hot spots or is not very accurate
Storage
Room temperature: Once completely cooled, store ghost meringue cookies in an airtight container at room temperature for up to 2 weeks. If your home is especially humid, place them in a freezer bag first, then into an airtight glass jar or plastic container to prevent them from becoming sticky.
Freezing: Meringue cookies freeze beautifully! Layer them between sheets of parchment paper in an airtight container and freeze for up to 3 months. Thaw at room temperature for 30 minutes before serving, making sure condensation doesn't touch the cookies.
Important: Never store meringues in the refrigerator-the humidity will make them soft and sticky. If meringues do absorb moisture and become chewy, you can re-crisp them by placing in a 200°F oven for 10-15 minutes.

Serving
These ghost meringue cookies are incredibly versatile! Serve them on their own as a sweet Halloween treat, use them like the above Ghost Marshmallows to top hot chocolate, Halloween punch, or even coffee.
You can even place them on frosted cupcakes or pumpkin cheesecake, arrange them around a Halloween-themed cheesecake, or set them out at your Halloween party alongside other spooky desserts.
They're also adorable nestled in treat bags as party favors!
Top Tips For Perfect Meringue Cookies Every Time (Even on a Rainy Day)
Egg white meringue is a sweet little confection that can be made chewy or crispy (pavlovas), or even soft and fluffy to top pies.
And it's really easy to make! I based this recipe on King Arthur's meringue recipe because they're the best at baking in my opinion. Martha Stewart's meringue technique also inspired some of these tips!
- Never use a plastic bowl to whip egg whites. Plastic accumulates oil over time that's hard to wash off completely. Oil or fat of any kind will prevent egg whites from whipping properly. Use only stainless steel, glass, or copper bowls and make sure there isn't a trace of grease before you start.
- Keep egg yolks out completely. When separating eggs, make sure not even a single drop of yolk makes it into the whites. Yolks contain fat, and any fat in egg whites will prevent them from reaching full volume and stiff peaks.
- Separate eggs using two bowls. Use separate bowls (not your mixing bowl) when separating eggs. If a yolk breaks, you won't ruin your whole batch and won't need to rewash your mixing bowl. This technique ensures your egg white meringue cookies turn out perfectly every time.
- Room temperature egg whites are essential. Cold egg whites take much longer to whip and won't reach the same volume. Let separated egg whites sit at room temperature for 30 minutes before whipping.
- Try aging your egg whites. For even more consistent results, weigh out 100g of egg whites into a small bowl, cover with plastic wrap and poke a few holes in the top, then refrigerate for 24 hours to 3 days. Remove from the fridge at least 1 hour before using. This technique helps create more stable meringues.
- Don't skip the cream of tartar. This acid stabilizes egg whites and prevents them from potentially collapsing during or after baking. You can substitute lemon juice or white vinegar if you don't have cream of tartar on hand.
- Add cornstarch in humid weather. If your environment is especially humid, the cornstarch in the sugar mixture helps ensure the meringues stay dry and crisp after baking. This means you can successfully make meringue cookies even on rainy days!
- Add sugar slowly and gradually. Sprinkling in sugar one tablespoon at a time over 4-5 minutes ensures complete dissolution and actually saves time because the whites whip up much faster. If you add all the sugar at once, they'll still whip up but will take significantly longer to reach stiff peaks.
- Bake meringues low and slow. Don't try to rush your meringues by baking at higher temperatures or for less time. Doing so may brown your meringues too much, leave them undercooked inside, or cause "weeping" after removing them from the oven.
- Use an oven thermometer. Many ovens run hot or cold. An inexpensive oven thermometer ensures you're baking at the correct low temperature for crispy meringue cookies.
- Leave them in the oven to cool. After baking, turn off the oven, crack the door open slightly, and let the meringues cool gradually. This prevents cracks from forming due to sudden temperature changes.
- Test for doneness. Meringues should lift off the parchment paper easily without sticking and feel completely dry to the touch. They should be very light in color-if they're browning, your oven is too hot.


Homemade vs Store-Bought Meringue Cookies
While you can buy meringue cookies at stores (Miss Meringue cookies and Trader Joe's meringue cookies are popular brands), homemade meringue cookies taste so much better and fresher!
Store-bought versions often have a less delicate texture and can taste artificial. Plus, making your own allows you to control the sweetness, create fun shapes like ghosts and bones, and customize flavors.
The cost savings are significant too-homemade meringue cookies cost just pennies per cookie compared to store-bought packages. If you're wondering where to buy meringue cookies for comparison, check specialty grocery stores or order online, but I promise this easy homemade version is worth the minimal effort!
FAQ: Troubleshooting Common Meringue Problems
The meringues didn't dry out completely during baking. They need to bake at low temperatures (225-250°F) for the full time indicated to allow all moisture to evaporate. Humid weather can also cause chewiness-store in an airtight container.
If they get chewy, pop them back in a 200°F oven for 10 minutes to re-crisp. Crispy meringue cookies should feel completely dry and shatter when you bite them.
This usually happens due to: (1) grease in the bowl or on the whisk, (2) even a tiny bit of egg yolk in the whites, (3) egg whites that were too cold, or (4) not beating long enough. Make sure your equipment is spotlessly clean and your eggs are room temperature. Stiff peaks are essential for perfect meringue cookies.
Cracks typically form when meringues cool too quickly. Always turn off the oven and let them cool gradually with the door slightly open. Also ensure you're baking at the correct low temperature-too hot can cause cracking.
Your oven temperature is too high. Use an oven thermometer to verify accuracy-many ovens run hot. Meringues should stay white or very pale cream-colored for the best meringue cookie recipe results.
They didn't bake long enough, or you stored them in a humid environment or the refrigerator. Always store at room temperature in an airtight container. Humid weather can require 30 extra minutes of baking time.
Yes! Substitute ¼ teaspoon lemon juice or white vinegar per egg white. The acid helps stabilize the egg whites, though your meringues may be slightly less stable without it. You can find easy meringue cookies recipes without cream of tartar.
They should lift off the parchment paper easily, feel completely dry to the touch, and be very light and no longer shiny like they are when you first pipe them. The base should not feel soft or sticky at all.
Perfect Piping Techniques for Ghost Shapes and Meringue Kisses
The key to adorable ghost meringues is mastering the piping technique. Don't worry-it's easier than it looks! These same techniques work for piping meringue kiss cookies, meringue bones, or any other shaped meringues.
- Hold the piping bag perpendicular to the baking sheet (straight up and down) for pointed peaks
- Keep steady, even pressure while squeezing-inconsistent pressure creates lopsided ghosts
- Start about ½ inch above the pan-too close creates flat cookies; too high creates witch's hat shapes
- Stop squeezing before lifting-release pressure completely, then pull straight up to form a point
- Practice makes perfect-your first few might look wonky, but that's part of their charm!
- Make them rustic-imperfect, slightly irregular ghosts are actually more endearing than perfectly uniform ones
- For meringue kisses-use the same technique but pipe smaller mounds, about 1 inch tall
- For meringue bones-pipe a short or long rectangle shape, then add small dollops on each end to create bone ends
Pro tip: If you don't have piping bags, use a large zip-top bag and snip off about ½ inch from one corner. This works beautifully and is perfect for kids to help with!
More Easy Halloween & Fall Recipes
If you love Halloween and fall recipes as much as I do, try out a few of our favorites we make every year when the weather starts to cool and apples and pumpkins are everywhere!
- Ghost Marshmallows Recipe For Beginners (With Video)
- Easy Apple Rum Cake with Pecan Crunch
- White Chocolate Salted Caramel Cheesecake With Oreo Cookie Crust
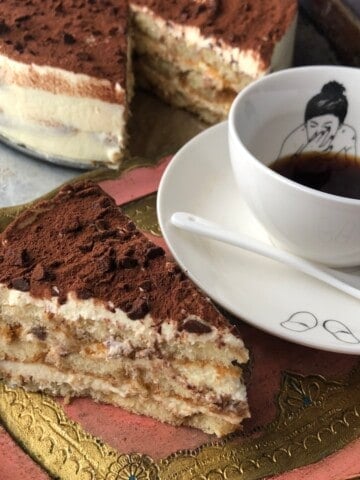
- Simple and Delicious Mascarpone Apple Torte
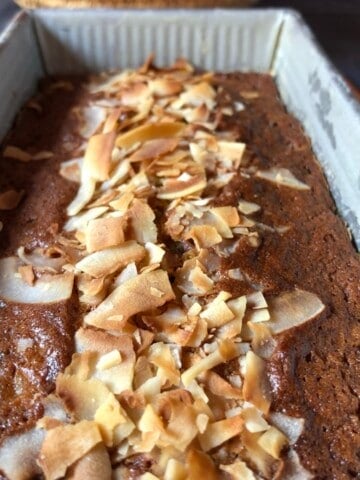
- Pumpkin Walnut Bread (Super Moist & No Mixer Needed)
- Pumpkin Pancakes Recipe (Extra Fluffy + Video)
- Bakery-Style Pumpkin Spice Blueberry Muffins (No-Mixer Needed)
- Candied Pecans Anyone Can Make (Easy, Holiday Party Nuts)


Let's Get Started!
Made this Recipe? We'd love for you to rate ⭐️ it and tell us how it went for you!
Print📖 Recipe

Ghost Meringues Recipe (Easy Halloween Meringue Cookies)
- Total Time: 2 hours 40 minutes
- Yield: 30 to 36 Ghostbuster Meringues
- Diet: Vegetarian
Description
Ghost meringue cookies (aka Ghostbuster Meringues) for make any Halloween dessert a little extra spooky and will have everyone smiling! These feather-light, crunchy confections taste great all by themselves, but they make a perfect dessert topper for cheesecakes and taste great floating on top of hot cocoa, or with a scoop of ice cream.
Ingredients
- 1 ¼ cup caster sugar or granulated sugar (220g)
- 1 ½ cups confectioner's sugar (197g)
- 6 large egg whites, room temperature (200g-225g)
- ¼ teaspoon cream of tartar
- ¼ teaspoon salt
- 2 teaspoons pure vanilla extract (sub peppermint, lemon, rum, or another flavored extract)
Instructions
- Prep your workspace. Preheat oven to 250°F/120°C and line a cookie sheet with parchment paper. Make sure your mixing bowl and whisk attachment are completely clean and grease-free-even a tiny bit of oil can prevent egg whites from reaching stiff peaks.
- Combine dry ingredients. In a small bowl, whisk together the superfine sugar, confectioner's sugar, and cornstarch. Set aside.
- Whip the egg whites. Separate your eggs carefully (no yolk!) and let the egg whites come to room temperature for about 30 minutes. Using a handheld mixer or stand mixer fitted with the whisk attachment, beat the egg whites and cream of tartar on low speed until foamy (about 2 minutes). Add the salt and slowly increase the speed.
- Add sugar gradually. When the egg whites have doubled in volume and turned opaque, start slowly sprinkling in the sugar mixture one tablespoon at a time over 4-5 minutes while continuing to beat. This gradual addition ensures the sugar fully dissolves.
- Beat to stiff peaks. Continue beating on high speed until the meringue is glossy and holds stiff peaks. The meringue is ready when you can turn the whisk upside down and the peak stands straight up without drooping. Fold in the vanilla extract gently.
- Pipe the ghost shapes. Transfer the meringue to a piping bag fitted with a large round tip (Ateco 809 (what I used) and Wilton 1A work perfectly). Pipe ghost shapes by holding the bag perpendicular to the parchment paper, squeezing with even pressure to create 2-inch tall mounds. Release pressure and pull straight up to create a little point on top of each ghost's head.
- Bake low and slow. Bake for 30 minutes at 250°F/120°C, then reduce temperature to 225°F/105°C and bake for 2 hours. Turn off the oven, crack the door open slightly, and let the meringues cool for 30 minutes. This prevents cracking. Remove to a cooling rack to finish cooling completely.
- Decorate your ghosts. Once completely cool, use an edible marker or black decorating gel to draw two eyes and a mouth on each ghost. Get creative-make some happy ghosts, some surprised ghosts, and some spooky ghosts, Enjoy!
Notes
- Do not use a plastic bowl to beat egg whites. Plastic bowls can hold on to residual oil from use over time which would keep the egg whites from whipping to stiff peaks. Instead use only glass, stainless steel, or copper so that you can be sure there is no fat or oil of any kind in the bowl.
- Cold eggs are easier to separate than room temperature eggs. You may separate the eggs when they're cold, but make sure you let the whites sit out for about 10 minutes until they reach room temperature before whipping. They whip up better this way and don't take nearly as long to reach stiff peaks.
- Meringues are fully cooked when the internal temperature reaches 165°F/74°C.
- For chewy meringues, bake them for around 1 hour less.
- If you want to flavor your meringues, after you fold in the vanilla (or another flavored extract), you can also add in chopped nuts or chocolate for a different flavor. Just before baking, you can sprinkle piped meringues with sugar.
- For super smooth and shiny meringues, use superfine sugar instead of regular granulated sugar. If you don't have superfine sugar, simply process regular sugar a few times in a food processor to achieve a superfine consistency. Regular sugar tastes just the same but will leave granular bumps in your meringue.
- To make this a vegan meringue recipe, for every 1 large egg white, replace with 2 tablespoons of aquafaba (the liquid drained off of a can of chickpeas or dried chickpea cooking liquid).
- Halve the recipe if you need less Ghost Meringues. This recipe makes a lot of meringue which is perfect for entertaining or baking for Halloween parties, but if you just need a few to top this spooky Halloween cheesecake, make a ½ recipe.
- Prep Time: 10 minutes
- Cook Time: 2 hours 30 minutes
- Category: Cookies
- Method: Bake
- Cuisine: American
Nutrition
- Serving Size: 1 to 2 meringues
Why These Ghost Meringues Are Perfect for Halloween Parties
Beyond being absolutely adorable, these ghost meringue cookies check every box for successful party treats.
They're incredibly lightweight (no heavy sugar crash!), naturally gluten-free, so everyone can enjoy them, and their crispy texture provides a satisfying contrast to rich chocolate treats and sticky candies.
Plus, they're make-ahead friendly-you can bake them up to two weeks before your party, which means one less thing to stress about on party day.
Kids go crazy for them, and adults appreciate their delicate sweetness and nostalgic marshmallow flavor. But if Halloween marshmallows is what you're looking for, check out this cutest ever Halloween ghost marshmallow recipe.
Arrange them on a tiered stand, nestle them into spooky-themed cupcakes, float them on top of hot chocolate or Halloween punch, or simply pile them in a bowl for guests to grab-these little ghosts are guaranteed to steal the show at any Halloween celebration!
The Secret to Crispy Meringue Cookies
The difference between perfectly crispy meringue cookies and disappointing chewy ones comes down to proper drying. While many recipes use the terms "baking" and "drying" interchangeably, meringues are technically being dried rather than baked.
The low oven temperature (225-250°F) allows moisture to evaporate slowly without browning the sugar. This is why it's crucial to leave them in the turned-off oven with the door cracked open after the baking time is complete-that final cooling period lets any remaining moisture escape.
The result? Gorgeously crisp exteriors that shatter with the slightest bite, revealing soft, marshmallow-like centers. If you live in a humid climate, you might need to add 15-30 minutes to the drying time, and always store your finished meringues in an airtight container to protect them from moisture in the air.
This technique works for all types of meringue cookies, whether you're making French meringue cookies, Swiss meringue cookies, or Italian meringue cookies.
Using This Meringue Recipe Year-Round
While these meringues shine as Halloween ghosts, this versatile base recipe works beautifully for any holiday or occasion!
For Christmas meringue cookies, pipe them into Christmas tree shapes using a star tip and add green food coloring, then decorate with red gel "ornaments."
Valentine's Day calls for heart-shaped pink or red meringues and cute broken hearts, or Cupid's arrow.
For Easter meringue cookies, pipe nest shapes and fill with candy eggs, or create pastel-colored meringues in bunny shapes.
You can even make elegant white swirls for weddings or baby showers, or simple meringue kiss cookies for everyday treats.
Try peppermint meringue cookies during the winter holidays, lemon meringue cookies for spring gatherings, or chocolate chip meringue cookies anytime! The technique remains the same-only the shapes, colors, and flavors change.
Once you master this simple meringue cookie recipe, you'll find yourself making it throughout the year for every celebration.
Food Safety
- Always use fresh eggs and check the expiration date
- Wash your hands thoroughly before and after handling raw eggs
- Keep egg whites refrigerated until 30 minutes before whipping
- Clean all equipment thoroughly with hot, soapy water before use
- Store baked meringues at room temperature in airtight containers-never in the refrigerator
- You can use pasteurized egg whites (available in cartons at most grocery stores)
- The low, slow baking process does cook the egg whites, making them safe to eat


Ariel_Min says
These were easy and turned out adorable! I made them for a themed birthday party and the kids loved them. Definitely using this for Halloween, but Ill add a couple drops of black food coloring to half to make a mix of grey and white ghosts.
Kelly says
Thanks, Ariel! I'm so happy you (and the kids) loved them! They really are super easy to make and you can pipe all kinds of shapes (bones are even easier)! I love the idea of ghoulish grey ghosts🤗.