This all-natural homemade 10-minute cherry pie filling is soon to be your favorite! It's perfect for cherry cobblers, pies, ice cream or cheesecake toppers, or your favorite no-bake desserts.
This 6-ingredient (gluten-free) easy cherry pie filling recipe is a game-changer and tastes nothing like canned cherry pie filling. Best part, you can use fresh or frozen cherries.

In this post, you'll learn how to make cherry pie filling taste better than store-bought, discover the secrets to properly thickening your filling, and explore countless ways to use it in your favorite desserts.
Plus, I've included my best tips and methods for storing it for later use, including how long cherry pie filling lasts and how to meal prep it for your holiday pies!

My entire family absolutely loves this pie filling! Its intense, pure cherry flavor is all-natural and never tastes flat (or like a tin can)! Frozen sour cherries aren't easy to find in Italy. My solution is to stock up on local IGP cherries during Marostica's annual cherry festival (a city famous for its production of premium cherries).
I pit and freeze cherries so I can use them year-round, making them ready to use in a matter of minutes whenever I'm in the mood for an easy cherry dessert.
But when I'm back in the States, I typically buy frozen sour cherries (which are the easiest option)!

Use this pie filling for making Southern fried cherry pies (hand pies), flaky double-crust sour cherry pies for Thanksgiving and Christmas, and our favorite cherry crumb crunch pie!
Jump to:
- Why You'll Love This Cherry Pie Filling Recipe
- Secret Ingredients For The Best Cherry Pie Filling
- Sour Cherry Pie Filling Ingredients
- How to Make Sour Cherry Pie Filling
- Troubleshooting Tips
- Substitutions
- Variations
- Equipment
- Storage
- Ways to Use Cherry Pie Filling
- Top Tips
- How to Pit Cherries Without a Cherry Pitter
- FAQ
- Looking for More Easy Fruit Filling Recipes & Desserts?
- 📖 Recipe
- Food Safety


Why You'll Love This Cherry Pie Filling Recipe
- It's all-natural, preservative-free, and additive-free
- Takes 10 minutes to make
- It's gluten-free for those with allergies or food intolerances
- It uses just 6 ingredients (with two of those being optional)
- Can be made with fresh or frozen sour cherries
- Tastes lightyears better than your favorite store-bought cherry pie filling
- Can be made with or without cornstarch (perfect for dietary restrictions)
- Freezer-friendly - learn exactly how to freeze cherry pie filling
- Versatile - discover multiple ways to use cherry pie filling in desserts
- Never worry about runny filling with our foolproof thickening method

Secret Ingredients For The Best Cherry Pie Filling
These all-natural 'secret' ingredients create an intense cherry flavor that surpasses any store-bought version. It's time to elevate your cherry pie filling with my favorite flavor-boosting ingredients:
- Fresh lime juice
- Pure almond extract
- A pinch (or two) of cinnamon

Sour Cherry Pie Filling Ingredients
Just a handful of all-natural ingredients creates this intensely flavored cherry pie filling. You won't find any added water in this pie filling (like you see used in the cornstarch slurry found in most other recipes). Why? Because I don't want to dilute a single drop of that natural cherry flavor!
- Tart cherries/Sour cherries: Use fresh or frozen pitted sour cherries, depending on availability and where you live. The best options include: Balaton, Montmorency, Early Richmond, and Michigan tart cherries. If you're in Italy, IGP Morello sour cherry and if you're in China, the Wenchuan Highland cherry is perfect. If you buy frozen, make sure there is no sugar added. All you want is natural frozen cherries.
- Granulated sugar: I use pure cane sugar and regular granulated sugar interchangeably for this recipe depending on what I have in my pantry.
- Lime juice: Use fresh-squeezed lime juice for the best flavor - call me crazy, but I swear it perfectly complements the cherries (trust me). Fresh lemon juice works just fine too. Avoid bottled juices; they contain unnecessary additives and lack the vibrant (real) taste of fresh citrus.
- Cornstarch: Any cornstarch will do, even store brand. See our cornstarch alternatives in the "Substitutions" section below to learn how to make cherry pie filling without cornstarch
- Pure almond extract: Splurge for pure almond extract if you can because it tastes better and a single bottle lasts a long time especially when kept in the refrigerator.
- Cinnamon: I use a pinch (or two) of powdered cinnamon, but you can substitute it with a ½-inch piece of cinnamon stick if desired. Believe me, it adds to the cherry flavor!
See recipe card for quantities.

How to Make Sour Cherry Pie Filling
Step 1. Cook the cherries to release some of their juices. In a large saucepan, cook cherries, lime juice, sugar, and cinnamon until sugar dissolves and cherries release some of their juice (2-3 minutes). Pour off ¼ cup of the juice, adding it to a small prep bowl with the cornstarch.


Step 2. Prepare the cornstarch slurry. Mix 2 tablespoons of cornstarch with reserved juice until smooth and no lumps remain.


Step 3. Combine the cherry mixture and cornstarch slurry. With the cherry mixture cooking on medium-high heat add the slurry stirring constantly as the mixture comes to a boil.

Step 4. Reduce the heat and thicken the cherry mixture. Reduce the heat to low and cook the cherry mixture until it's thick enough to coat the back of a spoon (about 4-5 minutes). Remove from heat, add almond extract, and pour the mixture into heat-proof glass jars.

Cool the pie filling and use it (or store it). Use the pie filling immediately once cooled to room temp or store it in the refrigerator or freezer until ready to use, Enjoy!
Hint
For the best flavor, use tart sour cherries, lime juice, and don't skip the almond extract and cinnamon - it intensifies and enhances the cherry flavor! Also, you'll know when the pie filling is ready because the color will go from a somewhat milky color to a clear, glistening, gel-like color.
Find detailed instructions in the recipe card.

Troubleshooting Tips
Is your filling too runny? If you follow this recipe it shouldn't be, but stuff happens! Here's how to thicken cherry pie filling: Heat the mixture back up over medium heat, stirring constantly. Mix 1 tablespoon cornstarch with 2 tablespoons of cold water to create a slurry. Slowly stir into the hot filling and cook until it reaches your desired thickness.
Substitutions
Whether you're looking for a cherry pie filling recipe without cornstarch or fresh cherries aren't in season, here are substitutes you can use any time.
- Frozen cherries can be substituted for fresh cherries
- Lemon juice can be substituted for lime juice
- Vanilla extract can be substituted for almond extract if you have a nut allergy
- Pumpkin pie spice can be substituted for the powdered cinnamon
Cherry Pie Filling Without Cornstarch
Cornstarch is my go-to pie filling thickener and what most of you likely already have in your pantry. But not everyone can use cornstarch for dietary reasons, etc. Each alternative creates slightly different textures - experiment to find your favorite!:
- Potato starch can be substituted 1:1 for cornstarch
- Tapioca starch substitute 2:1 for cornstarch (best for freezing)
- Arrowroot: Use 2 tablespoons (creates glossy finish)
- Clear Jel: substitute 2 tablespoons (ideal for canning a shelf-stable pie filling)
- Flour: substitute 2:1 for cornstarch (use in a pinch)


Variations
- Sweet and Sour Cherry Pie Filling: Use this dark sweet cherry + sour cherry combination pie filling recipe with a mix of sour cherries and sweet cherries for a slightly different flavor profile (*see left photo directly above for the image of my sweet and sour pie filling vs. the sour cherry pie filling on the right).
- Bourbon Cherry Pie Filling: Add a splash of bourbon while the cherries are cooking for an adult version.
- Brandy Cherry Pie Filling: Add a splash of brandy while the cherries are cooking.
- Zesty Cherry Pie Filling: Add the zest of a ¼ of an orange for a citrusy twist.
- Almond-free cherry pie filling recipe: To make a nut-free cherry pie filling, omit the almond extract and substitute Luxardo Amaretto to taste. FYI, Luxardo Amaretto liqueur is 100% nut-free (it uses the pits of cherry and apricot for its flavor). However, those allergic to almonds may also be more inclined to be allergic to cherry and apricot pits. When in doubt, omit the extract and/or replace it with vanilla extract.

Equipment
- Medium saucepan
- Whisk (or a large soup spoon)
- Glass canning jars for storage or other airtight containers
- Scale (or measuring cups and spoons)
- Silicone spatula
- Cherry pitter/Olive pitter (or use a straw as shown below in the FAQs)

Storage
This cherry pie filling can be stored in an airtight container in the refrigerator for up to 2 weeks or in the freezer for up to 3 months or even longer. If freezing, be sure to leave about 1 inch of headspace (empty space at the top of the jar) to allow for the filling to expand as it freezes without breaking the jar.
How Long Does Cherry Pie Filling Last?
- Room Temperature: You can leave cherry pie filling that's been baked into a pie at room temperature, covered for up to two days before you'll need to refrigerate it because it contains plenty of acid and sugar, which slows the bacteria growth
- Refrigerator: Properly stored in airtight containers, homemade cherry pie filling lasts 2 weeks
- Freezer: It maintains best quality for up to 3 months when properly stored
- Signs of Spoilage: Discard if you notice any mold, off-odors, or unusual texture changes


Ways to Use Cherry Pie Filling
Wondering what to make with cherry pie filling? Here are our favorite recipes using cherry pie filling:
- Quick Desserts: Top cheesecake, pound cake, ice cream
- Baked Treats: Cherry pies, cherry cobblers, crumbles, Italian cherry crostata, cherry turnovers, or black forest cake
- Fried Cherry Pies: Fill fried pie dough with this pie filling for a Southern dessert classic
- Breakfast Ideas: Topping for pancakes, waffles, French toast, classic banana bread, or yogurt
- No-Bake Options: Layer in parfaits, trifles, or use it to top cherry cheese pie or to fill cherry hand pies/cherry fried pies


Mini Black Forest Bundt Cakes
Top Tips
- Cook cherries just until thickened to maintain their texture and flavor (overcooked cherries lose flavor)
- For the most intense cherry flavor, skip the added water in the slurry and use the cherry juice (like this recipe calls for)
- Make sure to whisk constantly when adding the cornstarch slurry to avoid lumps or scorching the mixture
- Use a large stockpot or sauté pan (which has more surface area) to cook the cherry mixture. This speeds up the cooking process and keeps this recipe at just around 10 minutes total. Using a smaller pot (i.e. 2qt sauce pot) may increase cooking time by an extra 4 to 5 minutes to overall because the pot has less cooking surface area).
- Let the filling cool completely before using it in a pie to prevent a soggy pie crust

How to Pit Cherries Without a Cherry Pitter
You'll be happy to know that removing pits from cherries does not require a cherry pitter (although it does make the task a lot easier).
If you don't own a cherry pitter and have no desire to buy one, use a heavy-duty straw to easily remove the pits from cherries. Remove the stems and insert the straw into the bottom, side, or top of the cherry until the pit comes out.
Alternatively, you can use a small paring knife to cut the cherry from the pit.
FAQ
If you don't live in a sour cherry-producing area, it can be hard to find sour cherries, especially when it's not cherry season. But don't fret! The best places to buy frozen (tart) sour cherries are:
-from Harp's Grocery Stores (where I buy them when I'm back home in the States)
-from a well-stocked Eastern European food market in your area (which almost always carries them)
Sour cherries have delicate skins and are more perishable which is why you typically don't find them fresh in grocery stores unless you live near an area that produces them. And even then, you may only find them for a couple of weeks out of the year.
If you love cooking and baking with sour cherries as much as we do, I suggest seeking them out in the summer and pitting and freezing for later use.
Use our cornstarch slurry method during cooking, or see my alternatives for making cherry pie filling without cornstarch in the "Substitutions" section above (including arrowroot, tapioca starch, potato starch, all-purpose flour, ClearJel, and more).
Yes you can (and should) use frozen cherries to make cherry pie filling!
Frozen cherries are the perfect option for making cherry pie filling, whether you pick, pit, and freeze your own fresh cherries in season, or you buy them from your local grocery store.
Cherries (especially the more perishable sour cherry varieties) are picked at peak ripeness, packed, and frozen within minutes or hours of coming off the tree which makes them a perfectly delicious and convenient ingredient for making the best cherry pie filling.
It only takes 10 minutes to make this all-natural cherry pie filling from scratch! Not only does it taste superior to store-bought, but you also avoid additives and preservatives often found in canned cherry pie filling.
If you've seen my Homemade Cherry Pie Filling (Using Dark Cherries and Sour Cherries) post (as seen in the first image below), then you know I grew up with a cherry tree in my backyard, and I love all things cherry.
It makes sense to me to have two different (but equally delicious) homemade cherry pie filling recipes because sometimes a sweeter (less tart) cherry flavor works best in a recipe, while other times a really punchy sour cherry flavor is exactly what's needed. When you make homemade cherry pie filling yourself, you get to choose!
Using the combination of lime juice (instead of lemon juice), pure almond extract, and the slightest hint of cinnamon intensifies the cherry flavor in homemade cherry pie filling. Try this recipe and see for yourself!
Yes, you can freeze cherry pie filling! Leave ½ inch headspace in containers and freeze up to 3 months. It's a great way to get ahead of your holiday baking!
Below, you'll find my detailed freezing guide, which includes everything you need to know before you get started, depending on how you'll be using the topping (in a baked or fried dessert vs. as a topper for cheesecake etc.):
Cornstarch-thickened cherry pie filling will look slightly grainy after freezing and then thawing it. This is because cornstarch slightly degrades when frozen (see photo directly below ↓ for exactly what frozen cherry pie filling looks like after it's thawed). But there is zero loss of quality or flavor whatsoever. It just looks a little "shaggy"!
Tapioca starch-thickened cherry pie filling maintains a clearer, more attractive appearance when thawed because it doesn't degrade like cornstarch does when frozen. However, tapioca starch doesn't have the same thickening power as cornstarch, so you'll need twice as much tapioca starch as cornstarch for proper thickening.
Don't worry, both options taste equally delicious!
Follow the below general tips when making cherry pie filling ahead to freeze for later use:
For best results, choose your thickener based on how you'll use the cherry pie filling once you thaw it: (see more cornstarch alternatives in the "Substitutions" section above).
-For dessert toppings (like cheesecakes, no-bake desserts, cream cheese pies, ice cream, or any visible topping):
-Use tapioca starch (4 tablespoons in this recipe)
-For fried or baked desserts (like fried pies, cherry pie, cherry crumb pie, etc.):
-Use cornstarch (2 tablespoons in this recipe)
*If you only care about taste and not about visual presentation, then just use cornstarch. Your family will still LOVE this pie filling after it's been frozen!
From classic pies to no-bake desserts, see our complete list of ways to use cherry pie filling in the Serving section above.
Tart cherries are classified into two main groups, amarelle or morello and the amarelle cherry variety has only red skin, but not red flesh.
Properly stored, cherry pie filling lasts 2 weeks in the refrigerator or up to 3 months in the freezer.
Looking for More Easy Fruit Filling Recipes & Desserts?
Use this pie filling to make your favorite desserts like cherry crisps, cherry hand pies, double-crust cherry pies, cherry cobblers, mini cherry cheesecakes, mini cherry cheesecake devil's food cake ice cream sandwiches, mini black forest bundt cakes, and easy cherry cream cheese pies.
- Sweet Cherry Crumb-Crunch Pie w/Scratch Made Cherry Pie Filling & Streusel Topping
- Crispy Southern Fried Cherry Pie (w/Best Fried Pie Dough)
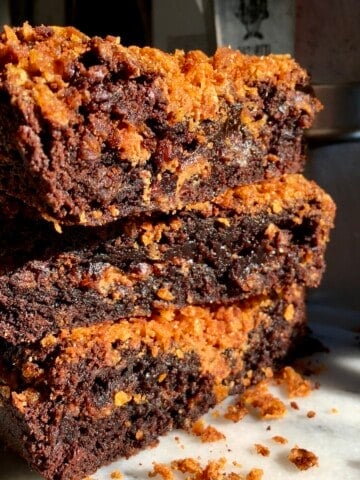
- Fudgey Biscoff Brownies w/Cornflake Crunch
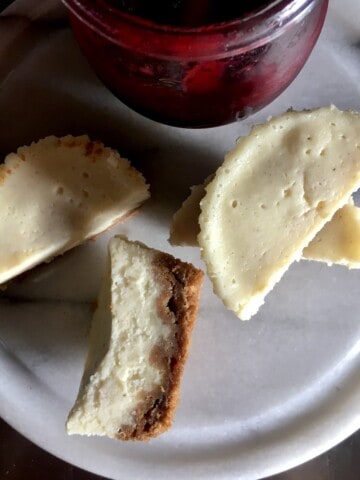
- Classic Cheesecake w/Biscoff Cookie Crust (+ Mini Option)
- Flaky Butter and Lard Pie Crust (Easy Recipe)
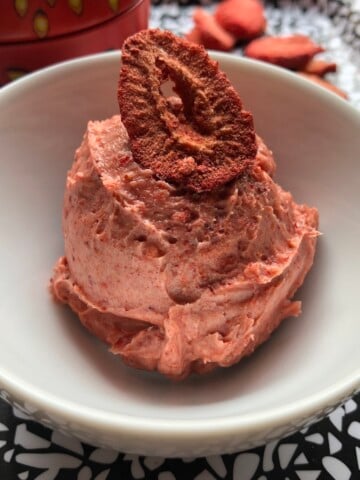
- Easy Strawberry-Rhubarb Pie Filling
- Bakery Style Banana Bread Recipe (Easy & Moist)
- Strawberry-Rhubarb Cream Cheese Pie (No-Bake)


Let's get started!
Print📖 Recipe

Ultimate 10-Minute Sour Cherry Pie Filling (From Scratch)
- Total Time: 10 minutes
- Yield: 4 cups (28.25 oz/800g)
- Diet: Vegan
Description
This Homemade Cherry Pie Filling transforms fresh or frozen cherries into a versatile, show-stopping dessert component in just 10 minutes. Using only 6 natural ingredients you likely have on hand, this recipe creates a deeply flavored filling that outshines store-bought versions every time. Perfect for classic cherry pies, cheesecake toppings, ice cream sundaes, fruit parfaits, and hand pies, this make-ahead filling freezes beautifully for up to 3 months.
Ingredients
- 24 ounces pitted tart sour cherries (about 3 cups), fresh or frozen (680g)
- 1 cup sugar, plus up to ½ cup or more depending on tartness of cherries (200g-300g)
- 1 teaspoon lime juice, freshly squeezed (6g)
- 2 tablespoons cornstarch (20g)
- ¼ teaspoon pure almond extract, or more to taste (1g) (approximately 6 drops)
- 2 to 3 pinches of cinnamon, or more to taste
Instructions
- Cook the cherries a bit to release their juices. In a large sauce pot, cook cherries, lime juice, sugar, and cinnamon over medium heat until sugar dissolves and cherries release some of their juice (2-3 minutes). Pour off about ¼ cup of the juice adding it to a small prep bowl.
- Prepare the cornstarch slurry. Add 2 tablespoons of cornstarch to reserved juice and mix until smooth and no lumps remain.
- Combine the slurry and cherry mixture. With the cherries cooking over medium-high heat, add the slurry stirring constantly as the mixture comes to a boil. Reduce the heat and simmer until the mixture is thick enough to coat the back of a spoon (about 4-5 minutes). Remove from heat, add almond extract, pour the mixture into heat-proof glass jars, and allow it to cool to room temperature before using or store it in the fridge or freezer for later use, Enjoy!
Notes
- If using frozen cherries, you may need cook the cherry mixture 1 to 2 minutes more for them to first start releasing their juices.
- Pro-tip for a lump-free cornstarch slurry: Cool slurry + hot liquid = lump-free mixture. Remove cherry juice from the cherry-sugar mixture after 2-3 minutes of cooking. It'll be cool enough to make a lump-free slurry.
- Customize the flavor: Taste the cherry mixture as it's cooking and increase the sugar or lime juice as desired. Increase sugar by ¼ to ½ cup or more for a sweeter pie filling or if your cherries are super tart.
- Substitute lemon juice for lime juice if that's what you have on hand.
- Add more almond extract for an even stronger "cherry" flavor, or substitute Luxardo cherry liqueur, or Kirsch if you have it on hand.
- To can the pie filling (preserve it) so it's shelf-stable, omit the cornstarch and use ClearJel (follow the ClearJel instructions).
- The consistency of this pie filling is like that of a canned cherry pie filling from the store. But if you are looking to thicken it even more, you may add up to 1 more tablespoon of cornstarch to the slurry before adding it to the hot cherry mixture.
- Prep Time: 5 minutes
- Cook Time: 5 minutes
- Category: Desserts
- Method: Stovetop
- Cuisine: Southern
Nutrition
- Serving Size: ¼ cup (50g)
- Calories: 55
- Sugar: 13g
- Sodium: 0.4g
- Fat: 0g
- Saturated Fat: 0g
- Unsaturated Fat: 0g
- Trans Fat: 0g
- Carbohydrates: 13.8g
- Fiber: 0.3g
- Protein: 0.2g
- Cholesterol: 0g
Food Safety
- Use clean utensils and equipment when preparing the cherry pie filling
- Refrigerate the filling promptly after it has cooled to room temperature
- Do not leave the cherry pie filling at room temperature for extended periods
See more guidelines at USDA.gov.


Yasmeen V. says
I took a cherry pie to our family reunion (I'm known for making it every year) and everyone who ate a piece commented that it was my best yet (most asked me for the recipe too)! It's absolutely perfect😍. THANKS!
Kelly says
Yasmeen, you have no idea how genuinely happy this makes me! And if your family is as serious about good food as mine is, I know how good that must have made you feel! Thanks for trying it out and sharing the recipe❤️.
Forrest K. says
Never buying cherry pie filling again! This makes the best cherry pie (even my family tasted the difference). I was a little skeptical about the lime and cinnamon but it works! I added about 3 tablespoons more sugar because the cherries were especially sour...also a couple of extra pinches of cinnamon. I can't believe how easy it was! It's my go-to holiday pie filling recipe from now on (thanks).
Collin H. says
This blows the canned stuff out of the water and it's the only cherry pie filling I'm using from now on. I double the batch and keep a jar in the freezer for cheesecake topping, yogurt, or "emergency" late-night spoonfuls straight from the jar. Really good stuff😍
Kelly says
Awe, Thanks Collin!☺️ Sounds like you love it as much as our family:) Appreciate the kind feedback❤️
Shane says
Superb!
Kelly says
Thanks so much, Shane! Glad you enjoyed it:)