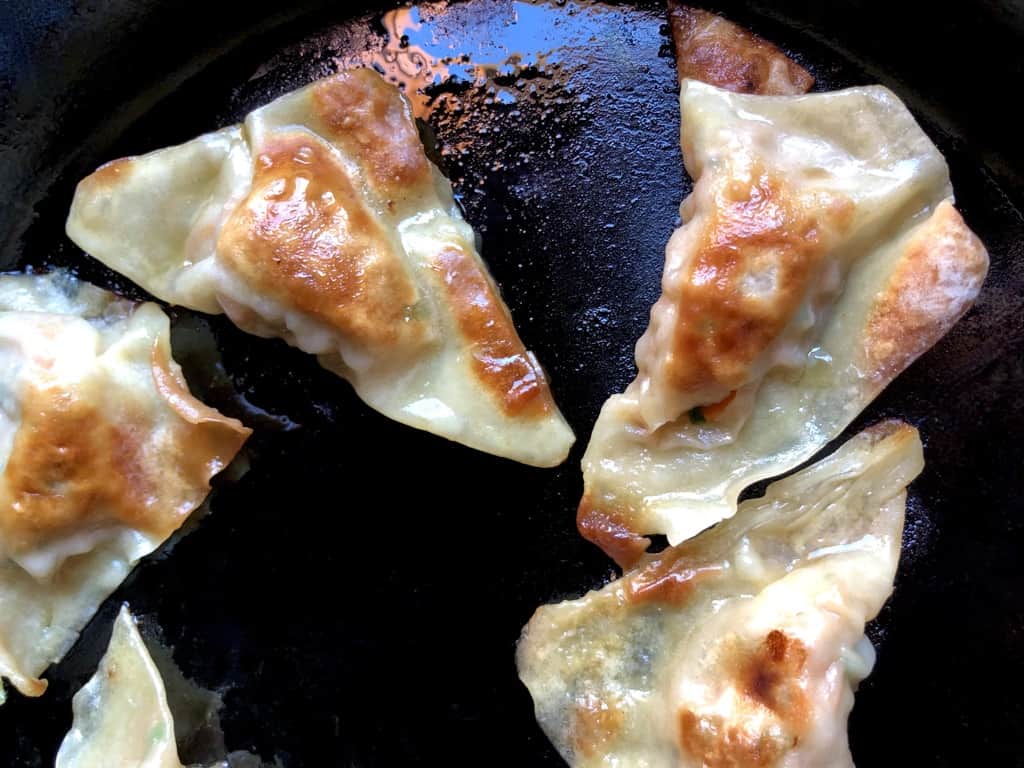
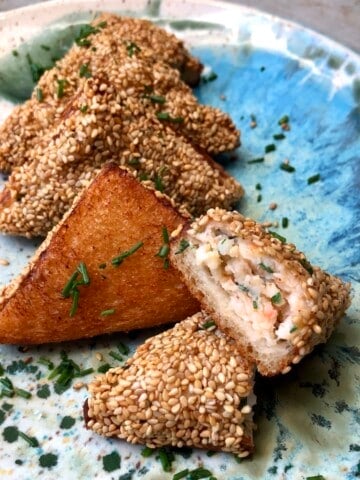
These crispy, chewy pork and chive potstickers are delicious and have been a total lifesaver when we've been too busy (or too lazy on the weekends) to cook. Not only is this one of the best make-ahead dinners, but these little potstickers also fill every kind of takeout craving you might be having. Dumplings and potstickers are inexpensive (and easy) to make and can be packed with as much (or as little) meat and/or vegetables as you like. Add our simple (and super tasty) potsticker dipping sauce and you will not miss your restaurant favorites (or the expense of it). For anyone who may be new to making potstickers or for kiddos helping out in the kitchen, we've included step-by-step recipe photos at the end of the post.

I've yet to meet a kiddo who didn't love these which makes it a great (healthy) way to feed your whole family without having to cook two separate meals. Add a salad, a bowl of homemade egg drop soup, or our favorite chicken & vegetable stir-fry noodle dish to round out the meal.

Dumplings vs Potstickers -- What's the Difference?
Potstickers are part of the humble (and seriously delicious) Chinese dumpling family. Made with a wrapper that's somewhere in between the thickness of a typical dumpling wrapper and a thinner wonton wrapper, it's filled with a mixture of meat or veggies (or both), and a few Chinese pantry staple seasonings and sauces like chives, Shaoxing wine, soy, and sesame oil, to name just a few. Each region of China has its own popular fillings to choose from (and within each region, every home will crank out its own special family recipe). To learn more about traditional potstickers, check out this post over here.
Top 7 Tips and Techniques for Making Dumpling + Potsticker Fillings Taste Just Like Takeout
There are a few easy (but critical) techniques and tips for making Chinese dumplings extra juicy and that taste just like (or even better than) your favorite restaurant. If you haven't already seen this post, hop over here to check out the 7 ways to make better dumplings and potstickers at home before you get started making this recipe.

The Easy Way to Assemble and Cook Potstickers at Home
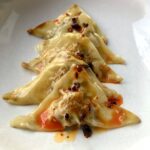
Making triangular potstickers is the easiest (quickest) way to assemble potstickers, in my opinion. It's even easier to buy a pack of dumpling or wonton wrappers (square or round), fill them, seal them with a simple cornstarch slurry, and cook them or freeze them for later. But, if you have time and want to make the dough from scratch (it's really easy), just use our easy 2-Ingredient dumpling wrapper recipe over here. Making the dough from scratch makes it easy to fold the potstickers into the traditional shape and even easier to make the pleats. However, if ease is what you're after without sacrificing flavor or texture, follow these simple steps below.
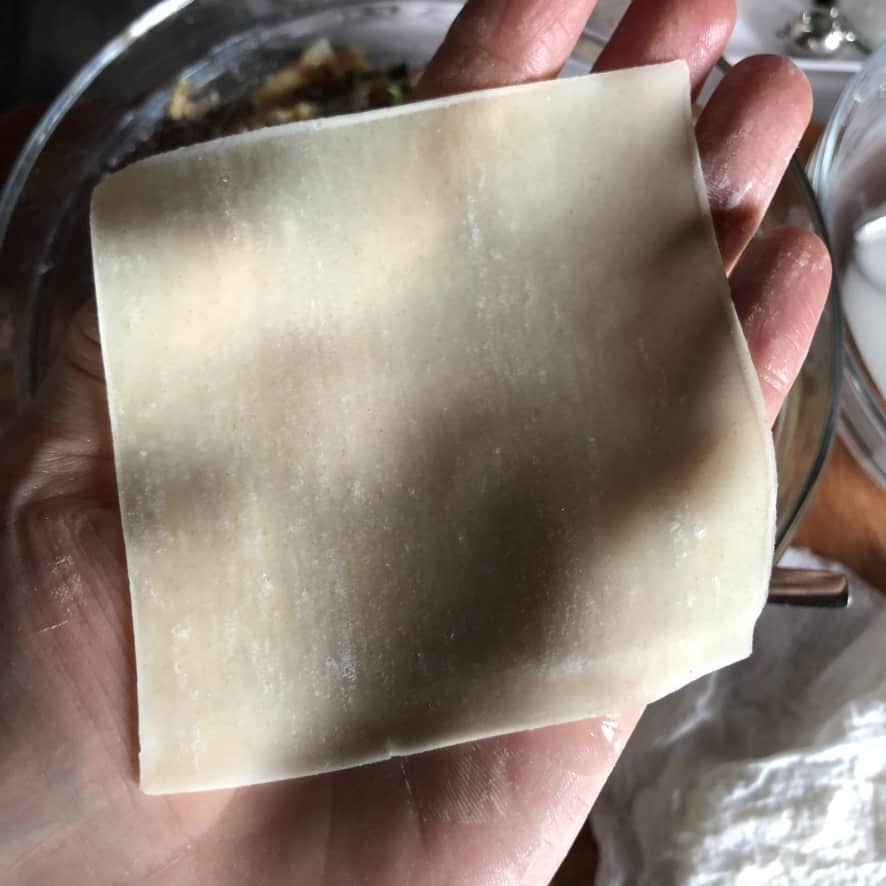
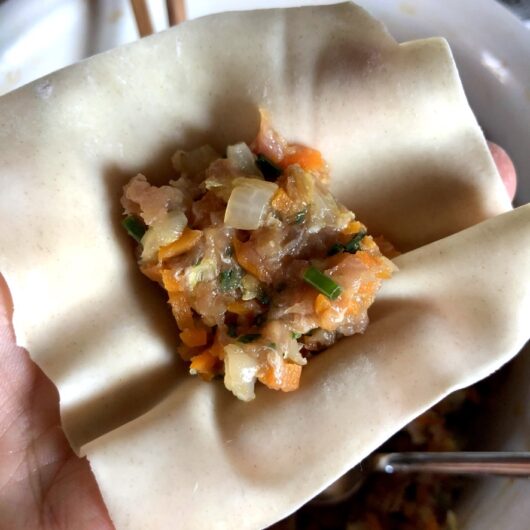
- Place a wonton or dumpling wrapper in the palm of your hand and add about 1 tablespoon (15g) of filling to the center.
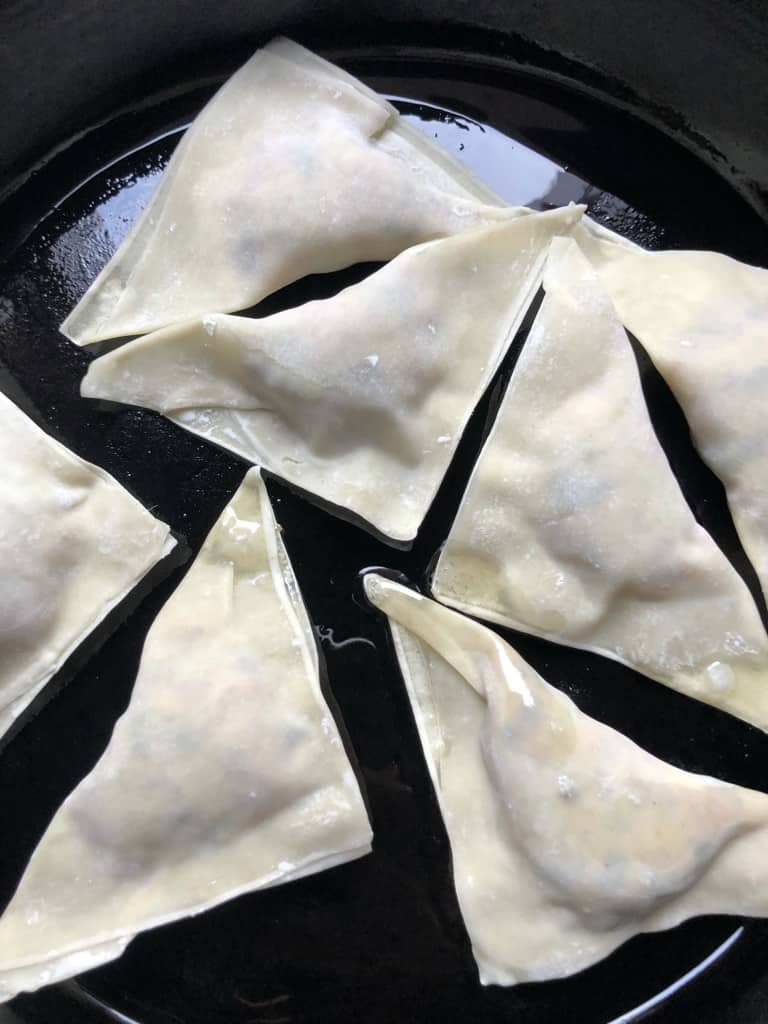
- Using your finger, brush two opposite sides of the dumpling wrapper or wonton square with the cornstarch slurry (which acts like glue), and close the wrapper to create a triangle being sure to press out any air around the filling mixture as you go. Seal the wrapper well by pinching the dough together around the perimeter.
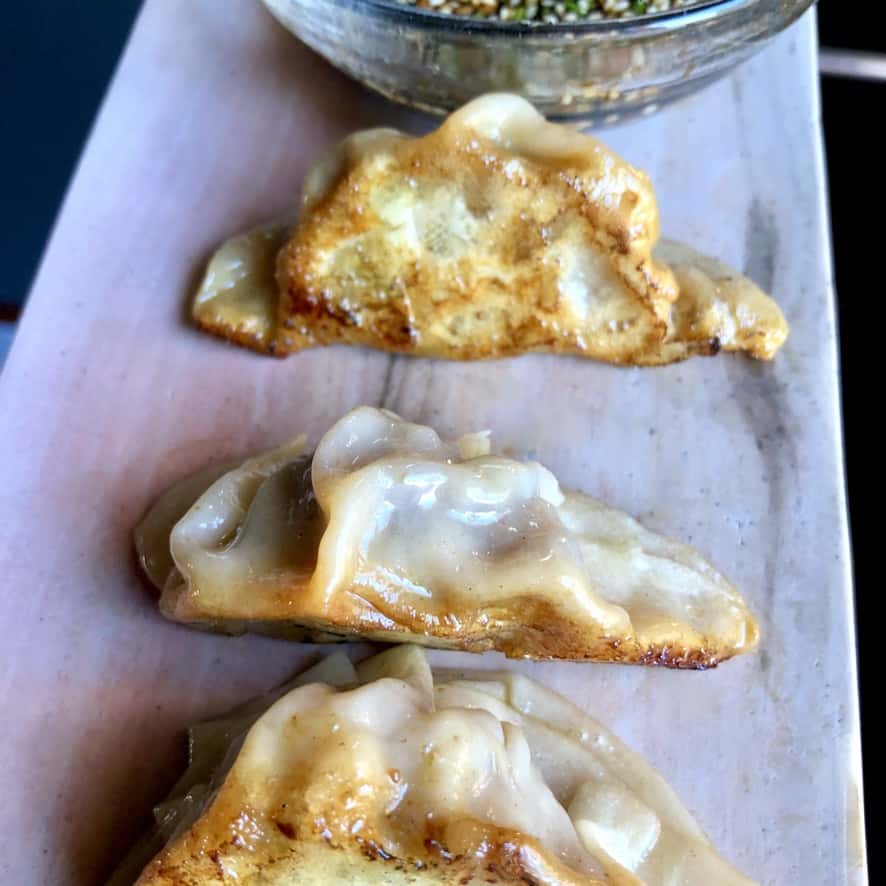
- Sear them in a hot pan with a little oil, until golden brown on one side, add a little water or an ice cube to the hot skillet, cover with a lid and steam the potstickers until cooked through and glossy in appearance. *I actually like to sear both sides of the potstickers when I use wonton wrappers before steaming them, but it's not necessary.

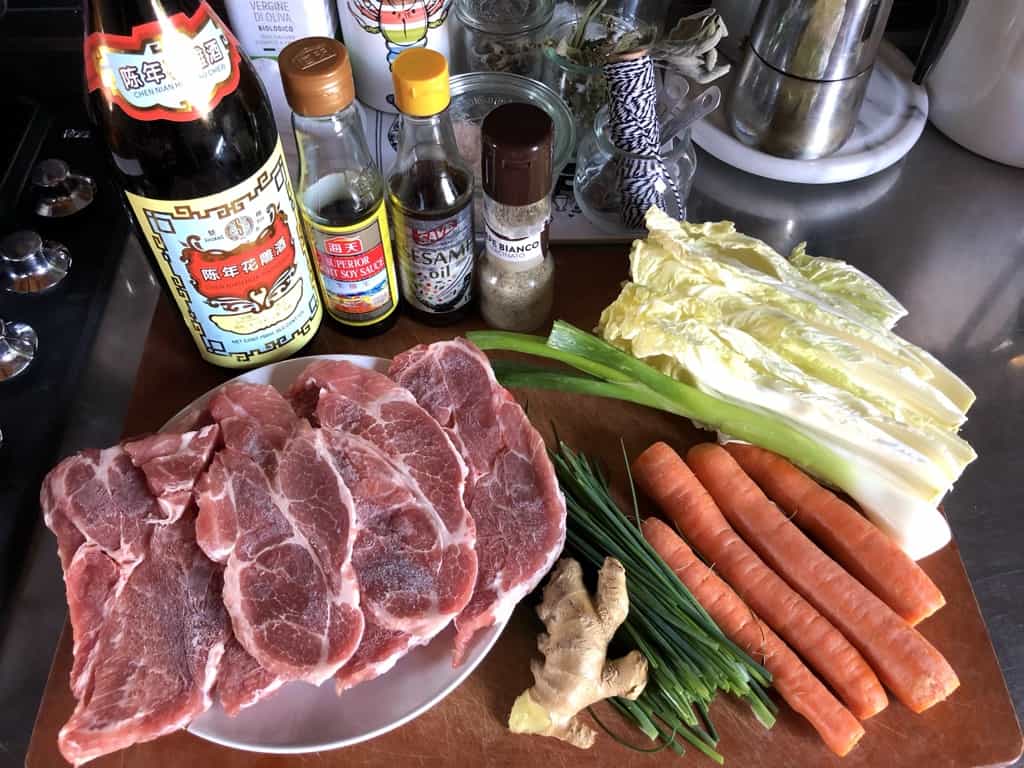
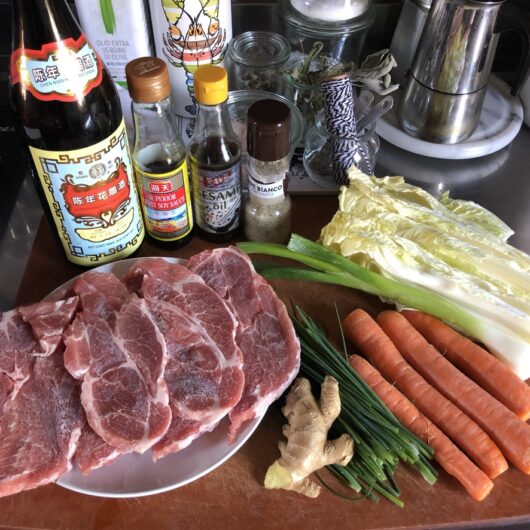
Pork and Chive Potsticker w/Sautéed Cabbage + Carrots Ingredients
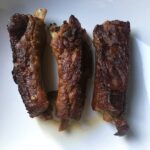
For this potsticker recipe, I ground the meat myself using inexpensive fatty pork shoulder steaks, but you can just buy fatty pre-ground pork to make this recipe even easier than it already is. To the pork, I've added chives, sautéed cabbage, and carrots (for deeper flavor and natural sweetness) and a ginger-infused sauce that make these potstickers taste as good or better than your favorite takeout. I recommend doubling the recipe and freezing if you have space because these go really fast.
FOR THE FILLING
- 1 pound of pre-ground fatty pork (OR 1 pound fatty pork shoulder meat) (450g)
- ½ pound (about 2 ½ cups) napa cabbage, shredded and finely chopped (225g)
- ½ pound (about 2 ½ cups) carrots, julienned (or grated) (225g)
- 7 tablespoons (2 ½ ounces) chives (or scallions, green parts only) finely minced (25g)*
- 6 to 7 slices fresh ginger (½ ounce), (10g)
- 2 tablespoons Shaoxing wine (30g)**
- 2 tablespoons light soy sauce (30g) (or sub regular soy)
- 2 tablespoons chicken or vegetable stock (or ginger-infused water) (30g)***
- ½ teaspoon toasted sesame oil (2g)
- ¼ teaspoon white pepper (0.5g)
- ½ teaspoon kosher salt, or more to taste (2g)
FOR ASSEMBLING THE POTSTICKERS
- 1 tablespoon cornstarch (7.5g) plus ½ cup of water (118g) combined (cornstarch slurry to seal potstickers)
- 1 package of wonton or dumpling wrappers (50 to 60ct) (300 to 400g)
TRADITIONAL DIPPING SAUCE
- ⅓ cup Chinese black vinegar (Chinkiang or Zhenjiang vinegar) (75g)
- 2 ½ tablespoons regular soy sauce (35g)
- 2 tablespoons sugar (30g)
- 1 tablespoon fresh ginger, cut into matchsticks (20g)
- 2 tablespoons sugar (30g)
- 1 teaspoon toasted sesame seeds (optional) (3g)
- chili oil or sambal to taste (optional)


How to Make Easy Homemade Chinese Pork and Chive Potstickers
Dumplings of any kind are easy to make at home and if you have a kitchen helper, creating an assembly line makes the prep work go even faster. But if it's just you, a bowl of filling, and a stack of wrappers, don't worry because once you start assembling, it all goes really quickly.
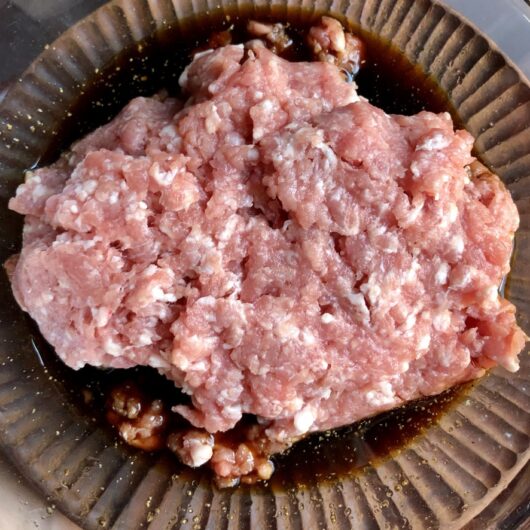
- Steep the ginger in the pork filling seasoning. Add the Shaoxing wine, light soy sauce, and ginger to a small bowl and allow the mixture to infuse for 30 minutes or up to an hour while you prepare the rest of the ingredients.
- Grind the pork (or use pre-ground fatty pork and skip to step 3). Place the pork into the freezer for 20 to 30 minutes to firm up and make it easier to slice and move through the grinder but do not let it freeze solid. Cut the pork shoulder into 2-inch cubes. Attach the KitchenAid food grinder attachment with the larger die, and start adding the meat and grinding. You may choose to grind the meat a second time, but I typically just give it all a quick chop with a knife on the cutting board to make sure all the pieces are nice and small.
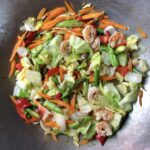
- Sauté the cabbage and carrots. Add 1 teaspoon (5 g) of extra virgin olive oil to a skillet set over medium heat, add the chopped cabbage and carrots, a pinch of salt, and cook until the vegetables are tender and no moisture remains in the pan (about 20 minutes). Remove the mixture to a bowl to cool completely.
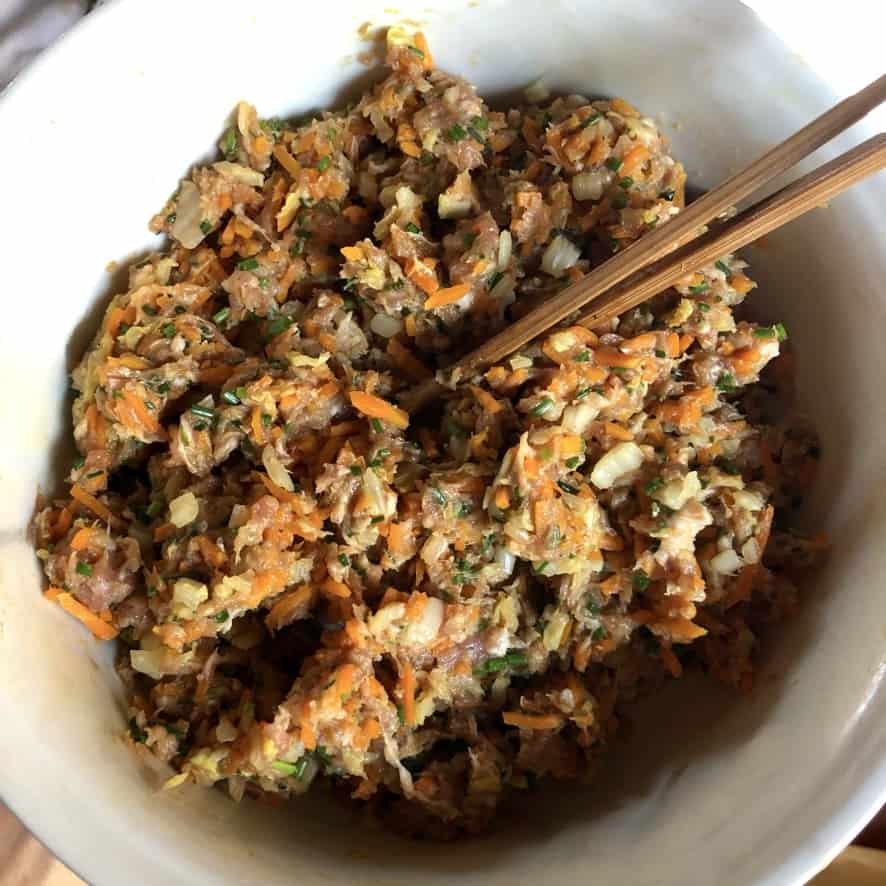
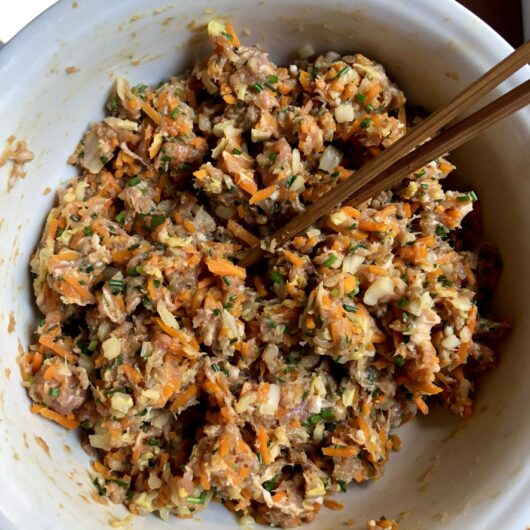
- Make + chill the pork filling. Remove the ginger from the pork filling seasoning and add the white pepper and toasted sesame oil and stir to combine. Add the ground pork and salt to a large mixing bowl with the pork filling seasoning and 2 tablespoons of chicken stock (or ginger-infused water or vegetable stock). Stir the mixture in one direction (clockwise) with chopsticks, or a fork until it becomes visibly "fluffy" and all of the ingredients are well combined and almost paste-like (about 8 to 10 minutes). At this point, the meat should have absorbed all of the liquid. Cover and place the mixture into the fridge to chill and allow the flavors to blossom for at least 15 minutes (or better up to an hour).
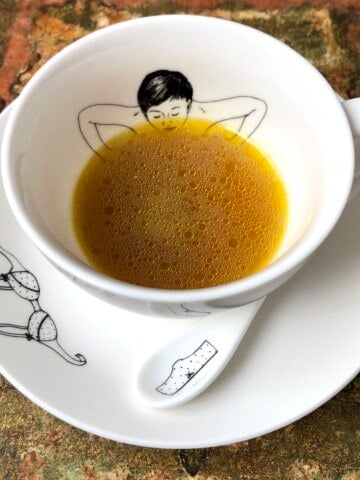
- Make the potsticker dipping sauce. Combine 1 teaspoon of sugar with warm water to dissolve. Add all other ingredients, adjust seasonings if necessary and set aside.
- Test the flavor of the pork filling. Pan fry a small amount of filling in a lightly oiled skillet to make sure the seasonings are just right. Adjust the salt and any seasonings as needed. Once the filling tastes just right, add the chives, sautéed cabbage, and carrots and stir well to combine.
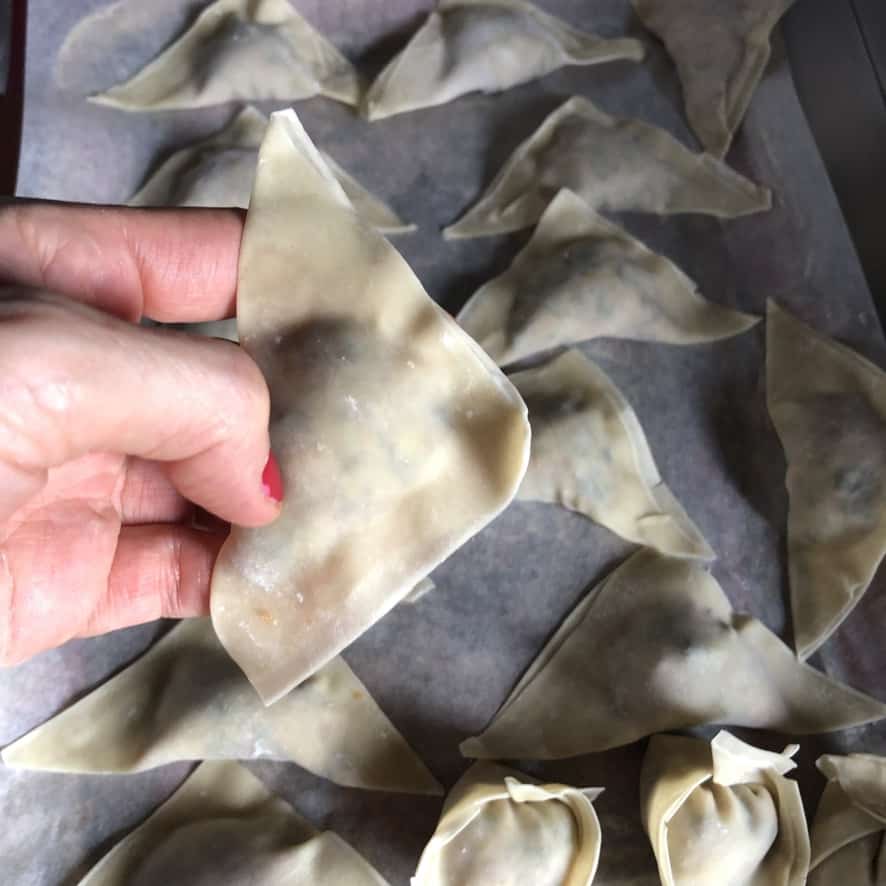
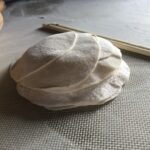
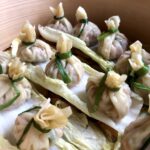
- Assemble the potstickers. Cover the wrappers with a slightly damp cloth to keep them from drying out while you're filling the dumplings. Add about 1 tablespoon of pork filling to the center of each wrapper. Dip your finger into the cornstarch slurry and brush two opposite sides of the wrapper and seal to create a triangle, pressing out any air inside the potsticker around the meat (no air bubbles). Set the filled potstickers on a parchment-lined tray without touching each other. *You may place parchment in between the potstickers if you need to stack them a bit to fit more on the tray (see photos).
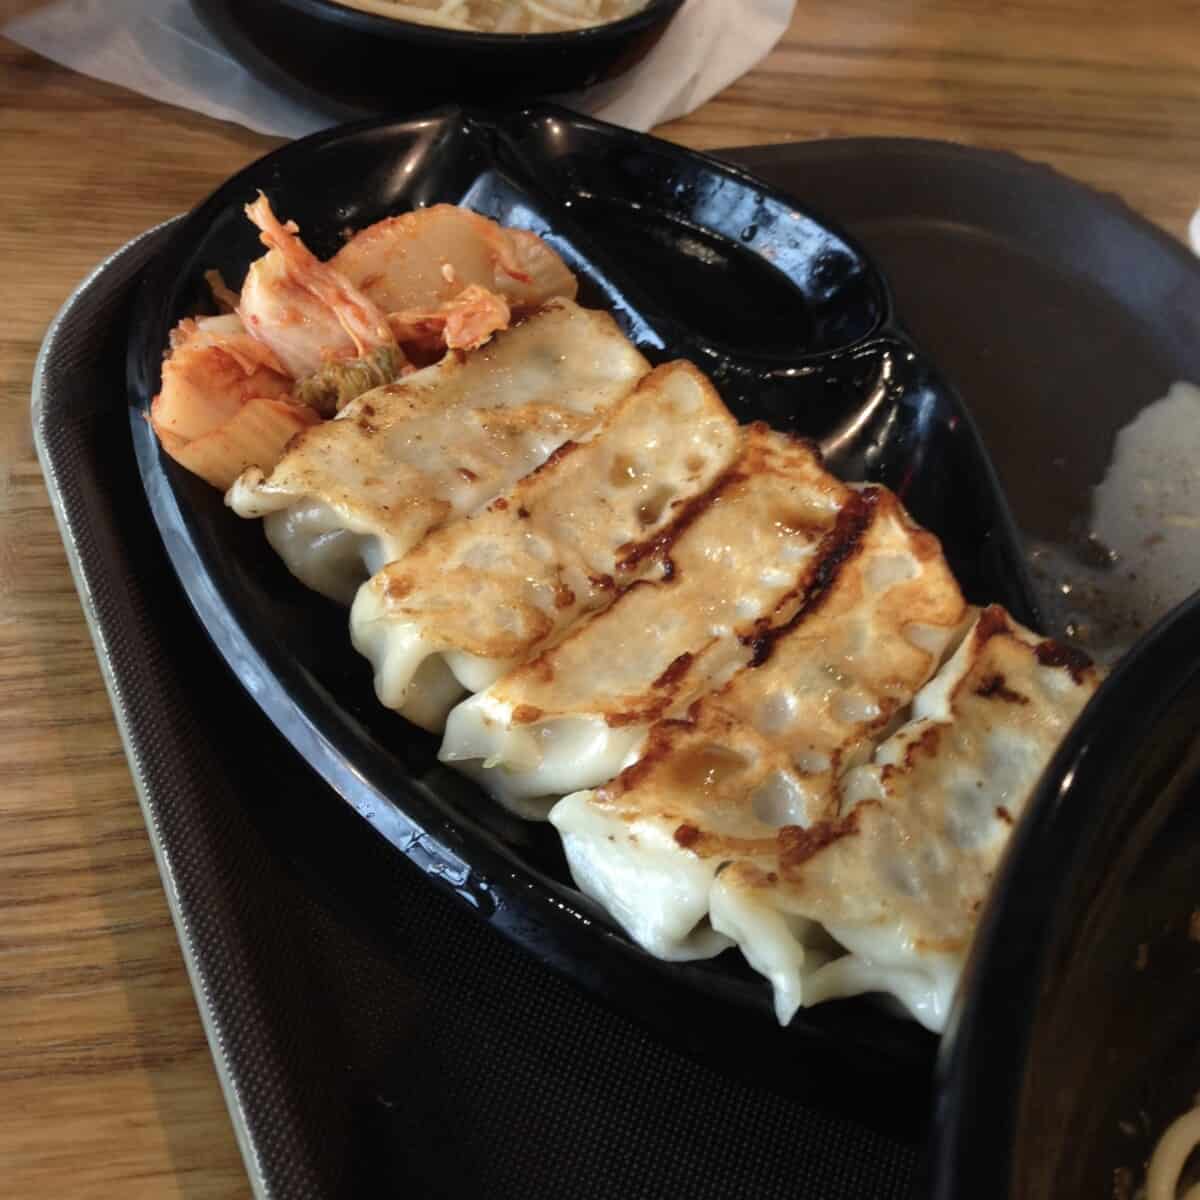
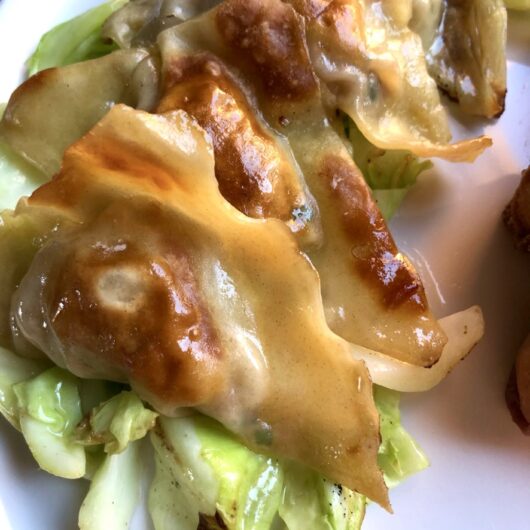
- Cook the potstickers (jiaozi). Heat a large skillet or wok to medium-high and drizzle it with a little vegetable oil. Just before the pan starts to smoke, add the potstickers in a single layer to the skillet and cook them for a couple of minutes, or until golden brown on the bottom. Add about 3 tablespoons of water (or ice cubes) directly to the pan, cover immediately with a lid and allow the potstickers to steam until cooked through and the liquid has evaporated leaving you a glossy potsticker (about 3 to 4 minutes). *I prefer to get both sides golden brown before I add the water to steam them, but you can do it the traditional way if you like and only brown one side). Remove the potstickers to a serving platter and serve with the dipping sauce Enjoy!
Pork and Chive Potstickers w/Sautéed Napa Cabbage & Carrots (Jiaozi)recipe step-by-step photos


Looking for a Few More Delicious Dim Sum or Asian Dishes?
If you're looking for a few other dishes to round out your takeout night in, below are a few of our favorites we think you may also enjoy.
- Lucky Lunar New Year Fried Cherry Pie "Wontons"
- Homemade Chinese Soup Dumplings Xiaolongbao (小笼包) (100% From Scratch)
- Easy Egg Drop Soup with Crispy Fried Wonton Strips (Danhuatang 蛋花湯)
- Thin + Chewy Homemade Chinese Wonton Wrappers
- Easy Homemade 2-Ingredient Chinese Dumpling Dough
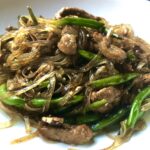
- Takeout Style Pork and Green Bean Stir-Fry w/Glass Noodles
- Easy Japanese Braised Pork Belly (for Momofuku & Ippudo Style Pork Buns)
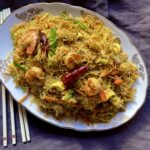
- 20-Minute Singapore Mei Fun Noodles (Shrimp Mei Fun)
- Best Ever Chicken Dumplings Recipe (Plump & Juicy Jiaozi)
- Easy Shrimp and Vegetable Stir Fry (w/Cantonese Style White Sauce)
- Easy and Delicious Pork Potsticker Recipe (Cantonese Style Jiaozi)
- Crispy Pork and Chive Spring Rolls w/Glass Noodles & Vegetables
- Steamed Pork & Chive Money Bag Dumplings (Beggar's Purse Dumplings)
- Hoisin Garlic-Ginger Oven-Braised Pork Ribs
- Easy Chashu Pork チャーシュー(Marinated Braised Pork Belly Recipe For Ramen )
- Chinese Takeout Chicken & Vegetable Stir-Fry w/Glass Noodles (a Family Favorite)


Let's get started!
Print📖 Recipe

Easy Pork and Chive Potstickers (w/Sautéed Napa Cabbage & Carrots)
- Total Time: 38 minutes
- Yield: 55 to 60 Potstickers
- Diet: Low Calorie
Description
These crispy, chewy pork and chive potstickers are delicious and have been a total lifesaver when we've been too busy (or too lazy on the weekends) to cook. Not only is this one of the best make-ahead dinners, but these little potstickers also fill every kind of takeout craving you might be having.
Ingredients
- 1 pound of pre-ground fatty pork (OR 1 pound fatty pork shoulder meat) (450g)
- ½ pound (about 2 ½ cups) napa cabbage, shredded and finely chopped (225g)
- ½ pound (about 2 ½ cups) carrots, julienned (or grated) (225g)
- 7 tablespoons (2 ½ ounces) chives (or scallions, green parts only) finely minced (25g)*
- 6 to 7 slices fresh ginger (½ ounce), (10g)
- 2 tablespoons Shaoxing wine (30g)**
- 2 tablespoons light soy sauce (30g) (or sub regular soy)
- 2 tablespoons chicken or vegetable stock (or ginger-infused water) (30g)***
- ½ teaspoon toasted sesame oil (2g)
- ¼ teaspoon white pepper (0.5g)
- ½ teaspoon kosher salt, or more to taste (2g)
- 1 tablespoon cornstarch (7.5g) plus ½ cup of water (118g) combined (cornstarch slurry to seal potstickers)
- 1 package of wonton or dumpling wrappers (50 to 60ct) (300 to 400g)
- ⅓ cup Chinese black vinegar (Chinkiang or Zhenjiang vinegar) (75g)
- 2 ½ tablespoons regular soy sauce (35g)
- 2 tablespoons sugar (30g)
- 1 tablespoon fresh ginger, cut into matchsticks (20g)
- 2 tablespoons sugar (30g)
- 1 teaspoon toasted sesame seeds (optional) (3g)
- chili oil or sambal to taste (optional)
Instructions
- Steep the ginger in the pork filling seasoning. Add the Shaoxing wine, light soy sauce, and ginger to a small bowl and allow the mixture to infuse for 30 minutes or up to an hour while you prepare the rest of the ingredients.
- Grind the pork (or use pre-ground fatty pork and skip to step 3). Place the pork into the freezer for 20 to 30 minutes to firm up and make it easier to slice and move through the grinder but do not let it freeze solid. Cut the pork shoulder into 2-inch cubes. Attach the KitchenAid food grinder attachment with the larger die, and start adding the meat and grinding. You may choose to grind the meat a second time, but I typically just give it all a quick chop with a knife on the cutting board to make sure all the pieces are nice and small.
- Sauté the cabbage and carrots. Add 1 teaspoon (5 g) of extra virgin olive oil to a skillet set over medium heat, add the chopped cabbage and carrots, a pinch of salt, and cook until the vegetables are tender and no moisture remains in the pan (about 20 minutes). Remove the mixture to a bowl to cool completely.
- Make + chill the pork filling. Remove the ginger from the pork filling seasoning and add the white pepper and toasted sesame oil and stir to combine. Add the ground pork and salt to a large mixing bowl with the pork filling seasoning and 2 tablespoons of chicken stock (or ginger-infused water or vegetable stock). Stir the mixture in one direction (clockwise) with chopsticks, or a fork until it becomes visibly "fluffy" and all of the ingredients are well combined and almost paste-like (about 8 to 10 minutes). At this point, the meat should have absorbed all of the liquid. Cover and place the mixture into the fridge to chill and allow the flavors to blossom for at least 15 minutes (or better up to an hour).
- Make the potsticker dipping sauce. Combine 1 teaspoon of sugar with warm water to dissolve. Add all other ingredients, adjust seasonings if necessary and set aside.
- Test the flavor of the pork filling. Pan fry a small amount of filling in a lightly oiled skillet to make sure the seasonings are just right. Adjust the salt and any seasonings as needed. Once the filling tastes just right, add the chives, sautéed cabbage, and carrots and stir well to combine.
- Assemble the potstickers. Cover the wrappers with a slightly damp cloth to keep them from drying out while you're filling the dumplings. Add about 1 tablespoon of pork filling to the center of each wrapper. Dip your finger into the cornstarch slurry and brush two opposite sides of the wrapper and seal to create a triangle, pressing out any air inside the potsticker around the meat (no air bubbles). Set the filled potstickers on a parchment-lined tray without touching each other. *You may place parchment in between the potstickers if you need to stack them a bit to fit more on the tray (see photos).
- Cook the potstickers (jiaozi). Heat a large skillet or wok to medium-high and drizzle it with a little vegetable oil. Just before the pan starts to smoke, add the potstickers in a single layer to the skillet and cook them for a couple of minutes, or until golden brown on the bottom. Add about 3 tablespoons of water (or ice cubes) directly to the pan, cover immediately with a lid and allow the potstickers to steam until cooked through and the liquid has evaporated leaving you a glossy potsticker (about 3 to 4 minutes). *I prefer to get both sides golden brown before I add the water to steam them, but you can do it the traditional way if you like and only brown one side). Remove the potstickers to a serving platter and serve with the dipping sauce Enjoy!
Notes
- If you're buying pre-ground pork mince, look for 80/20 pork to fat ratio, and even better if you can find 75/25 or 70/30.
- If you can't find fatty ground pork where you live, either ask the local grocery store butcher to grind it for you, or use fatty pork belly or pork shoulder as I've used in this recipe.
- MealPrep potstickers by freezing them in a single layer on a tray in the freezer for about 30 minutes, or until firm. Then place them into an airtight container or freezer bag until ready to cook. When ready to cook, place frozen potstickers into a preheated skillet with a little oil and cook for about 4 to 5 minutes, or until golden brown on the bottom, add about ¼ cup of water to the skillet, cover immediately and cook for about 5 minutes longer, or until the water has evaporated and the filling has cooked through.
- A great trick I learned from my friends in Chengdu for how to get ginger flavor into dumpling fillings without ever biting into actual pieces of ginger: Infuse dumpling filling sauces (like soy sauce) with ginger matchsticks instead of actually grating or mincing them and adding them to the filling. It adds just enough fragrant ginger flavor without ever being overpowering.
- Prep Time: 30 minutes
- Cook Time: 8 minutes
- Category: Dim Sum + Dumplings
- Method: Steamed
- Cuisine: Chinese
Nutrition
- Serving Size: 6 Potstickers


Made the Recipe? Tell Us What You Think!