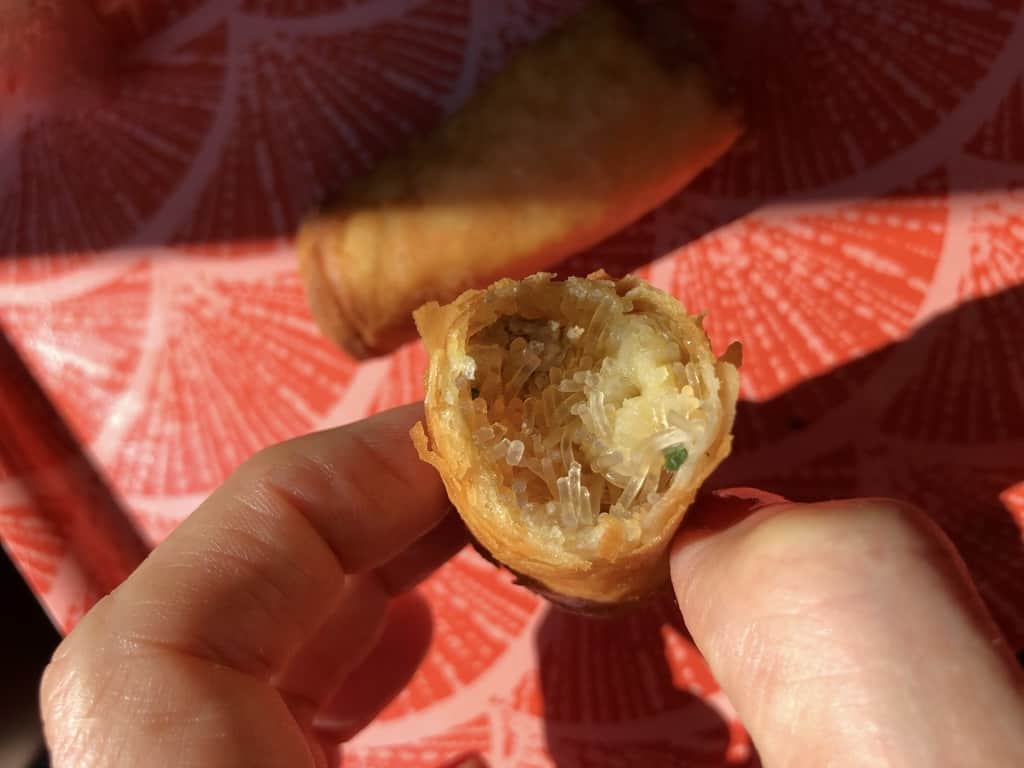
Crispy pork and chive spring rolls couldn't be easier to make, and they're just as good as your local takeout (try them for yourself because the proof is always in the final taste). These feather-light spring rolls are filled with a mixture of seasoned pork, chive, cabbage, carrots, and seasoned glass noodles (for that extra chew I crave from my favorite Thai restaurant spring rolls).
Fried just until golden brown, they're really delicious - all they need is one of our simple spring roll dipping sauces, and you won't be missing your usual takeout (or the expense of it). Make extra to freeze until you're ready to fry them (no need to thaw them out first).

What are Spring Rolls vs. Summer Rolls vs. Egg Rolls -- What's the Difference?
Chinese Spring Rolls
Spring rolls were first invented in China to celebrate the Spring Festival (aka Chinese New Year). They're a traditional filled appetizer that's rolled up in a wrapper made from flour (either wheat or rice flour) and water and either steamed, baked, or most often, fried.
In fact, the very first iteration of the spring roll was likely not crispy at all. When fried, the wrapper flakes off when you bite into it because it's so thin and crispy. They can be filled with just about any combination of vegetables and/or meat or even noodles to suit your tastes (this recipe includes all three) and served with a dipping sauce.
Spring rolls spread throughout Asia, giving rise to many different styles and country-specific ingredients.
Vietnamese Spring Rolls
Fresh Spring Rolls
Vietnamese fresh spring rolls (often called "summer rolls") are made using uncooked but rehydrated pliable rice paper wraps. Often, fresh sliced vegetables, tofu, cooked shrimp, chicken, pork, etc., and noodles, along with some fresh herbs like mint, cilantro, or basil leaves, are rolled up into the familiar spring roll shape and served with a dipping sauce. But this is only one type of Vietnamese spring roll.
Fried Spring Rolls
The second kind of Vietnamese spring roll is the fried spring roll, which uses the same rehydrated rice paper wrap and is filled with ingredients, sealed, and fried like a typical spring roll. The wrapper is thicker, chewier (in a good way), and less crackly, crispy, and more bubbly-crispy than the Chinese spring roll. It's very crispy and delicious.
Egg Rolls
Egg rolls are unique to Chinese-American cuisine and are thought to have been invented by Chinese immigrant Lum Fung in NYC sometime around the 1930s. The egg roll wrapper is much thicker than a traditional spring roll wrapper, and it has an outer crispy layer and an inner chewy layer because, in addition to being made with wheat flour and water, it also contains egg.
In fact, egg roll wrappers are made using the same ingredients as wonton wrappers, so it's easy to see how they originated. And unlike Chinese or Vietnamese spring rolls, egg rolls are always fried. They have a golden brown, bumpy outer exterior, unlike the smooth Chinese spring roll wrappers.
How to Roll a Spring Roll and Make Sure They Stay Sealed When Frying Them
There are a few easy tips and techniques for rolling up homemade spring rolls and ensuring they stay sealed and won't burst open when you're frying them. Follow these tips for golden brown, crispy spring rolls every time.
Don't over-stuff the spring roll wrapper. It's so tempting, but do not put too much filling into the wrapper. It's human nature (at least it's my nature) to want to stuff in as much of "the good stuff" as I can, but never with foods that need to stay sealed during a deep or shallow fry, like spring rolls. If it's too full, it can break open before or during the cooking process.
Make sure you're spring roll filling is at least at room temperature or cold. Using a hot filling will ruin your delicate wrappers and cause tears so make sure the filling is at least at room temperature, but even better if it's been chilled in the fridge for at least one hour before filling the spring rolls. A cold filling makes filling the spring rolls much easier.
Make sure your filling is "dry". Never use a wet or runny filling, which will result in the wrappers tearing open (even before you start to fry them) and can cause oil splattering if it seeps out during cooking.
Basically, the filling should never have liquid pooling around it, which would indicate that it's too wet to use. This is one reason why I choose to sauté the cabbage and carrots in this recipe before adding them to the pork mixture. Sautéing vegetables removes much of the moisture that can otherwise wreak havoc on a dry spring roll, potsticker, dumpling, or egg roll wrapper.
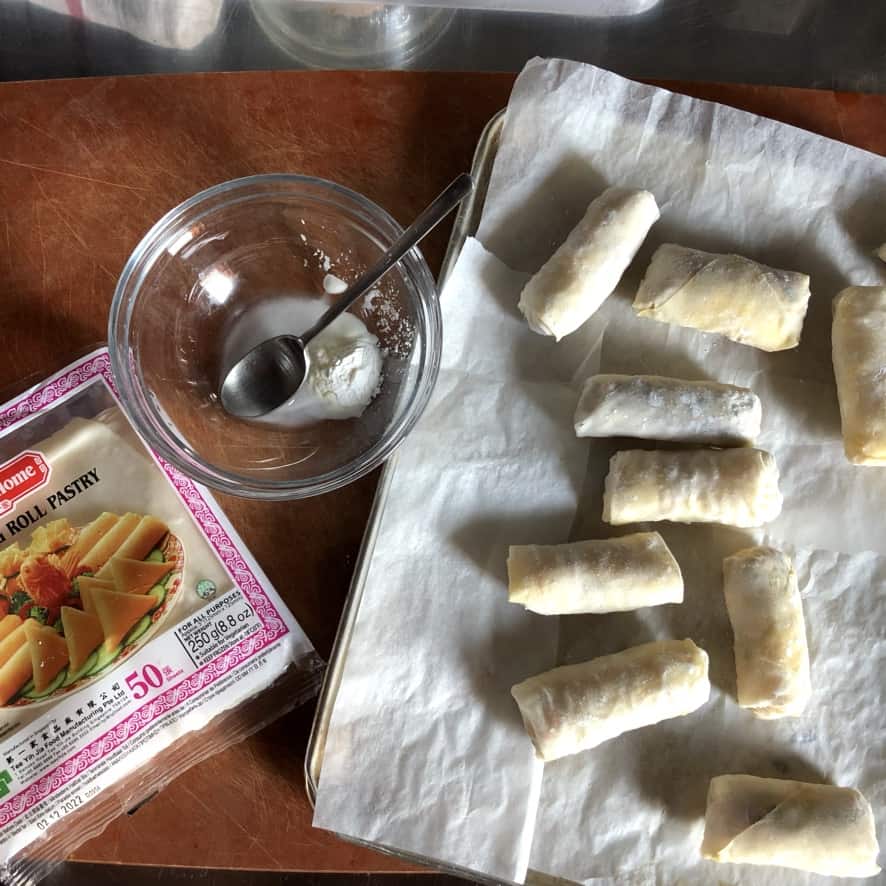
Use a cornstarch slurry to seal spring rolls. Cornstarch and water mixed together create the "glue" that's used to seal spring rolls so they stay closed during the fry time.
And it also leaves them perfectly golden brown and unblemished when they're fried, unlike an egg wash (a beaten egg), which can burn and create darker spots that aren't as pretty. That said, an egg wash will seal spring rolls up nicely, they're just not as pretty if that matters to you. Use what you have.
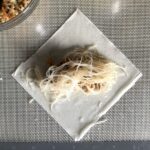
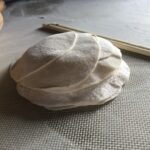
- Place a spring roll wrapper on a work surface with one of the corners pointing toward your body (6 o'clock position) and the other corner at the 12 o'clock position. Depending on the size of your spring roll wrapper (small or large) add the appropriate amount of pork filling and noodles to the center (remember do not over-stuff them) leaving an empty perimeter around the edge. *see step-by-step photos for reference
- For smaller spring roll wrappers dip your finger into the cornstarch slurry and brush two opposite sides of the wrapper and begin by rolling the bottom wrapper (at the 6 o'clock position) up and over the filling towards the top corner (at the 12 o'clock position), then fold the other two sides in from the sides (using more slurry to help seal as needed) and roll it up like a burrito using a little more slurry to seal the last corner.
- For larger spring roll wrappers it's not necessary to use as much of the cornstarch slurry to help seal the wrappers because they're large enough to hold the filling and fold over themselves without needing the extra "glue" to keep everything closed. You'll just need to add the cornstarch slurry at the very end on the last corner to seal them.
Keep spring roll wrappers covered with a slightly damp kitchen towel so they don't dry out. Cover them loosely with a damp kitchen towel while you work on filling the spring rolls. It's also not a bad idea to pick up an extra package of wrappers in case you have some that tear, or you end up with a little extra filling you want to use.
If I have any leftover wrappers, I stuff a damp paper towel inside the package directly on top of the wrappers, seal them up tightly (taping the package closed) wrap it in sustainable cling film, and put it into a freezer bag and pop them back into the freezer. I've never had a problem with using them after being stored this way. While it's not ideal, it's a great way to make sure you don't waste them.


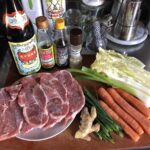
Pork and Chive Spring Rolls w/Glass Noodles & Vegetables Ingredients
For this spring roll recipe, I ground the meat myself using inexpensive fatty pork shoulder steaks, but you can buy fatty pre-ground pork. To the pork, I've added chives, sautéed cabbage, and carrots (for deeper flavor and natural sweetness), and a ginger-infused sauce that rounds out the seasoning without overwhelming it.
FOR THE FILLING
- ½ pound of pre-ground fatty pork (OR 1 pound fatty pork shoulder meat) (225g)
- ¼ pound (about 1 ¼ cups) napa cabbage, shredded and finely chopped (115g)
- ½ pound (about 2 ½ cups) carrots, julienned (or grated) (225g)
- 3 tablespoons (1 ¼ ounces) chives (or scallions, green parts only) finely minced (10g)*
- 3 to 4 slices fresh ginger (¼ ounce), (5g)
- 1 tablespoon Shaoxing wine (15g)**
- 1 tablespoon light soy sauce (15g) (or sub regular soy)
- 1 tablespoon chicken or vegetable stock (or ginger-infused water) (15g)***
- ¼ teaspoon toasted sesame oil (1g)
- ⅛ teaspoon white pepper (0.25g)
- ¼ teaspoon kosher salt, or more to taste (1g)
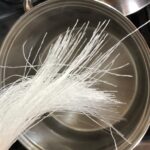
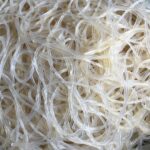
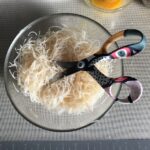
- 8 ounces mung bean glass noodles (225g)
FOR ASSEMBLING THE SPRING ROLLS
- 1 tablespoon cornstarch (7.5g) plus ½ cup of water (118g) combined (cornstarch slurry to seal the spring rolls)
- one 50ct package of TYJ Spring Roll Pastry wrappers (250g)
DIPPING SAUCE OPTION 1
- ⅓ cup Chinese black vinegar (or rice wine vinegar) (75g)
- 2 ½ tablespoons regular soy sauce (35g)
- 1 tablespoon warm water (15g)
- 2 tablespoons sugar (30g)
- 1 teaspoon toasted sesame seeds (optional) (3g)
- chili oil or sambal to taste (optional)
DIPPING SAUCE OPTION 2
- 2 tablespoons regular soy sauce (30g)
- 1 teaspoon rice wine vinegar, or more to taste (5g)
- ¼ teaspoon toasted sesame oil, or more to taste (1g)
- 1 tablespoon warm water (15g)
- 1 teaspoon sugar (5g)
- 1 teaspoon toasted sesame seeds (3g)
- chives, finely diced (optional)
*See notes in the recipe card for substitutions.

How to Make Easy Homemade Pork and Chive Spring Rolls w/Glass Noodles & Vegetables
Spring rolls are so easy to make at home, and if you have a good kitchen helper, it makes the task go by even more quickly. Be sure to use a cornstarch slurry to seal the spring rolls if you care about having a clean, finished look.
If you don't have cornstarch, use potato starch or one beaten egg (egg wash), but it will create darker spots on the outside as they fry. They'll still taste the same, though, they just won't look as pretty. Use what you've got.
- Steep the ginger in the pork filling seasoning. Add the Shaoxing wine, light soy sauce, and ginger to a small bowl and allow the mixture to infuse for 30 minutes or up to an hour while you prepare the rest of the ingredients.
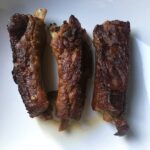
- Grind the pork (or use pre-ground fatty pork and skip to step 3). Place the pork into the freezer for 20 to 30 minutes to firm up and make it easier to slice and move through the grinder but do not let it freeze solid. Cut the pork shoulder into 2-inch cubes. Attach the KitchenAid food grinder attachment with the larger die, and start adding the meat and grinding. You may choose to grind the meat a second time, but I typically just give it all a quick chop with a knife on the cutting board to make sure all the pieces are nice and small.
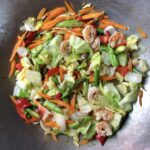
- Sauté the cabbage and carrots. Add ½ teaspoon (2.5g) of extra virgin olive oil to a skillet set over medium heat, add the chopped cabbage and carrots, a pinch of salt, and cook until the vegetables are tender and no moisture remains in the pan (about 20 minutes). Remove the mixture to a bowl to cool completely.
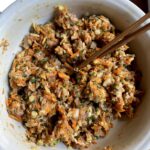
- Make + chill the pork filling. Remove the ginger from the pork filling seasoning and add the white pepper and toasted sesame oil and stir to combine. Add the ground pork and salt to a large mixing bowl with the pork filling seasoning and 1 tablespoon of chicken stock (or ginger-infused water or vegetable stock). Stir the mixture in one direction (clockwise) with chopsticks, or a fork until it becomes visibly "fluffy" and all of the ingredients are well combined and almost paste-like (about 8 to 10 minutes). At this point, the meat should have absorbed all of the liquid. Cover and place the mixture into the fridge to chill and allow the flavors to bloom for at least 15 minutes (or up to an hour).
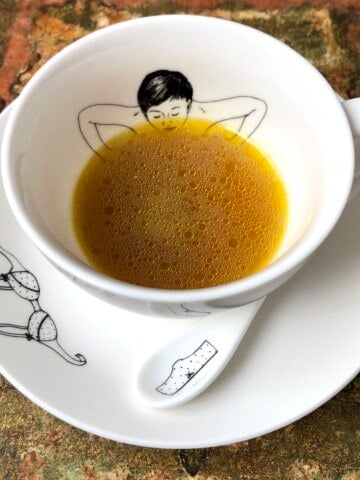
- Make the spring roll dipping sauce. Combine 1 teaspoon of sugar with warm water to dissolve. Add all other ingredients, adjust seasonings if necessary and set aside.
- Test the flavor of the pork filling. Pan fry a small amount of filling in a lightly oiled skillet to make sure the seasonings are just right. Adjust the salt and any seasonings as needed. Once the filling tastes just right, add the chives, sautéed cabbage, and carrots and stir well to combine.
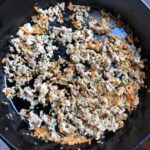
- Cook the spring roll filling. Heat a skillet over medium-high heat and add the pork filling mixture and sauté until the pork is cooked through (about 6 minutes). The mixture should be dry without any visible moisture seeping out. Remove the filling to a bowl and allow it to completely cool to room temperature before assembling the spring rolls.
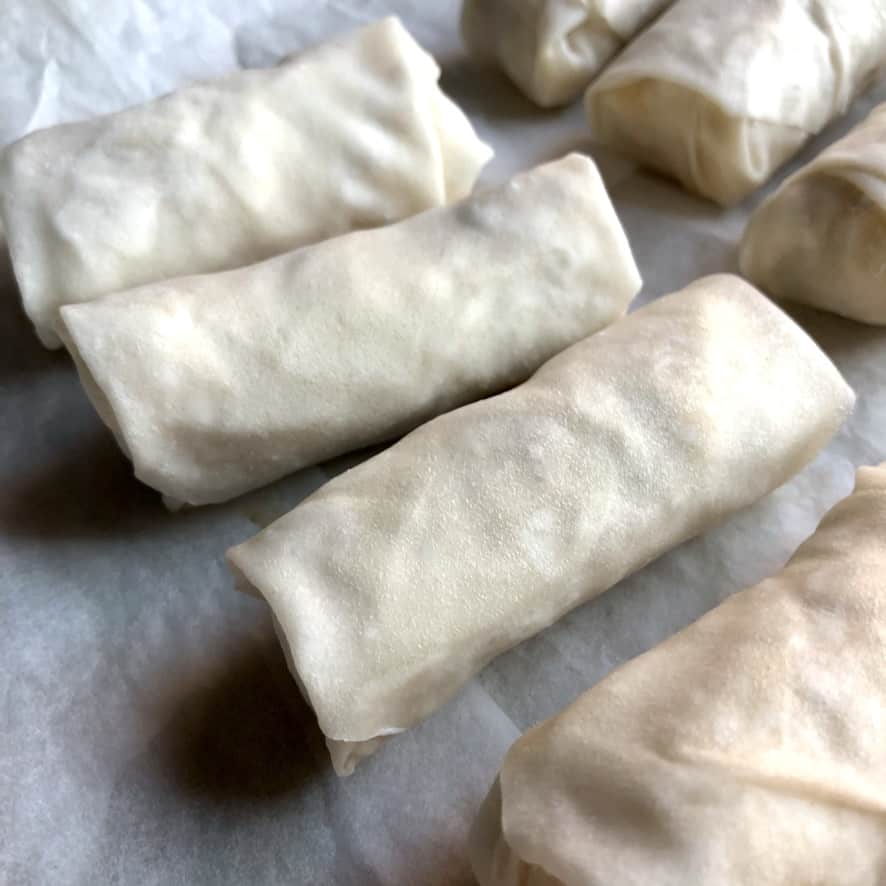
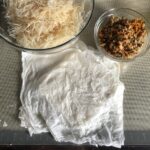
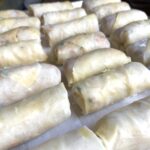
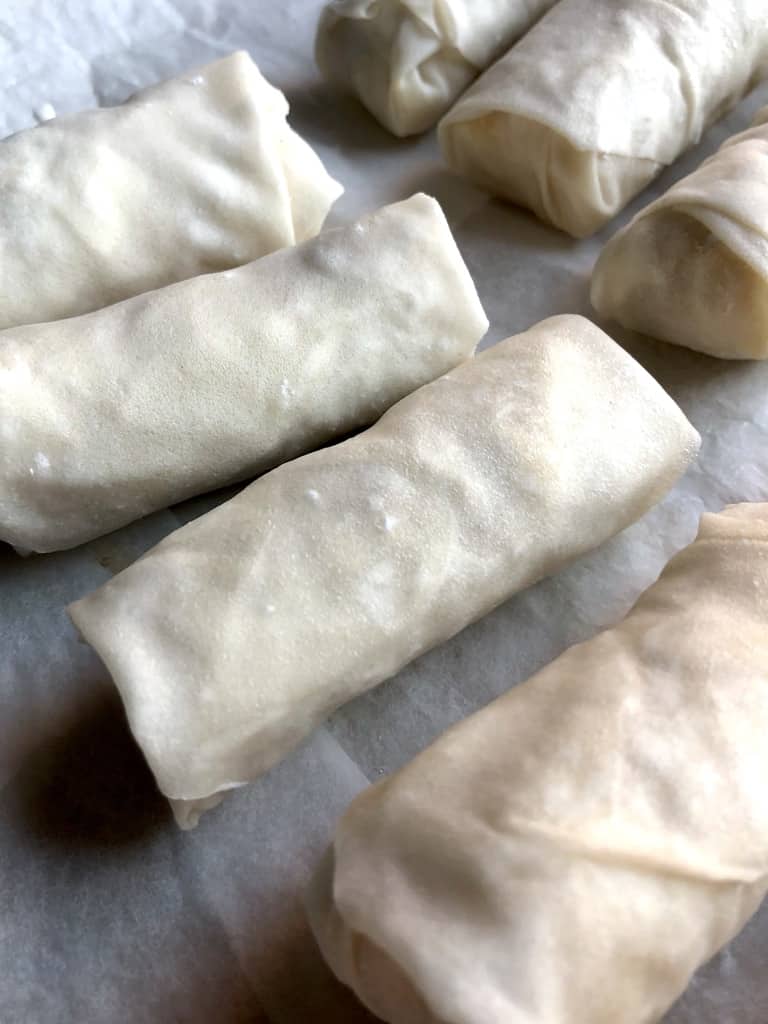
- Assemble the spring rolls. Add a small amount of pork filling to the center of each wrapper and top with noodles. Dip your finger into the cornstarch slurry and brush two opposite sides of the wrapper and roll the bottom wrapper over the filling, then fold the two sides in (using more slurry to help seal as needed) and roll it up like a burrito to seal and create a secure spring roll. Set the filled spring rolls on a parchment-lined tray without touching each other while you continue filling the remaining spring rolls. *See helpful tips and step-by-step recipe photos in the post for more assistance if needed.
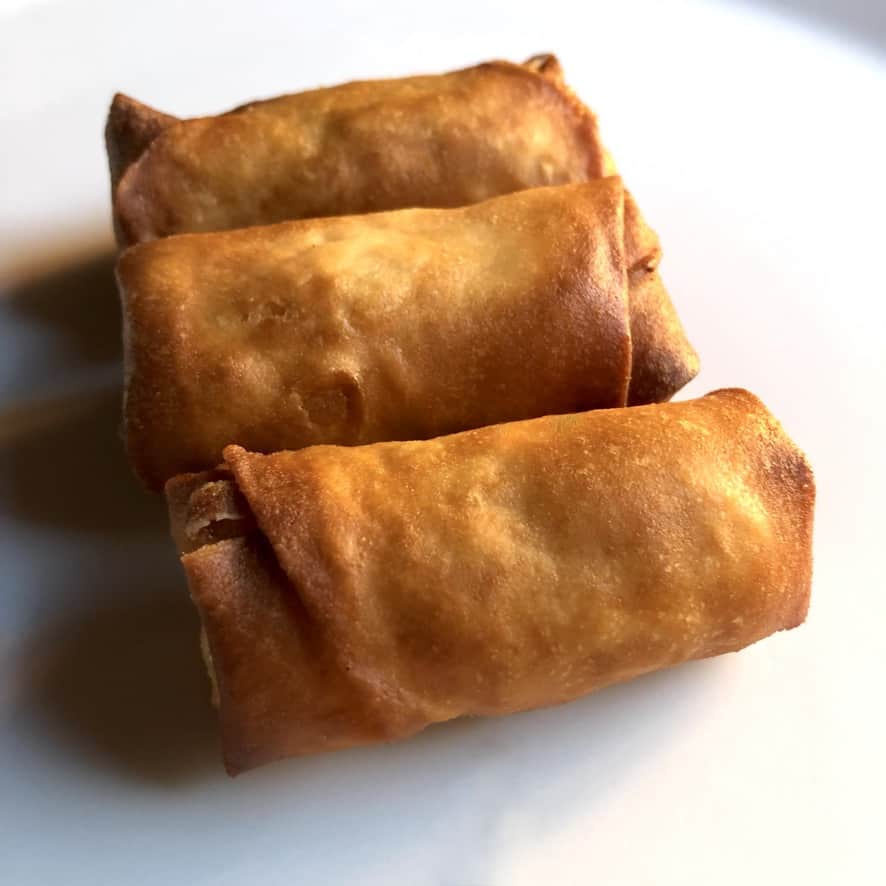
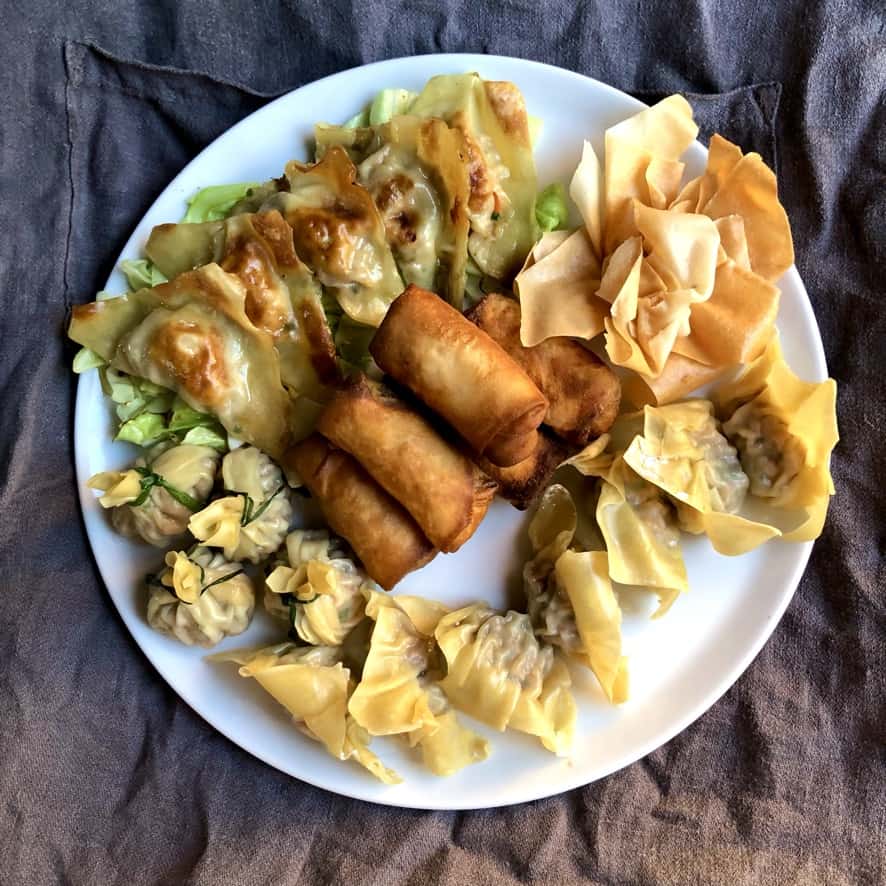
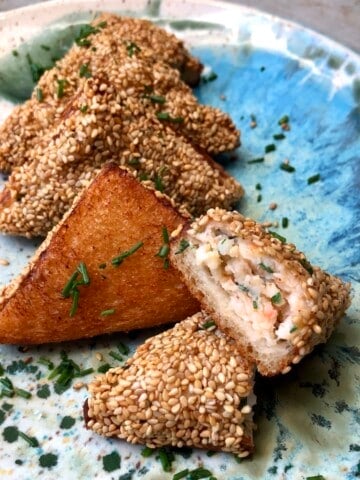
- Fry the spring rolls. Pre-heat a neutral frying oil to 375°F/190°C and add the spring rolls one at a time being sure not to overcrowd the pot. Fry until golden brown, turning occasionally to ensure even browning (about 1 ½ to 2 minutes). Be sure to maintain an oil temperature between 350°F-375°F (180°C-190°C). Remove the spring rolls to a paper towel-lined platter using a slotted spoon and serve with the dipping sauce Enjoy!
Pork and Chive Spring Rolls w/Glass Noodles recipe step-by-step photos


How to Store, Freeze, and Reheat Fried Spring Rolls
To Freeze. Place filled, uncooked spring rolls onto a parchment-lined tray in a single layer (not touching each other) and pop them into the freezer until completely frozen. Once frozen, add them to a freezer bag for up to 3 months. They shouldn't stick to each other at this point, but if they do, don't try to pull them apart, just fry them that way.
To Cook Frozen Spring Rolls. Cook frozen spring rolls just as you would fresh spring rolls, but add a minute or two to the frying time. Don't thaw frozen spring rolls because they can get wet and tear.
Storing Leftover Fried Spring Rolls. You probably won't have this problem (because they're so good!), but if you do end up with leftover fried spring rolls, cover them or place them in a sealed container and pop them into the fridge, and eat them within a couple of days.
To Reheat Fried Spring Rolls. Simply pop them into a preheated 375°F/190°C oven for a few minutes until warmed through. They'll never be as crispy as freshly fried spring rolls, but they're still delicious.

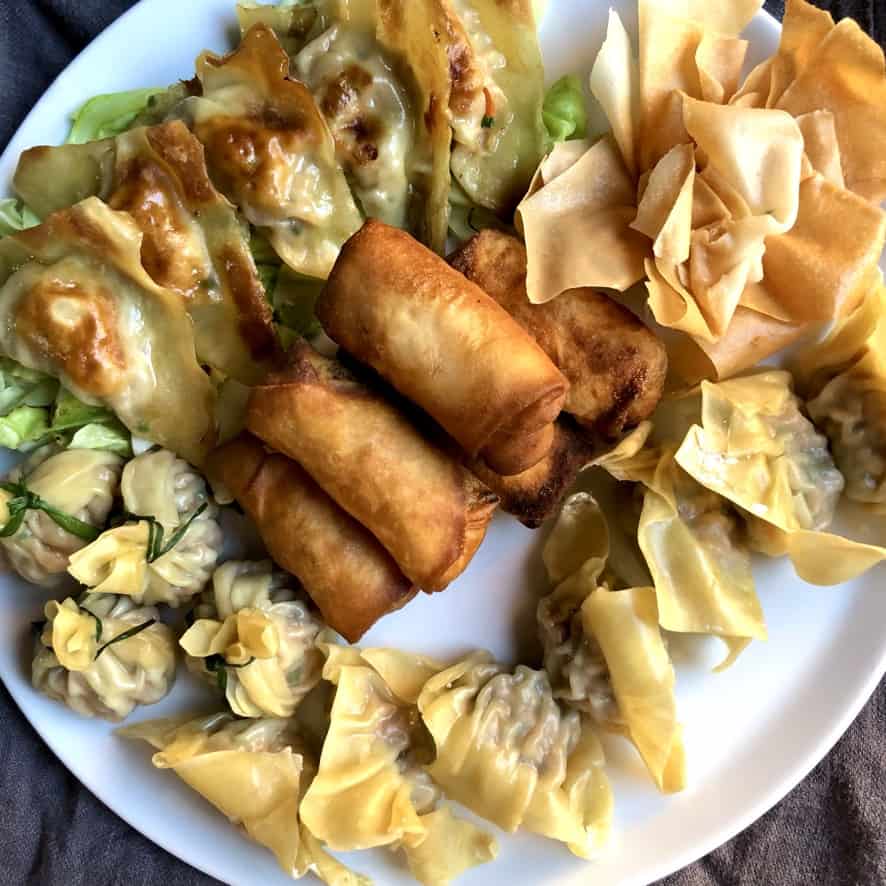
More Delicious Dim Sum & Asian-Inspired Dishes
If you're looking for a few other dishes to round out your takeout night in, below are a few of our favorites we think you may also enjoy.
- Lucky Lunar New Year Fried Cherry Pie "Wontons"
- Homemade Chinese Soup Dumplings Xiaolongbao (小笼包) (100% From Scratch)
- Easy Egg Drop Soup with Crispy Fried Wonton Strips (Danhuatang 蛋花湯)
- Thin + Chewy Homemade Chinese Wonton Wrappers
- Easy Homemade 2-Ingredient Chinese Dumpling Dough
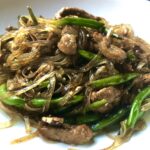
- Takeout Style Pork and Green Bean Stir-Fry w/Glass Noodles
- Easy Pork and Chive Potstickers w/Sautéed Napa Cabbage & Carrots (Jiaozi)
- Chinese Takeout Chicken & Vegetable Stir-Fry w/Glass Noodles (a Family Favorite)
- 20-Minute Singapore Mei Fun Noodles (Shrimp Mei Fun)
- Best Ever Chicken Dumplings Recipe (Plump & Juicy Jiaozi)
- Easy and Delicious Pork Potsticker Recipe (Cantonese Style Jiaozi)
- Easy Shrimp and Vegetable Stir Fry (w/Cantonese Style White Sauce)
- Steamed Pork & Chive Money Bag Dumplings (Beggar's Purse Dumplings)
- Hoisin Garlic-Ginger Oven-Braised Pork Ribs


Let's get started!
Print📖 Recipe

Crispy Pork and Chive Spring Rolls w/Glass Noodles & Vegetables (Sautéed Napa Cabbage, Carrots)
- Total Time: 2 hours 20 minutes
- Yield: 50 (5 inch) Spring Rolls
Description
These feather-light super cripsy spring rolls are filled with a mixture of seasoned pork, chive, cabbage, carrots, and seasoned glass noodles (for that extra chew I crave from my favorite Thai restaurant spring rolls). They're fried just until golden brown and are so delicious you won't miss your regular takeout (or the expense of it). Make extra to freeze.
Ingredients
- ½ pound of pre-ground fatty pork (OR 1 pound fatty pork shoulder meat) (225g)
- ¼ pound (about 1 ¼ cups) napa cabbage, shredded and finely chopped (115g)
- ½ pound (about 2 ½ cups) carrots, julienned (or grated) (225g)
- 3 tablespoons (1 ¼ ounces) chives (or scallions, green parts only) finely minced (10g)*
- 3 to 4 slices fresh ginger (¼ ounce), (5g)
- 1 tablespoon Shaoxing wine (15g)**
- 1 tablespoon light soy sauce (15g) (or sub regular soy)
- 1 tablespoon chicken or vegetable stock (or ginger-infused water) (15g)***
- ¼ teaspoon toasted sesame oil (1g)
- ⅛ teaspoon white pepper (0.25g)
- ¼ teaspoon kosher salt, or more to taste (1g)
- 8 ounces mung bean glass noodles (225g)
- 1 tablespoon cornstarch (7.5g) plus ½ cup of water (118g) combined (cornstarch slurry to seal the spring rolls)
- one 50ct package of TYJ Spring Roll Pastry wrappers (250g)
- ⅓ cup Chinese black vinegar (or rice wine vinegar) (75g)
- 2 ½ tablespoons regular soy sauce (35g)
- 1 tablespoon warm water (15g)
- 2 tablespoons sugar (30g)
- 1 teaspoon toasted sesame seeds (optional) (3g)
- chili oil or sambal to taste (optional)
- 2 tablespoons regular soy sauce (30g)
- 1 teaspoon rice wine vinegar, or more to taste (5g)
- ¼ teaspoon toasted sesame oil, or more to taste (1g)
- 1 tablespoon warm water (15g)
- 1 teaspoon sugar (5g)
- 1 teaspoon toasted sesame seeds (3g)
- chives, finely diced (optional)
Instructions
- Steep the ginger in the pork filling seasoning. Add the Shaoxing wine, light soy sauce, and ginger to a small bowl and allow the mixture to infuse for 30 minutes or up to an hour while you prepare the rest of the ingredients.
- Grind the pork (or use pre-ground fatty pork and skip to step 3). Place the pork into the freezer for 20 to 30 minutes to firm up and make it easier to slice and move through the grinder but do not let it freeze solid. Cut the pork shoulder into 2-inch cubes. Attach the KitchenAid food grinder attachment with the larger die, and start adding the meat and grinding. You may choose to grind the meat a second time, but I typically just give it all a quick chop with a knife on the cutting board to make sure all the pieces are nice and small.
- Sauté the cabbage and carrots. Add ½ teaspoon (2.5g) of extra virgin olive oil to a skillet set over medium heat, add the chopped cabbage and carrots, a pinch of salt, and cook until the vegetables are tender and no moisture remains in the pan (about 20 minutes). Remove the mixture to a bowl to cool completely.
- Make + chill the pork filling. Remove the ginger from the pork filling seasoning and add the white pepper and toasted sesame oil and stir to combine. Add the ground pork and salt to a large mixing bowl with the pork filling seasoning and 1 tablespoon of chicken stock (or ginger-infused water or vegetable stock). Stir the mixture in one direction (clockwise) with chopsticks, or a fork until it becomes visibly "fluffy" and all of the ingredients are well combined and almost paste-like (about 8 to 10 minutes). At this point, the meat should have absorbed all of the liquid. Cover and place the mixture into the fridge to chill and allow the flavors to bloom for at least 15 minutes (or up to an hour).
- Make the spring roll dipping sauce. Combine 1 teaspoon of sugar with warm water to dissolve. Add all other ingredients, adjust seasonings if necessary and set aside.
- Test the flavor of the pork filling. Pan fry a small amount of filling in a lightly oiled skillet to make sure the seasonings are just right. Adjust the salt and any seasonings as needed. Once the filling tastes just right, add the chives, sautéed cabbage, and carrots and stir well to combine.
- Cook the spring roll filling. Heat a skillet over medium-high heat and add the pork filling mixture and sauté until the pork is cooked through (about 6 minutes). The mixture should be dry without any visible moisture seeping out. Remove the filling to a bowl and allow it to completely cool to room temperature before assembling the spring rolls.
- Assemble the spring rolls. Add a small amount of pork filling to the center of each wrapper and top with noodles. Dip your finger into the cornstarch slurry and brush two opposite sides of the wrapper and roll the bottom wrapper over the filling, then fold the two sides in (using more slurry to help seal as needed) and roll it up like a burrito to seal and create a secure spring roll. Set the filled spring rolls on a parchment-lined tray without touching each other while you continue filling the remaining spring rolls. *See helpful tips and step-by-step recipe photos in the post for more assistance if needed.
- Fry the spring rolls. Pre-heat a neutral frying oil to 375°F/190°C and add the spring rolls one at a time being sure not to overcrowd the pot. Fry until golden brown, turning occasionally to ensure even browning (about 1 ½ to 2 minutes). Be sure to maintain an oil temperature between 350°F-375°F (180°C-190°C). Remove the spring rolls to a paper towel-lined platter using a slotted spoon and serve with the dipping sauce Enjoy!
Notes
FILLING & WRAPPING SPRING ROLLS
- Place a spring roll wrapper on a work surface with one of the corners pointing toward your body (6 o'clock position) and the other corner at the 12 o'clock position. Depending on the size of your spring roll wrapper (small or large) add the appropriate amount of pork filling and noodles to the center (remember do not over-stuff them) leaving an empty perimeter around the edge. *see step-by-step photos for reference
- For smaller spring roll wrappers dip your finger into the cornstarch slurry and brush two opposite sides of the wrapper and begin by rolling the bottom wrapper (at the 6 o'clock position) up and over the filling towards the top corner (at the 12 o'clock position), then fold the other two sides in from the sides (using more slurry to help seal as needed) and roll it up like a burrito using a little more slurry to seal the last corner.
- For larger spring roll wrappers it's not necessary to use as much of the cornstarch slurry to help seal the wrappers because they're large enough to hold the filling and fold over themselves without needing the extra "glue" to keep everything closed. You'll just need to add the cornstarch slurry at the very end on the last corner to seal them.
FILLING SUBSTITUTIONS
*If using scallions (which often have a more pungent flavor as compared to chives, you may want to reduce the amount by half or according to your taste.
**If you use high-quality unsalted Shaoxing wine, you may need to increase the amount of salt you add. If you can't find Shaoxing wine, use dry sherry in a 1:1 ratio. If you're thinking about using mirin, it's acceptable if that's all you've got (but it really has a totally different flavor than Shaoxing wine and it's also a bit sweet).
***If using water instead of chicken stock or vegetable stock in the filling, add a few slices of ginger to the water and allow it to infuse for at least 20 minutes before using. When you test fry a little dumpling filling to check for seasonings, you may find that you need to add just a bit more salt to the mixture, or a dash of soy sauce.
- Prep Time: 40 minutes
- Refrigerating + Cooling Time: 1 hour
- Cook Time: 40 minutes
- Category: Dim Sum + Dumplings
- Method: Deep Fried, Shallow-Fried, or Air Fryer
- Cuisine: Chinese
Nutrition
- Serving Size: 2 Small Spring Rolls


Yan says
These are perfect (and cheap) noodles even without added msg! My family loves them😍.
Angelika says
Delicious! Much better than takeout and it's packed with goodies (not just filler). This recipe is a keeper😊!
Sallie says
Great recipe!