It takes just 8 to 10 minutes to pan-sear thick-cut steaks at home, which is perfect for those of you who want to spend more time eating and less time cooking (without compromising on flavor or needing to fire up the grill).
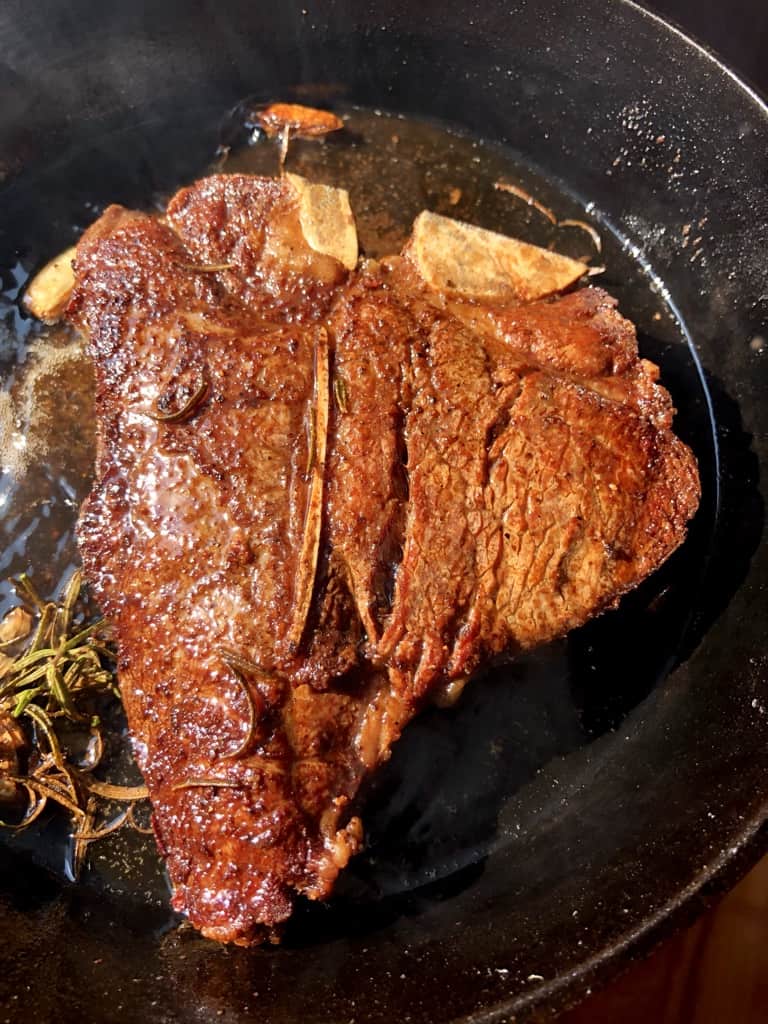
We enjoy pan-searing steak at home because it's delicious and a really convenient way to cook beef. This Italian Bistecca alla Fiorentina recipe (aka Porterhouse steak from Chianina cattle) is basted with clarified butter, which helps it cook a bit faster and more importantly, helps create that tasty crust we particularly love about a good pan-seared steak.
Using clarified butter also means less smoke in the kitchen without compromising on flavor, while whole garlic cloves and rosemary give the steak even more flavor.


When to Salt Steak Before Cooking It
There are lots of opinions about this, but I've always found that salting steak just before you sear it, works well for us.
No matter when I decide to salt (well in advance of cooking, or just before), when I first get the steak home I remove it from the package, pat it completely dry on both sides, place it onto a wire rack sitting on top of a small platter, and pop it into the refrigerator overnight and up to a couple of days.
This allows the outside to dry even more and helps create a better crusty golden brown sear when it hits the hot skillet. And the crust is where so much of the delicious flavor comes from in a steak (especially if you're working with less expensive cuts of beef).
Depending on how much time you have, here are 3 good options for when to salt a steak before cooking it:
Salt steaks right before cooking. Salt the steak really well (using kosher salt) and pepper it, and get it into the pan right away.
Salt steaks 2 to 3 days before cooking. Salting the steak in advance allows the process of osmosis to take place, where the kosher salt draws out the moisture from the steak as it's resting in the refrigerator (at about the 20-30 minute range after having been salted).
This is when you'll see pools of moisture "or steak juice" beading up on top of the steak, but giving it just 10 to 20 minutes more in the fridge at this point allows the moisture to reincorporate back into the steak.
Then, allowing the steak to stay in the fridge after this point will again help the steak's surface to become dry, which will help with achieving a nicely browned crust.
Salt steaks at least 1 hour before cooking. If you're in a hurry and want to pre-salt your steak, do so at least 1 hour before you'll be cooking them. For the reasons mentioned above (osmosis of the salt), the steak needs time to reincorporate the moisture that is drawn out from being salted.
If you cook the steaks when the moisture is still pooled on top (and not yet reincorporated back into the steak), you've just lost all that moisture that would've kept your steak from becoming dry and chewy.
Jump to:
- When to Salt Steak Before Cooking It
- What Kind of Steak is Best to Pan-Sear?
- Homemade Pan-Seared Butter-Basted Thick-Cut Steak Ingredients
- How to Pan-Sear Thick-Cut Steak
- Pan-Seared Butter-Basted Thick-Cut Steak step-by-step recipe photos
- What Temperature Should Steak Be Cooked To?
- What Should I Serve with Butter-Basted Pan-Seared Steak?
- Best Tips & Techniques For How to Cook a Restaurant-Quality Steak at Home
- Let's get started!
- 📖 Recipe


What Kind of Steak is Best to Pan-Sear?
For this post, I've used a bone-in Tuscan steak cut called "Bistecca alla Fiorentina" or "steak in the style of Florence". It's famous in Italy and is cut from the young cattle of the Chianina breed from either the "vitellone" or the heifer "scottona". Chianina, pronounced (kee-ah-nee-nah), is the largest breed of cattle in the world (they're huge and also really cute).
They are a white to silver color with black skin and tongues, which makes them more resistant to disease. They're a very muscular breed, so their meat is prized for being lean, yet also marbled and full of flavor.
In the US, the equivalent steak is a USDA Prime Porterhouse which comes from the short loin of the cattle (near the rear so it includes a larger piece of the tenderloin). But any thick-cut steak that's at least 1 ½ to 2 inches thick is great to use for this recipe.
We love a good USDA Prime dry-aged, well-marbled steak, but as you'll see, even the grass-fed Italian steak we used (with less marbling) is still tasty. If you can afford Prime, do it because the meat is usually very well-marbled and comes from cows under 42 months of age, and you can definitely taste the difference.
But if that's not within your budget, opt for USDA Choice. You'll still end up with a great-tasting homemade steak.
- NY Strip
- Ribeye
- Kansas City Strip
- T-Bone
- Porterhouse


Homemade Pan-Seared Butter-Basted Thick-Cut Steak Ingredients
You only need 4 or 5 simple ingredients to make restaurant-quality steak at home. Basting with butter not only adds flavor to the finished steak, but it also allows the steak to cook a little more quickly and ensures you end up with a beautiful golden brown crust on the outside of your steak.
You may substitute regular butter for clarified butter, which is excellent, just know it will smoke a lot and has a tendency to burn if you add it too early in the cooking process. This is because the milk proteins (which consist of sugar, minerals, and proteins) in butter have a lower smoke point than pure butterfat (aka clarified butter or ghee).
When you clarify butter (or melt it to the point that it separates into 3 layers) and skim off the "impurities" from the top, you're left with the golden middle layer (the pure butterfat), which has a much higher smoke point because it no longer contains the sugar, minerals, and proteins that burn easily.
The cloudy bottom layer consists of milk solids and water. These sugars, minerals, and proteins in the milk solids equal flavor. I like to reserve the milk solids and anything we skim off of the butter as it's clarifying and use it as a finishing "oil". So, nothing goes to waste and you end up with the best flavor.
- 1 large bone-in Porterhouse, T-Bone, Ribeye, or other thick-cut steak (24 to 32 ounces) (680g-900g)
- ¼ cup grapeseed oil (or other neutral cooking oil with a high smoke point) (60g)
- ¼ cup clarified butter, milk solids reserved (60g) (sub room temperature butter)
- kosher salt and pepper to taste
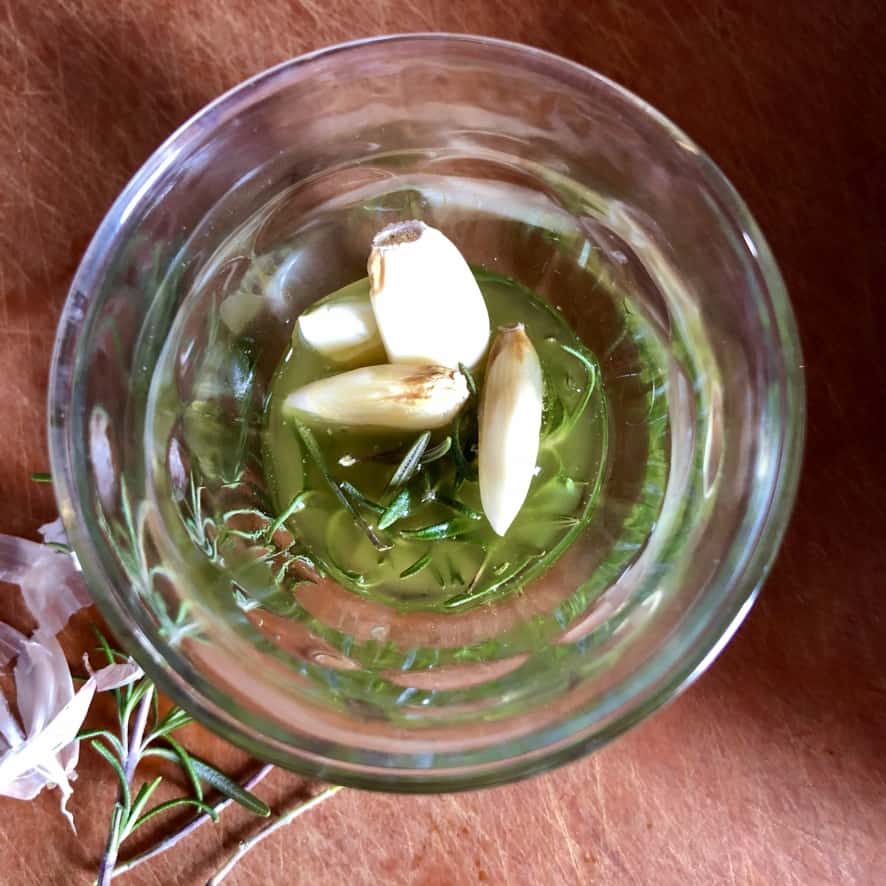
- fresh rosemary or thyme (optional but recommended)
- 3 whole garlic cloves, smashed (optional but recommended)


Although it's not necessary, I sometimes ask for some of the trimmings to be left on the steak so I can remove them myself at home and render them to be used as part of the oil to sear the steak.


How to Pan-Sear Thick-Cut Steak
Cooking thick-cut steak at home is easier than you might think. And pan-searing steak gives you flexibility, especially in the colder months when you don't feel like firing up the grill. I prefer to use my well-seasoned cast-iron skillet, but you can also use high-quality stainless steel (or even an aluminum skillet) with excellent results.
It's important to sear steaks in a skillet with even heat distribution, which is why a heavy-gauge skillet provides the best results. Unlike thinner-cut steaks (which I only flip once during cooking), I tend to flip thicker steaks periodically throughout the duration of cooking while simultaneously basting them with butter in order to get a nicely browned and evenly cooked steak.
- Dry the steak. Pat the steak completely dry with paper towels (or a clean kitchen towel) on all sides and refrigerate uncovered (or loosely covered if you prefer) overnight and up to 3 days.
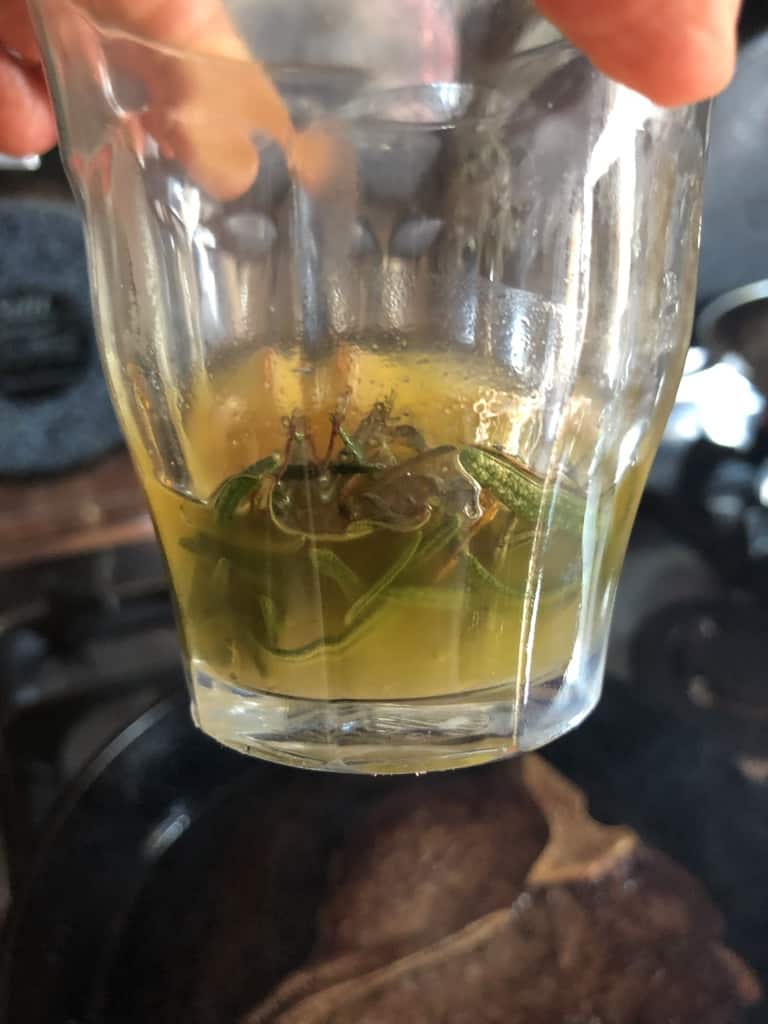
- Make the clarified butter. In a small pot, heat ¼ cup of unsalted butter over medium-low heat for 15 to 20 minutes. The mixture will separate into three distinctive layers (the top foamy layer, the clear golden middle layer (pure butterfat), and the milky bottom layer that contains the milk solids and water. Skim off any white foam that floats to the top as the butter melts until there is only a layer of golden butterfat. Slowly pour off the golden butterfat into a small glass. Then add the milky solids at the bottom of the pan to the bowl with the foam you skimmed off as the butter melted. Set aside.
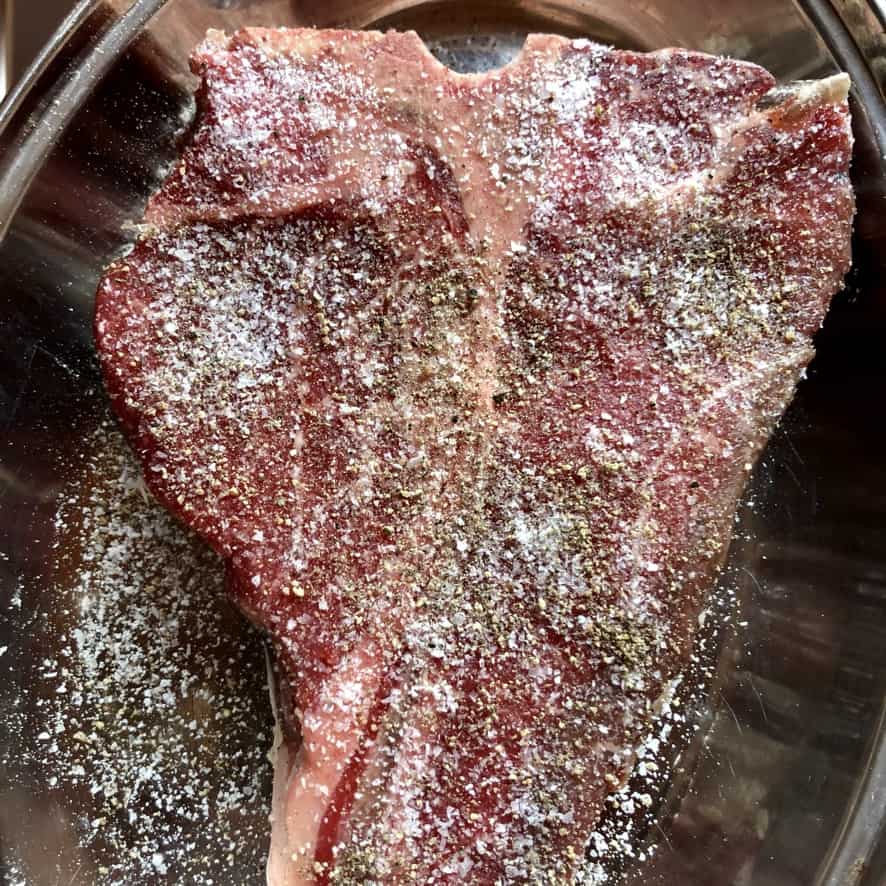
- Heat the oil & season the steak. Add the oil to the skillet and heat over high heat just until it begins to smoke. While the oil is heating, season the steak liberally with kosher salt and freshly cracked black pepper on all sides (even the edges).
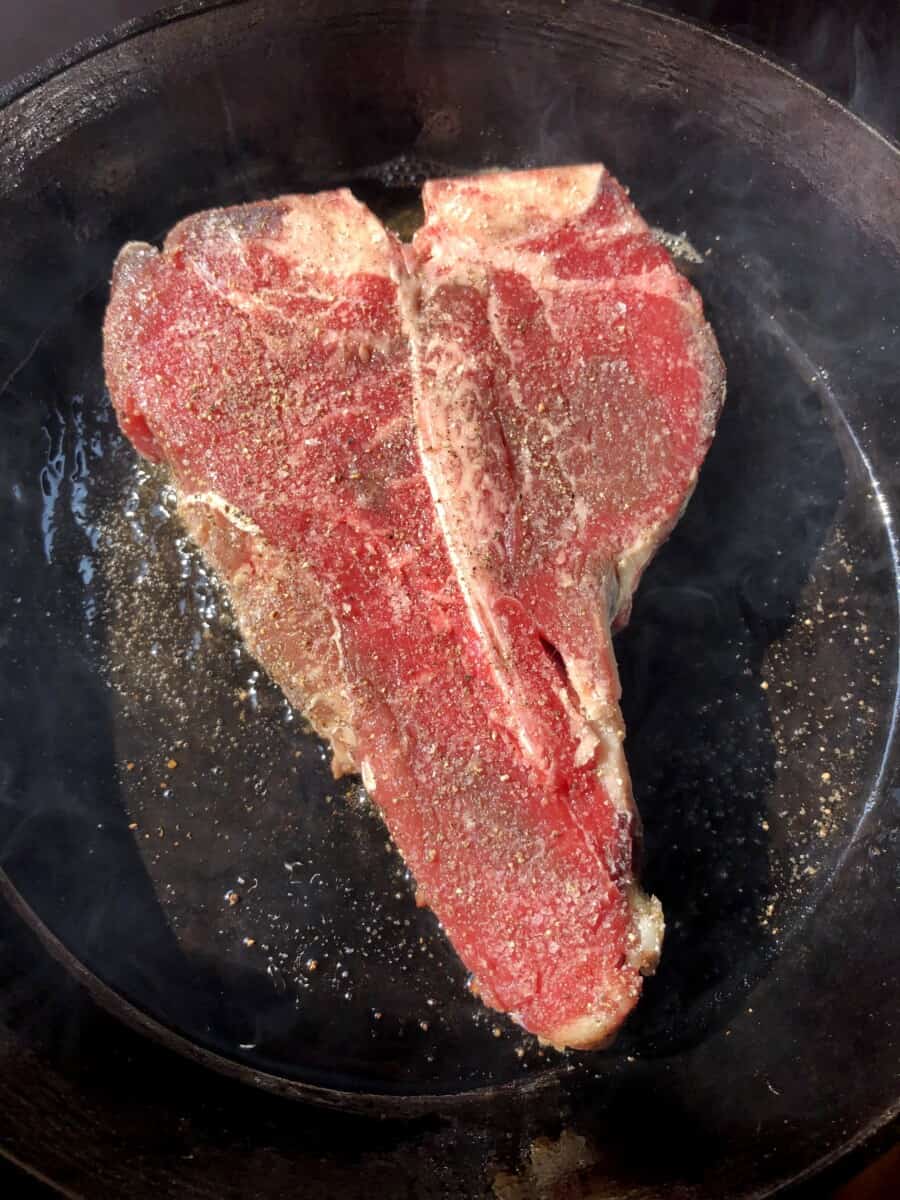
- Sear the steak. When the skillet first begins to smoke, add the steak to the hot pan and allow it to sear without moving it for about 2 minutes. Flip it over and sear it for another 2 minutes.
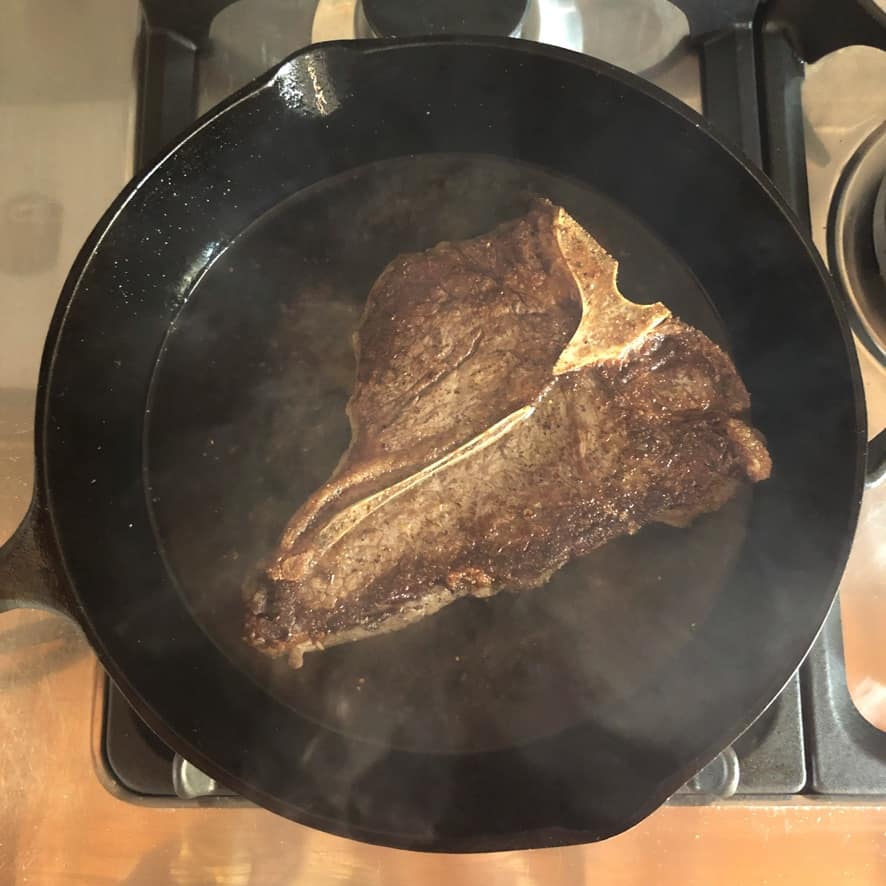
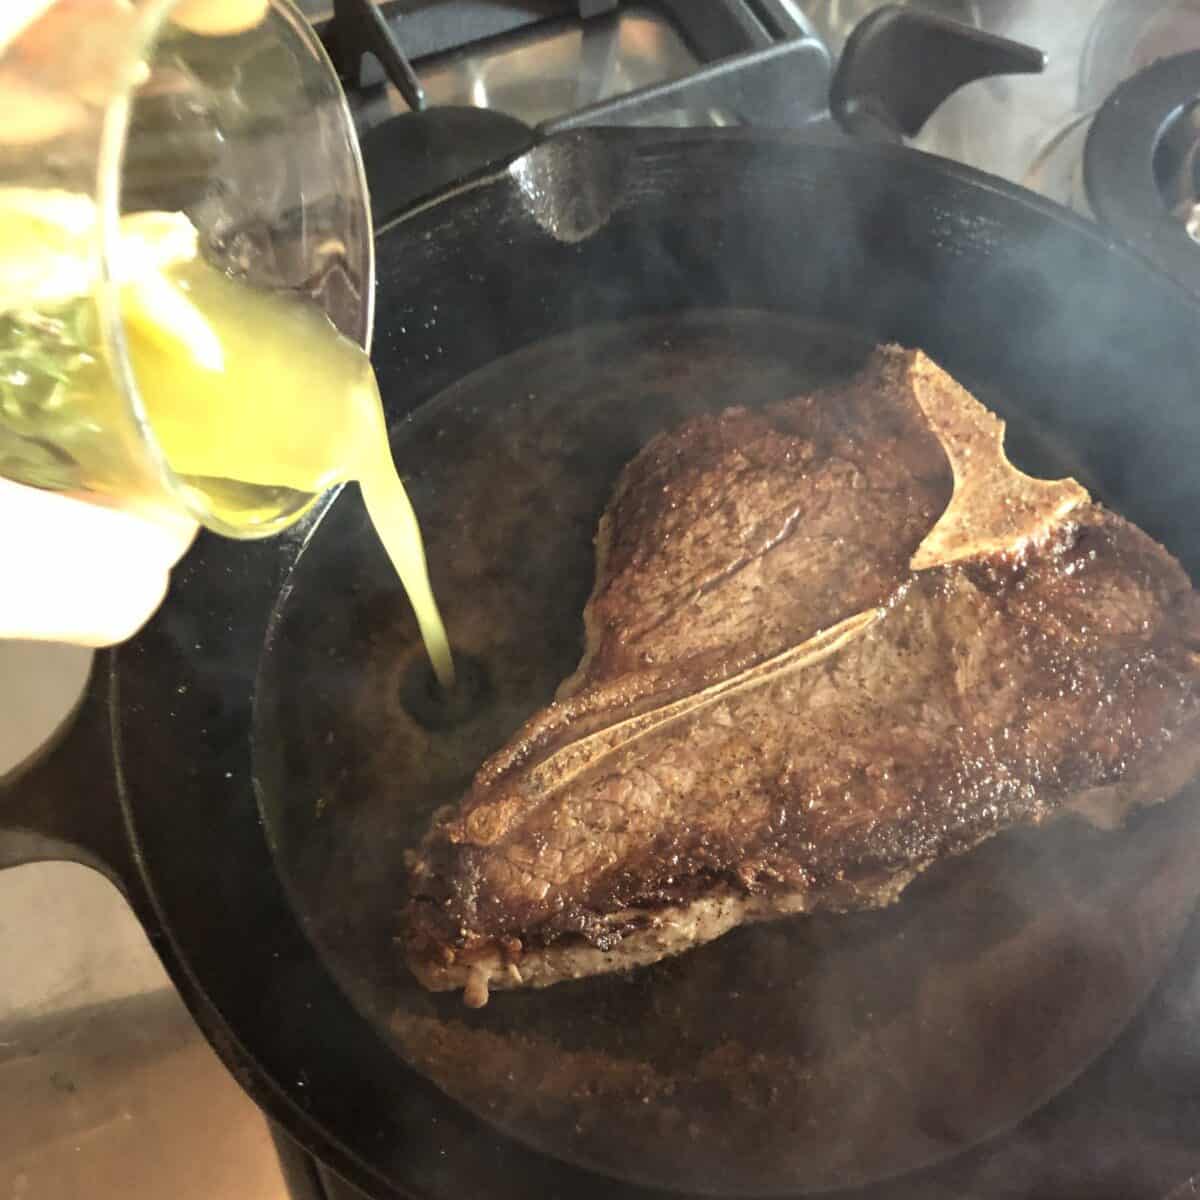
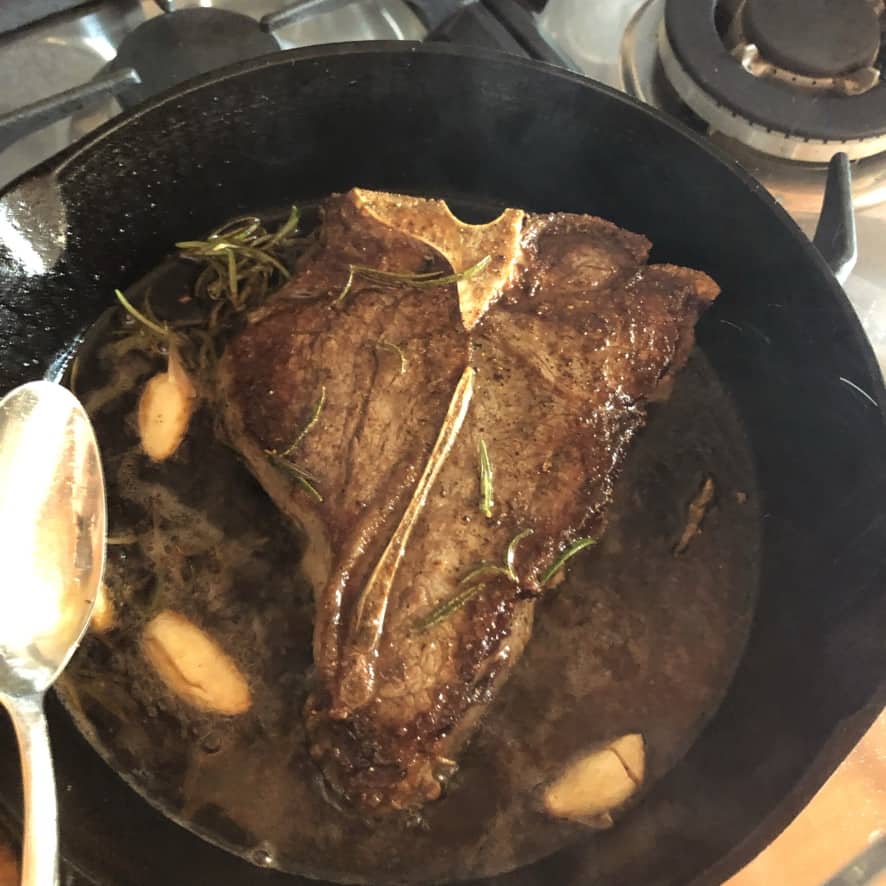
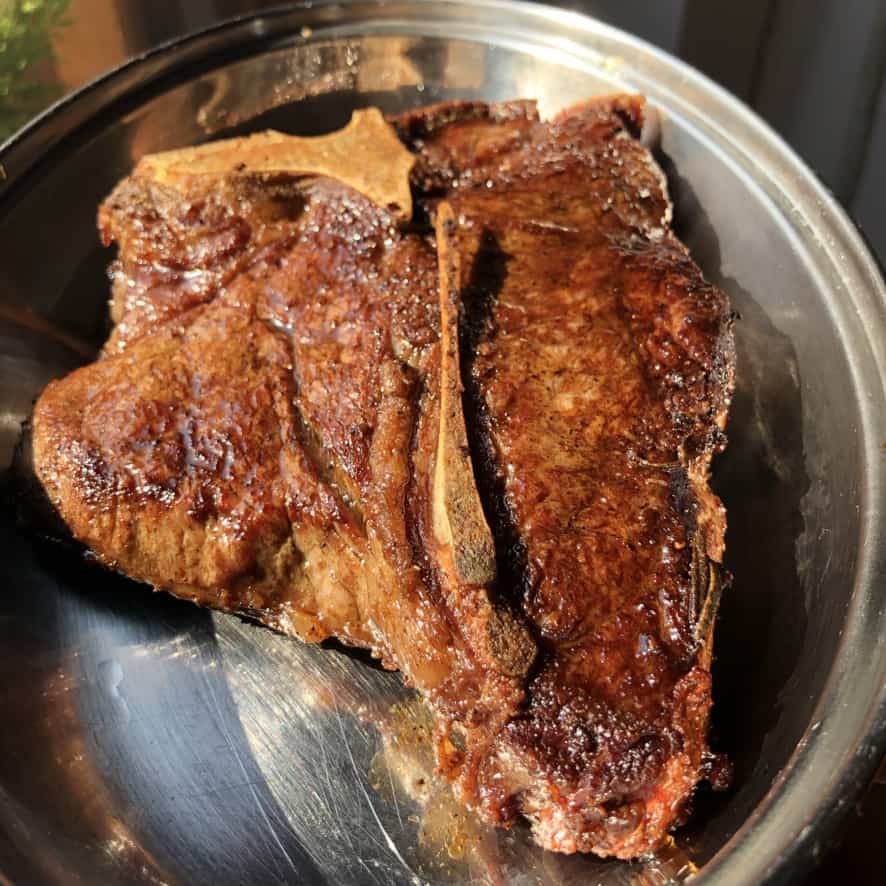
- Add the aromatics and clarified butter & baste the steak. After 4 minutes of cooking time has passed, add the garlic cloves, rosemary, and clarified butter, and continue to cook, flipping the steak over periodically while using a large spoon to baste any lighter spots on the steak's surface. *Tilting the pan helps to pool the butter in one spot, making it easier to pick up with the spoon. Continue basting and flipping the steak for a total of 8 to 10 minutes, or until a thermometer inserted into the thickest part of the steak registers 120°F to 125°F (49°C to 52°C) for medium-rare or 130°F (54°C) for medium. Immediately remove the steak to a platter.
- Let the steak rest. Pour the pan mixture over the top of the steak, and also, if desired, pour the reserved milk solids, etc, leftover from making the clarified butter. Allow the steak to rest for 5 to 10 minutes before serving, Enjoy!
Pan-Seared Butter-Basted Thick-Cut Steak step-by-step recipe photos


What Temperature Should Steak Be Cooked To?
Use this helpful internal temperature guide for cooking all kinds of steak at home. All you need is a meat thermometer or enough experience cooking steak at home to avoid ever overcooking it.
- Extra Rare or Blue (bleu) [80-100°F/28-36°C] Barely warm, deep red color, soft and squishy texture
- Rare [120-125°F/49-51°C] Bright pink center and pinkish around the exterior, texture is soft
- Medium-Rare [130-135°F/55-57°C] Very pink center with slightly brown exterior, slightly hot, texture is starting to firm up and yields just slightly when touched
- Medium [140-145°F/60-63°C] Light pink center with brown exterior and hot throughout, texture is starting to firm up and yields just slightly when touched, similar to Medium-Rare
- Well [150-155°F/65-69°C] Mostly grey-brown throughout with only the slightest hint of pink in the center, firm texture
- Well done [160°F+/71°C+] Consistently grey or brown throughout and hot, firm, or hard texture


What Should I Serve with Butter-Basted Pan-Seared Steak?
We usually enjoy a mixed green salad with sweet grape tomatoes with our bone-in steak, but in case you're looking to make it a little fancier we've got you covered. Here are a few tasty surf and turf ideas and delicious wholesome sides to pair with your next steak dinner at home.
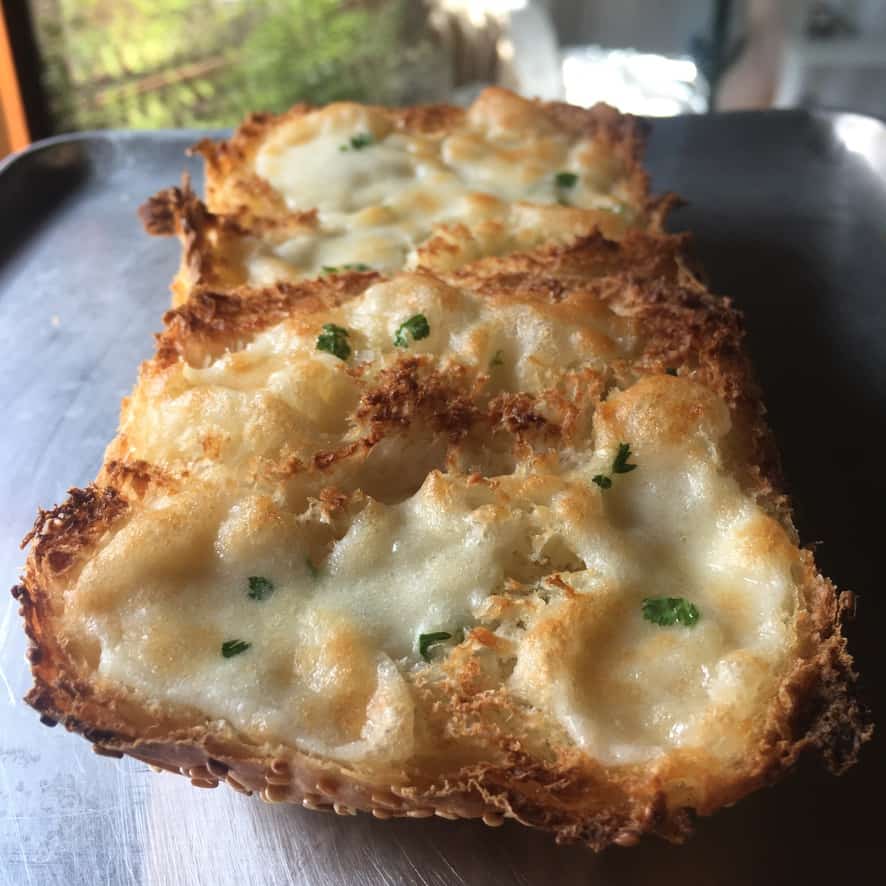
- toasted garlic bread with mozzarella-parm butter
- Pan-Seared Purple Cauliflower Sesame Steaks
- Diver Scallops au Gratin (Capesante Gratinate)
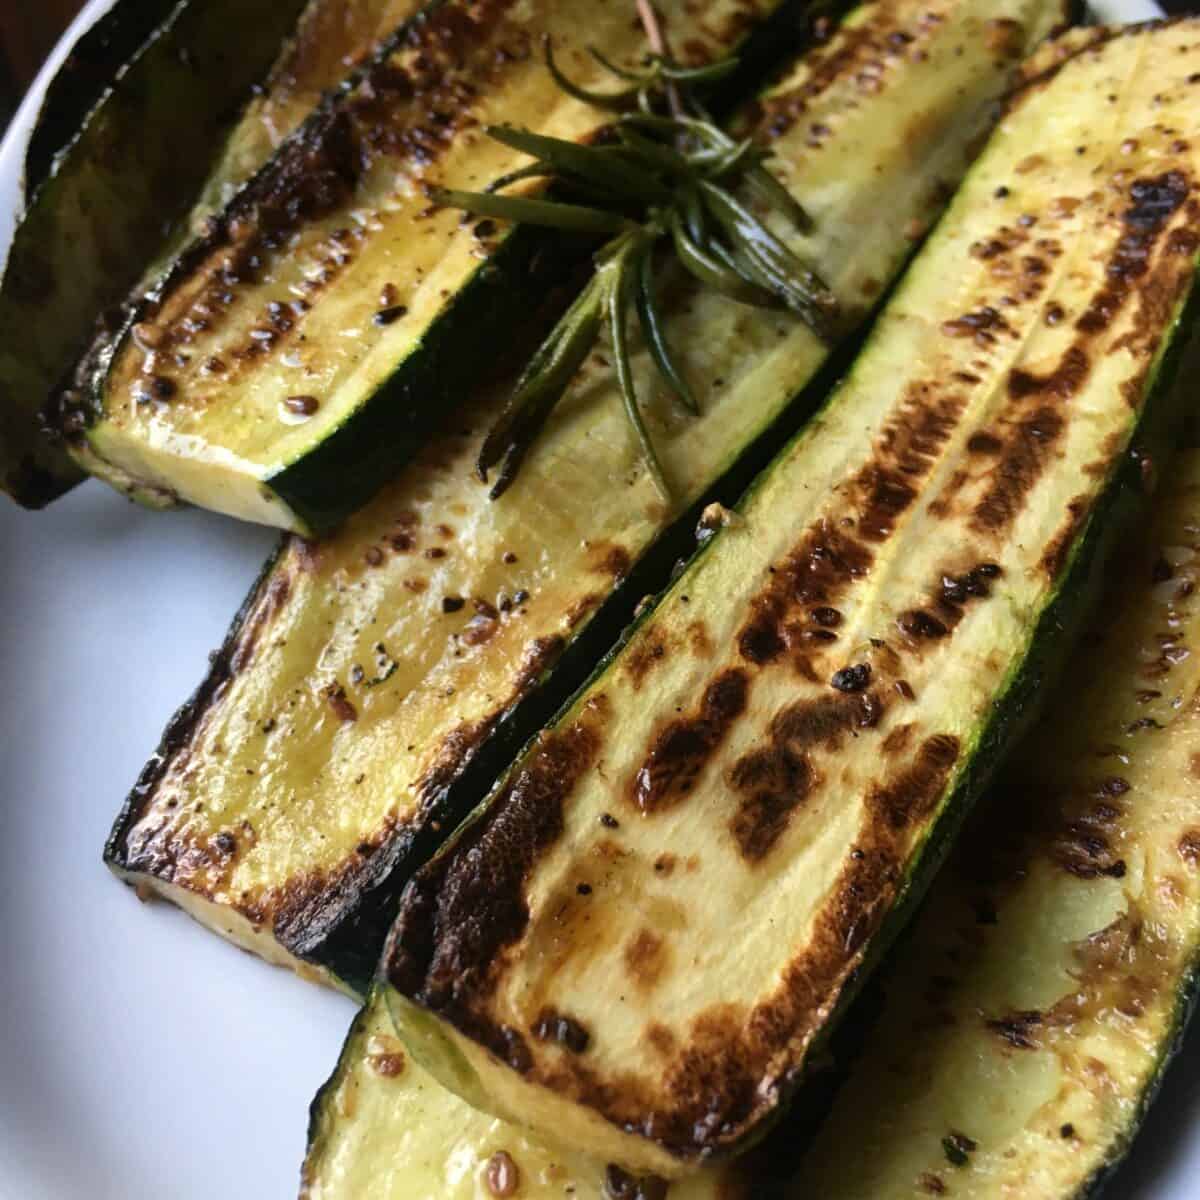
- Perfect Pan-Seared Zucchini
- Summer Starburst Vinaigrette (a favorite salad dressing)
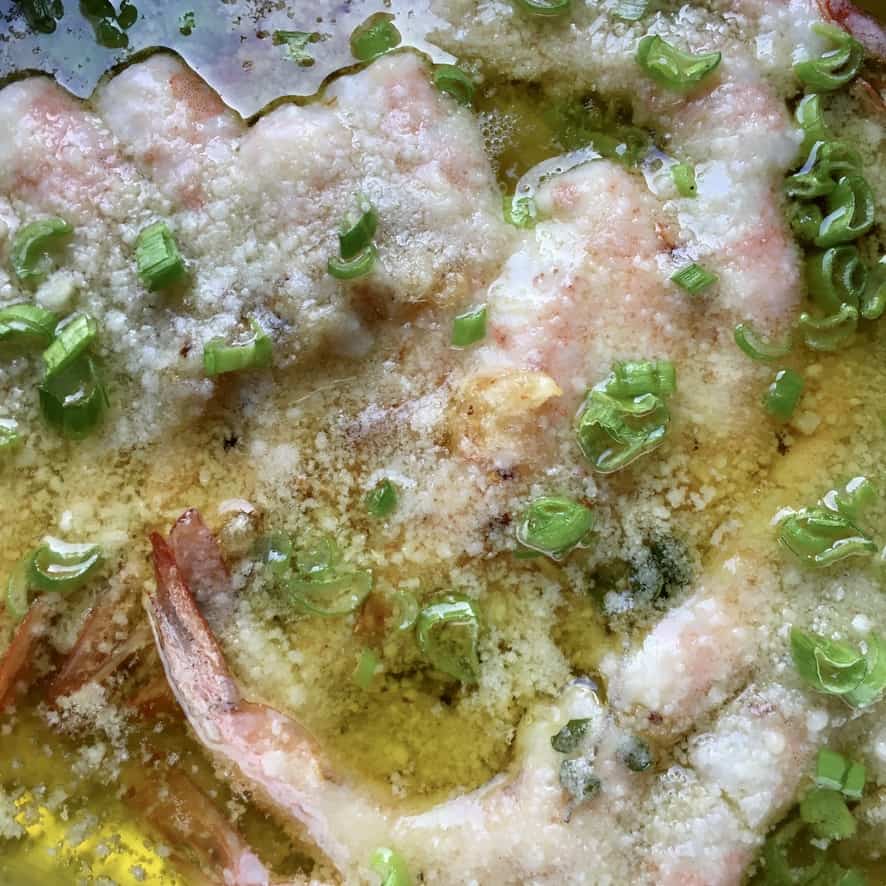
- 4-Minute Perfect Pan-Seared Shrimp
- Easy & Delicious Shrimp Au Gratin (Gamberi Gratinati)
- Shrimp Scampi for Two (or a Crowd)

Best Tips & Techniques For How to Cook a Restaurant-Quality Steak at Home
Beef is a favorite in our house, although we eat much less of it nowadays, and when we do, we get it from our local butcher, Bruno, who sources sustainably.
The meat tastes great, and we get to support local Italian farmers. But since we eat less of it, when it is on the menu, I want to make sure that it gets treated right, especially the more expensive steak cuts.
Below are a few tips for how to cook perfectly pan-seared steak so you can avoid any blunders:
Use a well-seasoned cast-iron skillet or another heavy-gauge skillet. It helps to use a heavy-bottomed pan with good even heat distribution (cast-iron, carbon steel, 7-ply stainless steel like All-Clad, or even All-Clad heavy-duty aluminum with multiple layers).
Dry the steak before you cook it. No wet beef here. You need to have dry steaks so that when they hit the hot oil, they will start to brown. If you don't dry the steaks, they will have blood (moisture) that will start steaming the steaks when they hit the pan, ultimately giving you grey steaks and zero chance of a good "crust" without overcooking the steak.
If the steak is really moist or has excess blood simply pat them dry with a paper towel before seasoning and adding the pieces to the hot skillet. If you're really serious about a dry steak surface (for more expensive cuts like ribeye, NY strip, filet, and t-bone), dry it completely and leave it in the fridge overnight on a platter. This will help dry out the surface even better.
Season the steaks well. Good beef really only needs salt and freshly cracked black pepper. But if you like Lawry's or Montreal Steak Seasoning (or any other spice blend), use it. Your kitchen, your steak.
I use Diamond Crystal kosher salt because the larger salt crystals allow me to know if I've salted it enough. If you end up under-salting the steak remedy this by adding a sprinkle or two of finishing salt (like Maldon sea salt with larger flakes). It will also add a nice crunch to each bite.
*Do not season the steaks until just before putting them into the hot pan. Adding salt draws out moisture (blood in this case), and you already know that a wet steak keeps you from getting a flavorful "crust", or sear.
Use a neutral oil with a high smoke point (400-450°F/204-232°C) to cook steaks. Use vegetable oil, grapeseed oil, clarified butter, or another neutral cooking oil with a high smoke point.
Do not use an extra-virgin olive oil to pan-sear steaks. EVOO has a low smoke point of around 350°F/176°C, which means it would burn before the steaks are properly seared. Plus, everything special about EVOO (the phenols and antioxidants) that make it so healthy would be lost as it oxidizes after going beyond its smoke point (which isn't good for your health). Not only that, it will smoke up your kitchen.
Get the skillet and oil really hot. Add the steaks to the hot pan with oil immediately after it starts to smoke and not before. When the steak makes contact with the pan, it needs to be so hot that it sizzles and sounds like applause.
Have patience.
For thinner steaks (like flank, iron, skirt, or hanger), once you place the steaks into the skillet, do not move them around. Let them have constant contact with the hot pan and the oil so that the browning can take place.
If you move them around or flip them over too soon, you'll miss out on all that extra flavor and beef "crust" you get from a good sear.
After about 2 minutes, you can peek at the underside of the steaks using a pair of tongs, but don't move it around too much. This is one good indicator to help you know when it's a good time to flip them over.
When cooking flank or skirt steak, depending on the size, the meat has a tendency to slightly "curl", which pulls the center somewhat away from the pan.
This is why some people like to put a weight in the middle of the steaks to ensure the center always has direct contact with the pan. You may also use a spatula to press down on the middles while cooking them.
For thicker bone-in steaks (like ribeye, porterhouse, bistecca alla Fiorentina, and T-Bone), it's ok to flip the steaks over periodically while simultaneously basting them with butter and aromatics. This helps ensure even cooking, browning, and helps larger steaks develop a nice golden crust.
Do not add butter or aromatics to the skillet too soon (if using butter at all). Butter, herbs, and garlic cloves are great ways to add flavor to pan-seared steaks. However, if you add them too soon, they'll burn before the steak is cooked through.
It's best to add aromatics about ½ way through the cooking time (after you've flipped the steak over) and start quickly and constantly basting the steak. Alternatively, you may add a pat of butter or compound herb butter to the tops of steaks as they rest just after removing them from the skillet.
For flank, hanger, and skirt steaks I don't usually add butter because they don't need it. However, I do enjoy basting with butter and herbs for thicker steaks like t-bones, ribeyes, filets, and strips.
Use a timer. Setting a timer as soon as your steaks hit the pan really helps you determine how long they need to cook. It's an easy way to not have to think as much about when the steak is going to need to be flipped or finished cooking.
That said, I never leave a steak alone. I check steaks periodically to make sure I have the flame adjusted properly and that they're cooking the way I intended. It's not foolproof to set a timer because several factors are involved with properly cooking steaks.
This includes the cut of meat, the thickness of the steak, whether or not it's bone-in or boneless, and even the type of range and skillet you're using. But using a timer does provide a little extra help with timing, especially if you're busy prepping other sides.
Use a thermometer. It's a great idea to use a thermometer. I personally don't use one for pan-searing (although there have been times I could've benefited from one♡).
But for some people, it makes all the difference and gives them peace of mind, especially when cooking for larger groups or dinner parties. Practice is the best teacher when it comes to making a good cast-iron steak, and beyond experience, a good meat thermometer is always the best tool.
Let's get started!
Print📖 Recipe

How to Cook Restaurant-Quality Steaks at Home (Bistecca Fiorentina)
- Total Time: 13 minutes
- Yield: 2 servings
- Diet: Kosher
Description
It's possible (even for those new to cooking) to make restaurant-quality steak at home. This Italian Bistecca alla Fiorentina (aka Porterhouse steak from Chianina cattle) is basted with clarified butter which helps it cook a bit faster and helps create that prized "crust" we particularly love about a good pan-seared steak. Basting with clarified butter also means less smoke in the kitchen and aromatics like whole garlic cloves and rosemary give the steak even more flavor. This steak recipe is simple, delicious, and costs much less than your favorite steakhouse.
Ingredients
- 1 large bone-in Porterhouse, T-Bone, Ribeye, or other thick-cut steak (24 to 32 ounces) (680g-900g)
- ¼ cup grapeseed oil (or other neutral cooking oil with a high smoke point) (60g)
- ¼ cup clarified butter, milk solids reserved (60g) (sub room temperature butter)
- kosher salt and pepper to taste
- fresh rosemary or thyme (optional but recommended)
- 3 whole garlic cloves, smashed (optional but recommended)
Instructions
- Dry the steak. Pat the steak completely dry with paper towels (or a clean kitchen towel) on all sides and refrigerate uncovered (or loosely covered if you prefer) overnight and up to 3 days.
- Make the clarified butter. In a small pot, heat ¼ cup of unsalted butter over medium-low heat for 15 to 20 minutes. The mixture will separate into three distinctive layers (the top foamy layer, the clear golden middle layer (pure butterfat), and the milky bottom layer that contains the milk solids and water. Skim off any white foam that floats to the top as the butter melts until there is only a layer of golden butterfat. Slowly pour off the golden butterfat into a small glass. Then add the milky solids at the bottom of the pan to the bowl with the foam you skimmed off as the butter melted. Set aside.
- Heat the oil & season the steak. Add the oil to the skillet and heat over high heat just until it begins to smoke. While the oil is heating, season the steak liberally with kosher salt and freshly cracked black pepper on all sides (even the edges).
- Sear the steak. When the skillet first begins to smoke, add the steak to the hot pan and allow it to sear without moving it for about 2 minutes. Flip it over and sear it for another 2 minutes.
- Add the aromatics and clarified butter & baste the steak. After 4 minutes of cooking time has passed, add the garlic cloves, rosemary, and clarified butter, and continue to cook flipping the steak over periodically while using a large spoon to baste any lighter spots on the steak's surface. *Tilting the pan helps to pool the butter in one spot making it easier to pick up with the spoon. Continue basting and flipping the steak for a total of 8 to 10 minutes, or until a thermometer inserted into the thickest part of the steak registers 120°F to 125°F (49°C to 52°C) for medium-rare or 130°F (54°C) for medium. Immediately remove the steak to a platter.
- Let the steak rest. Pour the pan mixture over the top of the steak and also if desired pour the reserved milk solids etc leftover from making the clarified butter. Allow the steak to rest for 5 to 10 minutes before serving Enjoy!
Notes
- Use a well-seasoned cast-iron skillet or another heavy-gauge skillet. It helps to use a heavy-bottomed pan with good even heat distribution (cast-iron, carbon steel, 7-ply stainless steel like All-Clad, or even All-Clad heavy-duty aluminum with multiple layers).
- Dry the steak before you cook it. No wet beef here. You need to have dry steaks so that when they hit the hot oil, they will start to brown. If you don't dry the steaks, they will have blood (moisture) that will start steaming the steaks when they hit the pan, ultimately giving you grey steaks and zero chance of a good "crust" without overcooking the steak. If the steak is really moist or has excess blood simply pat them dry with a paper towel before seasoning and adding the pieces to the hot skillet. If you're really serious about a dry steak surface (for more expensive cuts like ribeye, NY strip, filet, and T-bone), dry it completely and leave it in the fridge overnight on a platter. This will help dry out the surface even better.
- Season the steaks well. Good beef really only needs salt and freshly cracked black pepper. But if you like Lawry's or Montreal Steak Seasoning (or any other spice blend), use it. Your kitchen, your steak. I use Diamond Crystal kosher salt because the larger salt crystals allow me to know if I've salted it enough. If you end up under-salting the steak remedy this by adding a sprinkle or two of finishing salt (like Maldon sea salt with larger flakes). It will also add a nice crunch to each bite. *Do not season the steaks until just before time to put them into the hot pan. Adding salt draws out moisture (blood in this case) and you already know that a wet steak keeps you from getting a flavorful "crust", or sear.
- Use a neutral oil with a high smoke point (400-450°F/204-232°C) to cook steaks. Use vegetable oil, grapeseed oil, or another neutral cooking oil with a high smoke point. Do not use an extra-virgin olive to pan-sear steaks. EVOO has a low smoke point of around 350°F/176°C which means it would burn before the steaks are properly seared. Plus, everything special about EVOO (the phenols and antioxidants) that make it so healthy, would be lost as it oxidizes after going beyond its smoke point (which isn't good for your health). Not only that, it will smoke up your kitchen.
- Get the skillet and oil really hot. Add the steaks to the hot pan with oil immediately after it starts to smoke and not before. When the steak makes contact with the pan, it needs to be so hot that it sizzles and sounds like applause.
- Have patience.
- For thinner steaks (like flank, iron, skirt, or hanger), do not move them around once you place them into the skillet. Let them have constant contact with the hot pan and the oil so that the browning can take place. If you move them around or flip them over too soon, you'll miss out on all that extra flavor and beef "crust" you get from a good sear. After about 2 minutes, you can peek at the underside of the steaks using a pair of tongs. This is one good indicator to help you know when it's a good time to flip them over. When cooking flank or skirt steak, depending on the size, the meat has a tendency to slightly "curl" which pulls the center somewhat away from the pan. This is why some people like to put a weight in the middle of the steaks to ensure the center always has direct contact with the pan. You may also use a spatula to press down on the middles while cooking them.
- For thicker bone-in steaks (like ribeye, porterhouse, bistecca alla Fiorentina, and T-Bone), it's ok to flip the steaks over periodically while simultaneously basting them with butter and aromatics. This helps ensure even cooking, browning, and helps larger steaks develop a nice golden crust.
- Do not add butter or aromatics to the skillet too soon (if using butter at all). Butter, herbs, and garlic cloves are great ways to add flavor to pan-seared steaks. However, if you add them too soon, they'll burn before the steak is cooked. It's best to add aromatics about ½ way through the cooking time (after you've flipped the steak over) and start quickly and constantly basting the steak. Alternatively, you may add a pat of butter or compound herb butter to the tops of steaks as they rest just after removing them from the skillet. For flank, hanger, and skirt steaks I don't usually add butter because they don't need it. However, I do enjoy basting with butter and herbs for thicker-cut steaks.
- Use a timer. Setting a timer as soon as your steaks hit the pan really helps you determine how long they need to cook. It's an easy way not to have to think as much about when the steak is going to need to be flipped or finished cooking. That said, I never leave a steak alone. I check steaks periodically to make sure I have the flame adjusted properly and that they're cooking the way I intended. It's not foolproof to set a timer because several factors are involved with properly cooking steaks such as the cut of meat, thickness of the steak, whether or not it's bone-in or boneless, and even the type of range and skillet you're using. But using a timer does provide a little extra help with timing especially if you're busy prepping other sides.
- Use a thermometer. It's a great idea to use a thermometer. I personally don't use one for pan-searing (although there have been times I could've benefited from one♡). But for some people, it makes all the difference and gives them peace of mind, especially when cooking for larger groups or dinner parties. Practice is the best teacher when it comes to making a good cast iron steak and beyond experience, a good meat thermometer is always the best tool.
When to Salt Steaks Before Cooking
There are a few options for when to season (salt) a steak prior to cooking. Below are 3 ways depending on how much time you have and your schedule.
- Salt steaks right before cooking. Salt the steak really well (using kosher salt) and pepper it and get it into the pan right away.
- Salt steaks 2 to 3 days before cooking. Salting the steak in advance allows the process of osmosis to take place where the kosher salt draws out the moisture from the steak as it's resting in the refrigerator (at about the 20-30 minute range after having been salted). This is when you'll see pools of moisture "or steak juice" beading up on top of the steak, but giving it just 10 to 20 minutes more in the fridge at this point allows the moisture to reincorporate back into the steak. Then allowing the steak to stay in the fridge after this point will again help the steak's surface to become dry which will help with achieving a nicely browned crust.
- Salt steaks at least 1 hour before cooking. If you're in a hurry and want to pre-salt your steak, do so at least 1 hour before you'll be cooking them. For the reasons mentioned above (osmosis of the salt), the steak needs time to reincorporate the moisture that is drawn out from being salted. If you cook the steaks when the moisture is still pooled on top (and not yet reincorporated back into the steak), you've just lost all that moisture that would've kept your steak from becoming dry and chewy.
- Prep Time: 5 minutes
- Rest Time:
- Cook Time: 8 minutes
- Category: Meat + Chicken
- Method: Pan-Sear
- Cuisine: Italian
Nutrition
- Serving Size: 4 ounce serving


Shauty P. says
I'd never made a steak in a skillet before but it was great and saved me from having to fire up the grill (was feelin lazy). Cooks up perfect and I wasn't sure about the herbs, but damn we couldn't stop sliding the steak through it sop up the goodness. Recommend.
Kelly Leding says
So glad you loved it, Shauty P.! I also love a grilled steak, but sometimes convenience wins the day. I think a lot of people feel the same hesitation about the herbs, but we love the added flavor. Just have to make sure to add them at the right time so they don't end up burnt:) Glad you got the timing down. Thanks for taking the time to leave a comment!
Robert says
Easy to follow recipe with outstanding restaurant results! I used a bone-in ribeye, a little duck fat and butter and it was perfectly cooked. We even dipped bread into the drippings (piggish yes, but damn good).
Adam K. says
Made this for our anniversary but also added a sprig of fresh thyme - absolutely perfect! Crispy crust, rosy red-pink center. My wife loved it, but we didn't feel like we gave up anything by eating in this year:)