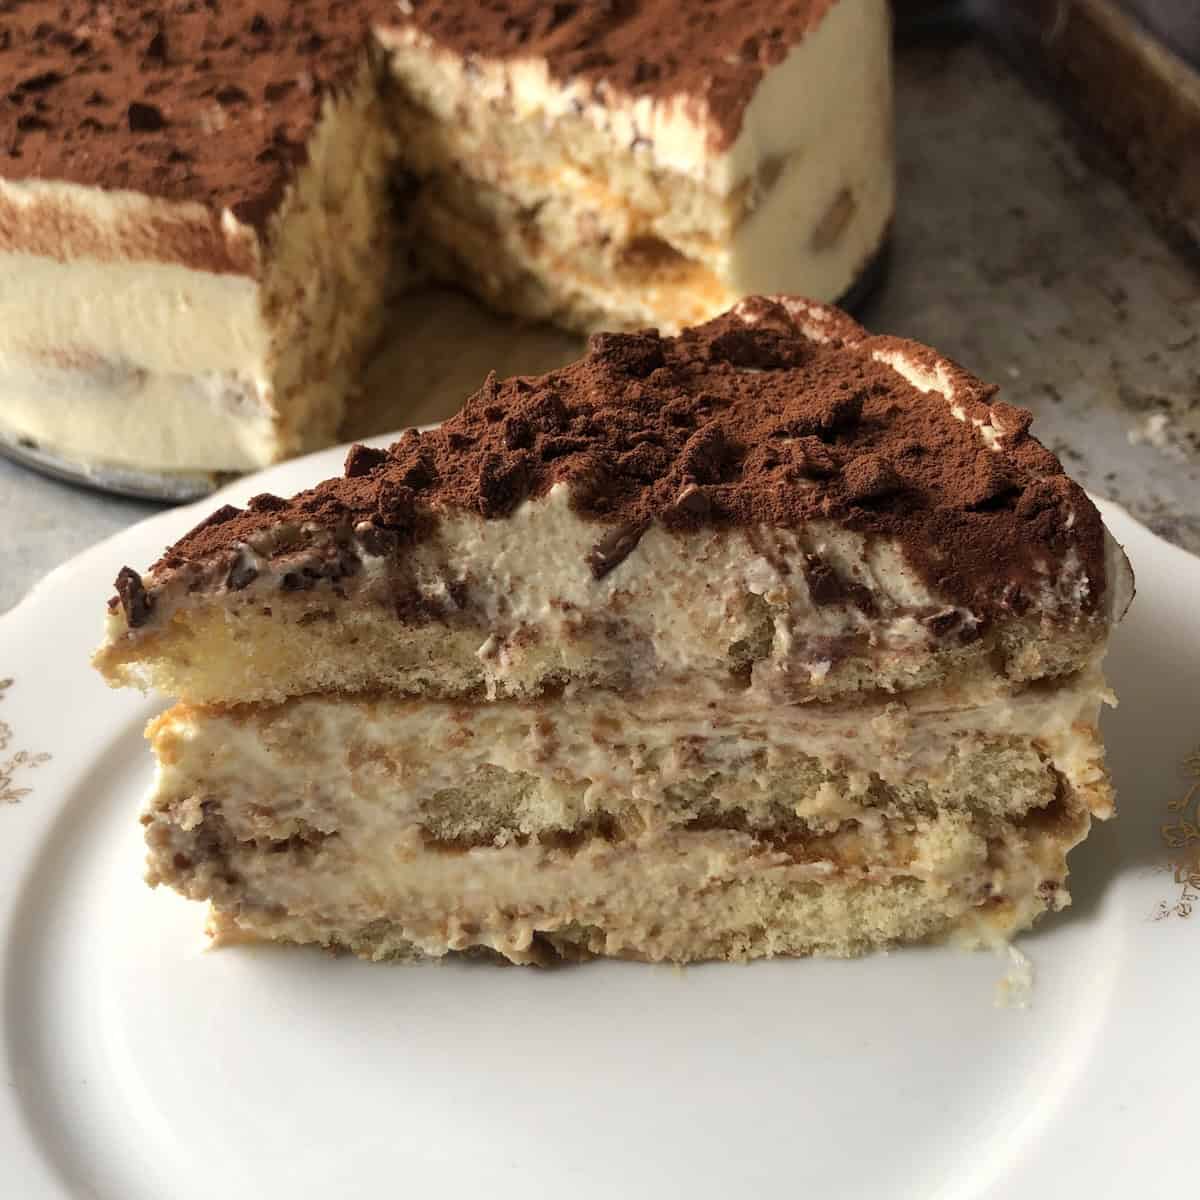
This tiramisu recipe with thick, luscious, sturdy mascarpone cream slices like a cake and sets every single time. And it's even earned eccellente and ottimo accolades from Luca's entire family here in the Veneto. Not an easy feat! I'll show you three easy ways to layer the same tiramisu for different looks!
Living an hour from Treviso, where tiramisu was born, means the bar for perfecting Italy's most loved no-bake dessert was unforgivingly high. I wanted to make sure it was just right before I shared it with you. And that meant passing the toughest critics I know, my Italian family and friends 😉. No runny cream. No soggy ladyfingers here!
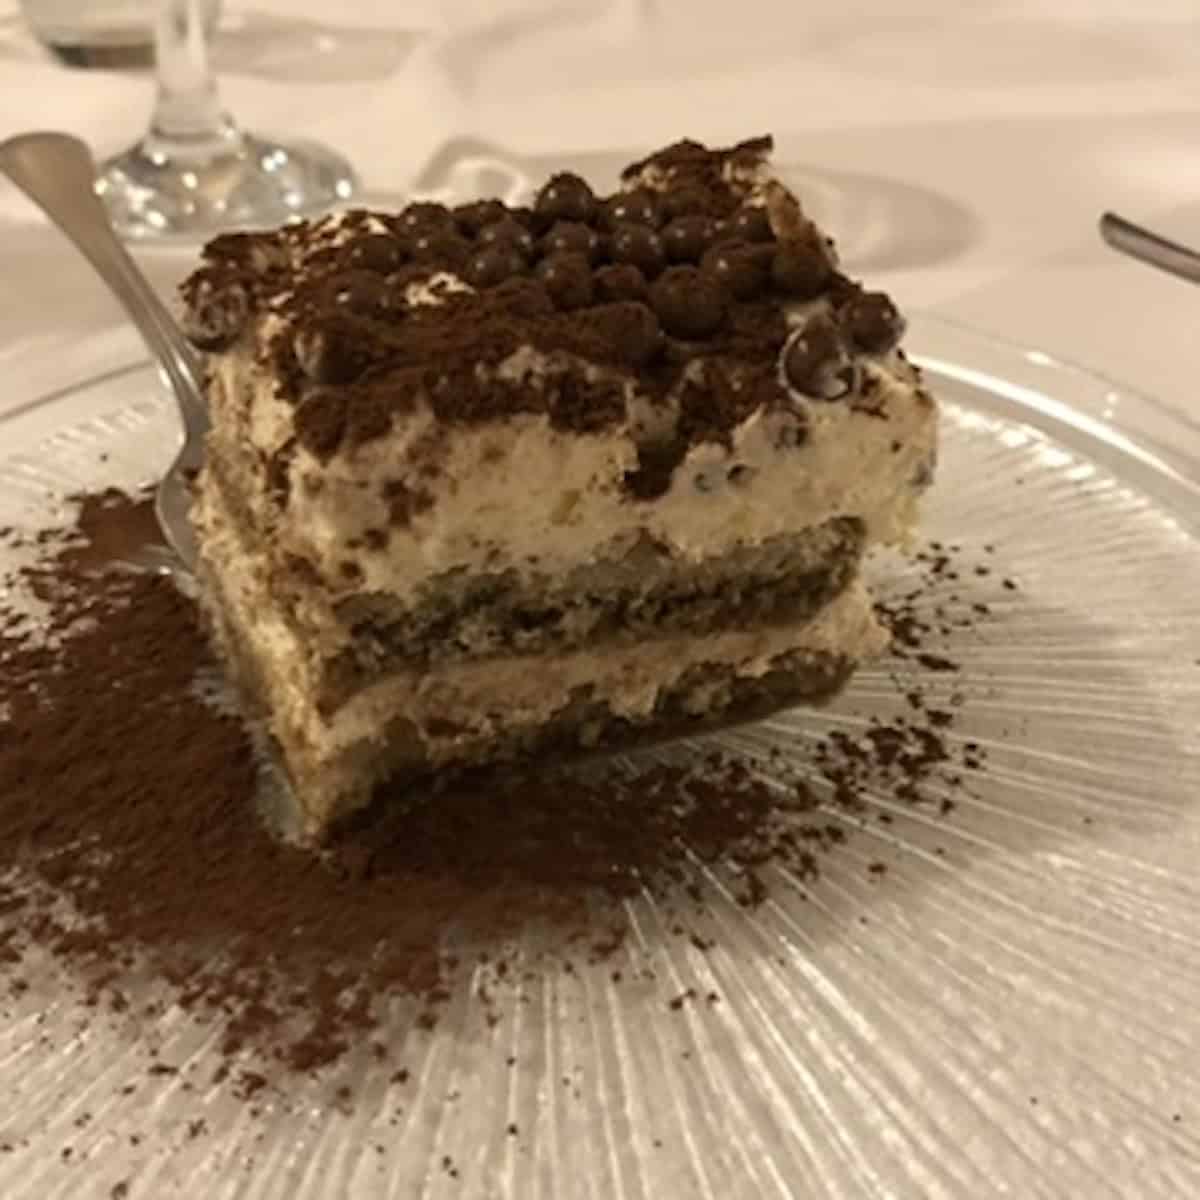
This is the quintessential authentic Italian tiramisu recipe to have up your sleeve from now until the end of time! It's based on our favorite restaurant tiramisu that we've eaten all over Italy. And I've included some of these photos below so you can see for yourself what real Italian restaurant tiramisu looks like and how restaurants serve it here.
Also, you'll be happy to know it's incredibly easy to make and layer it just about any way you want! And it makes the perfect Mother's Day dessert.
Jump to:
- What Tiramisu Actually Looks Like When You Order it in Italy
- Why it Works
- Why You'll Love It
- What Is Tiramisu?
- Tiramisu Ingredients
- The Best Ladyfingers for Tiramisu
- The Best Mascarpone for Tiramisu
- What Coffee to Use for Tiramisu
- Does Tiramisu Have Alcohol? What About Rum and Amaretto?
- How to Make Tiramisu (Step by Step)
- What to Do if Your Tiramisu Cream Isn't Smooth
- What Makes This an Easy Tiramisu Recipe
- Never Soggy Ladyfingers (Ever)
- Why Is My Tiramisu Cream Runny (and How to Avoid It)
- Are Raw Eggs Safe in Tiramisu?
- How to Serve Tiramisu
- Substitutions
- Equipment
- Storage, Make-Ahead, and Freezing Tiramisu
- Top Tips
- FAQ
- Related Recipes
- 📖 Recipe
- Food Safety
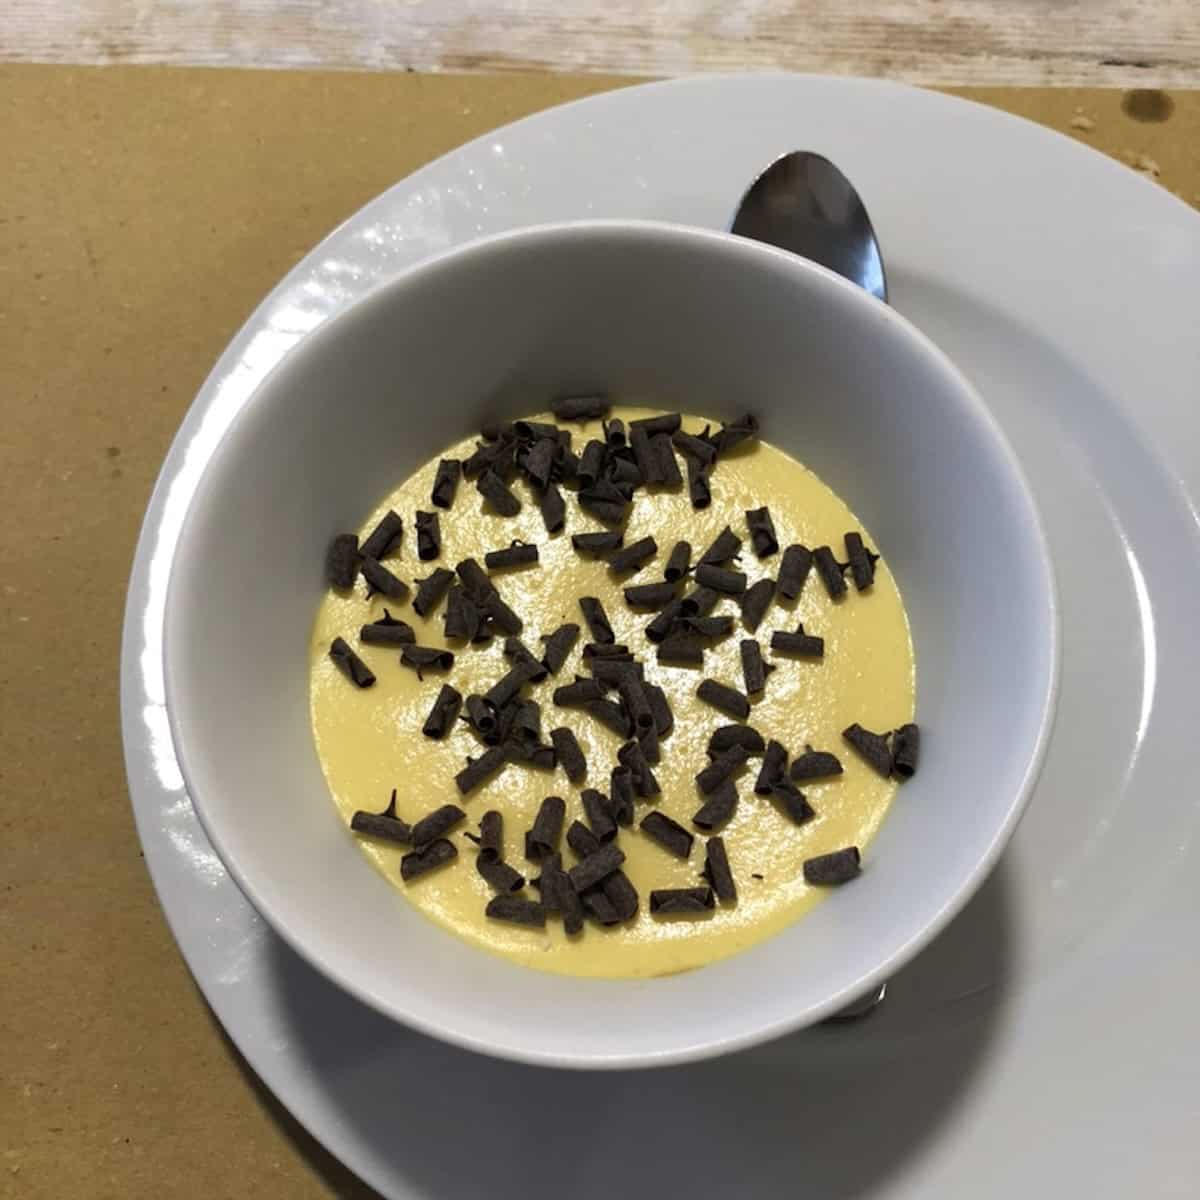
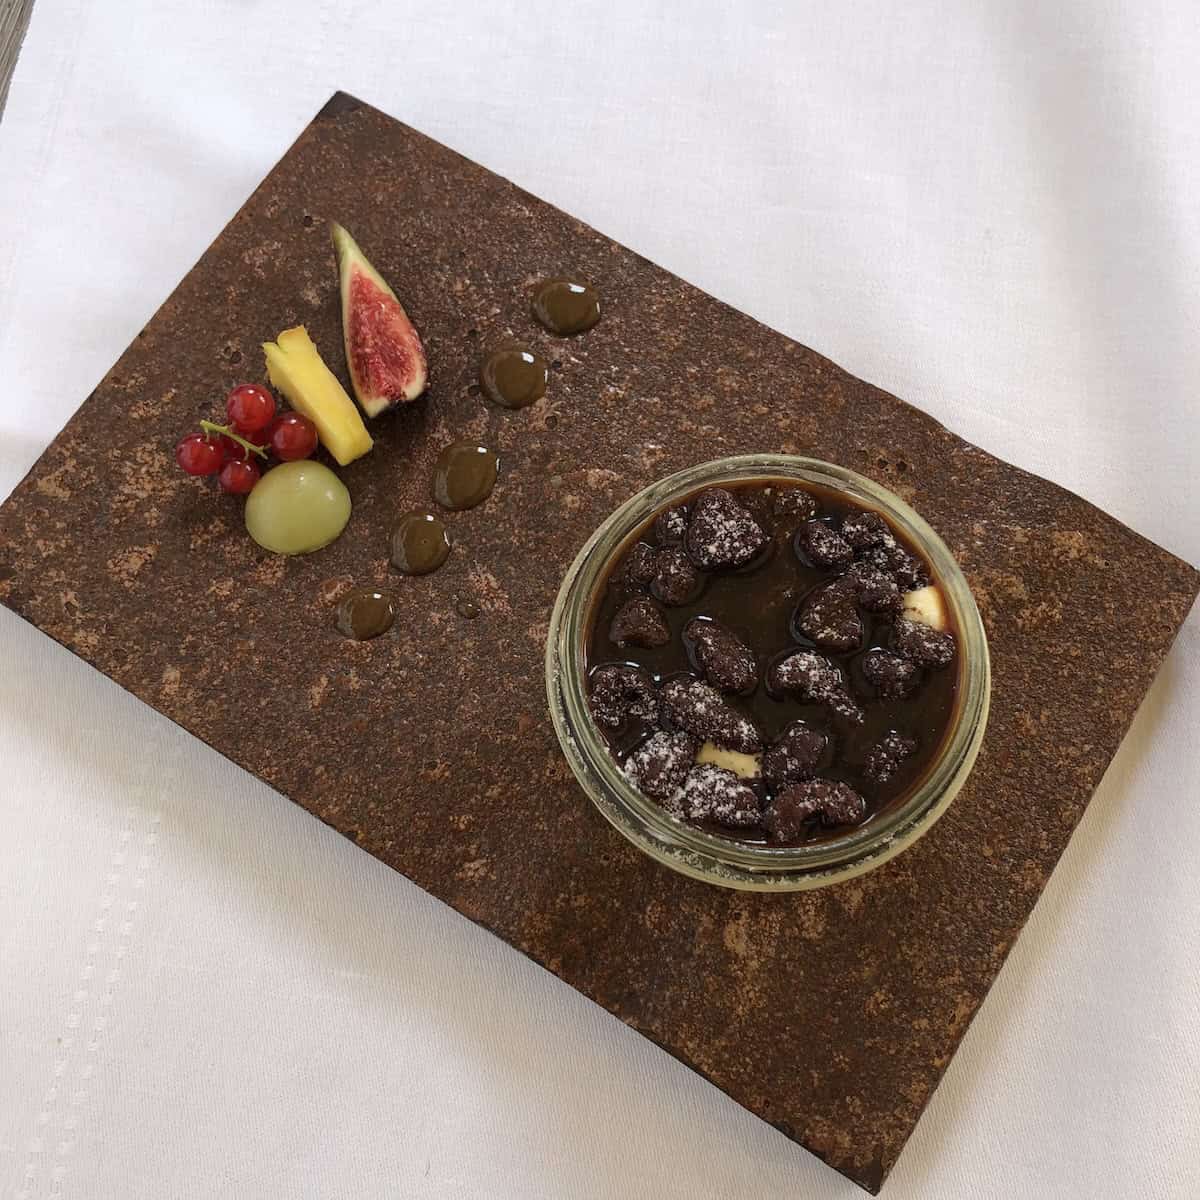
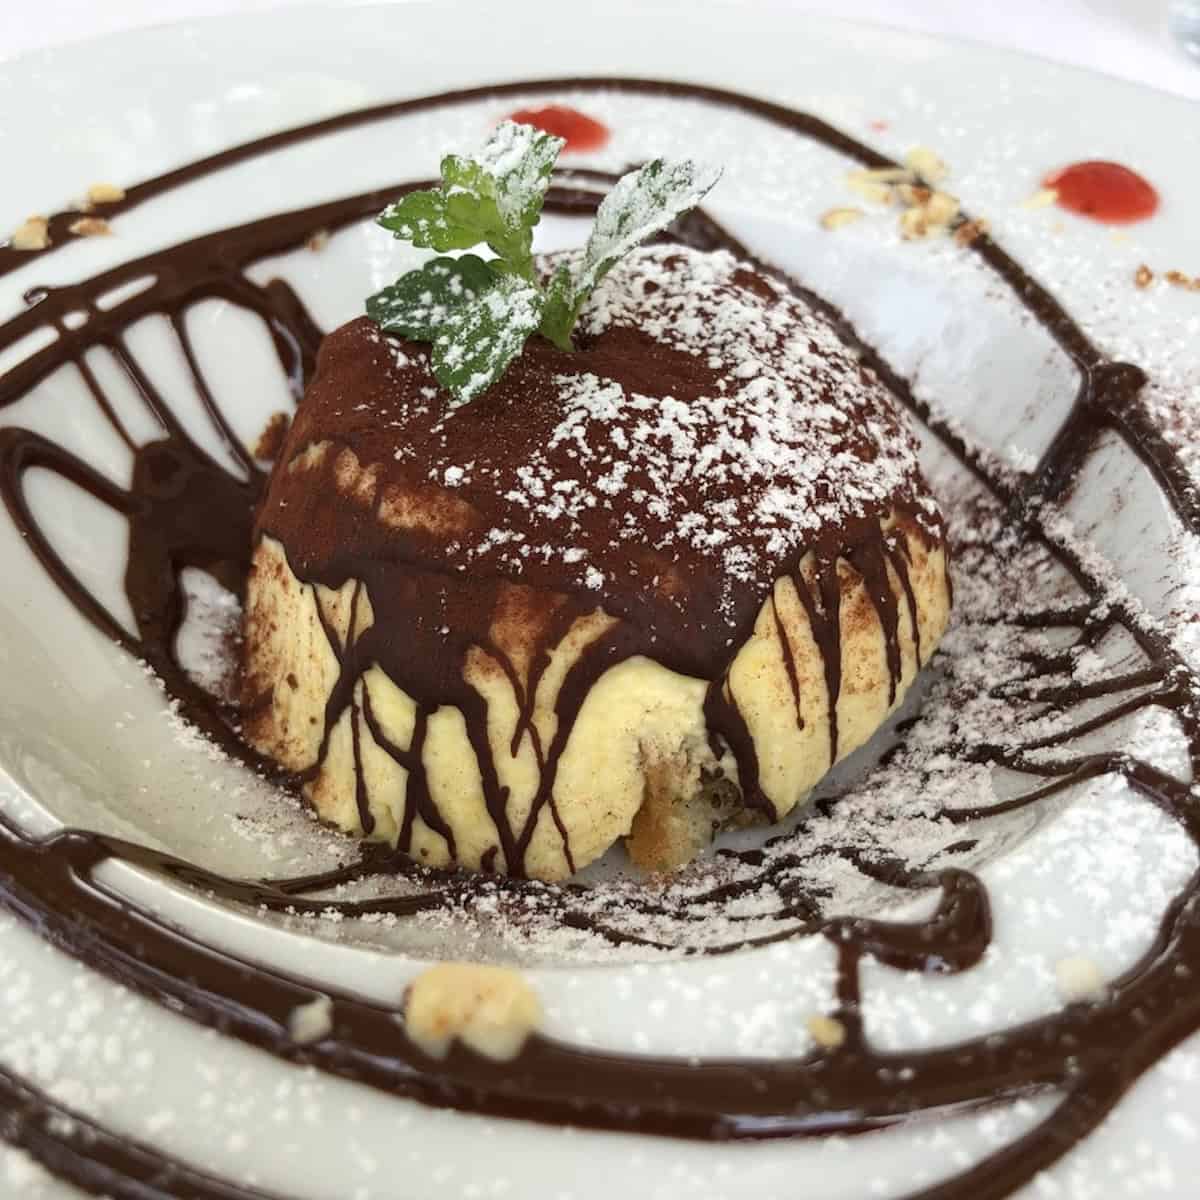
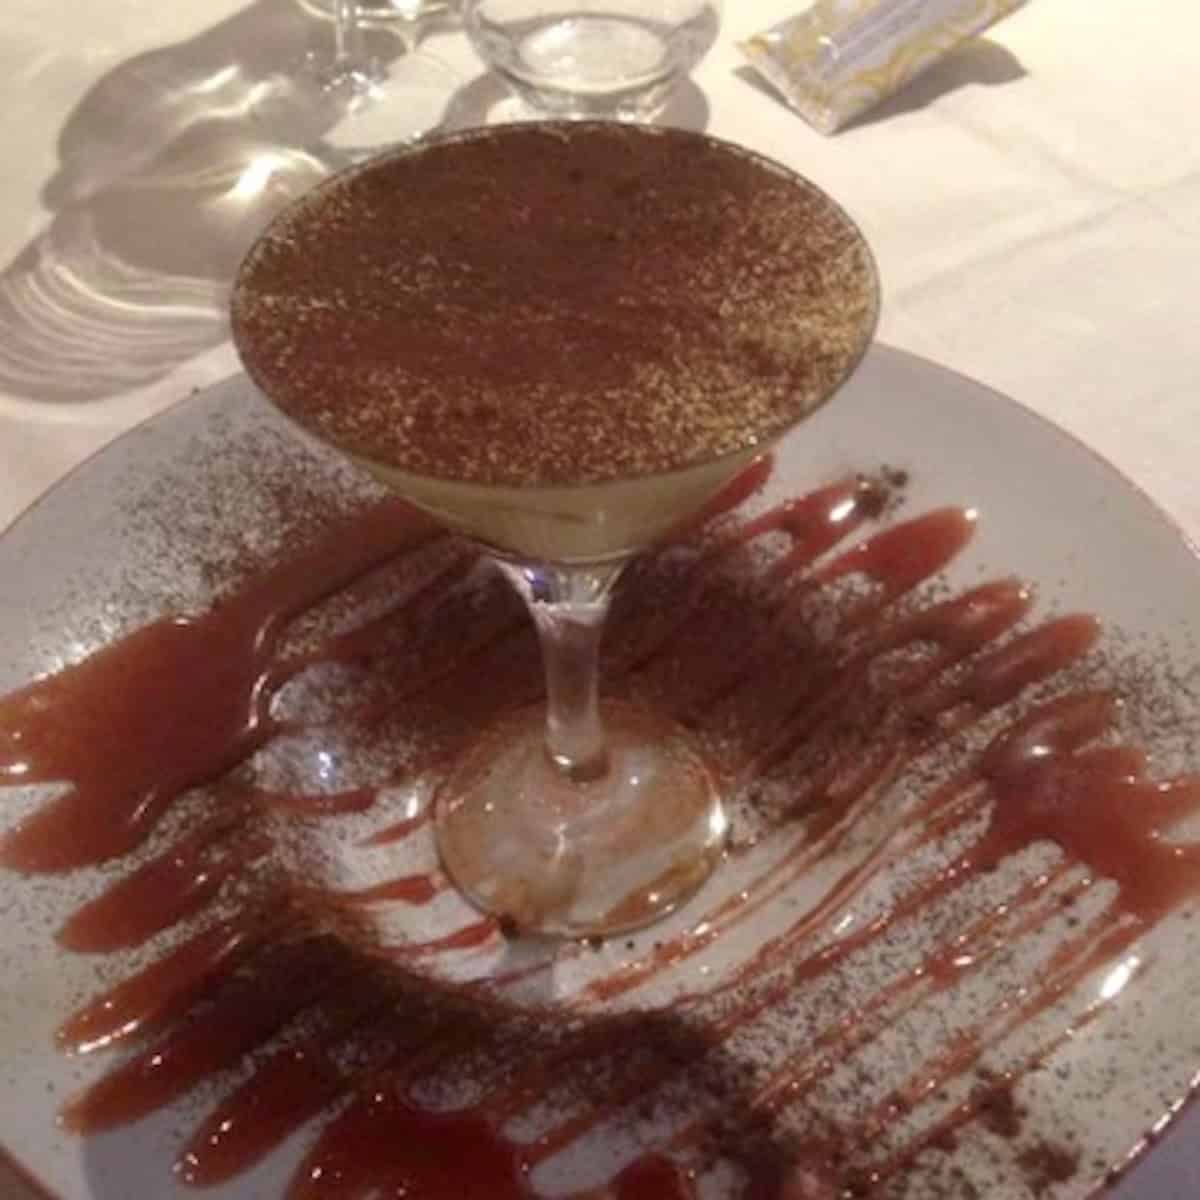
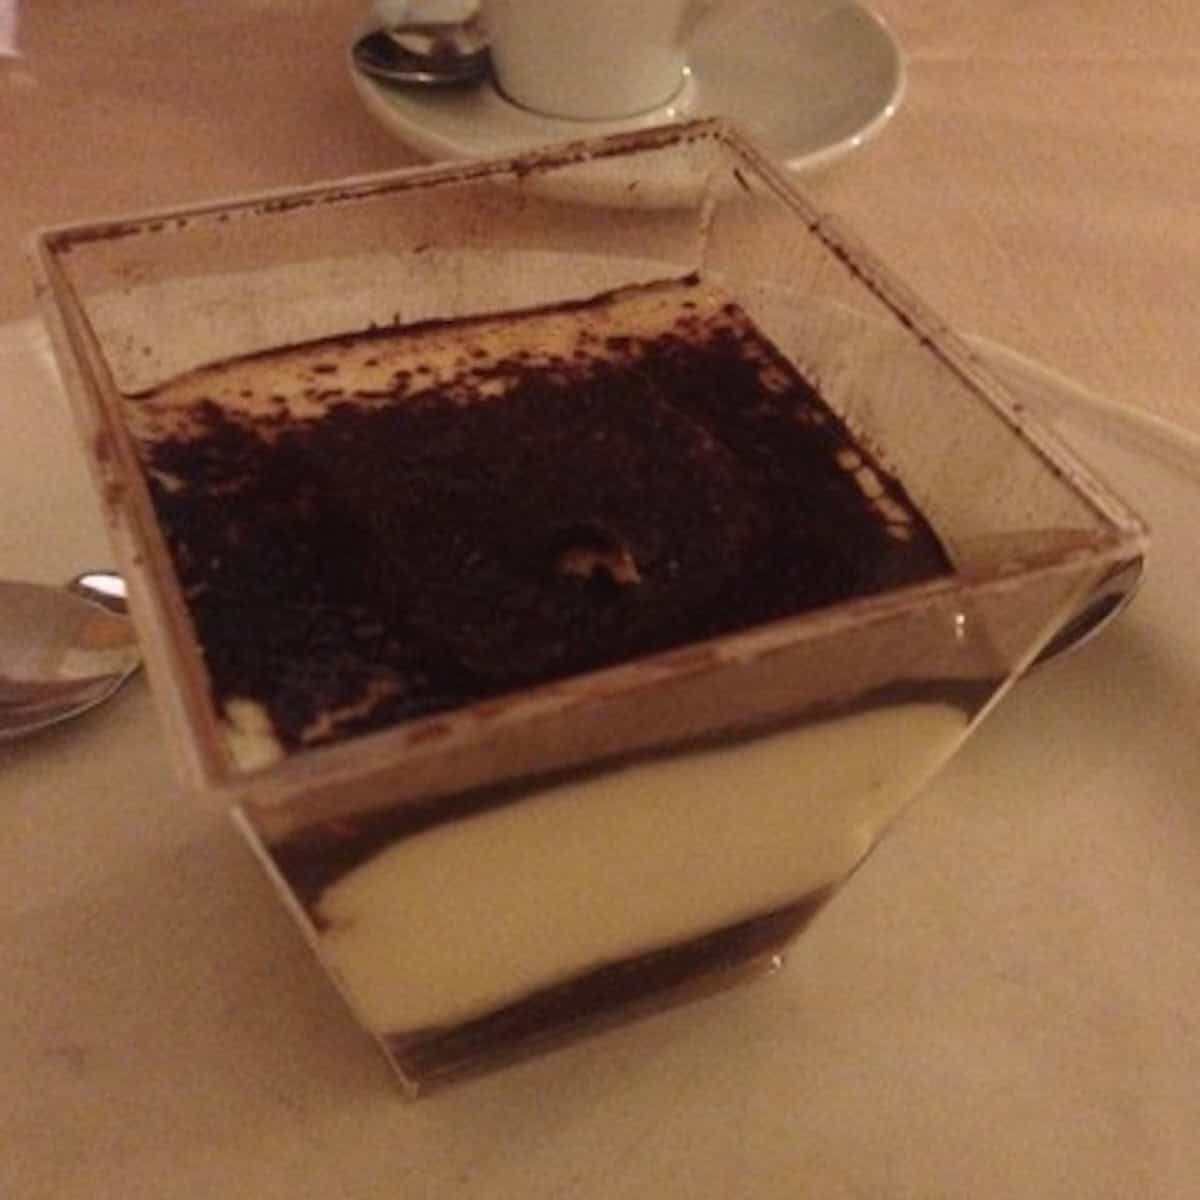
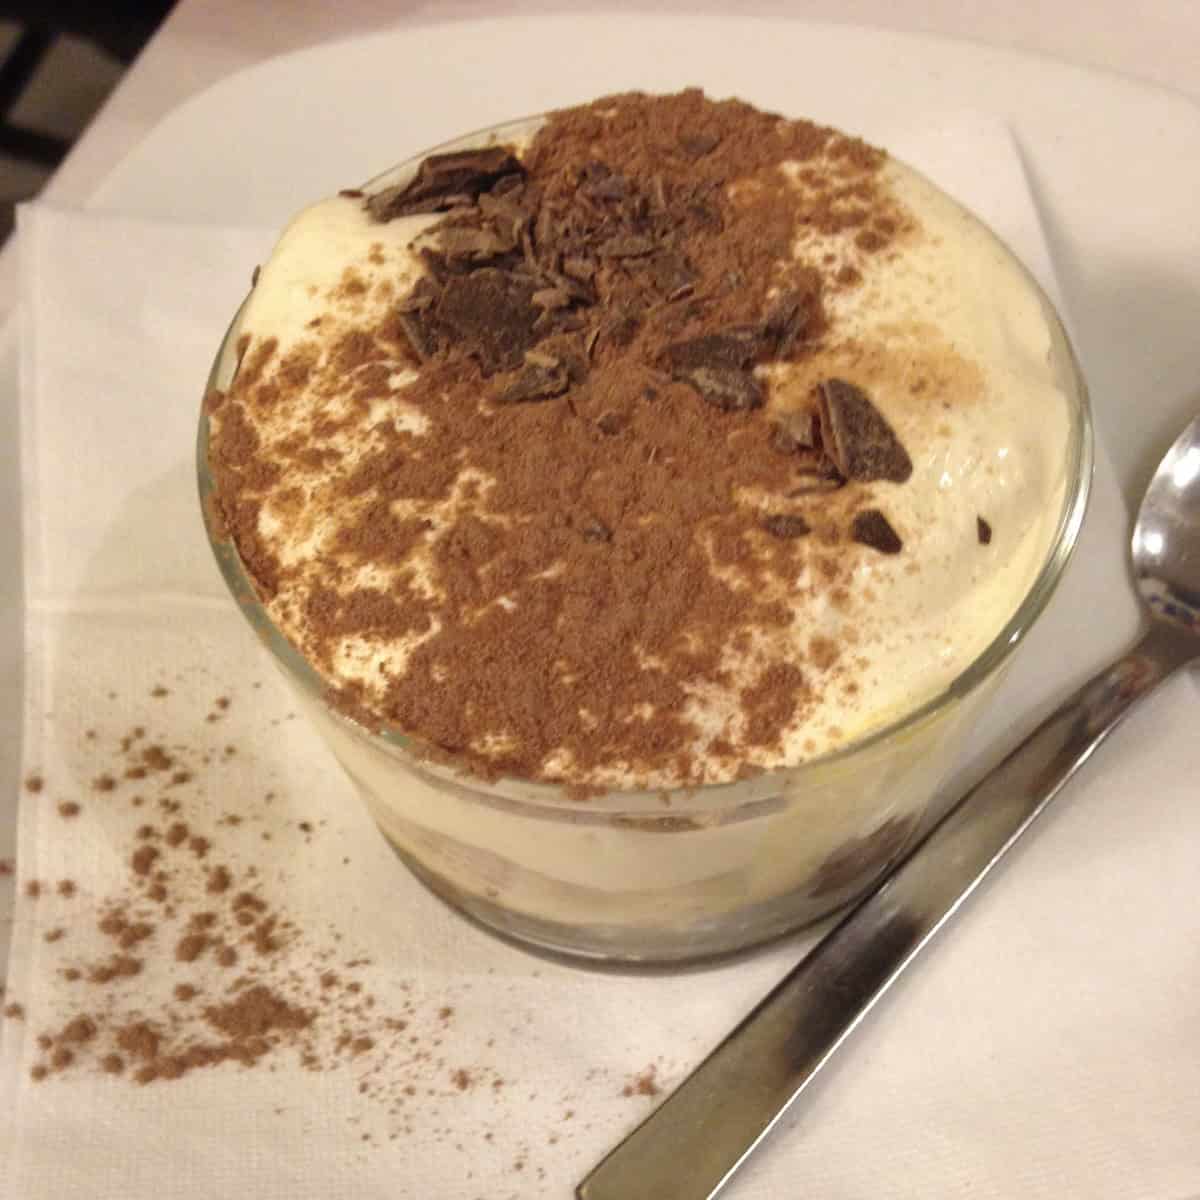
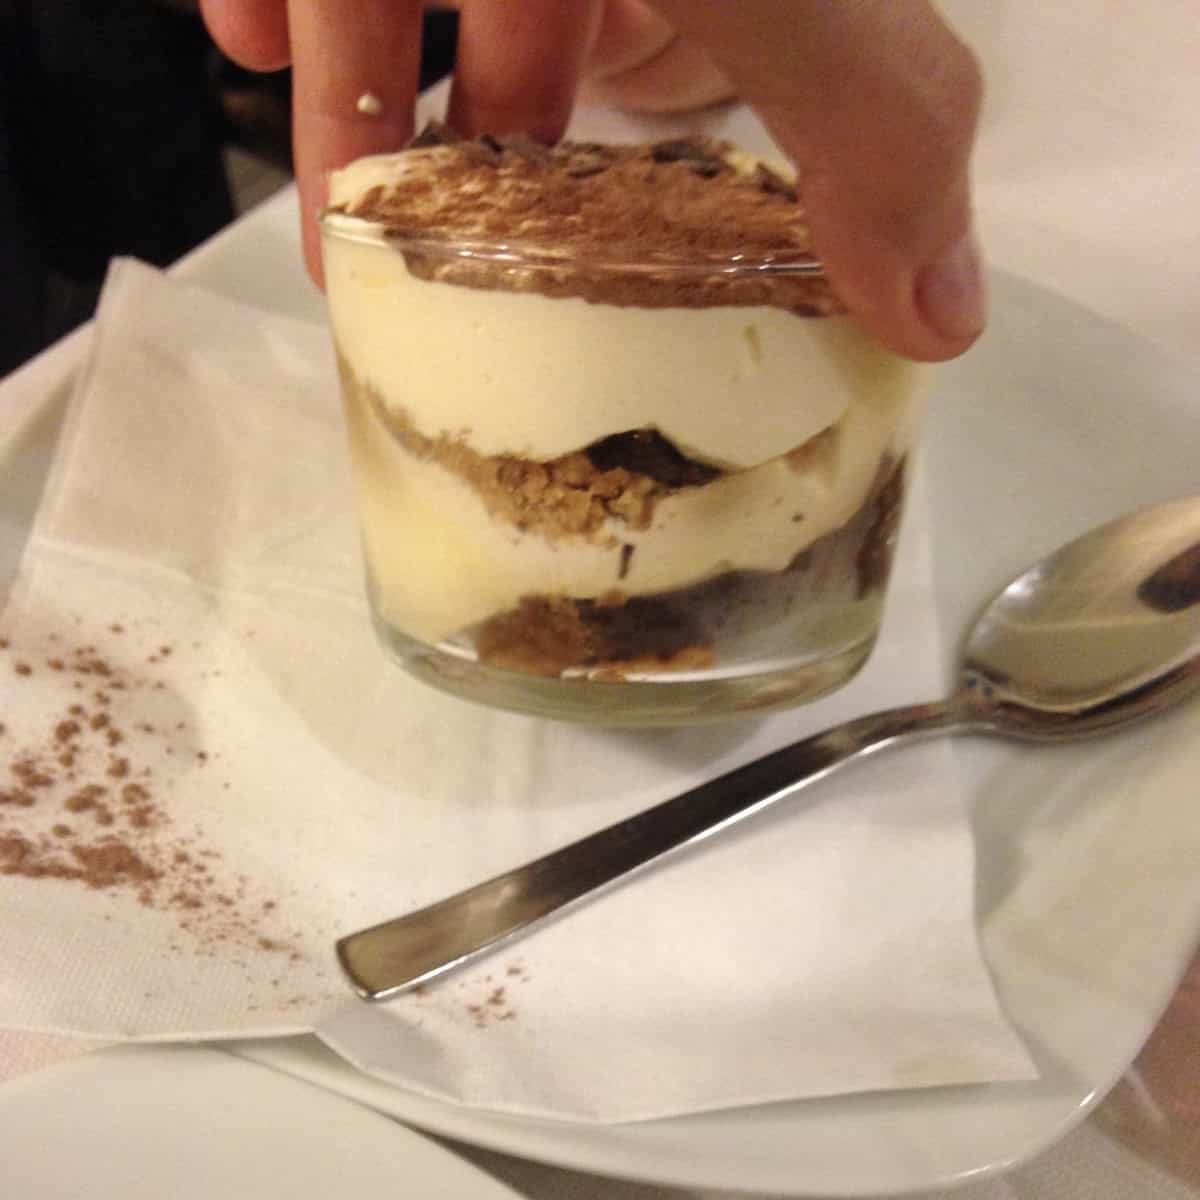
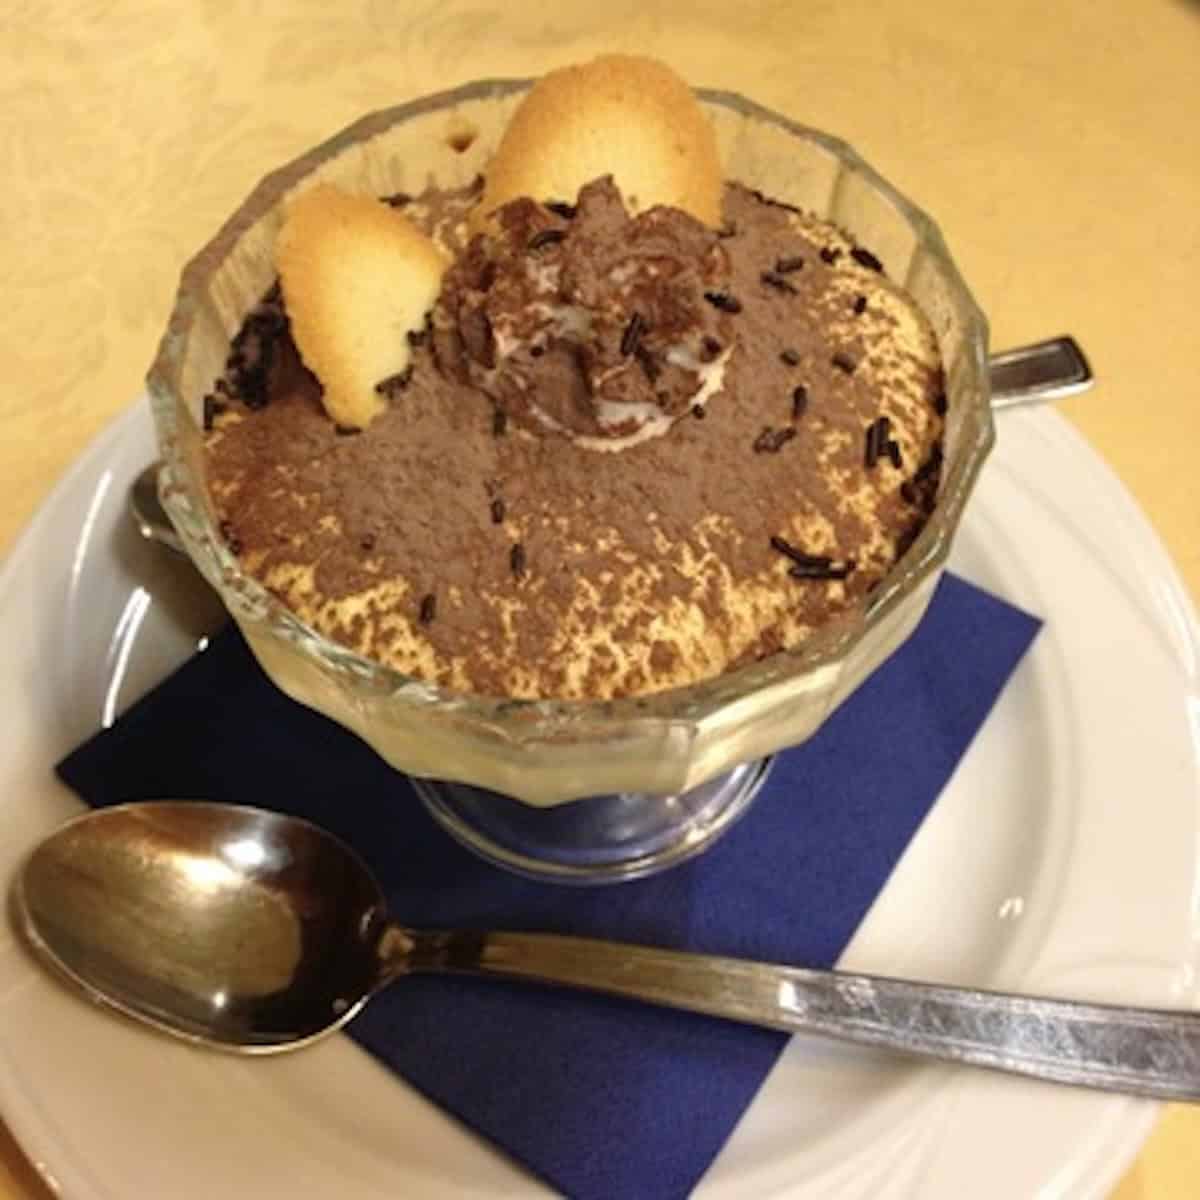
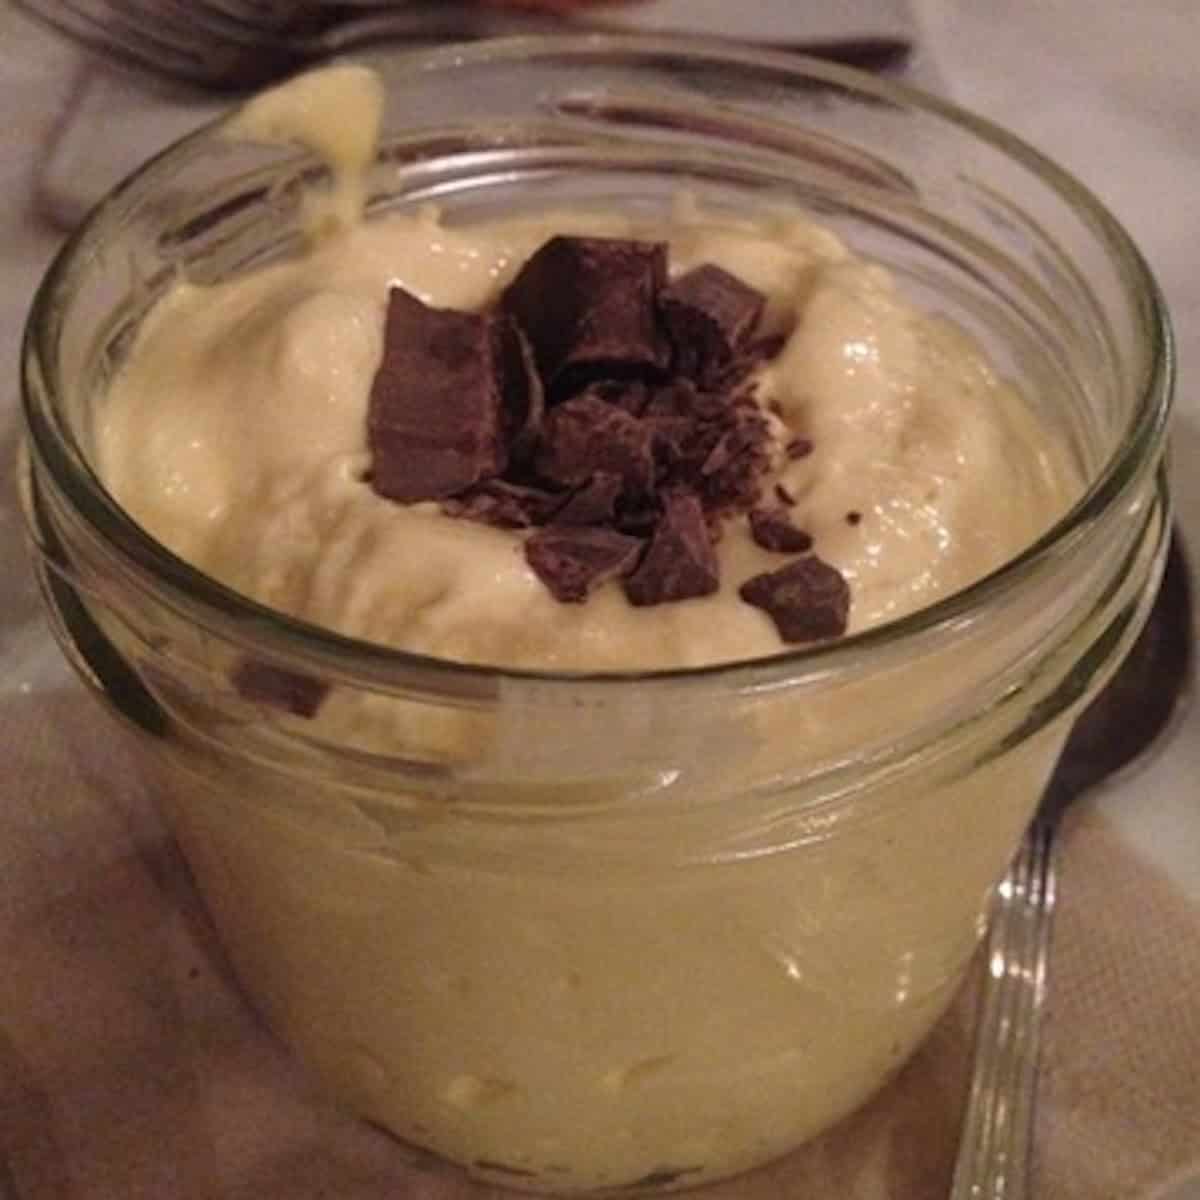
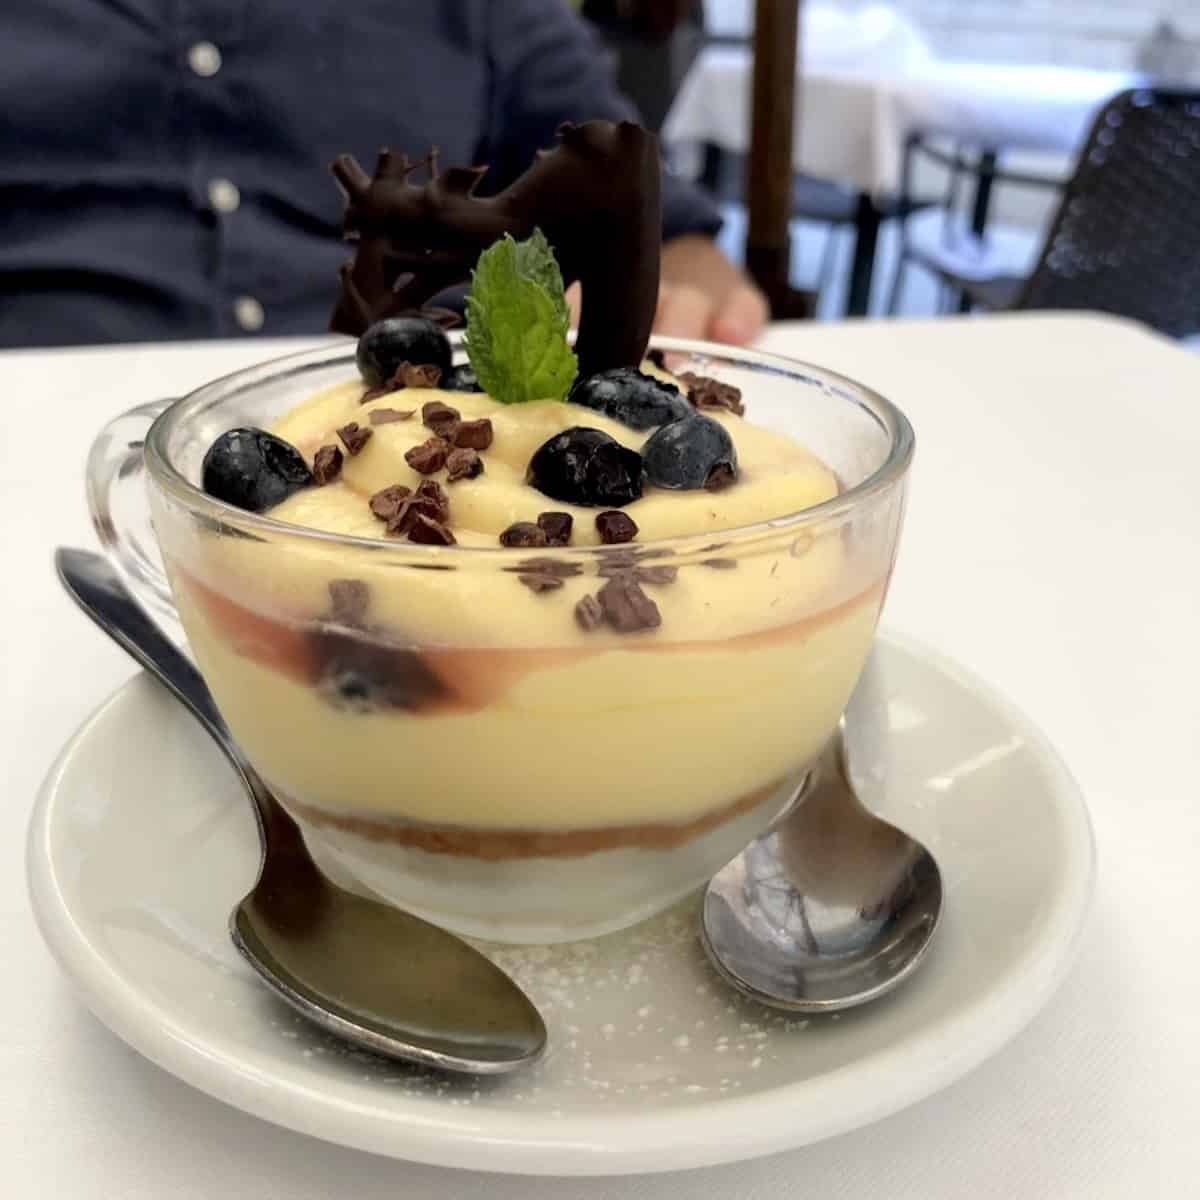
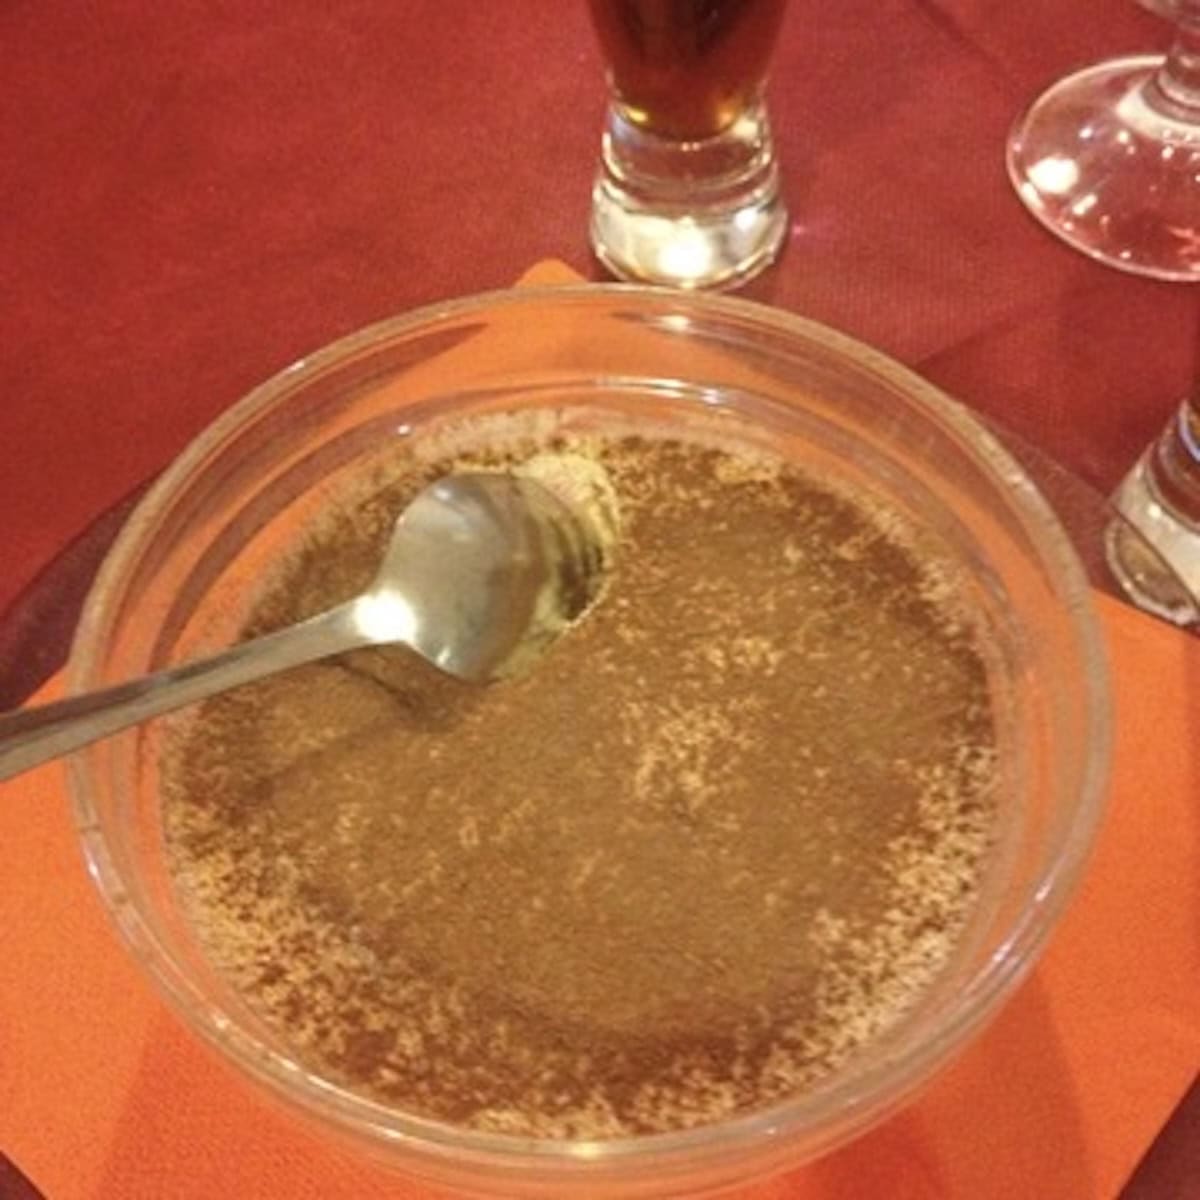
What Tiramisu Actually Looks Like When You Order it in Italy
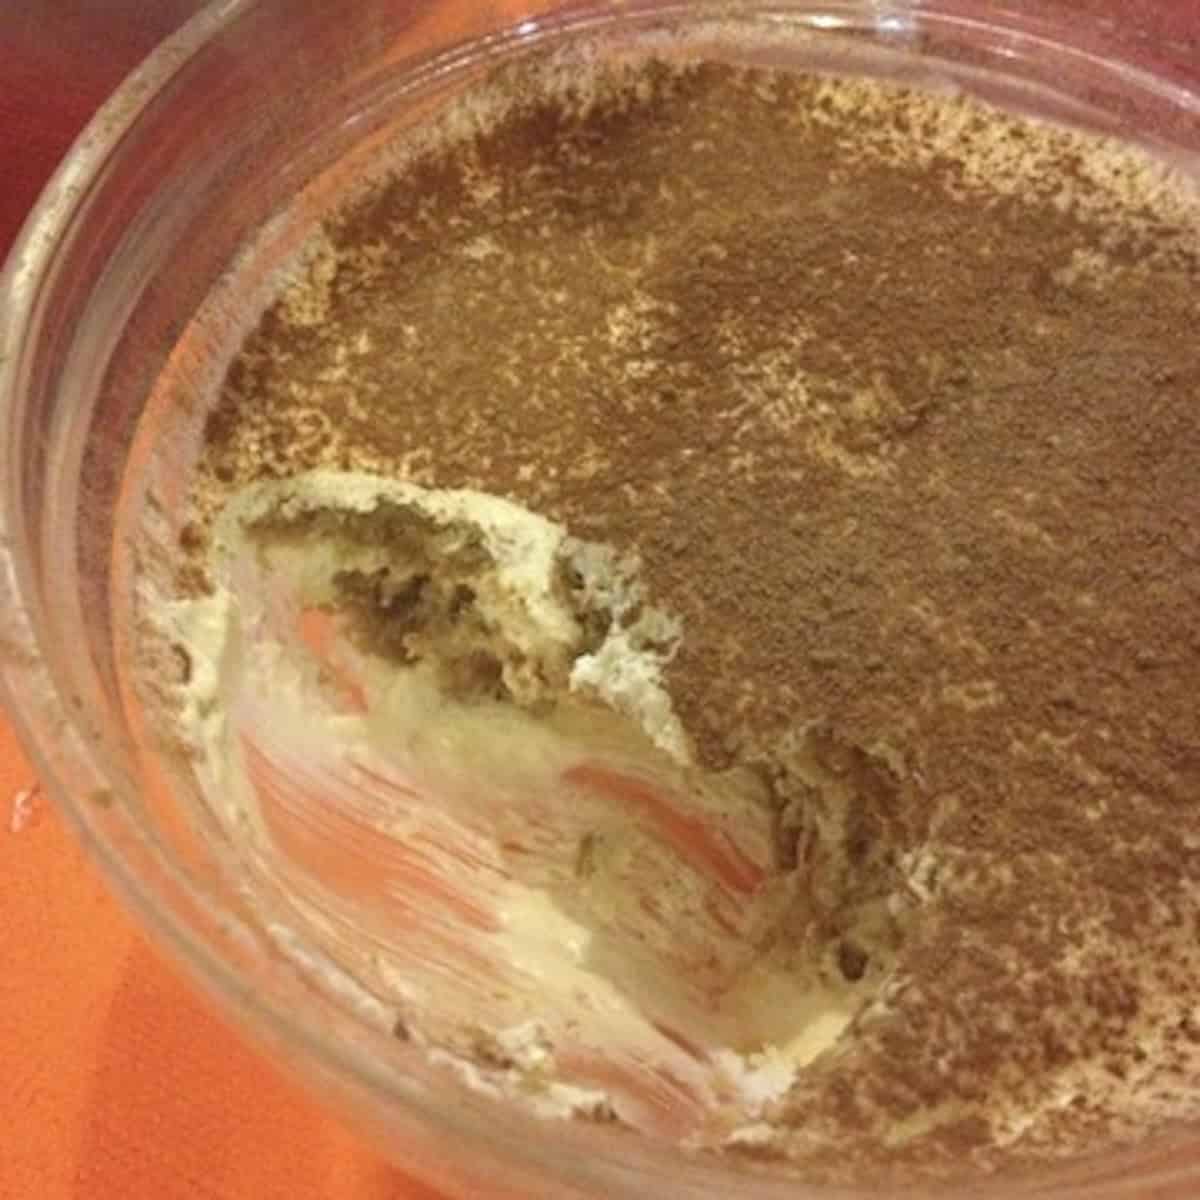
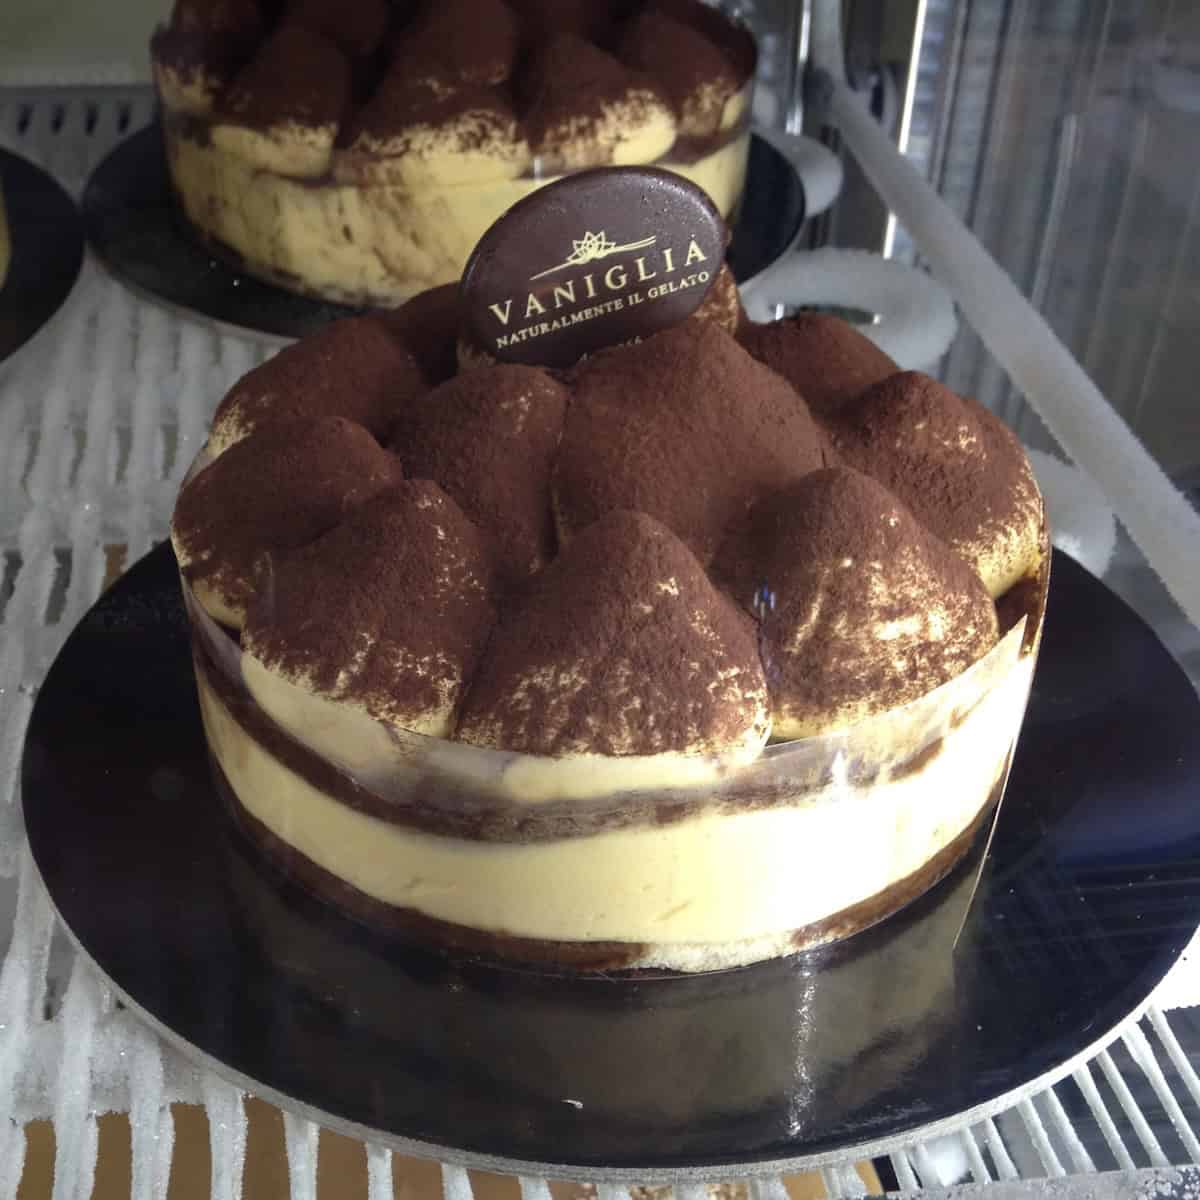
Ordering tiramisu across Italy means encountering it in endless, deliciously different forms! From elegant cake slices at upscale restaurants to casual spoonfuls straight from a casserole dish at a neighborhood trattoria. For a bit of inspiration, here's how tiramisu is actually served on tables across the country.
Why it Works
- This recipe is based on the best restaurant versions we've enjoyed over the years, and the delicious tiramisu Luca grew up eating (as you can see, we've eaten a lot of it!)
- The Italian pâte à bombe method pasteurizes the egg yolks without a double boiler (easier and faster) and is safe for everyone to eat.
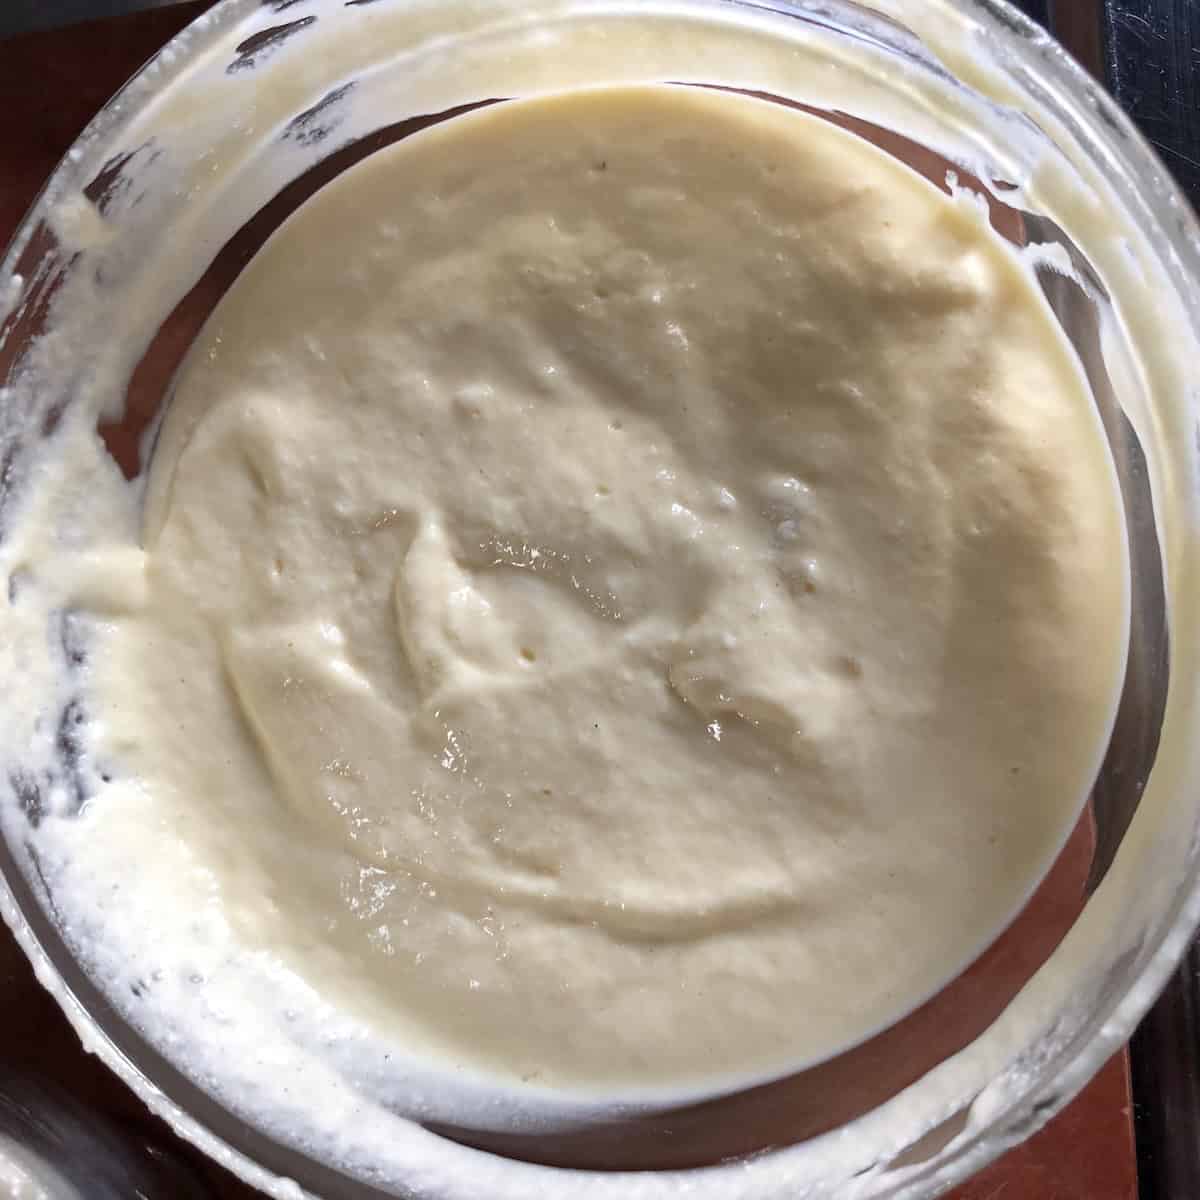
- No egg whites (they're not in the original Treviso recipe), and their absence is a major reason this cream sets every time. I've made it both ways, so you can see side by side the cream comparison and avoid the disappointment of homemade tiramisu failure
- Unsweetened whipped heavy cream is not in the original recipe, and the tiramisu cream sets perfectly without it, but it makes the cream even more unctuous and perfectly structured without changing the intended flavor at all. Since mascarpone is just heavy cream coagulated with heat and an acid (like lactic acid, citric acid, or even lemon juice), adding more cream only amplifies what's already there. I've tested it both ways, and Luca's entire family prefers this version, which is meaningful praise given that tiramisu was one of his dad's specialties❤️.
- Fail-proof techniques. No soggy ladyfingers, no runny cream, never too sweet (the three most common tiramisu failures, solved)
Why You'll Love It
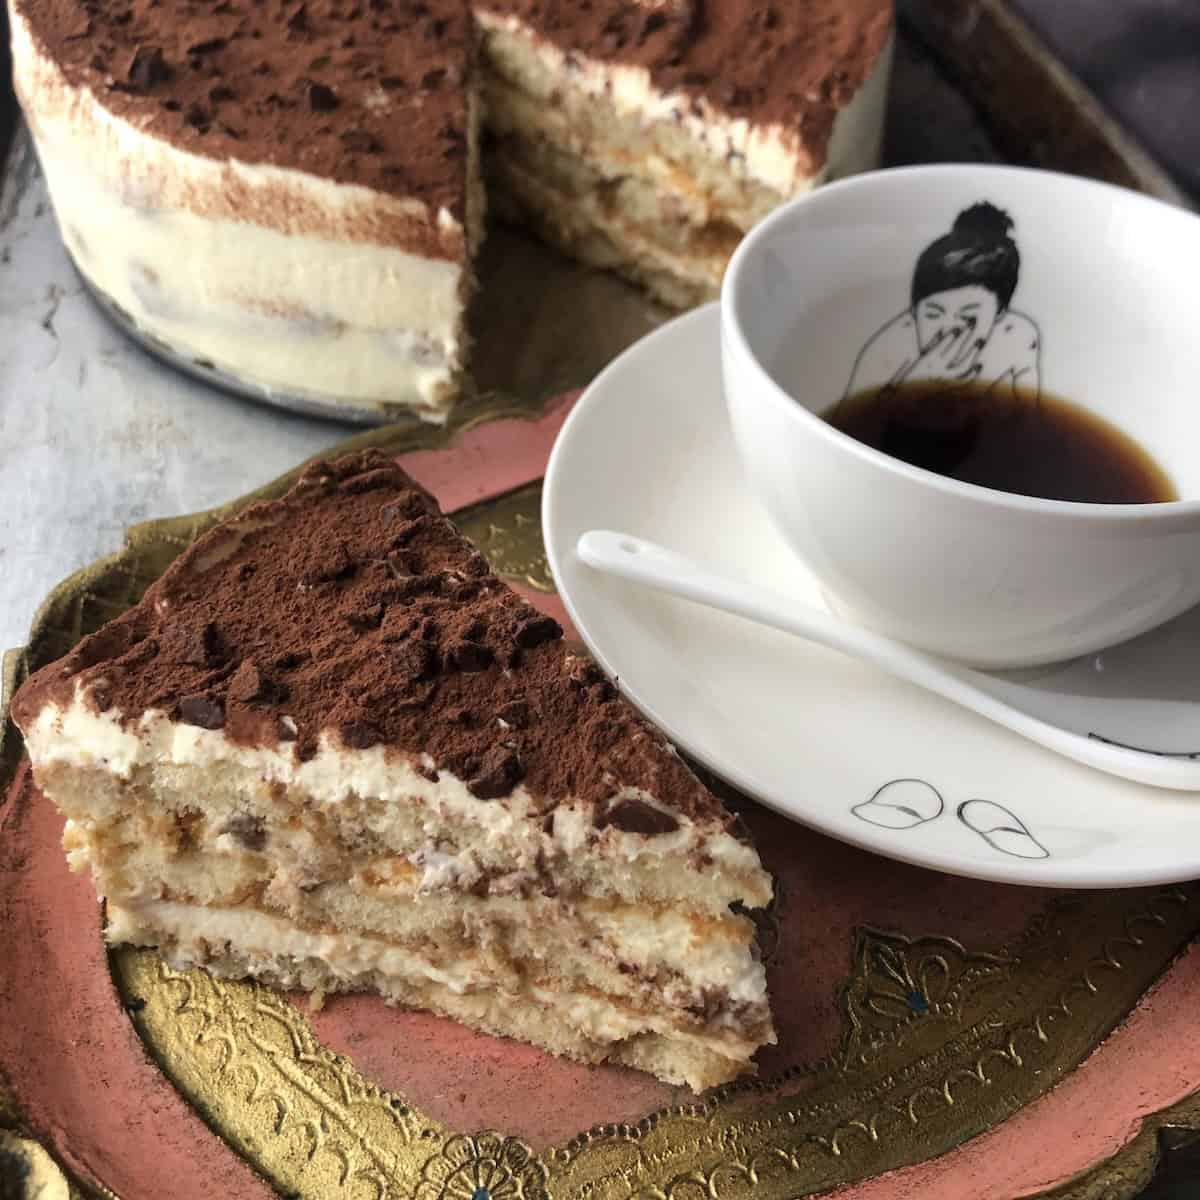
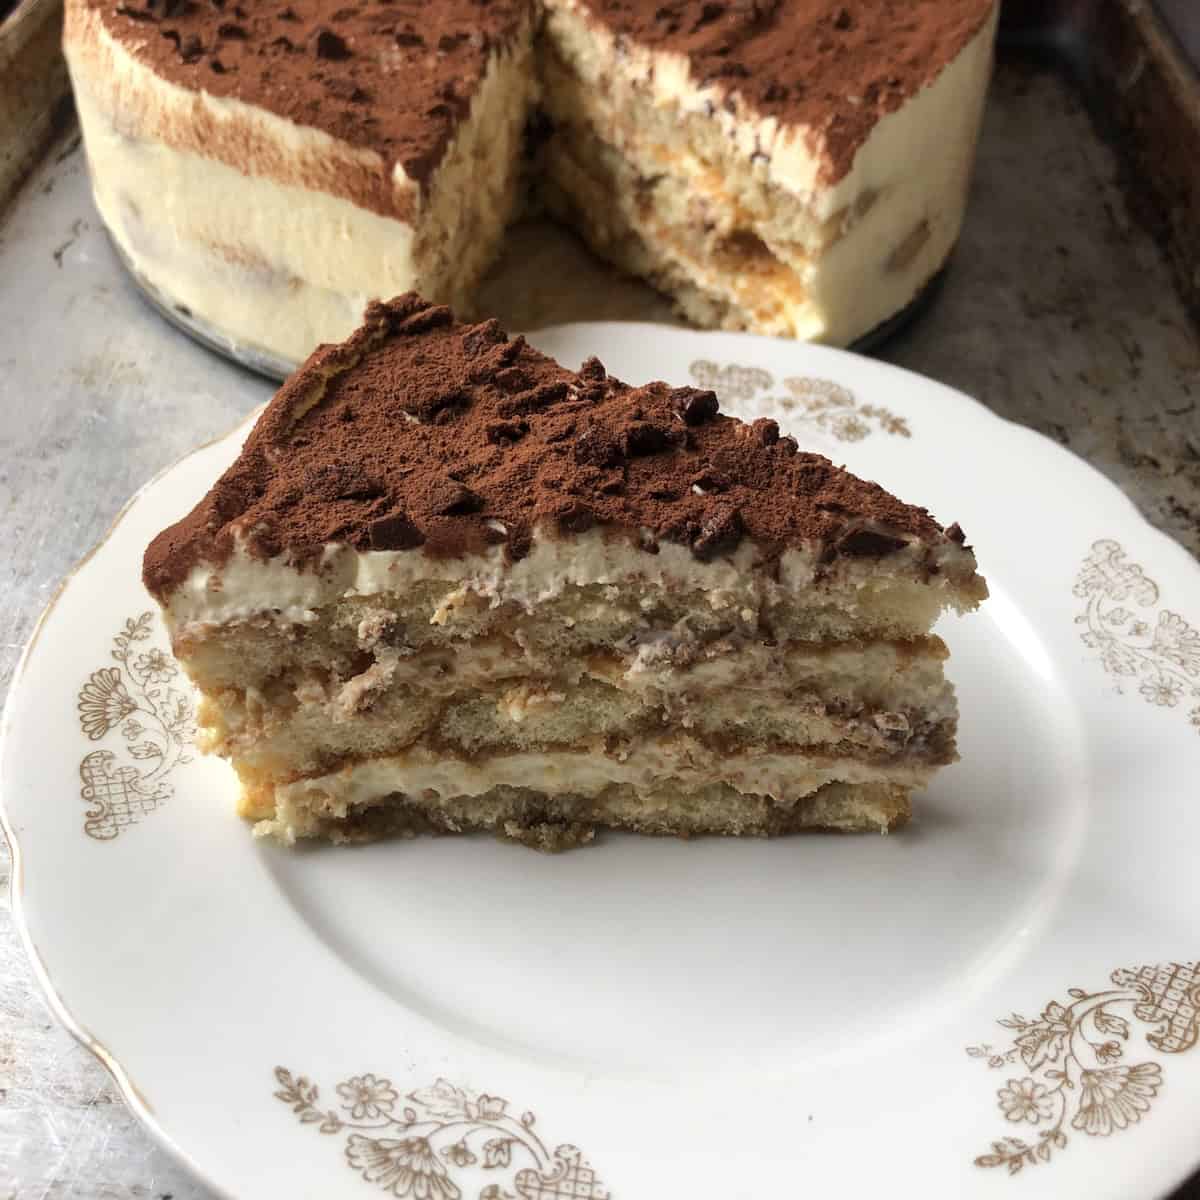
- Produces a cream so thick and luscious that it slices like cake and holds its shape perfectly.
- The tiramisu cream is perfectly sweetened and balanced (no sickly sweet tiramisu here!)
- Totally customizable. Three layers of perfectly coffee-saturated Vicenzovo savoiardi made in an 8 or 9-inch springform pan (my favorite for the wow-factor presentation) or cake ring, or 2 layers in a 9x13 casserole dish, or use two 8-inch loaf pans, individual glass jars, or, honestly, any container you have on hand (even a large mixing bowl). You can layer this dessert into anything!
- No special equipment required beyond a handheld or stand mixer.
- Gets better after 24 to 48 hours for the perfect no-bake make-ahead dessert.
- No oven, no baking, about 45 minutes of active time (most of that dipping and layering).
What Is Tiramisu?
Tiramisu (tirami su in Italian) literally translates as "pull me up" (tirami = pull me, su = up) and means "pick me up" or "lift me up." It's a direct reference to the caffeine buzz from the espresso in the dessert, and also a nod to the generally kid-like fuzzy feelings you get when you eat it!
It's a super delicious, chilled, classic Italian no-bake dessert made from layers of espresso-soaked savoiardi (ladyfingers) that become soft and cake-like in a rich mascarpone cream, finished with a generous dusting of unsweetened cocoa powder and often a garnish of shaved 'cioccolato fondente' (dark chocolate) at many restaurants here.
With few exceptions, it's on virtually every restaurant menu in Italy, from the most casual trattorie to fine dining restaurants.
The original recipe was born in Treviso, a beautiful city of little canals, an impressive seafood scene (also the birthplace of prosecco), about an hour from where we live in the Veneto.
It's credited to Chef Roberto Linguanotto and his apprentice Francesca Valori at Le Beccherie restaurant, sometime in the late 1960s or early 1970s. You can still go there and order it today alongside their modern Veneto cuisine while you sit canal-side, which I highly recommend!
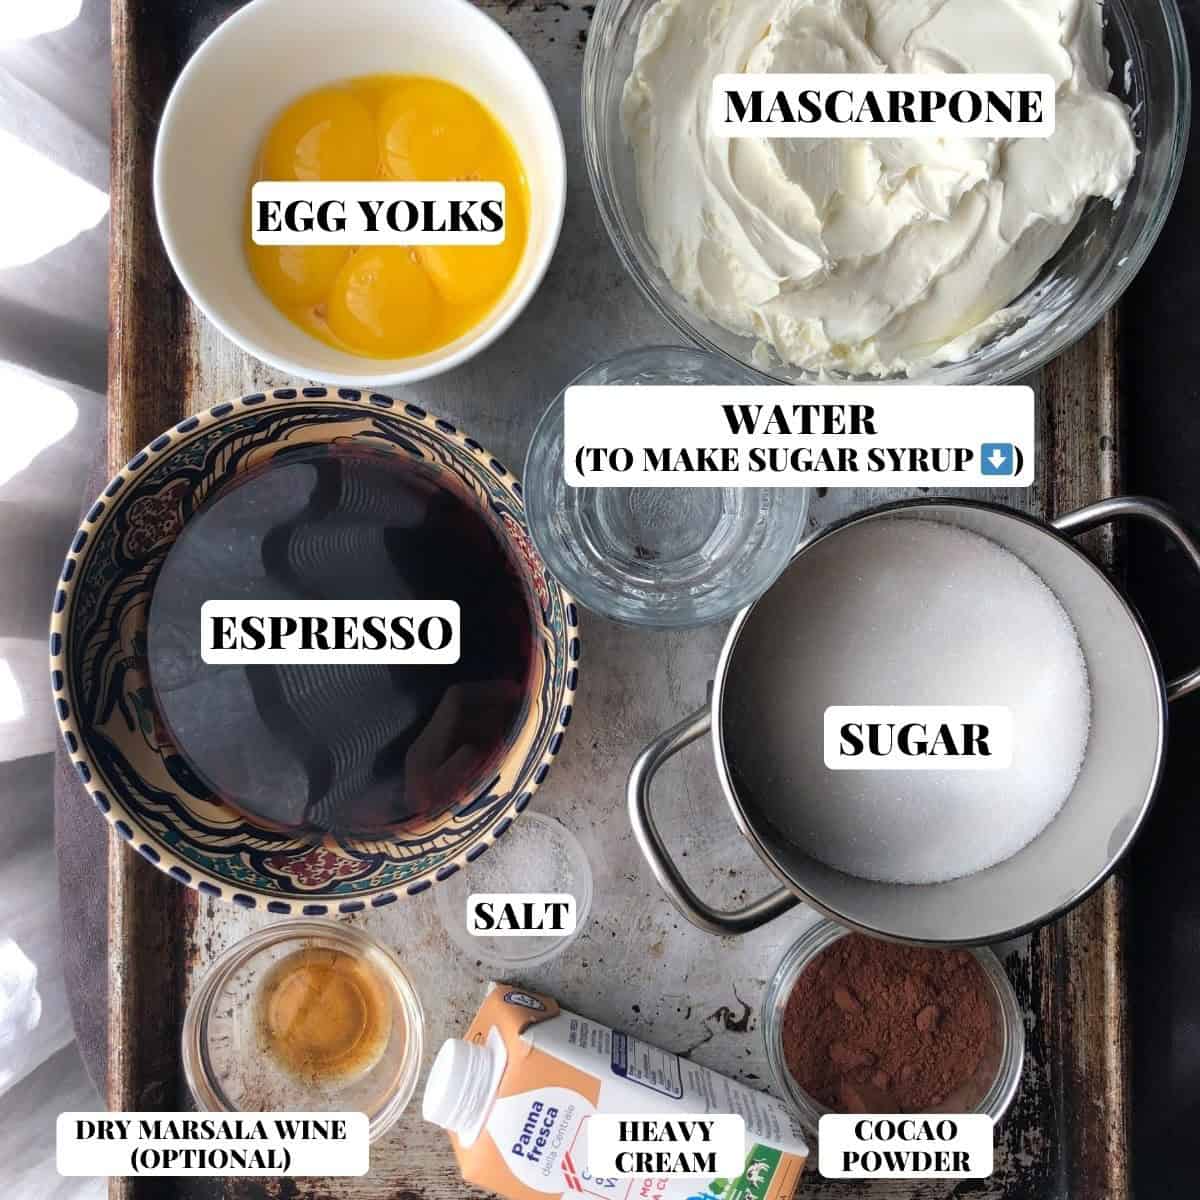
It contains exactly six ingredients: savoiardi (ladyfingers), espresso (never regular drip coffee), egg yolks, sugar, mascarpone, and cocoa powder. No alcohol (not even Marsala). No whipped cream (although many modern versions here in Italy do include unsweetened whipped cream). And never egg whites.

Tiramisu Ingredients
Six core ingredients. The quality of each one matters because the list is so simple.
Six ingredients do all the work here. Quality matters more in this recipe than almost any other - there's nothing to hide behind.
- Egg yolks: Must be room temperature so they whip up to their maximum volume and pale yellow ribbon state (the foundation of the pâte à bombe cream)
- Granulated sugar: Used to make the hot syrup that pasteurizes the yolks and helps build the cream's structure. Do not substitute.
- Mascarpone: Cold, straight from the fridge. Brand and moisture content matters significantly here - see the mascarpone section below for specific recommendations and what to avoid.
- Heavy cream: 32-35% fat, cold. Whipped to stiff peaks and folded in for added structure, balancing the sweetness, and that velvety mouthfeel. Do not substitute with lower-fat cream or half and half.
- Savoiardi (ladyfingers): Dry and crisp only (never the soft cakey kind). Look for the thickest ones you can find for better structure. See the ladyfingers section below for brand recommendations and what to avoid.
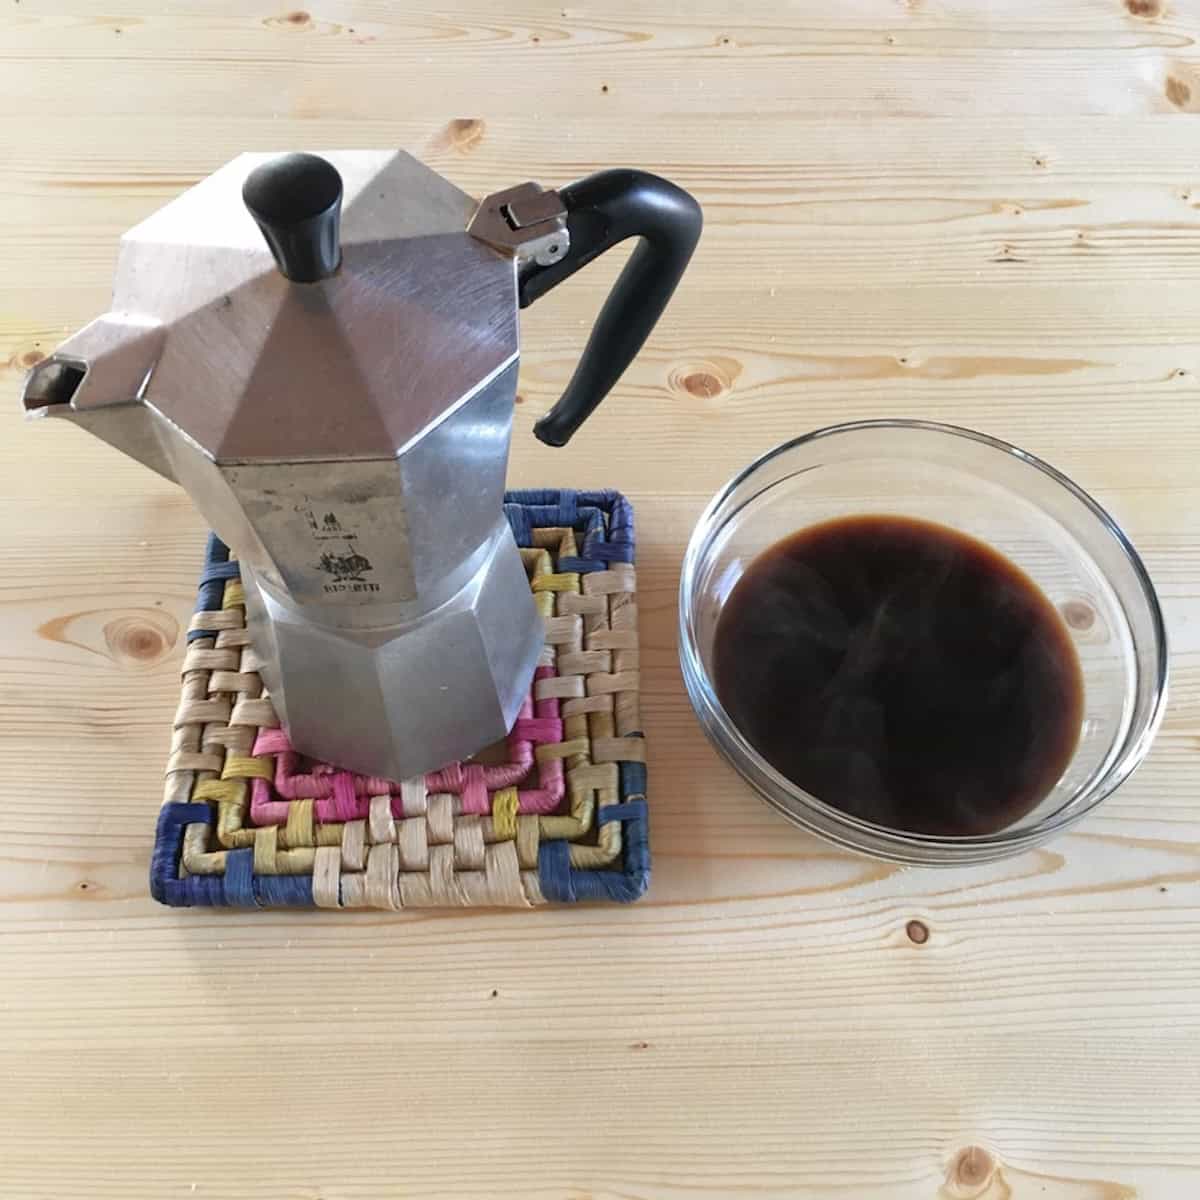
- Strong espresso: Cooled completely to room temperature or refrigerated before using. A moka pot is the traditional Italian method (See the coffee section below for alternatives if you don't have one. Don't use strong drip coffee as a substitute...it does not taste the same).
- Unsweetened cocoa powder: Applied only at the very last moment before serving. Dutch-process is the gold standard for a smoother, less bitter finish.
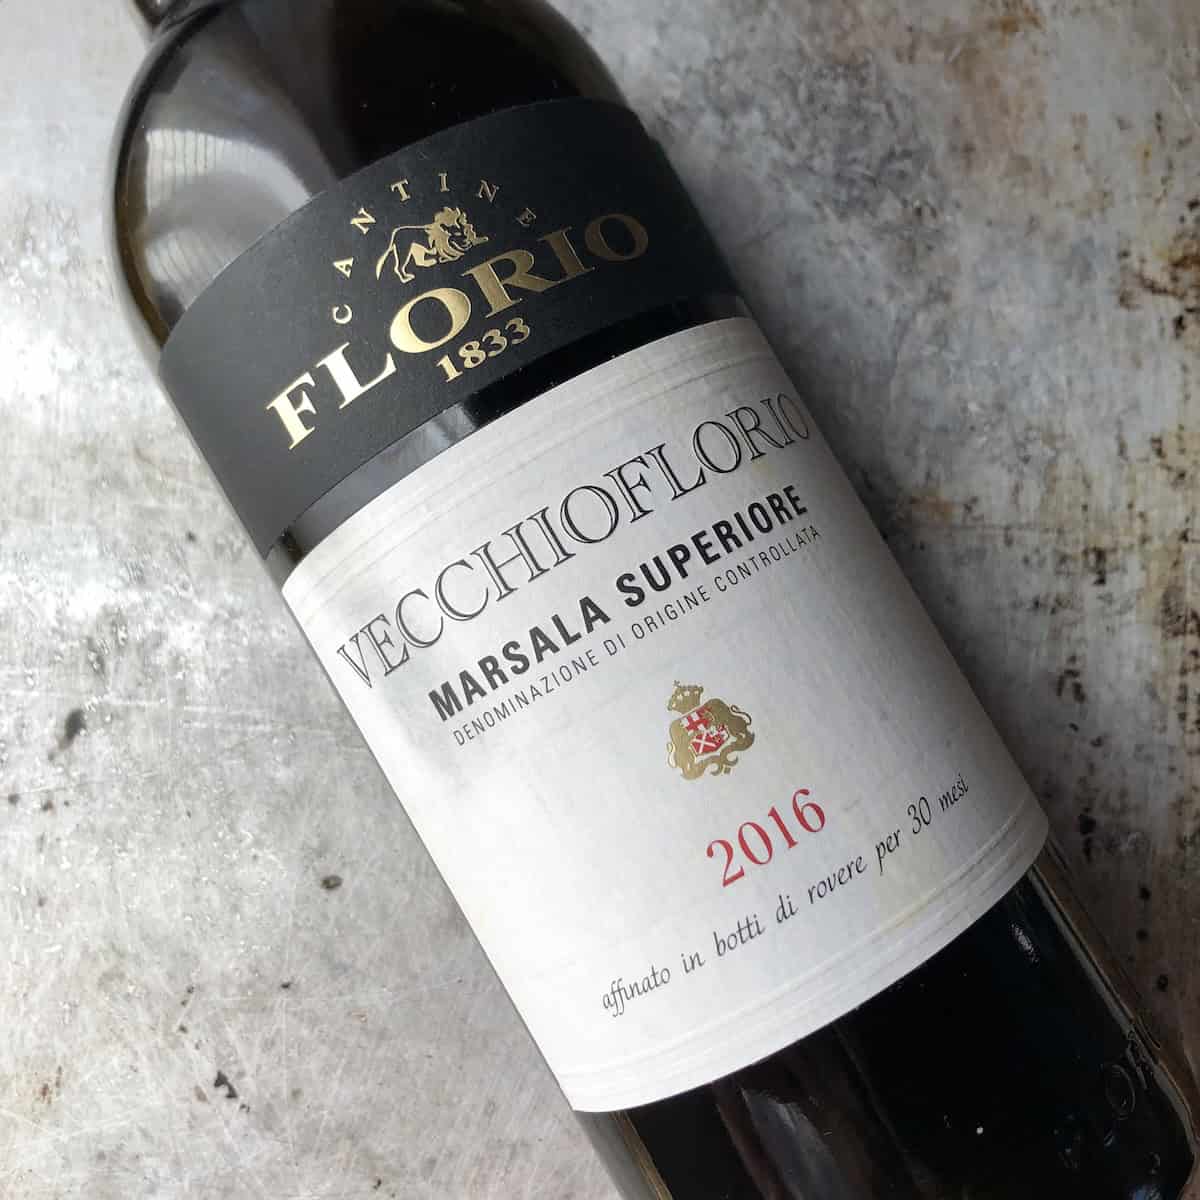
- Dry Marsala wine: Optional. Just 1½ teaspoons (7g) stirred into the cooled espresso. Dry (Marsala secco) only. Never add sweet Marsala and never add it to the tiramisu cream, which will change the intended flavor of the dish.
- Kosher salt: Just an ⅛ teaspoon in the tiramisu cream. It doesn't make it taste salty. It keeps the sweetness from feeling heavy and one-note. As with many traditional Italian desserts, it's not an ingredient in the original, but many modern Italian pastry chefs are beginning to use it because they understand how even a couple of pinches of salt can keep desserts from tasting flat. I've noticed many of the best tiramisu (and other traditional Italian desserts) here now include a little salt for balance.
See recipe card for exact quantities.
Le Beccherie's Original Tiramisu Recipe vs. Biting at the Bits Tiramisu
| Recipe | Le Beccherie Original | B@TB Test 1 | B@TB Test 2 | B@TB Winner |
|---|---|---|---|---|
| Egg yolks | 6 | 4 | 6 | 5 |
| Egg whites | None | 4 | None | None |
| Whipped cream | None | None | 200ml | 200ml |
| Sugar | 250g | 150g | 130g | 130g |
| Mascarpone | 500g | 500g | 500g | 500g |
| Salt | None | 2 pinches kosher salt | ⅛ teaspoon kosher salt | ⅛ teaspoon kosher salt |
| Alcohol | None | 1 tablespoon dry Marsala | Optional — 1½ teaspoon dry Marsala | Optional — 1½ teaspoon dry Marsala |
| Ladyfingers | 300g | 300g | 300g + 4 extra | 300g |
| Layers | 2 | 2 | 3 | 3 |
| Pan Size | 9-inch Round cake ring | 9x13 casserole dish | 9-inch springform pan | 9-inch springform pan |
| Pasteurized | No | No | Yes — pâte à bombe method | Yes — pâte à bombe method |
| Safe for all groups | No | No | Yes | Yes |
| Structure | Sets up, clean slices | Too runny, doesn't set well | Sets up, clean slices | Optimal: sets up, clean slices, unctuous |
| Sweetness level | High | Slightly too sweet, less balanced | Perfectly balanced | Perfectly balanced |
| Notes | A beloved classic worth ordering in Treviso, but on the sweet side and not pasteurized | Alcohol flavor way too pronounced, poor texture | Flavor and mouthfeel with 6 yolks were ok but surprisingly slightly too rich. Extra ladyfingers needed to cover the cream due to how this version layers | Perfect balance of richness and flavor — the kind of tiramisu you want to keep eating. Flower pattern layering uses exactly 300g ladyfingers |
See recipe card for exact quantities.
The Best Ladyfingers for Tiramisu
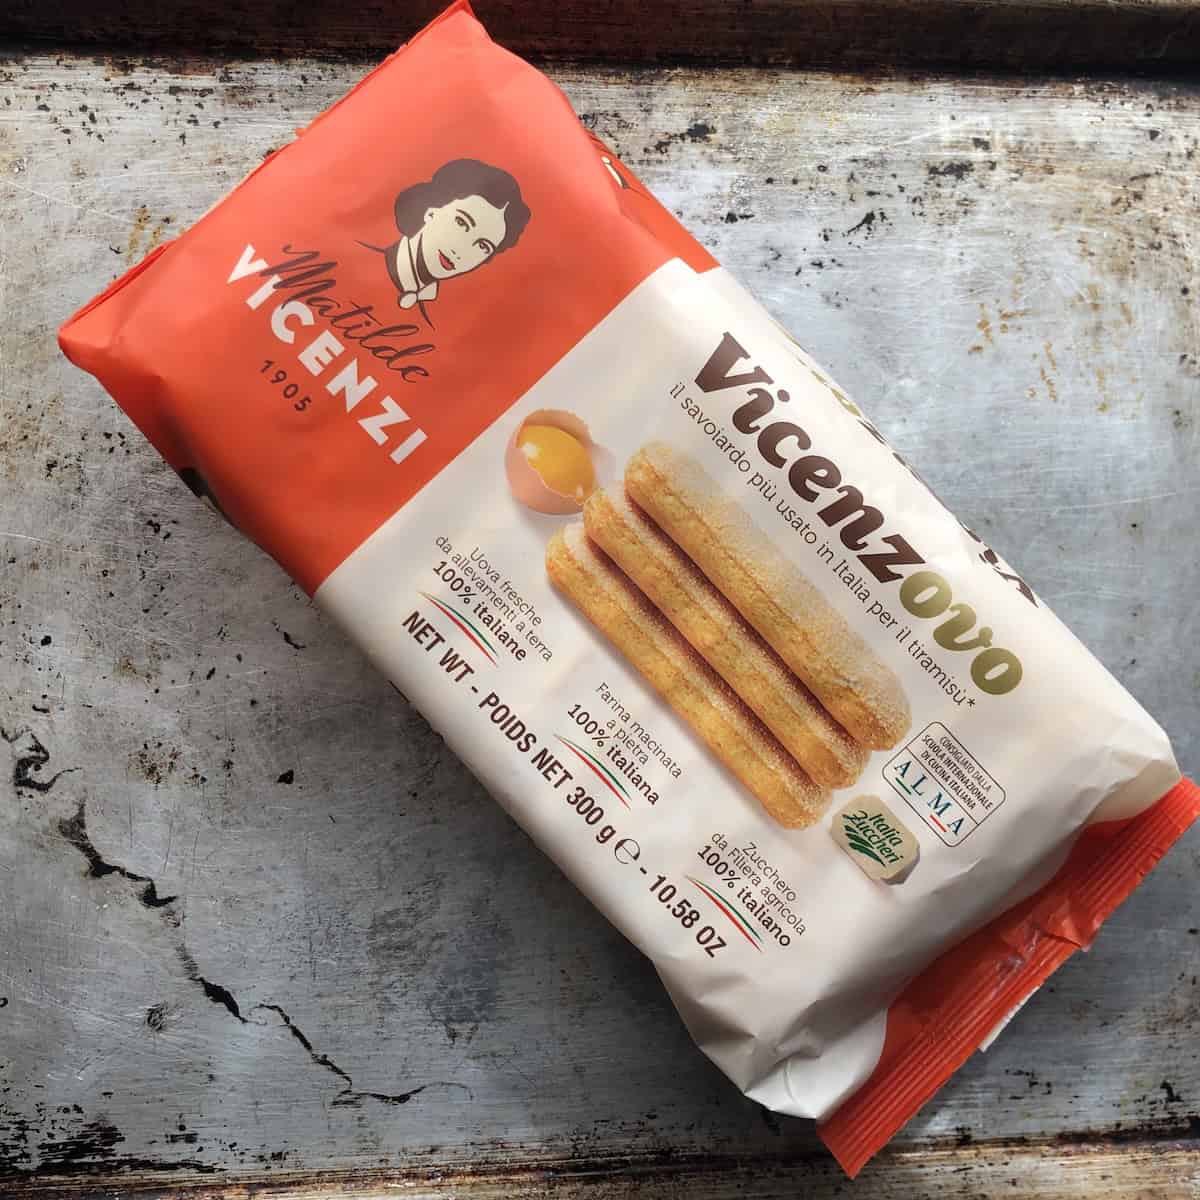
I've used Vicenzovo ladyfingers in this recipe, made by Matilde Vicenzi in San Giovanni Lupatoto, in the province of Verona, about 35 minutes from our house. We pass the factory anytime we drive to Verona, Lake Garda, Merano, etc. Matilde Vicenzi herself opened her bakery there in 1905.

She was a sole female entrepreneur at the turn of the twentieth century, and her original handwritten recipe book is now preserved in the company museum. The Vicenzovo recipe hasn't changed in over a century: flour, sugar, and 26% fresh eggs. No artificial flavoring, no preservatives, no palm oil. This is what you should look for when buying them.
In 2005, Vicenzovo actually became the first Italian product to earn government certification under the official regulation defining what a savoiardo legally is. It's officially a specific elongated shape, has an airy bubble structure, a sugar-dusted top, and a precise egg content range.
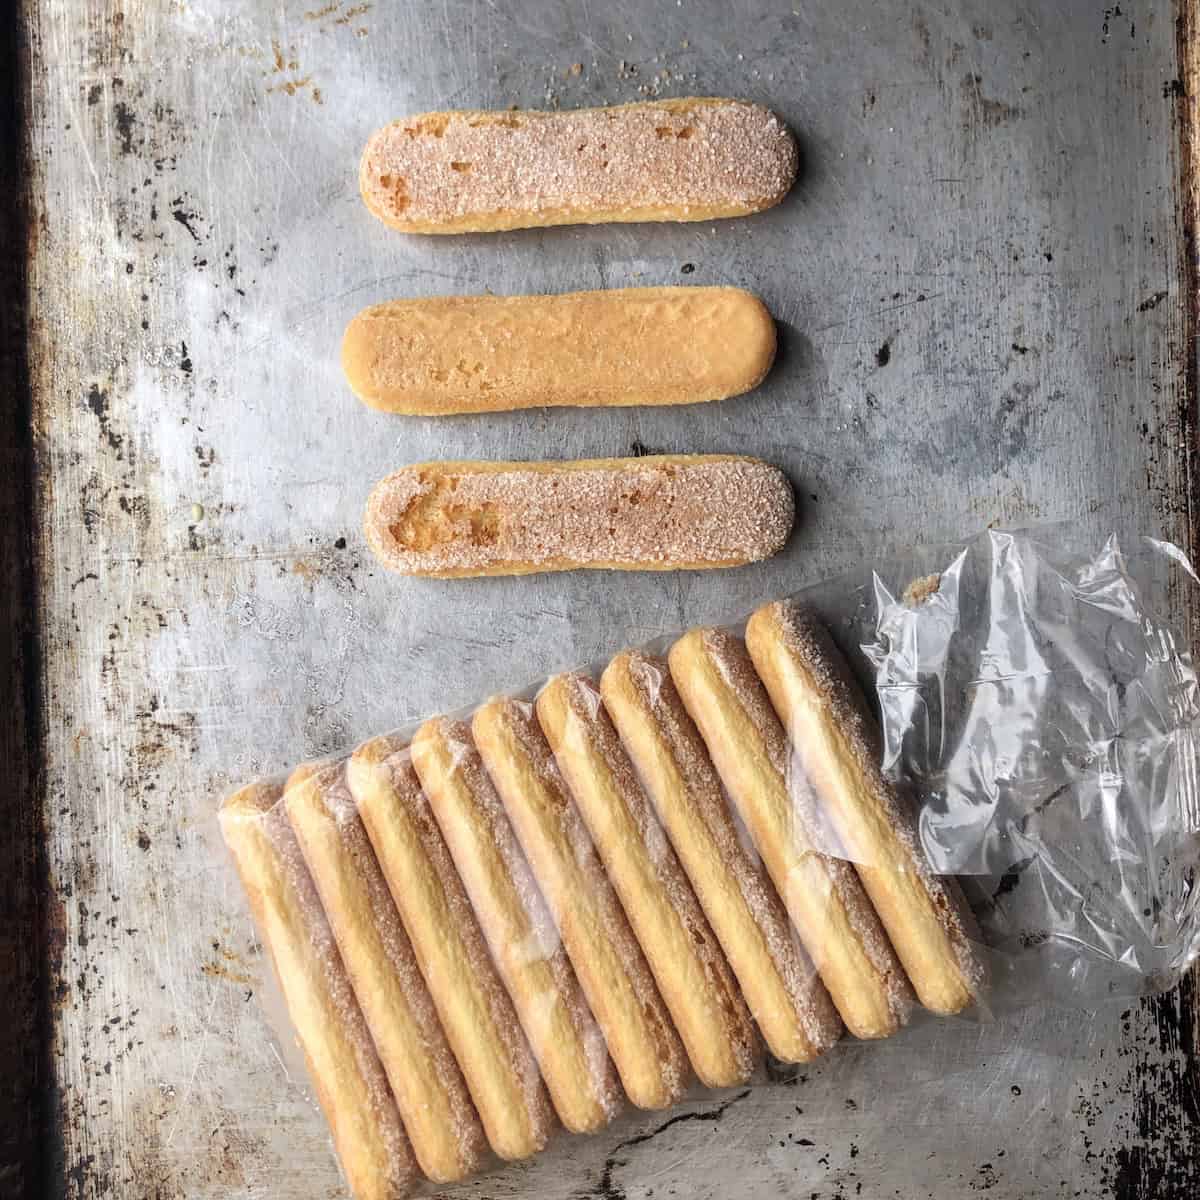
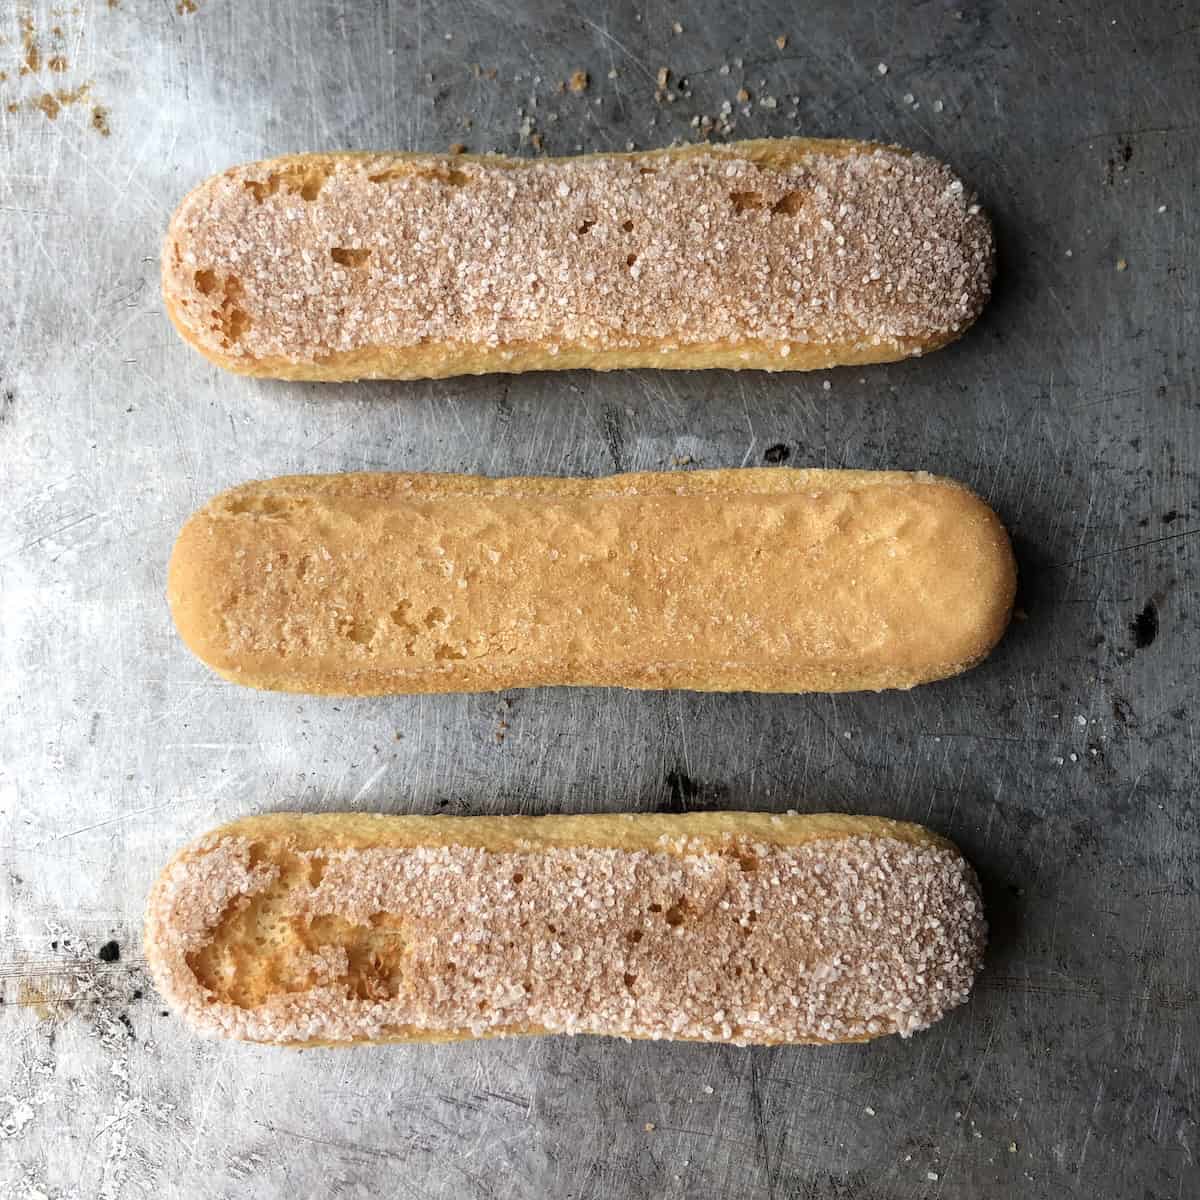
They're engineered to absorb liquid without collapsing (unless you dip them too long), which is exactly what tiramisu requires. It's essentially like you're rehydrating a cake.
Vicenzovo comes in 300g (10.58-ounce) packages with three individual packages that can be opened as needed. They are slightly narrower than some other brands, which makes them easier to arrange in layers than wider-format options.
Best ladyfingers for tiramisu available in the US:
| Brand | Made In | Package Size (US) | Notes |
|---|---|---|---|
| Vicenzovo by Matilde Vicenzi | Verona, Italy | 300g/10.58 oz - 3 individually wrapped packs 100g (3.5oz) each | First choice, Italy's #1 certified savoiardo. One full package is the perfect amount for this recipe. |
| Forno Bonomi | Roverè Veronese, Italy | 500g/17.5oz - also available in 200g/7oz | Widely available on Amazon and Walmart; excellent structure |
| Sanniti Savoiardi | Italy | 500g/17oz | Available on Amazon |
| Bellino | Italy | 7 oz (2 individually wrapped packs of 3.5 oz each) - also available in a larger 17oz pack | Found in many US grocery stores and online |
What to avoid: soft, cakey ladyfingers. These are not the same thing as the dry, crisp, sugar-dusted variety used for tiramisu. They absorb liquid too quickly and would produce exactly the soggy fall-apart layer that will ruin this dessert.

The Best Mascarpone for Tiramisu
Mascarpone quality is one of the most common causes of runny, grainy, or split tiramisu cream. The brand matters as do the ingredients.
High-quality mascarpone starts with fresh, high-fat cream heated to around 85 to 90°C before an acidifying agent is added to coagulate it. Many of the most premium artisanal Italian brands use lactic acid (a natural milk compound) that produces a firmer, denser, naturally sweeter curd that holds its structure well when beaten (much the same way American Philadelphia Cream Cheese does).
Citric acid is very common in mass-produced mascarpone and tends to create a softer, wetter result that releases more moisture and is more prone to breaking when mixed. But the acid is only part of the story. The freshness and fat content of the cream and the absence of stabilizers matter just as much, if not more.
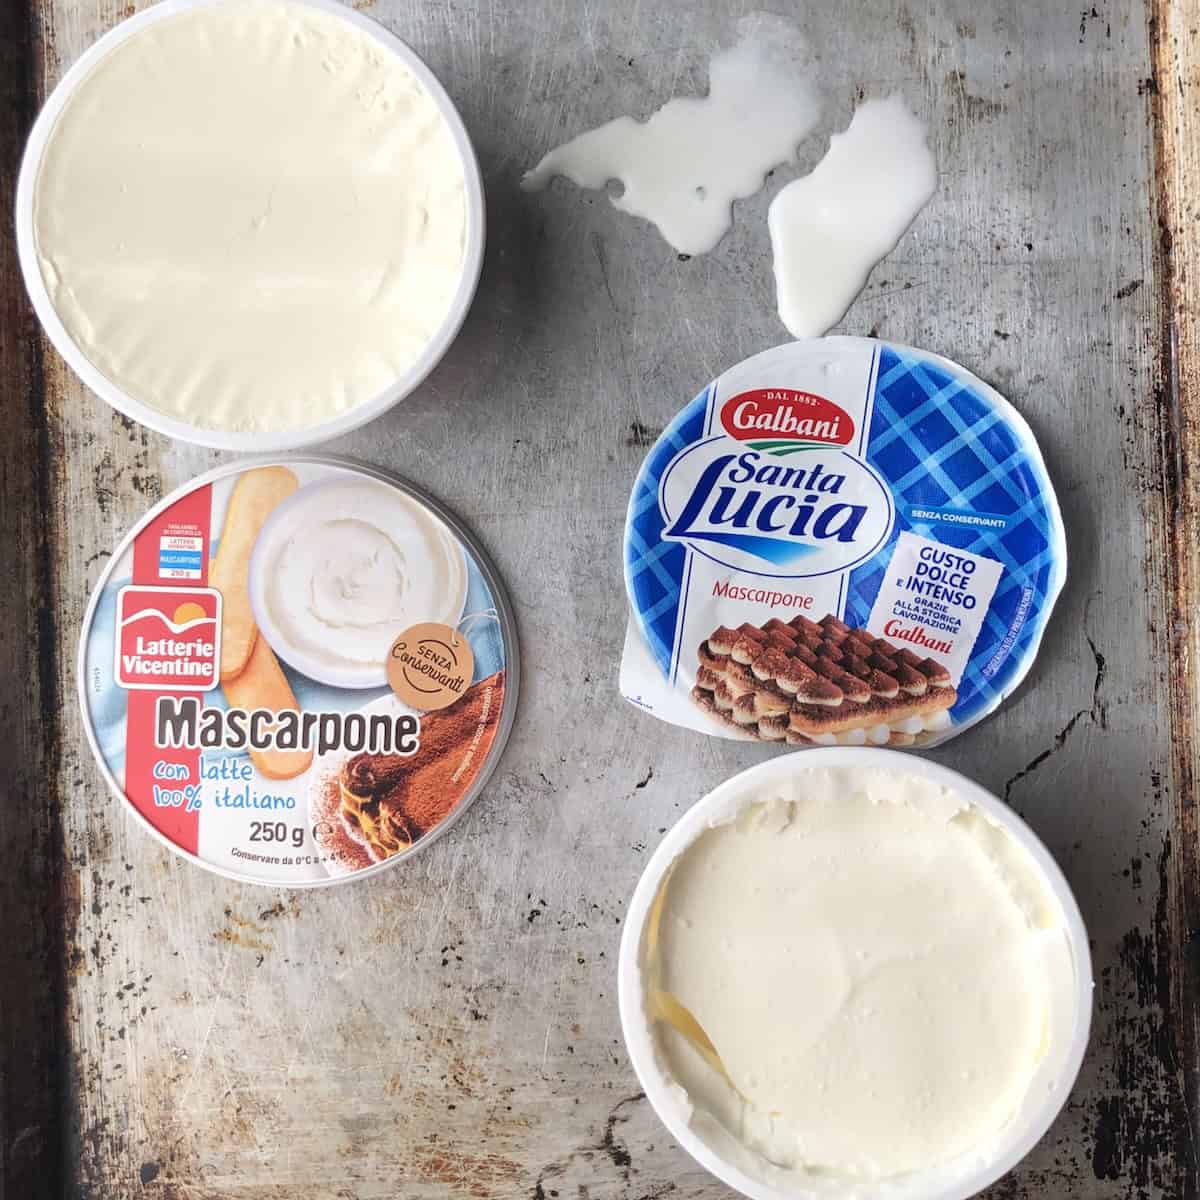
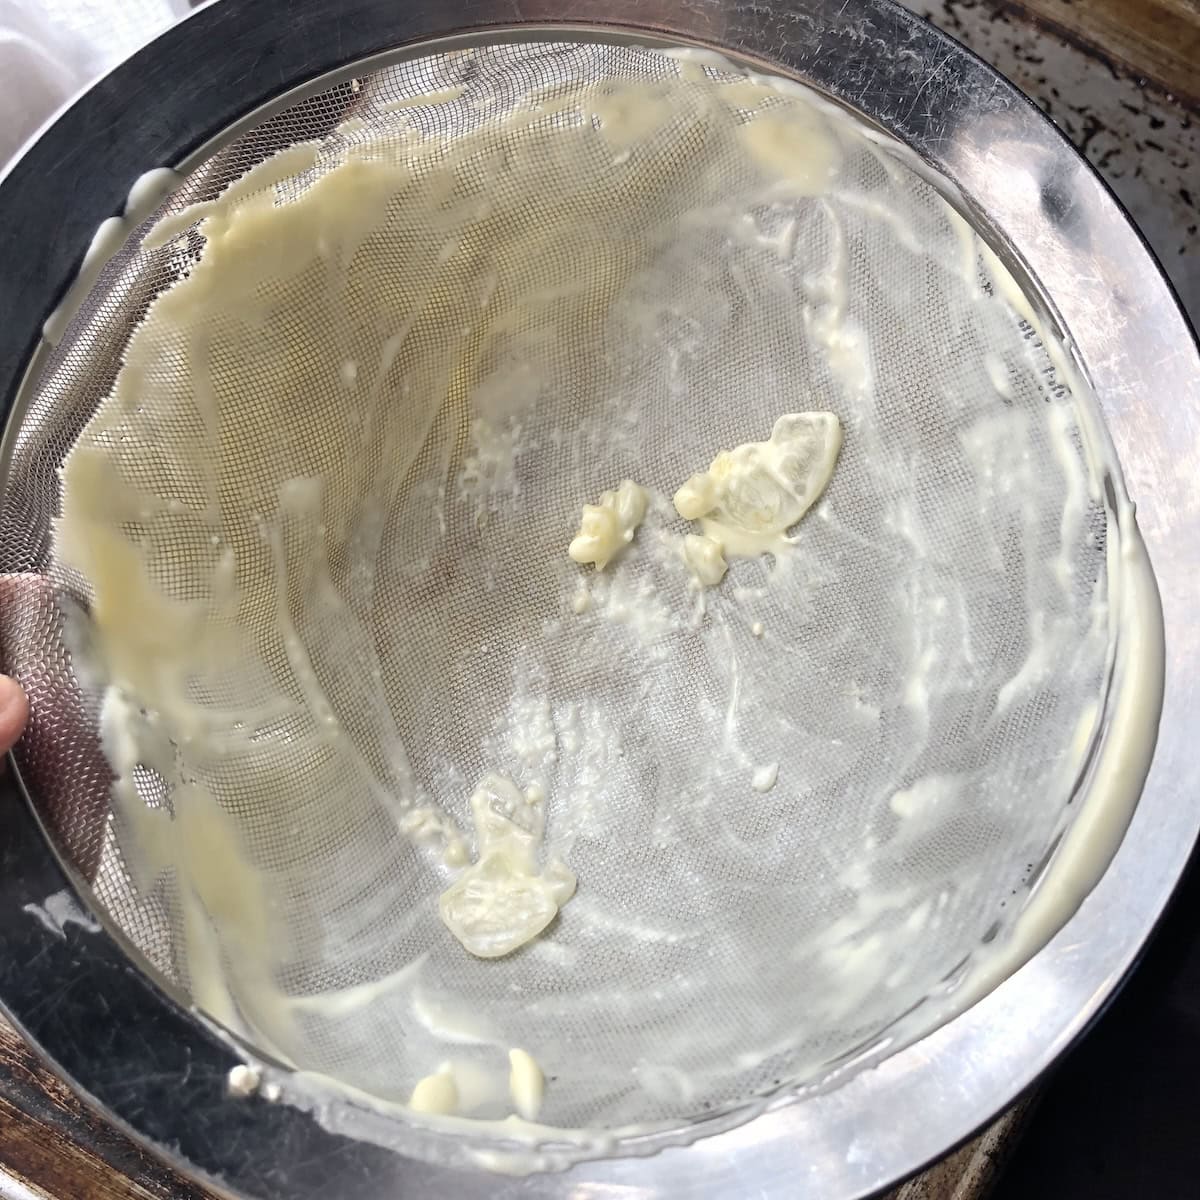
A good mascarpone should smell of fresh cream, taste naturally sweet and delicate, and have a smooth, dense, shiny consistency with little to no graininess or bumps (which actually you can see in the Galbani version in the second photo below).
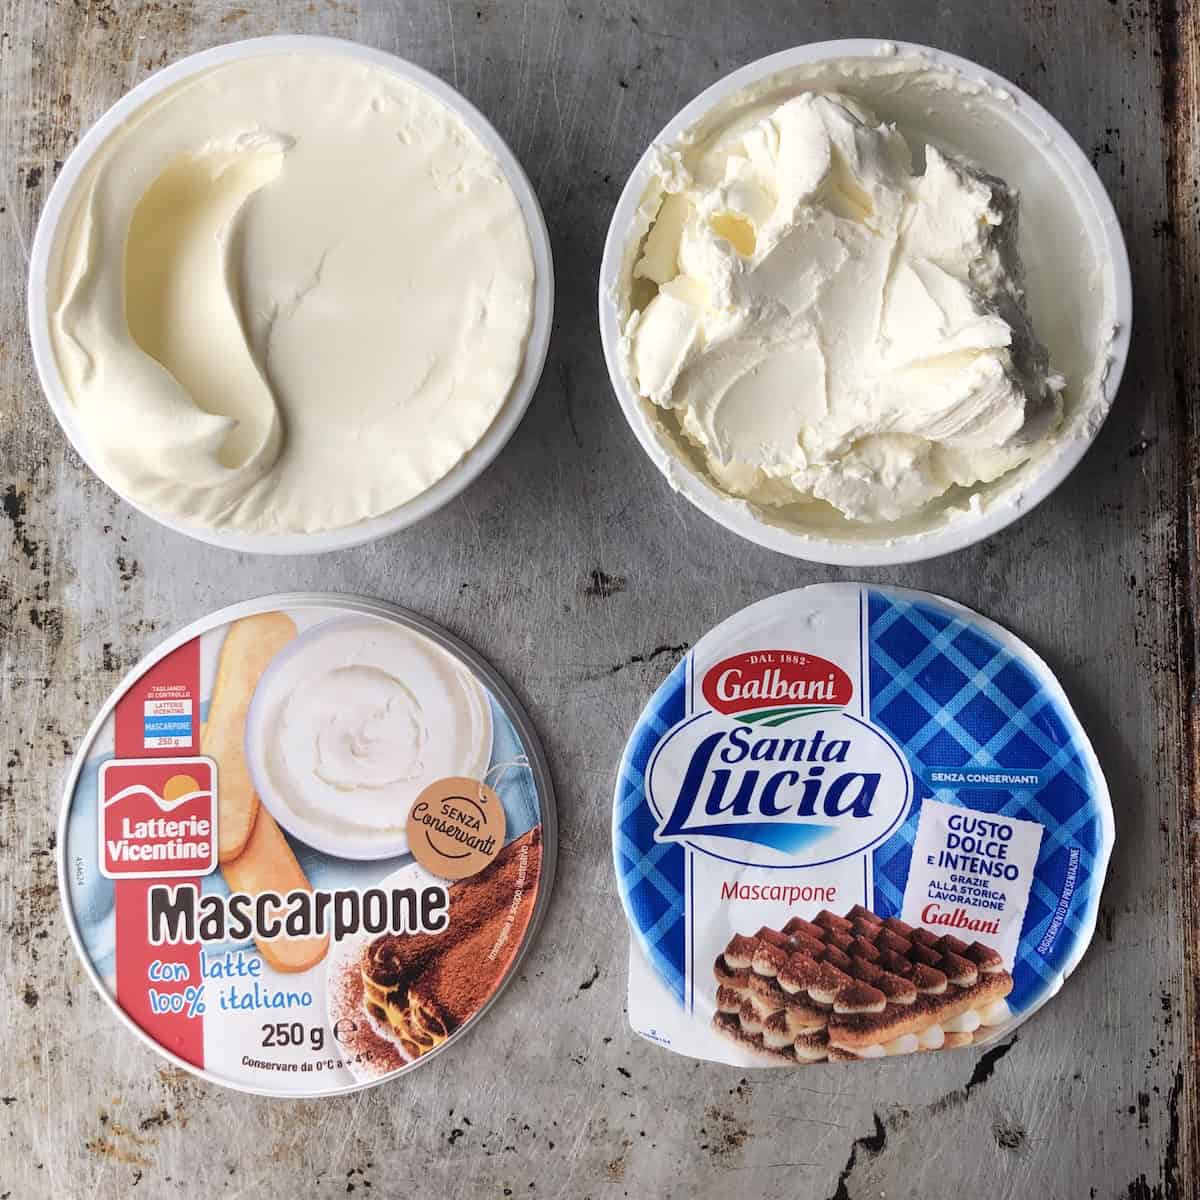
If you open the tub and see pooled liquid (like the Galbani below), drain it before using. Even if you don't initially see any liquid on the surface, it's worth turning it over and straining it to get any that may be hiding near or under the bottom.
| Mascarpone Brand | Made In | Ingredients | Verdict |
|---|---|---|---|
| Latterie Vicentine | Bressanvido, Italy | Cream, milk, lactic acid | Personal favorite. Firmer, denser, naturally sweeter, and less watery than citric acid versions. The lactic acid produces a tighter curd with a cleaner, more delicate cream flavor. Worth seeking out this style at Italian specialty stores or online. |
| GranTerre | Modena, Italy | Cream, citric acid | A personal favorite for the flavor it lends to the cream. Official mascarpone of Bake Off Italia. Made with 100% Italian cream and citric acid - not as firm as Latterie Vicentine but produces a beautifully smooth, creamy finished tiramisu with a delicate, clean flavor. |
| Polenghi | Torino, Italy | Cream, citric acid | America's Test Kitchen top-rated. Made with cream only, no milk, giving it a higher fat content, denser texture, and exceptionally smooth consistency that slices neatly. Best widely available option for US readers. |
| Galbani (Santa Lucia) | Corteolona (PV), Italy | Cream, milk, citric acid | Widely available in the US and Italy. The same mascarpone used in the photos in this post. Looser and creamier than Latterie Vicentine, but still holds up beautifully with it. Reliable and consistent. |
| Vermont Creamery | Websterville, Vermont, USA | Cream, skim milk, glucono delta-lactone | Great domestic US option. Glucono delta-lactone is a natural acidifier derived from glucose, milder than citric acid. Consistent, reliable, and widely available at Whole Foods and specialty grocery stores. |
| BelGioioso | Denmark & Pulaski areas, Wisconsin, USA | Milk, cream, citric acid | Milk is listed before cream on the label, meaning more milk than cream, making it wetter, lower in fat, and more prone to splitting when beaten. Widely available, but avoid if another option is accessible. |
Always check the use-by date. Old mascarpone breaks down during mixing, even when handled correctly.
What Coffee to Use for Tiramisu
Absolutely do not use regular drip-brewed coffee (not even when made "extra-strong"). It tastes nothing like espresso, lacks the concentration the recipe requires, and will produce a flat-tasting, watered-down result. Tiramisu was built around bold, deeply concentrated unsweetened espresso to balance the tiramisu cream. It's non-negotiable.
But, if you don't own an Italian moka to make homemade espresso, you still have plenty of great options! Here they are:
Best options:
- Moka pot: Espresso made in a traditional Italian home method. Like us, every Italian household has at least one moka (often several in different sizes). Strong, concentrated, and exactly what this dessert was designed for.
- Espresso machine: Great option if you can afford one and/or have the counter space for one. Brew enough shots to yield just about 500ml/2 cups of espresso.
- Starbucks Doubleshot Espresso (Americana Black): Easy, ready-to-drink canned, unsweetened, widely available at grocery stores and convenience stores. Look for the Americana Black version only. Do not use flavored or sweetened versions.
- Illy Issimo Caffè Unsweetened Espresso (Italian Espresso Style Coffee Drink): Easy, ready-to-drink canned, unsweetened, widely available at grocery stores and convenience stores. Do not use flavored or sweetened versions.
- Espresso shots from a coffee shop: Another easy option if you have a location near you, but it will likely be more expensive. Order enough, seal in a cup, and cool completely before using.
- Starbucks VIA instant espresso packets: Acceptable in a pinch, made strong per packet instructions.
The throughline here: Use only unsweetened, unflavored espresso (not cold-brew coffee or drip coffee of any kind). Do not add sugar, vanilla, maple syrup, or any other sweetener to the espresso for dipping the ladyfingers. If you do, it won't taste like it's supposed to, and the tiramisu will be way too sweet and unbalanced.
For decaf tiramisu: For all the flavor of the classic with less of a pick-me-up, use decaf espresso by any of the methods above. The flavor will not be impacted, and the result is just as satisfying.

Does Tiramisu Have Alcohol? What About Rum and Amaretto?
The original Treviso recipe contains no alcohol at all. The internet is full of tiramisu recipes adding rum, amaretto, Kahlúa, or Grand Marnier as though they're essential. They're not, and adding any of them creates a completely different dessert.
The only addition with any historical grounding in northern Italian pastry tradition is dry Marsala wine, and even that is widely debated. Plenty of Italian friends and family use it and always have, so it earns its optional place here, and I always use it sparingly.
If you use it, two things matter. First, always use dry (secco) Marsala, which contains less than 40g of residual sugar per litre. Sweet Marsala adds too much sweetness to the espresso, which is supposed to counterbalance the sweetness of the cream.
Second, add it to the espresso only, never to the cream. Adding liquid to the mascarpone cream works against the firm, sturdy texture you're building, and it changes the intended flavor of the cream itself.
This recipe uses just 1½ teaspoons (7g) stirred into the cooled espresso. It adds subtle depth without being detectable or overpowering the coffee. Don't use 1 to 2 tablespoons as many recipes suggest. That's far too much, and your tiramisu will taste of alcohol rather than coffee.
If you don't already have a bottle of dry Marsala lying around, don't make a special trip to go buy it. Left out entirely, the tiramisu is excellent, and you likely won't notice the difference 😉.
Rum and amaretto are popular additions in many recipes, particularly outside Italy, and they do add flavor. Rum brings a warm, slightly caramel note, and amaretto adds an almond cherry-like sweetness. But if you're after classic Italian tiramisu, skip them. They shift the flavor profile away from coffee-forward and toward something else. Use dry Marsala, or nothing at all.
| Alcohol | Authentic? | Flavor Note | Verdict |
|---|---|---|---|
| None | Yes, it's the original recipe | Clean coffee flavor | Great without it! |
| Dry Marsala (secco) | Modern Italian traditional interpretation | Subtle, nutty | Our choice: 1.5 teaspoon (7g) added to the espresso |
| Sweet Marsala (dolce) | Modern Italian traditional interpretation | Sweet, nutty | Too Sweet, use dry or nothing at all. |
| Dark rum | No | Warm, caramel notes | Non-Italian addition; changes flavor profile |
| Amaretto | No | Almond sweetness | Non-Italian addition; makes it sweeter |
| Kahlúa / coffee liqueur | No | Sweet coffee flavor | Non-Italian addition; Adds sweetness; |
How to Make Tiramisu (Step by Step)
There are several steps, but it's all really quick and easy! Read through the full recipe once before starting, and have all your equipment ready: a stand mixer or hand mixer, a small heavy-bottomed saucepan, a candy thermometer if you have one, and your springform pan prepped and lined. The biggest time investment is the chilling, not the making.
Step 1: Brew and cool the espresso first
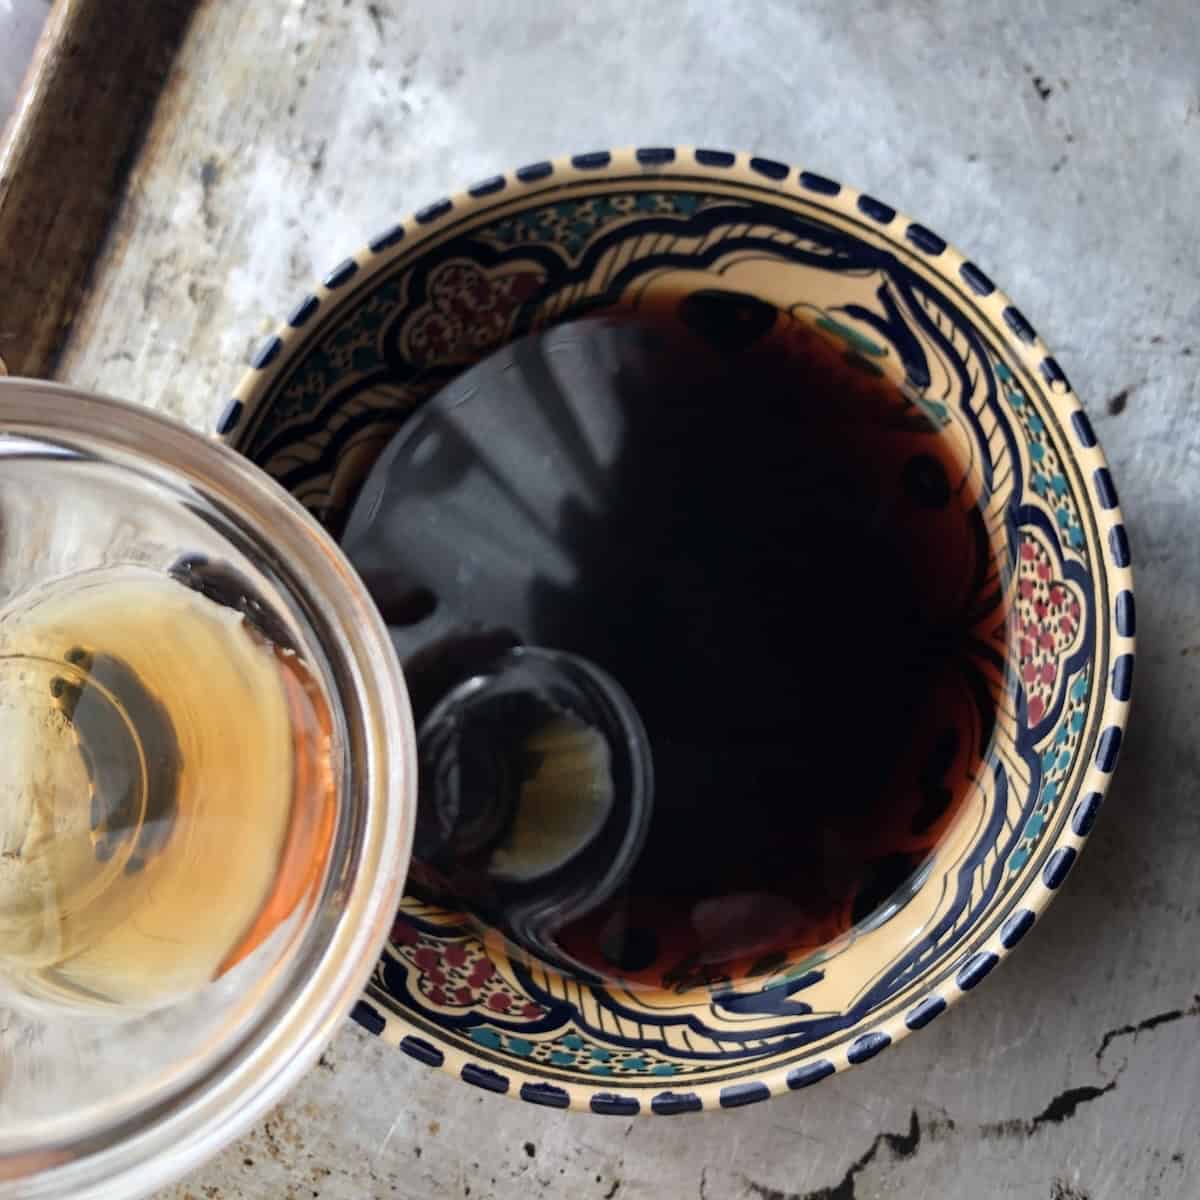
Make your espresso and pour it into a wide, shallow bowl. Set aside to cool completely to room temperature, or speed this up by refrigerating it the night before. This step must happen first. Warm coffee will over-soak the ladyfingers and create a soggy hot mess before they can even make it into the pan.
Add the dry marsala (if using) and set it aside until ready to dip the ladyfingers.
Step 2: Line and prep the springform pan
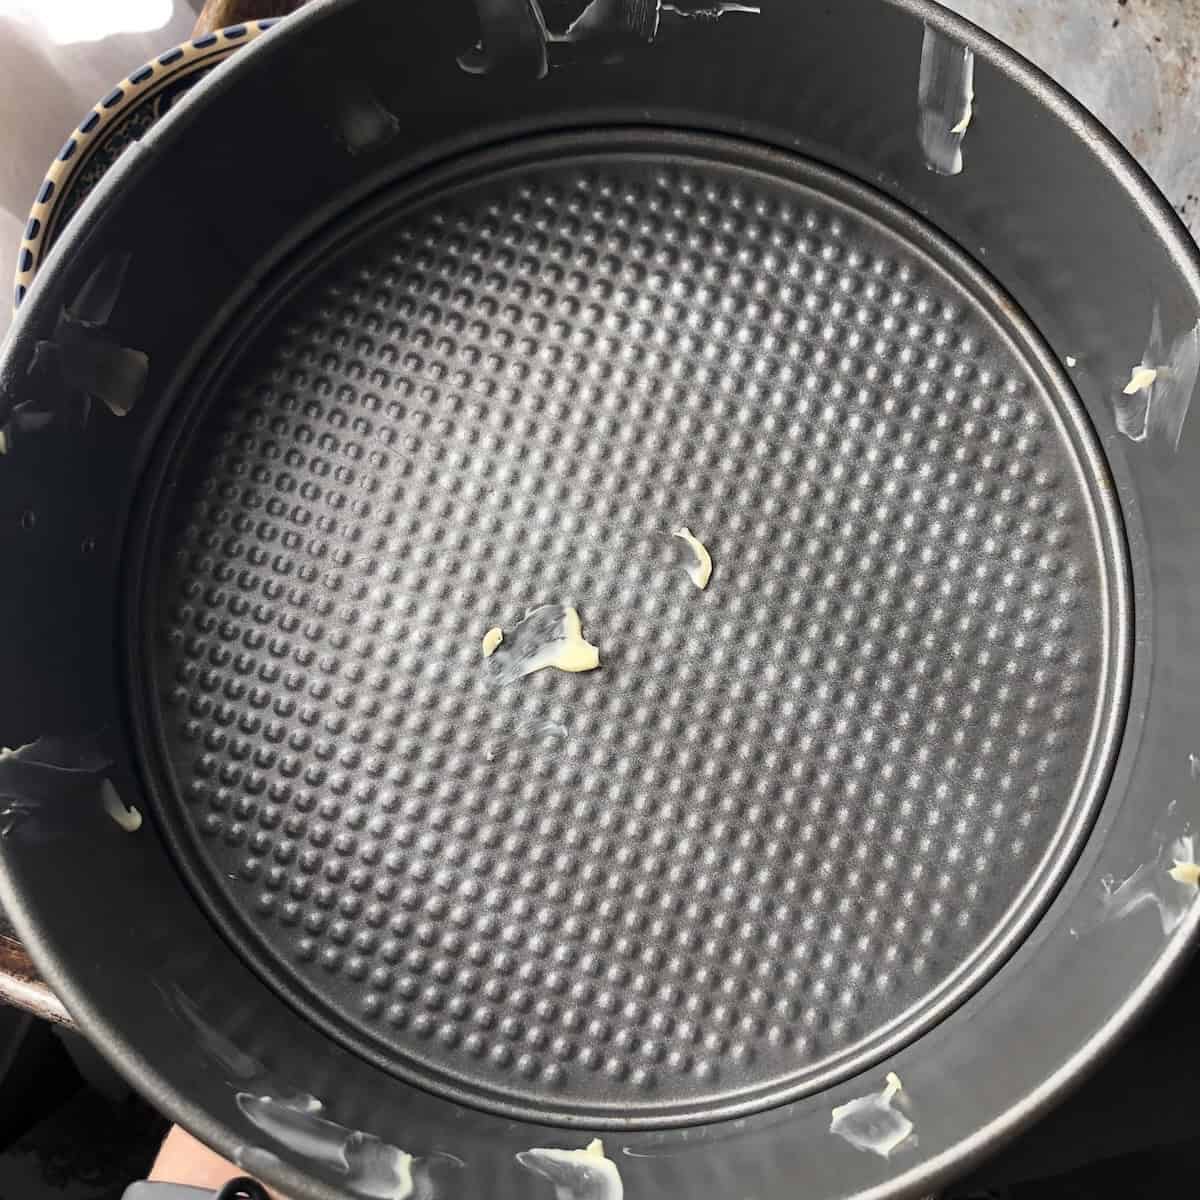
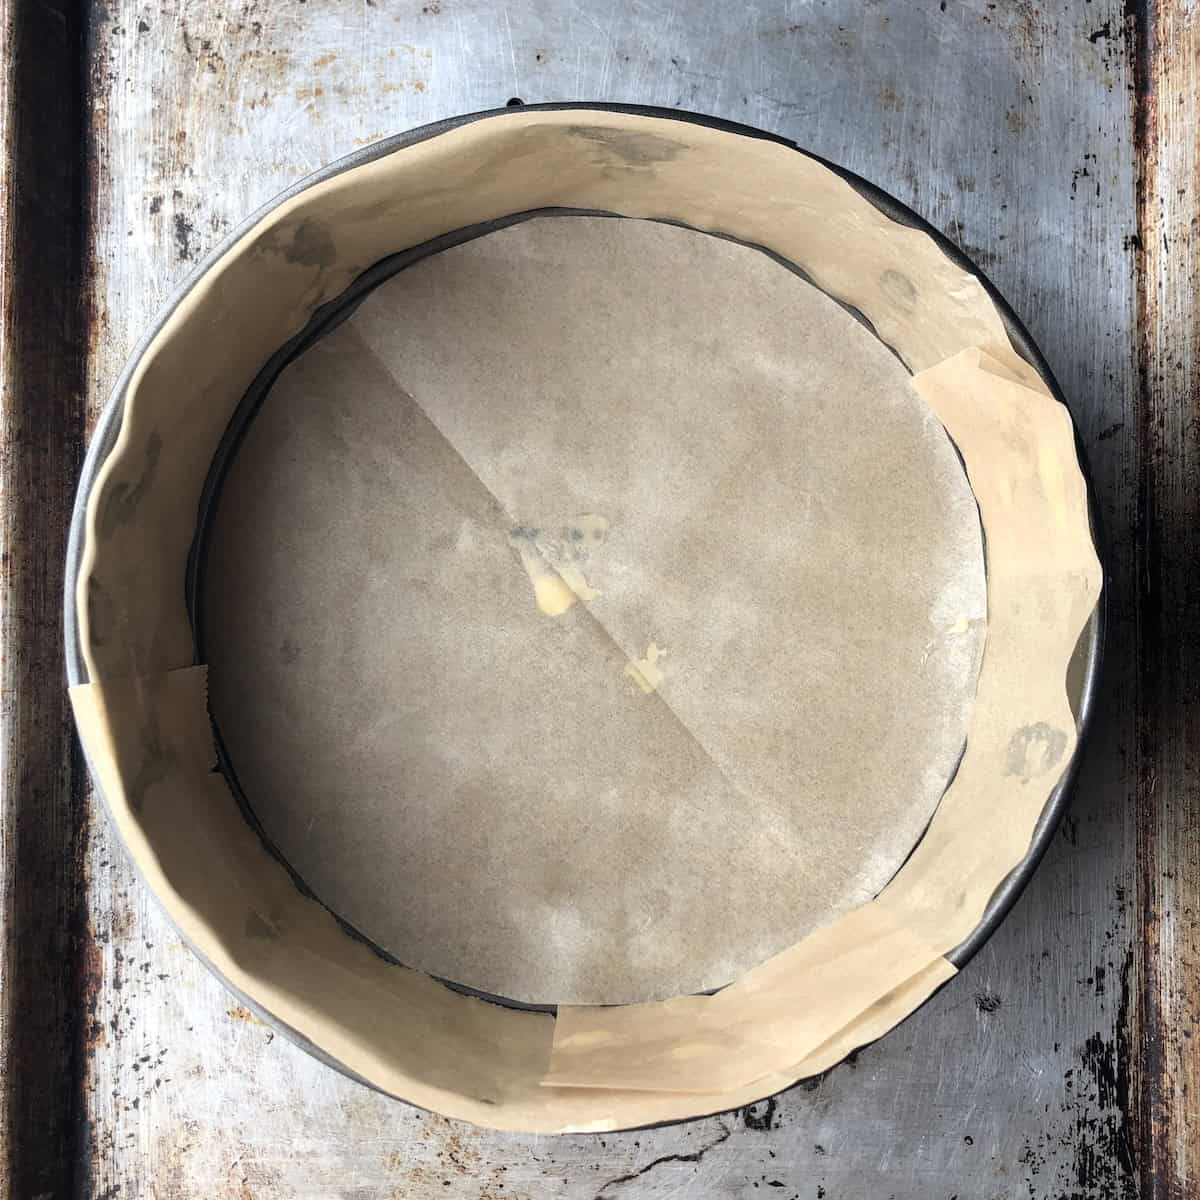
Line the base of a 9-inch springform pan with a round of parchment paper. If you're not using the flower layering method (more on that in the assembly steps), also line the inside walls with strips of parchment or acetate cut to the full height of the pan, using small dabs of butter on the pan to act like glue to hold the strips in place.
This gives the tiramisu clean, sharp sides when unmolded and makes removing the ring effortless.
Step 3: Whip the egg yolks

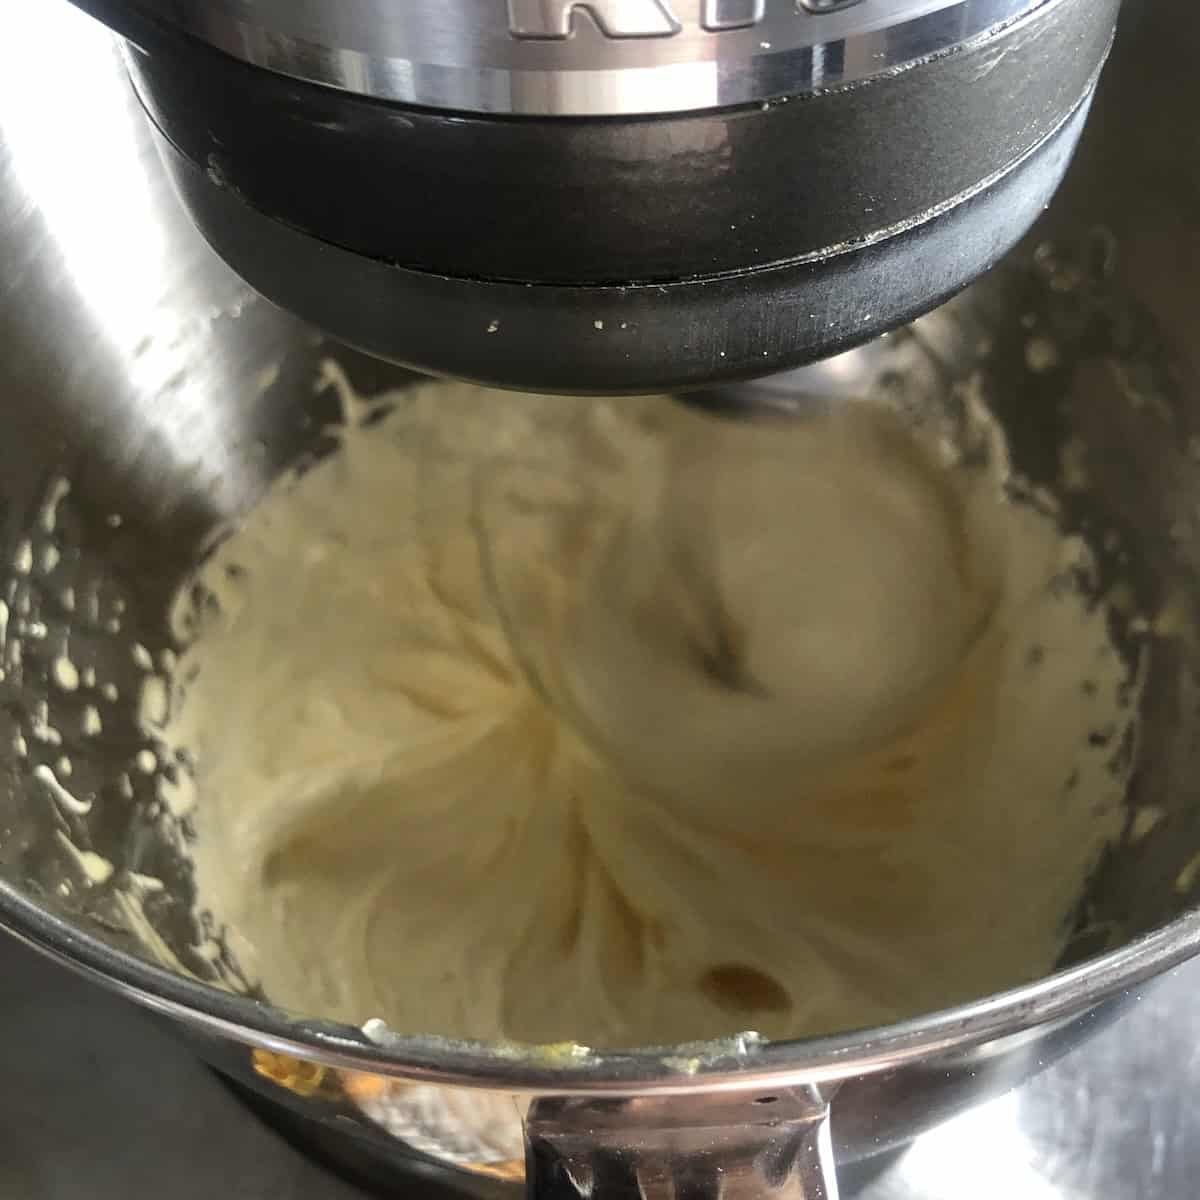
Place the 5 egg yolks in the bowl of a stand mixer fitted with the whisk attachment (or a large bowl for a hand mixer). Start whipping on high speed immediately. You want them fluffy, pale yellow, and holding "ribbons" before the syrup is ready. Whip for 5-7 minutes until pale, thick, and noticeably increased in volume.
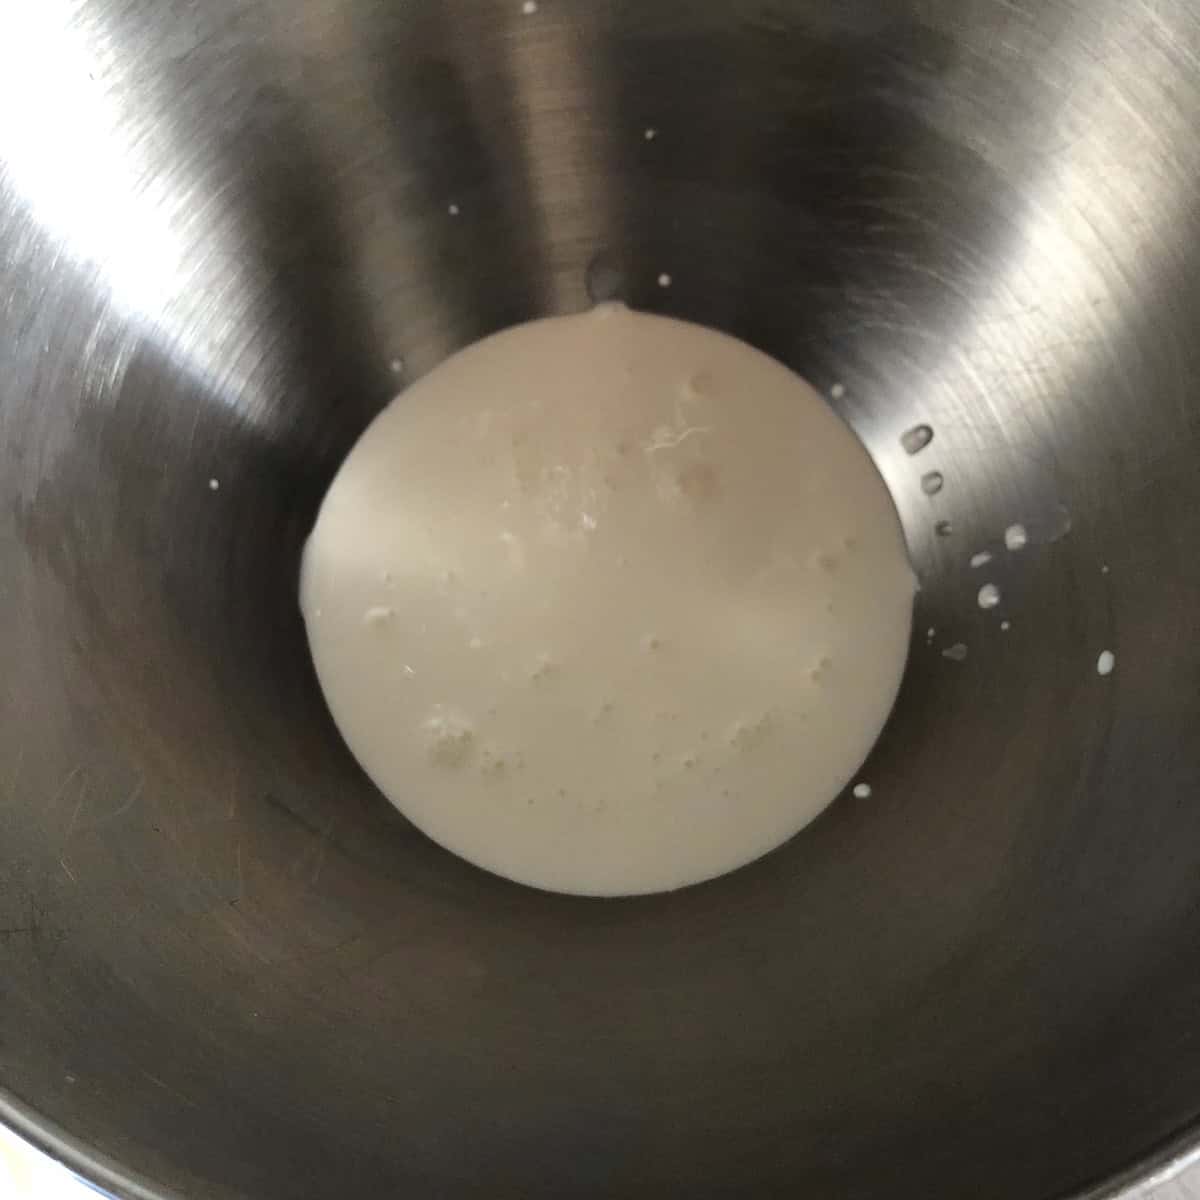
Step 4: Make the sugar syrup

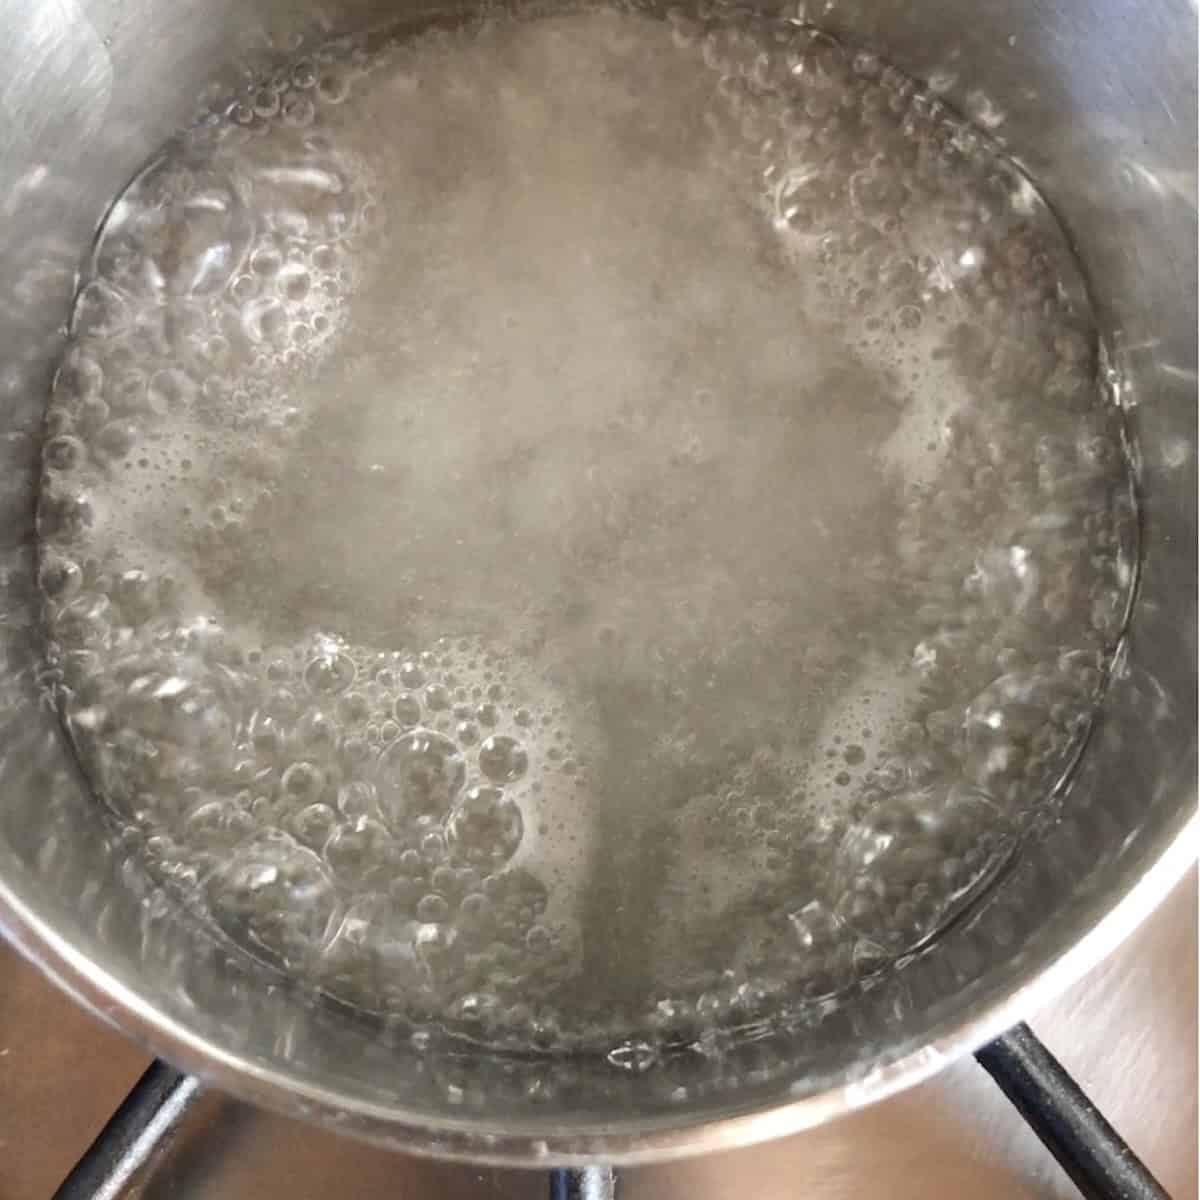
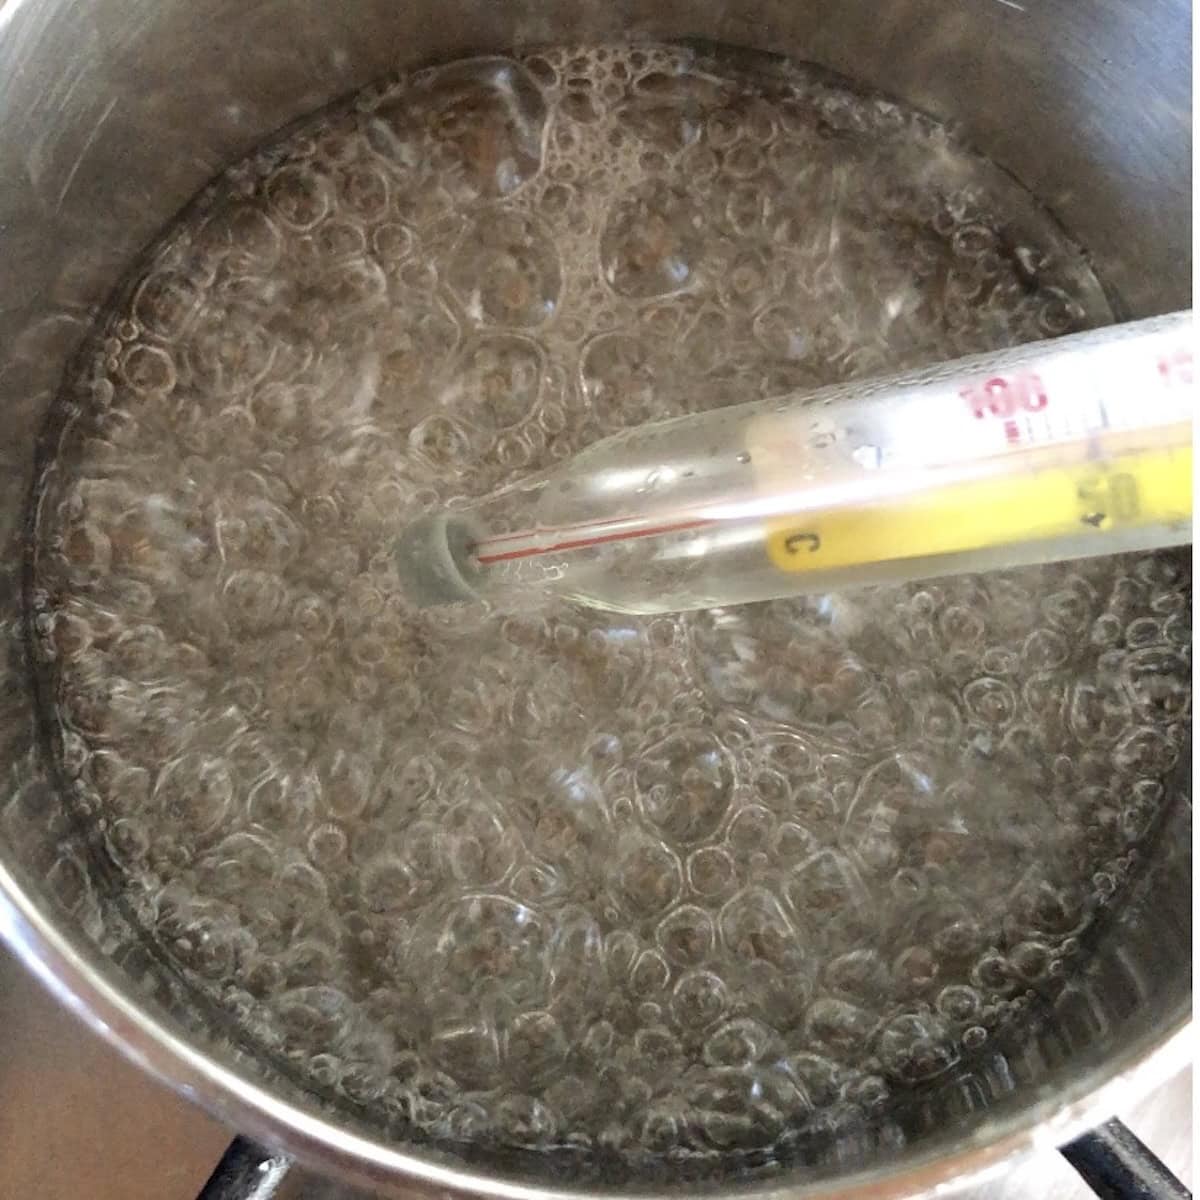
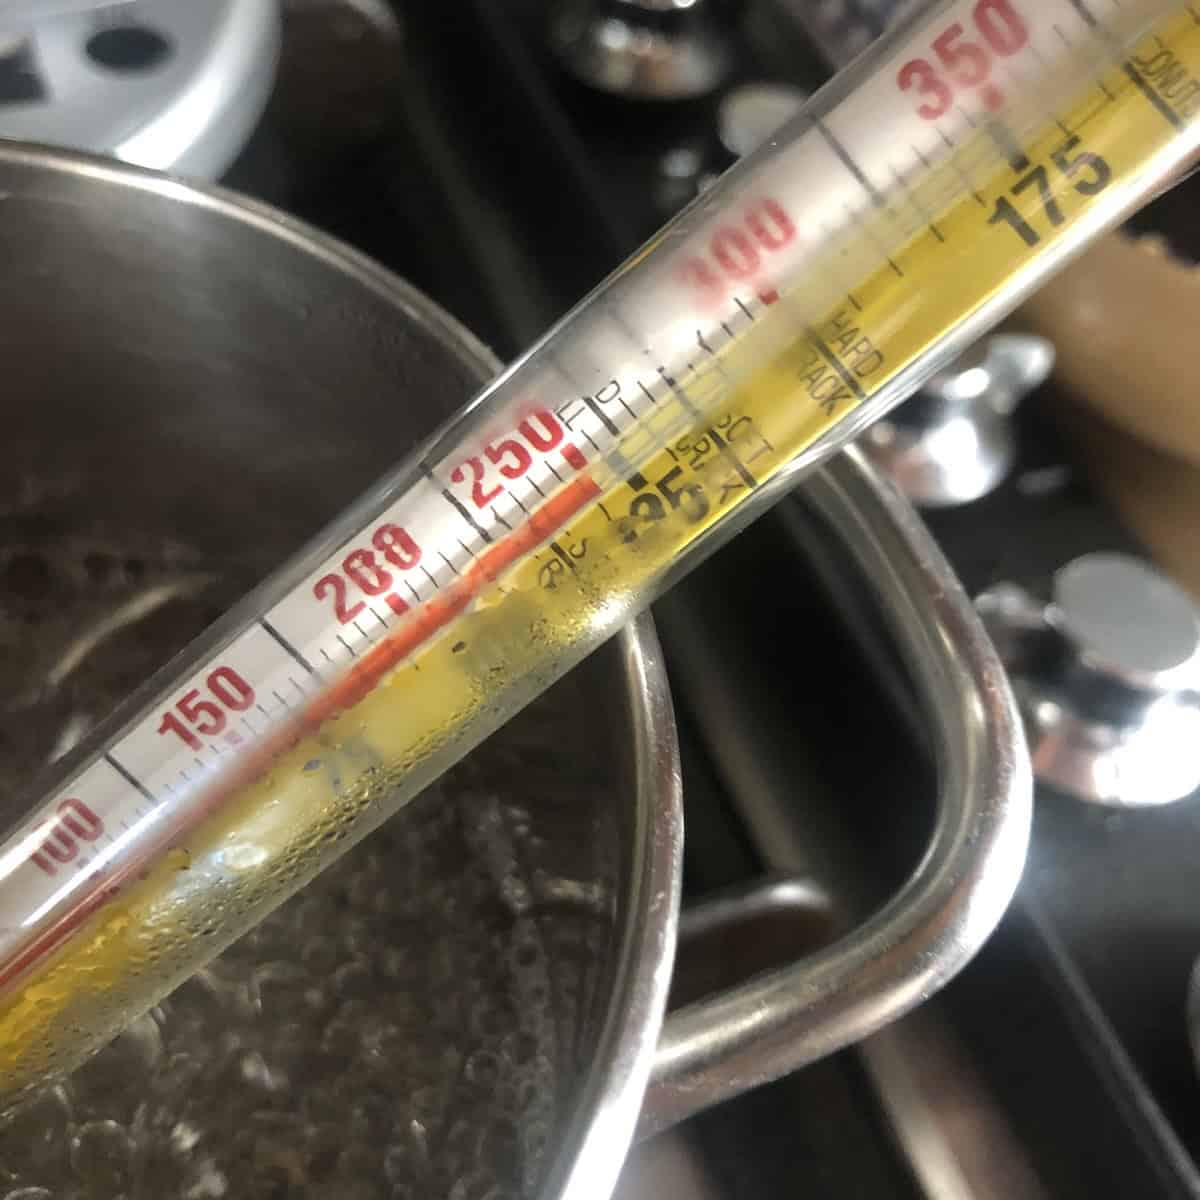
Combine the sugar and water in a small heavy-bottomed saucepan. Stir once to combine, then place over medium heat. Do not stir again. With a thermometer: bring to 250°F/121°C, which takes approximately 6 to 8 minutes from when it starts to simmer. Watch closely in the final 2 minutes.
Without a thermometer: Without a thermometer, here are the key visual and audio cues to look for:
- The syrup will start with large, lazy, slow-popping bubbles.
- As the water evaporates and the sugar concentration rises, the bubbling becomes faster, more vigorous, and higher-pitched, shifting from a low, slow blub-blub to a more rapid, hiss and sputter.
- At the right temperature, the syrup will look thick, glassy, and nearly transparent, and the bubbles will be small, tight, and very active.
- If it starts to take on any color at all, it has gone way too far.
Do the cold water test: Ok, in the moment, this test only works if you're conducting it at lightning speed! For this reason, I suggest doing a test at the 6 ½-minute mark because it can go from the perfect hard ball stage to soft crack or hard crack stage in seconds. Use a spoon or fork to drop a small amount into cold water, and if it forms a firm but pliable ball you can roll and smash between your fingers, it's ready. If it dissolves, keep going for no more than about 1 minute more. If it hardens and snaps, it's gone too far.
Step 5: Make the pâte à bombe
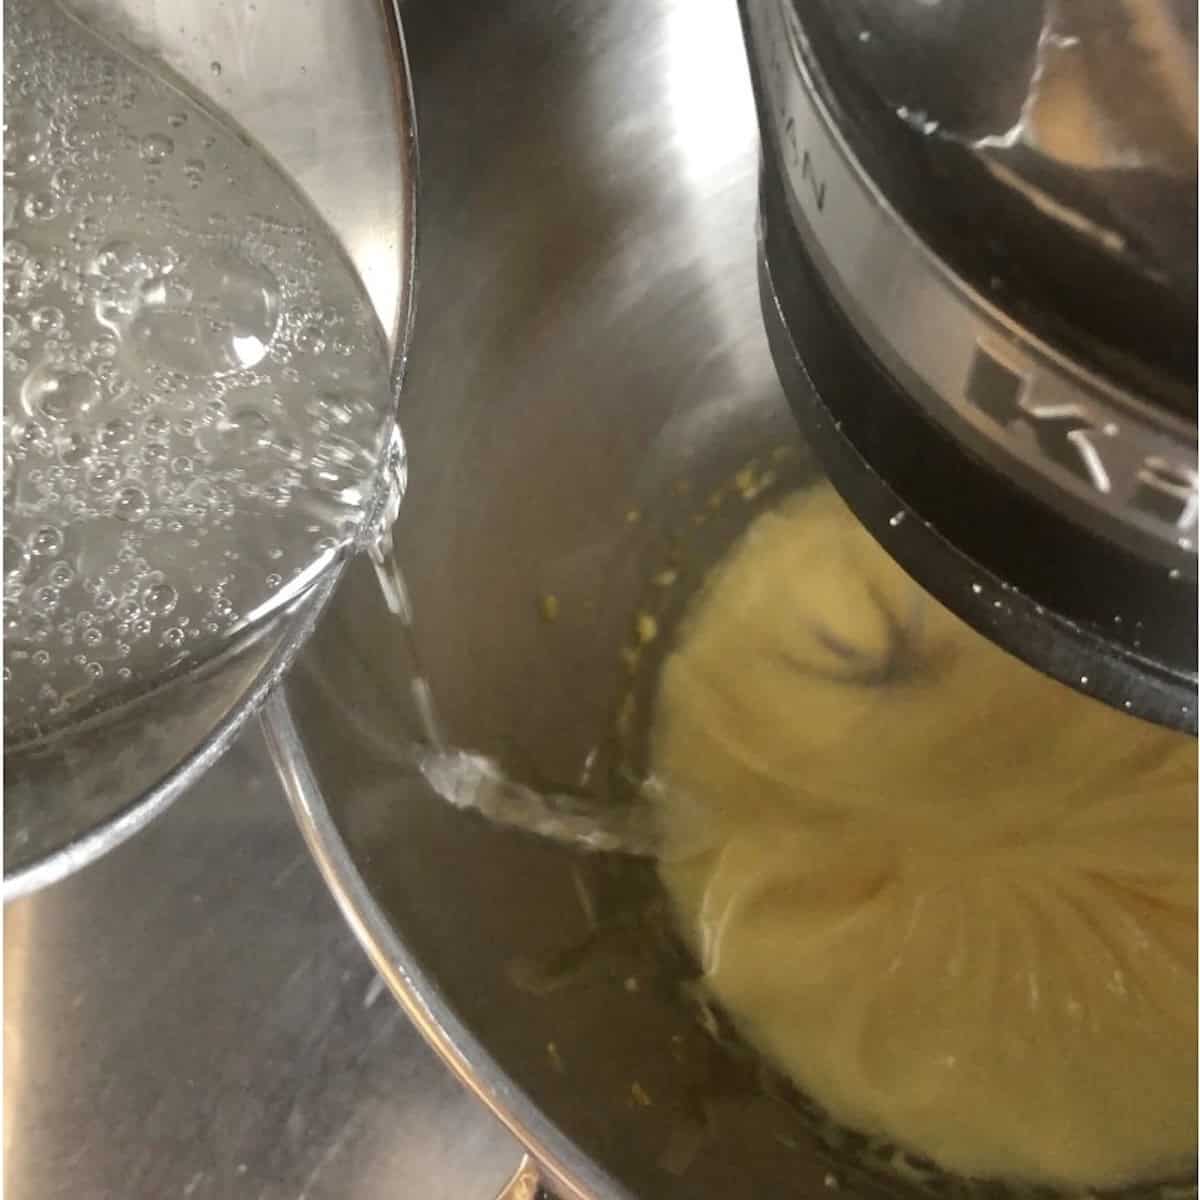
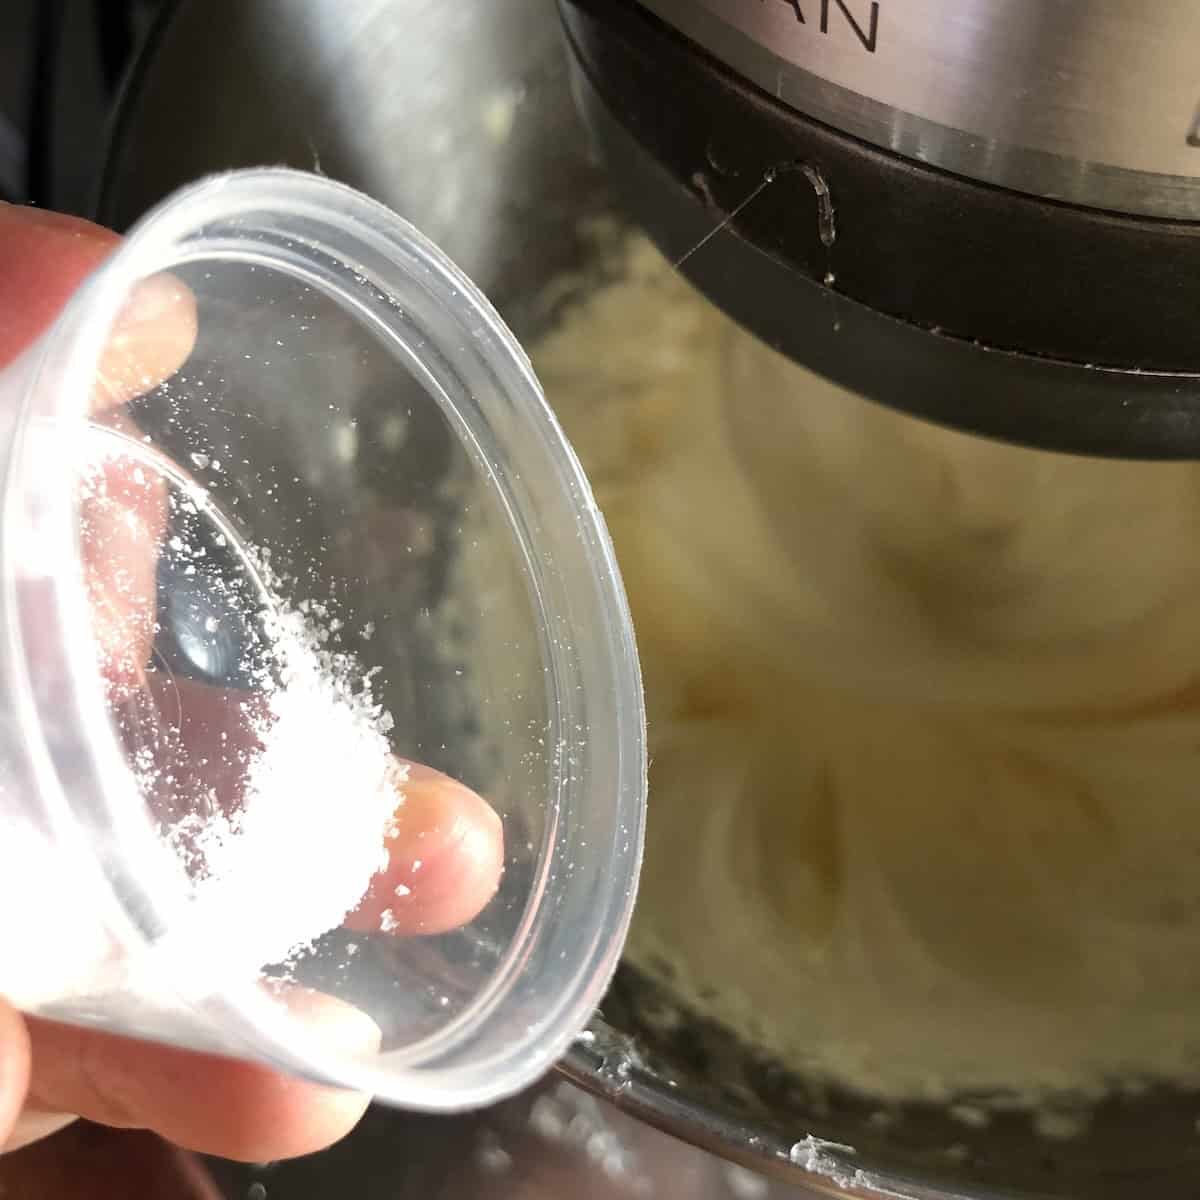
Reduce the mixer to medium speed. Pour the hot syrup in a slow, thin, steady stream down the inside wall of the bowl (never directly onto the whisk or it will splatter).
Once all the syrup is in, add the kosher salt immediately. Increase to high speed and whip for 10 to 12 minutes, or until the outside of the bowl is completely cool to the touch and the mixture is very pale, thick, and holds a ribbon when the whisk is lifted. This is your pâte à bombe. It must be fully, completely cooled before mascarpone goes in. A warm base will cause a runny tiramisu cream.
Step 6: Add the mascarpone

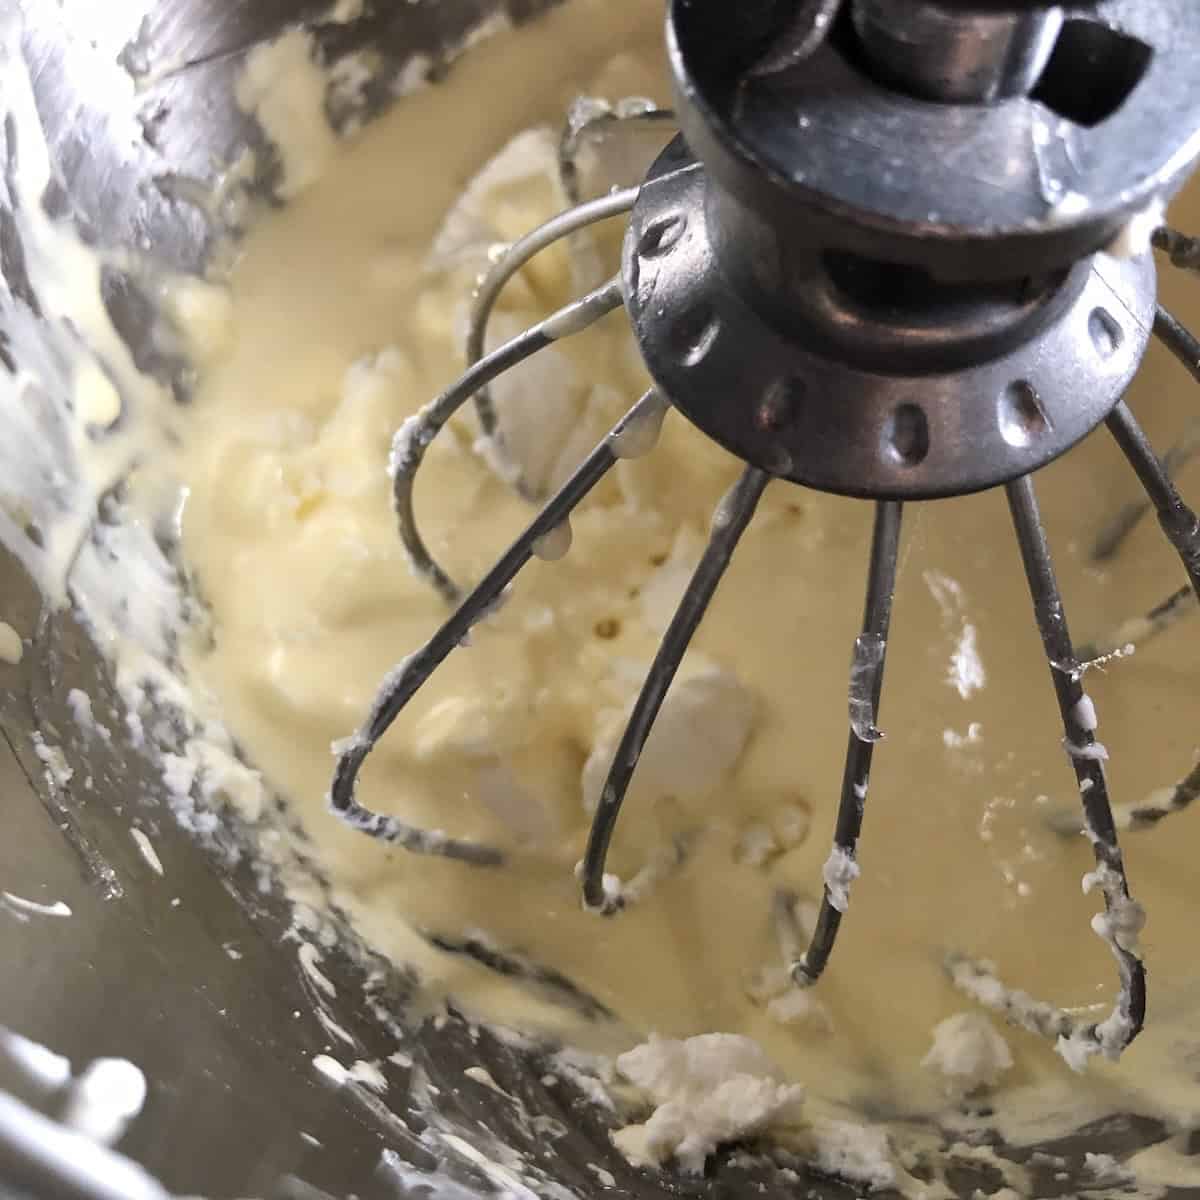
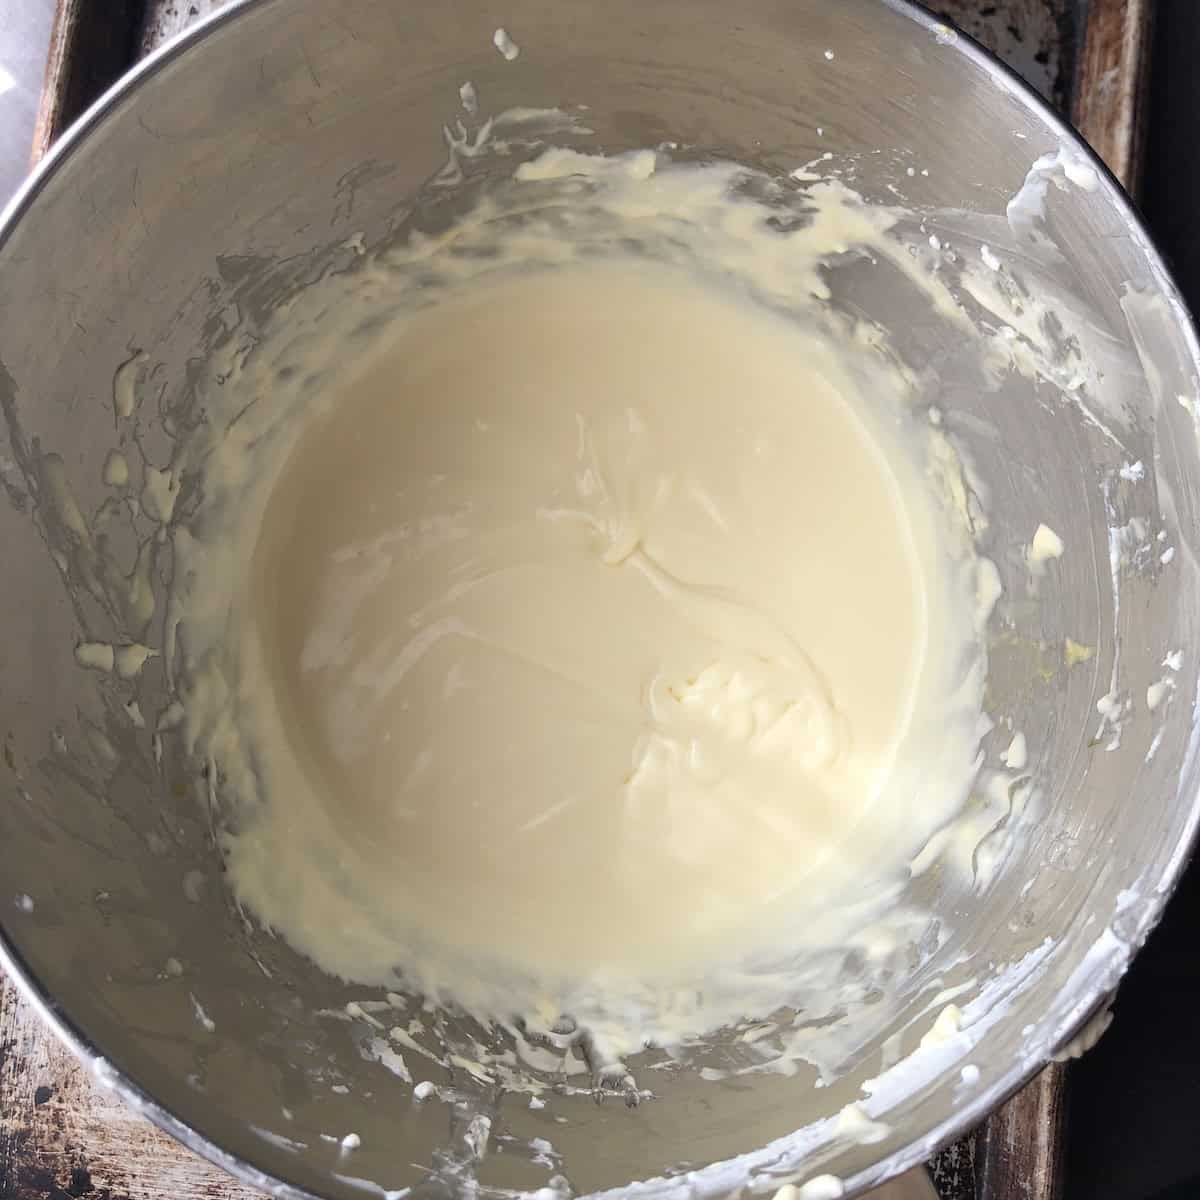
Take the mascarpone straight from the fridge. In a separate bowl, smash it briefly with a spatula or spoon just to loosen it. Don't warm it or beat it. Reduce the mixer to its lowest speed. Add the cold mascarpone to the pâte à bombe one or two heaping spoonfuls at a time, waiting for each addition to incorporate before adding the next.
Beat it only as long as is strictly necessary to make the cream smooth and homogeneous. Overmixing here breaks the fat emulsion in the mascarpone, causing it to turn grainy and loose. At this point, you can use the tiramisu cream as is for the original Le Beccherie tiramisu, or go one step further and add the heavy cream, which I can't recommend highly enough!
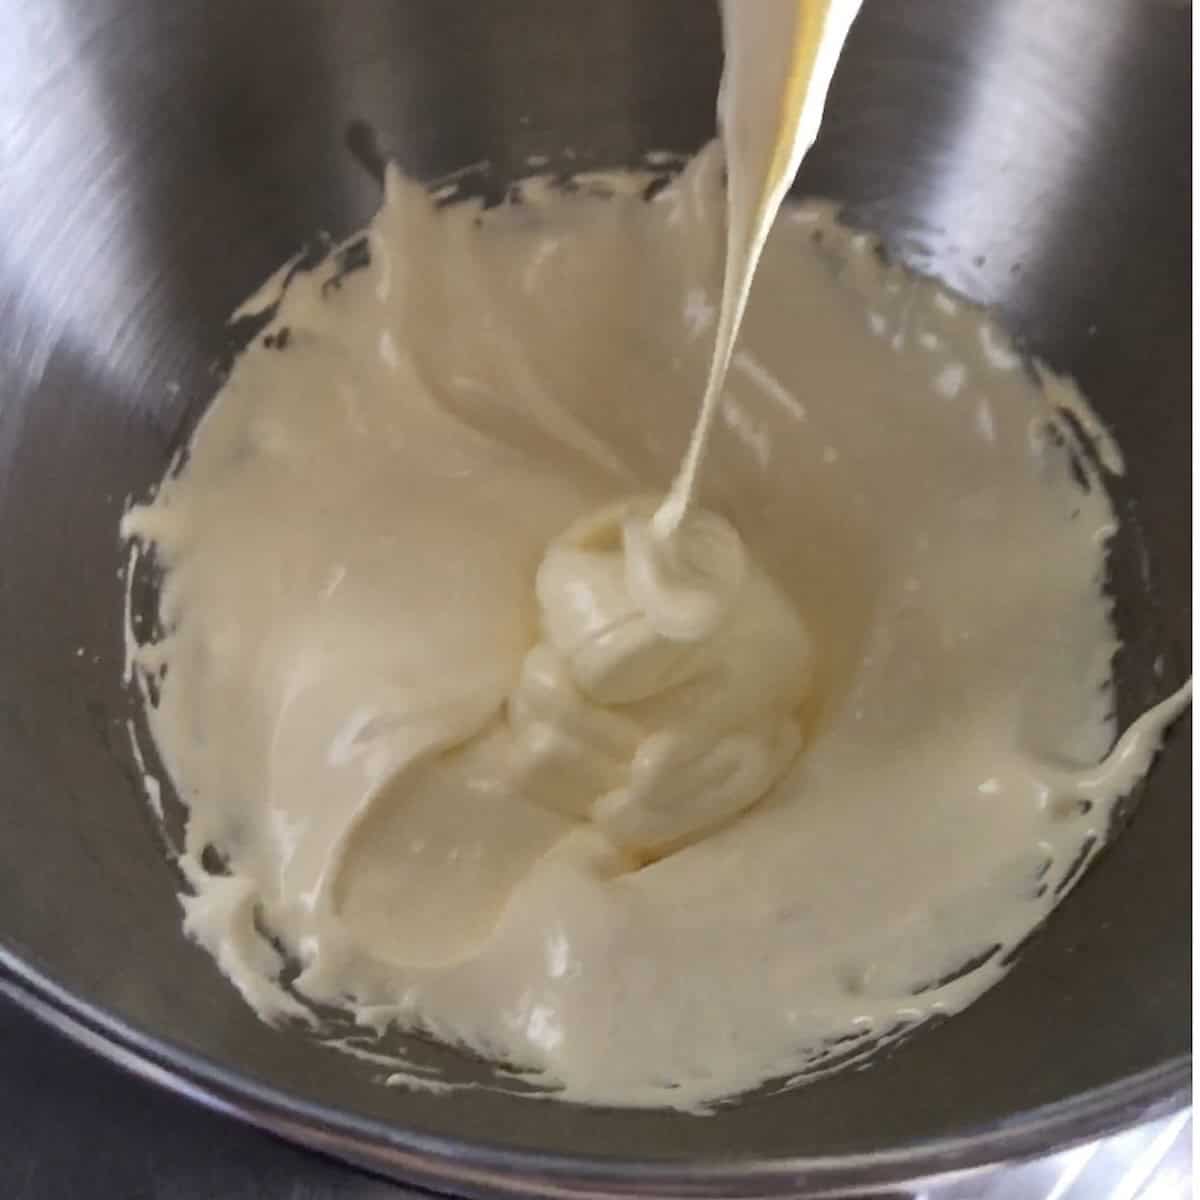
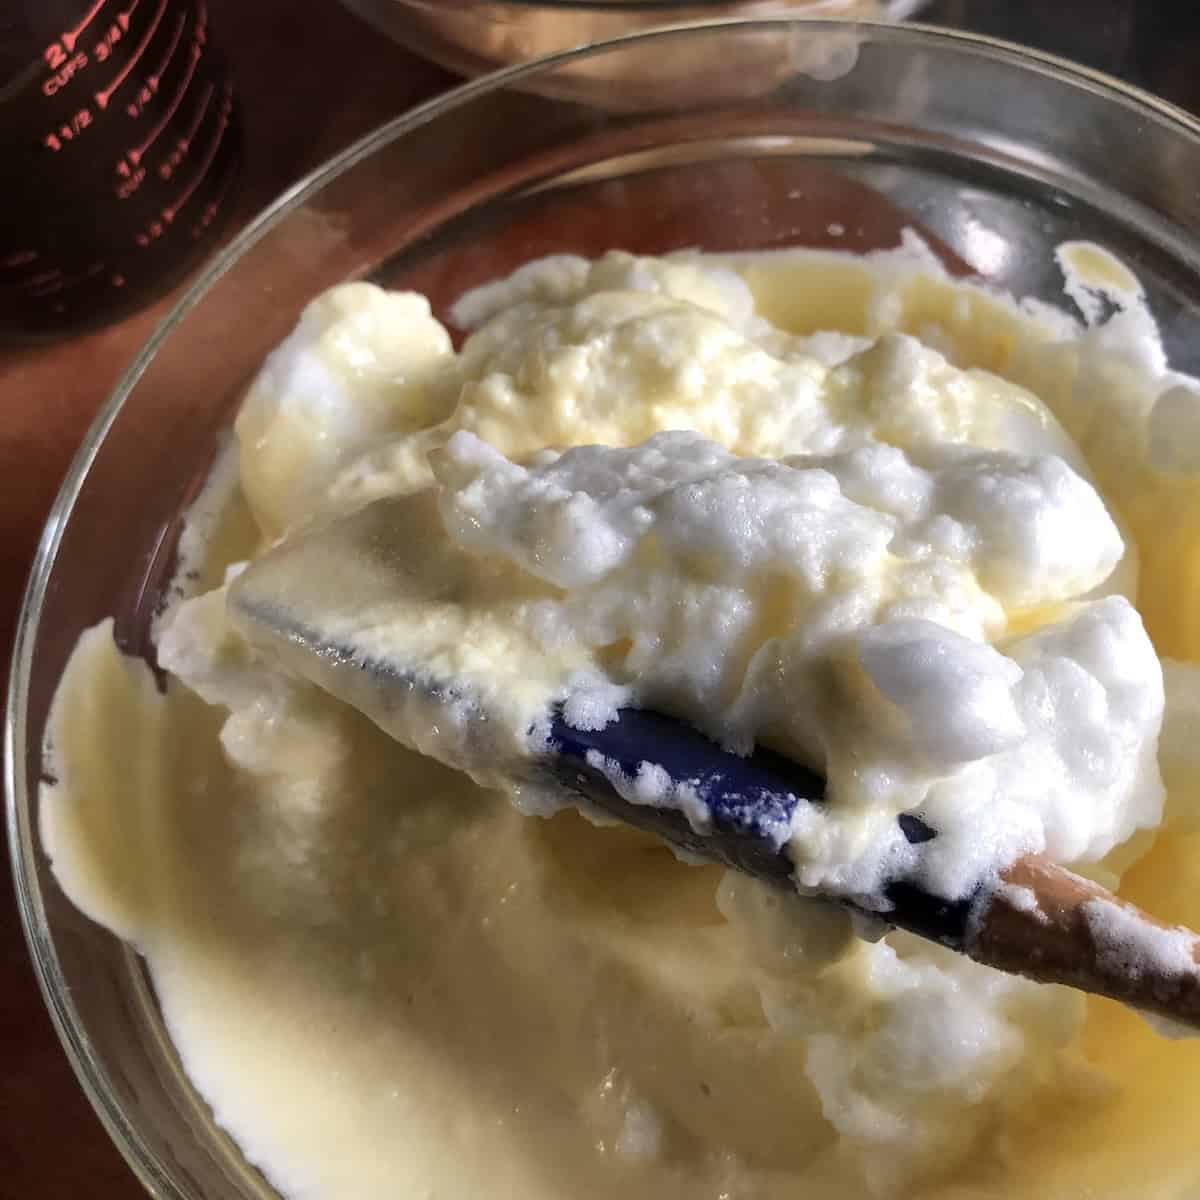
Step 7: Fold in the whipped cream
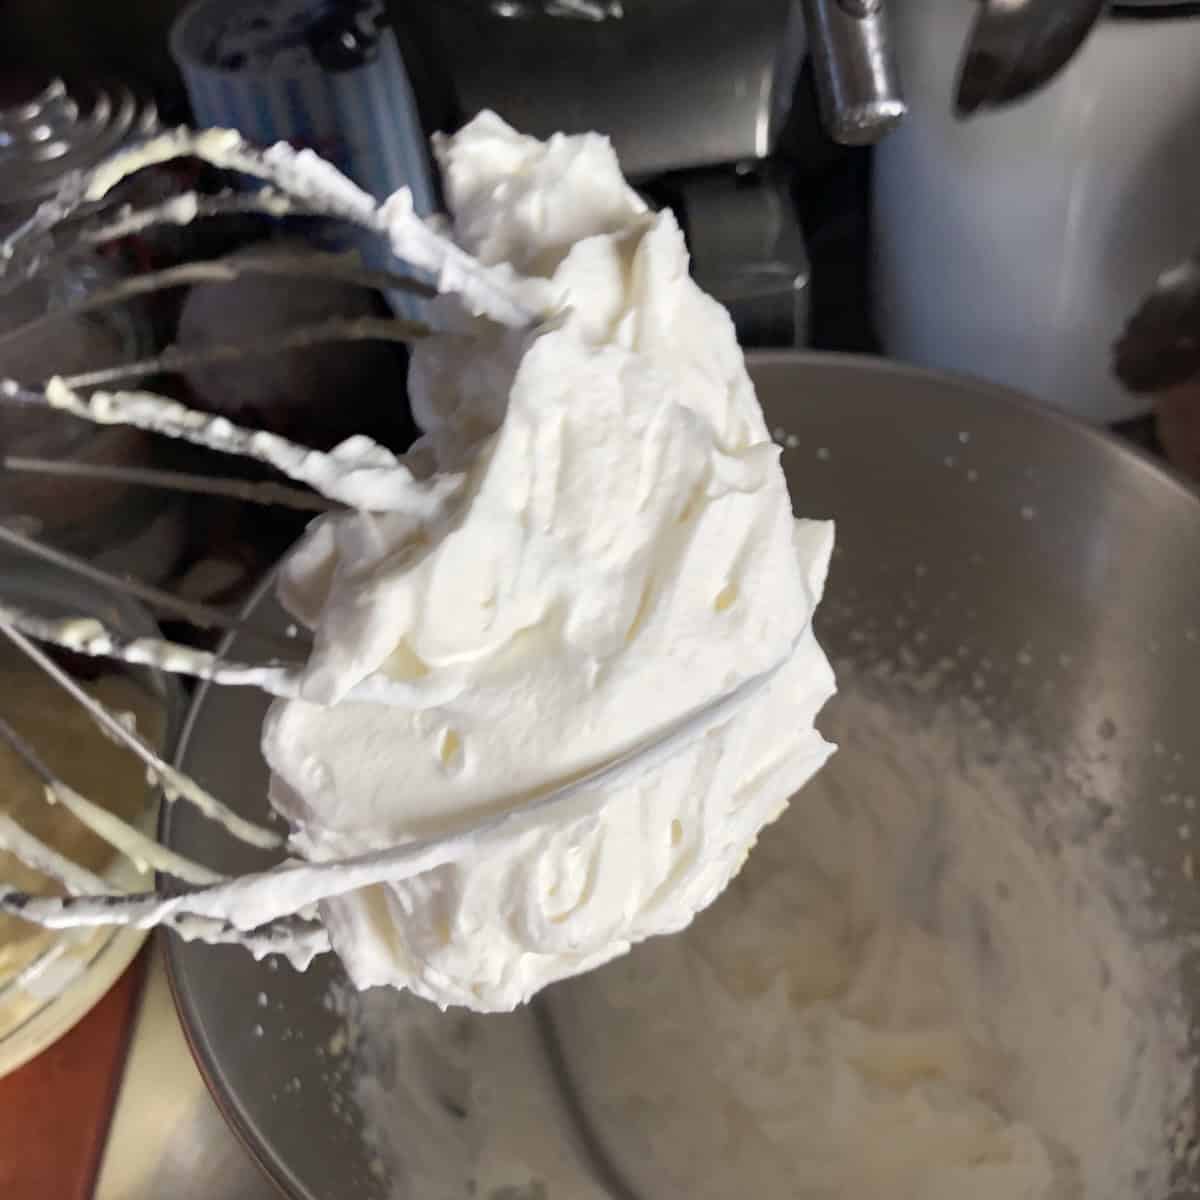
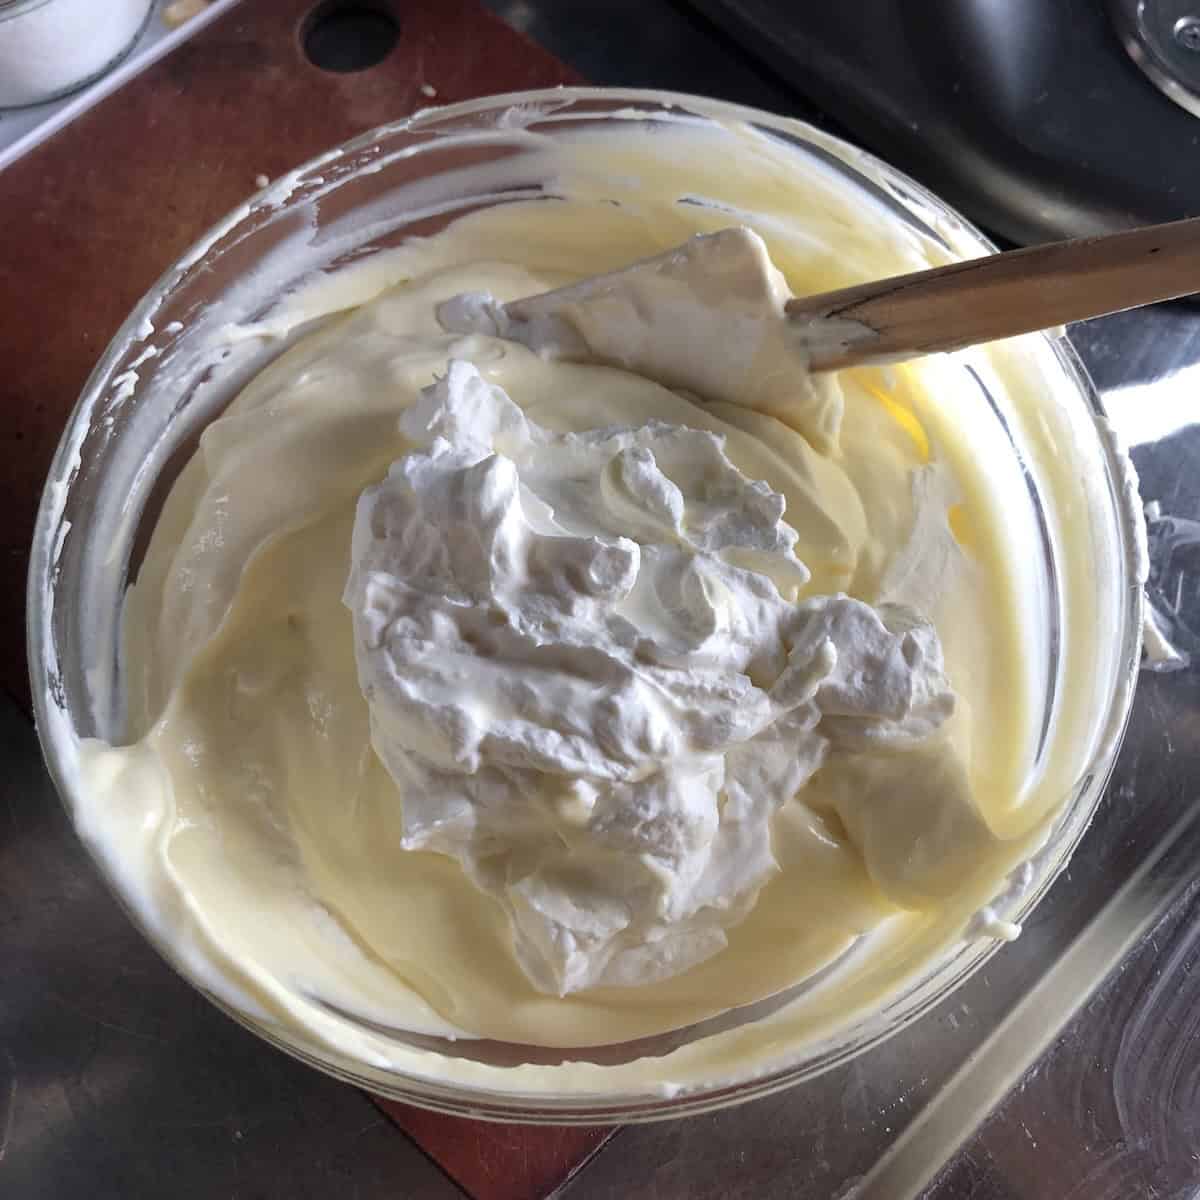
In a separate cold bowl, whip the cold heavy cream to stiff peaks (firm enough to hold shape on the whisk when turned upside down), but stop it before it turns grainy or into butter.
Add the whipped cream to the mascarpone mixture in two or three additions, folding gently with a spatula using slow bottom-to-top movements. Stop as soon as no white streaks remain.
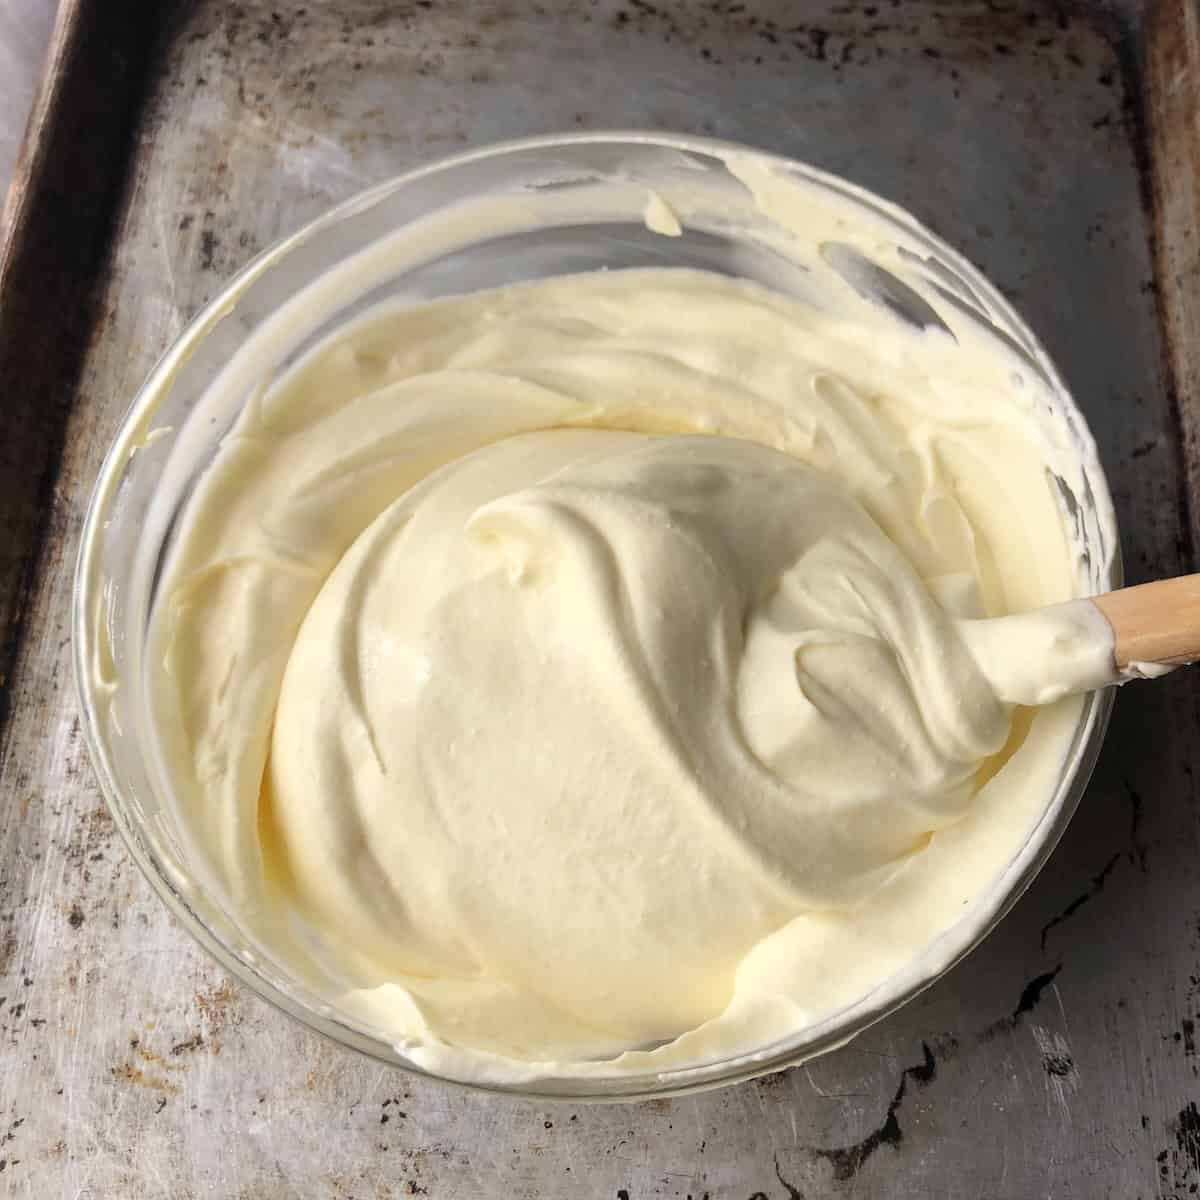
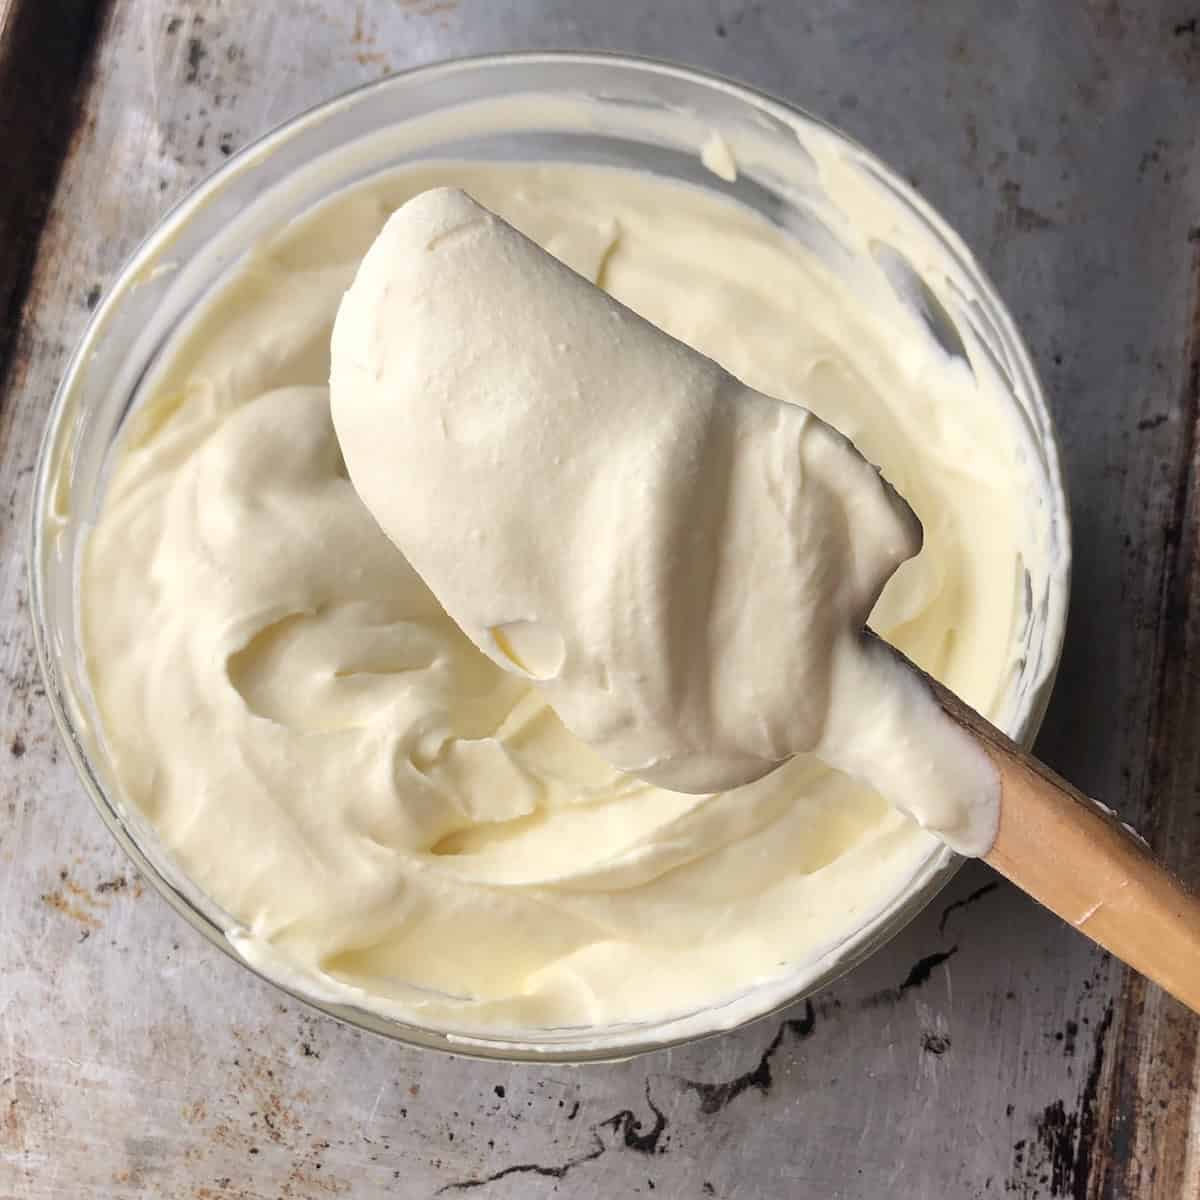
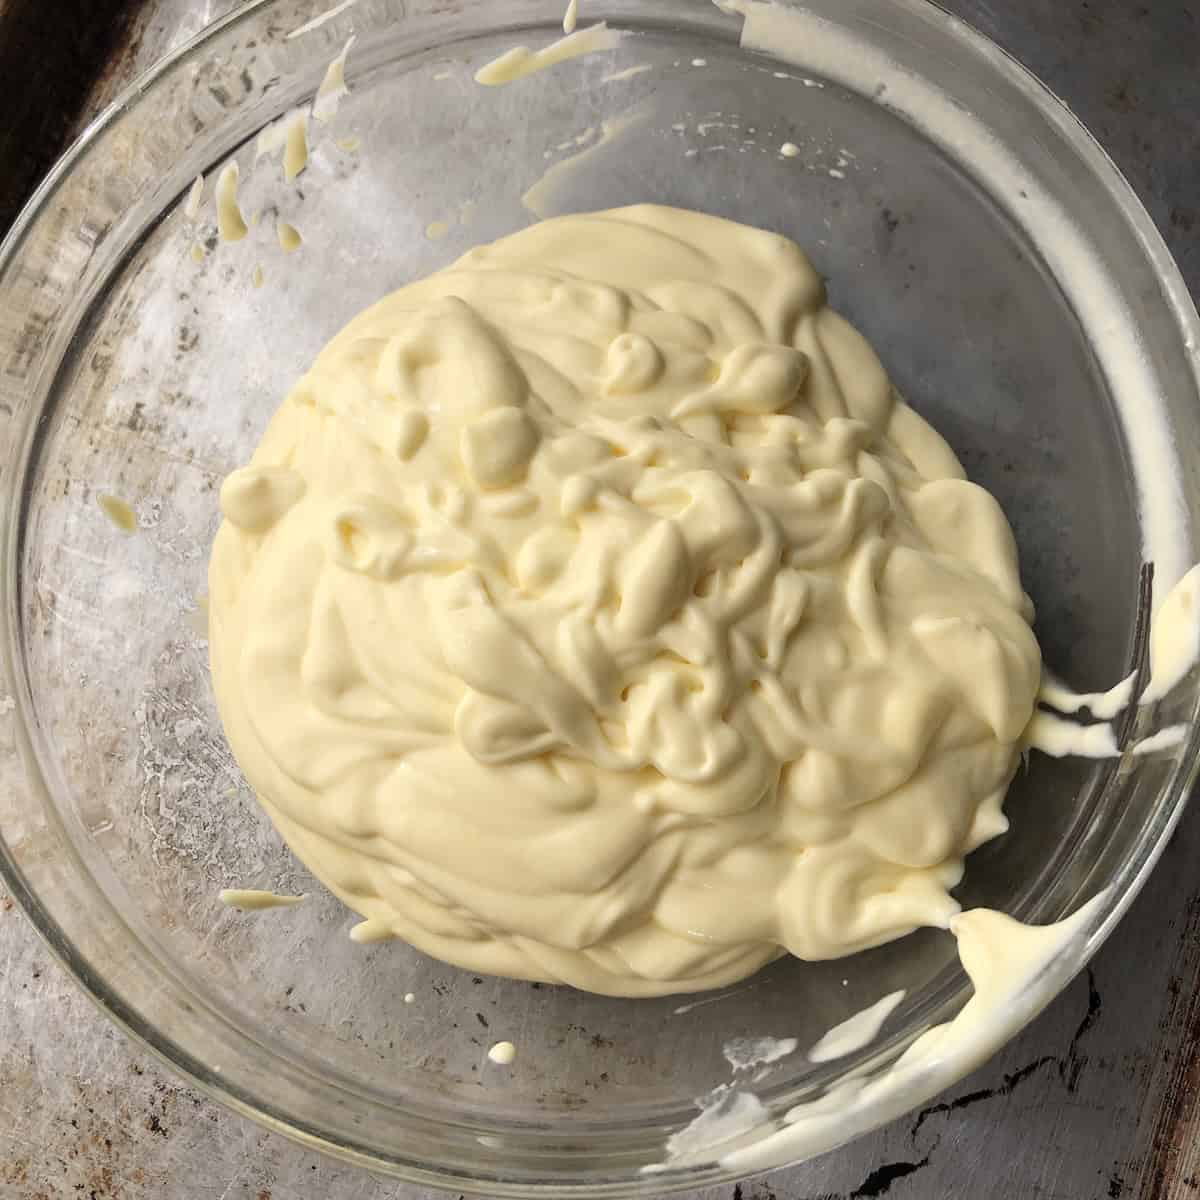
The finished cream should be thick enough to hold its shape on a spatula and look smooth and substantial. If it looks slightly loose at room temperature (that's normal), but not runny like crepe batter. It will firm up perfectly once it's chilled.
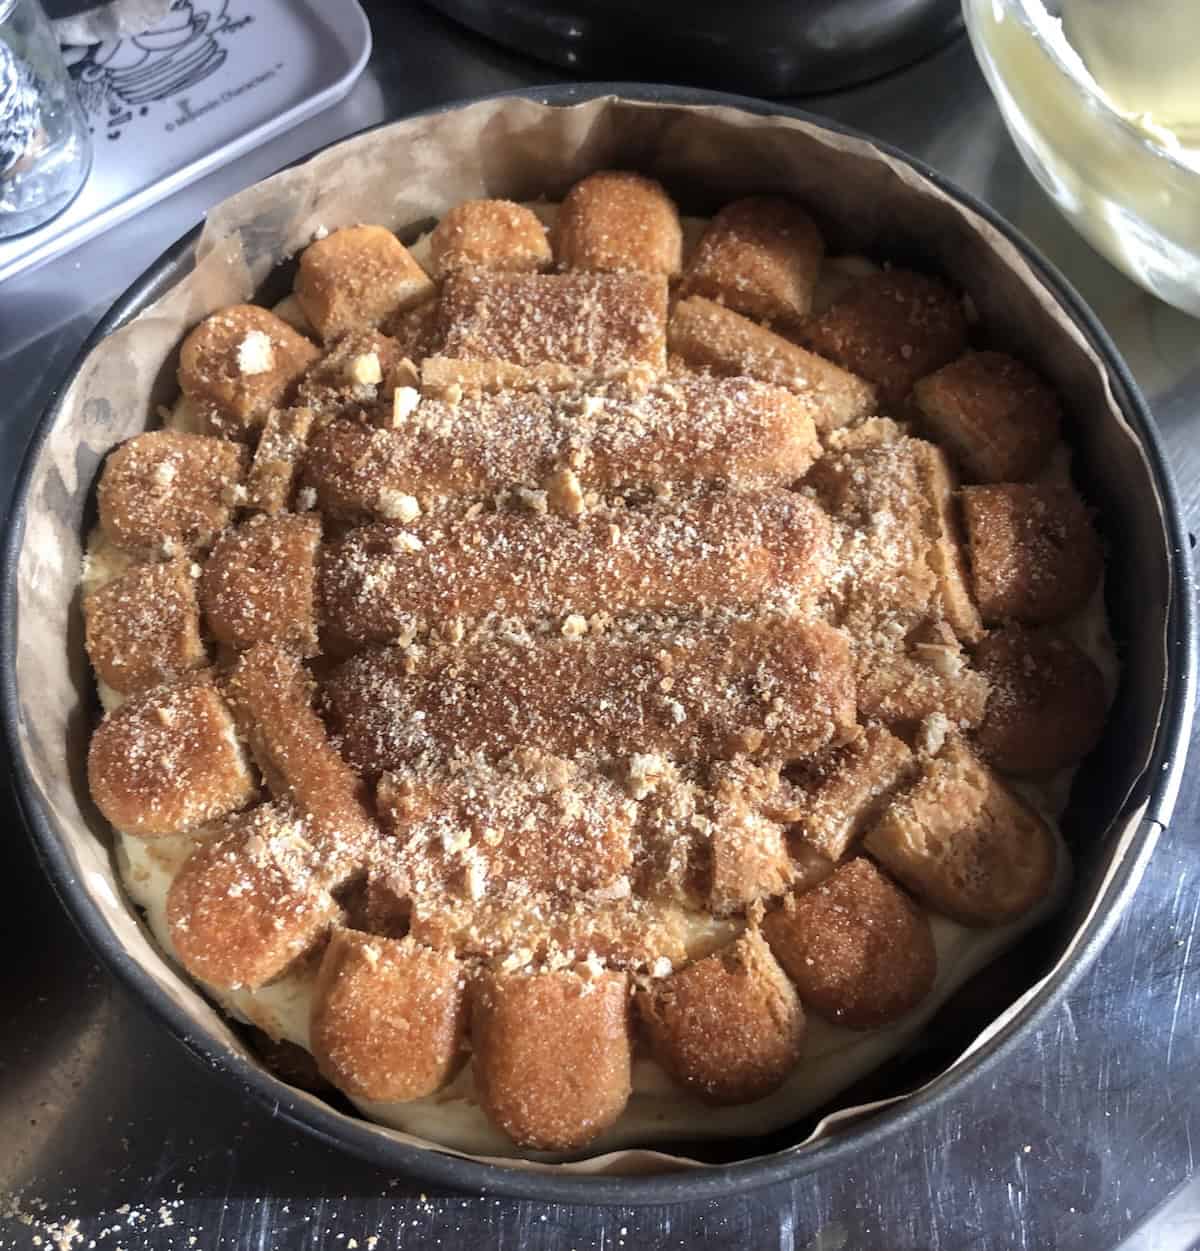
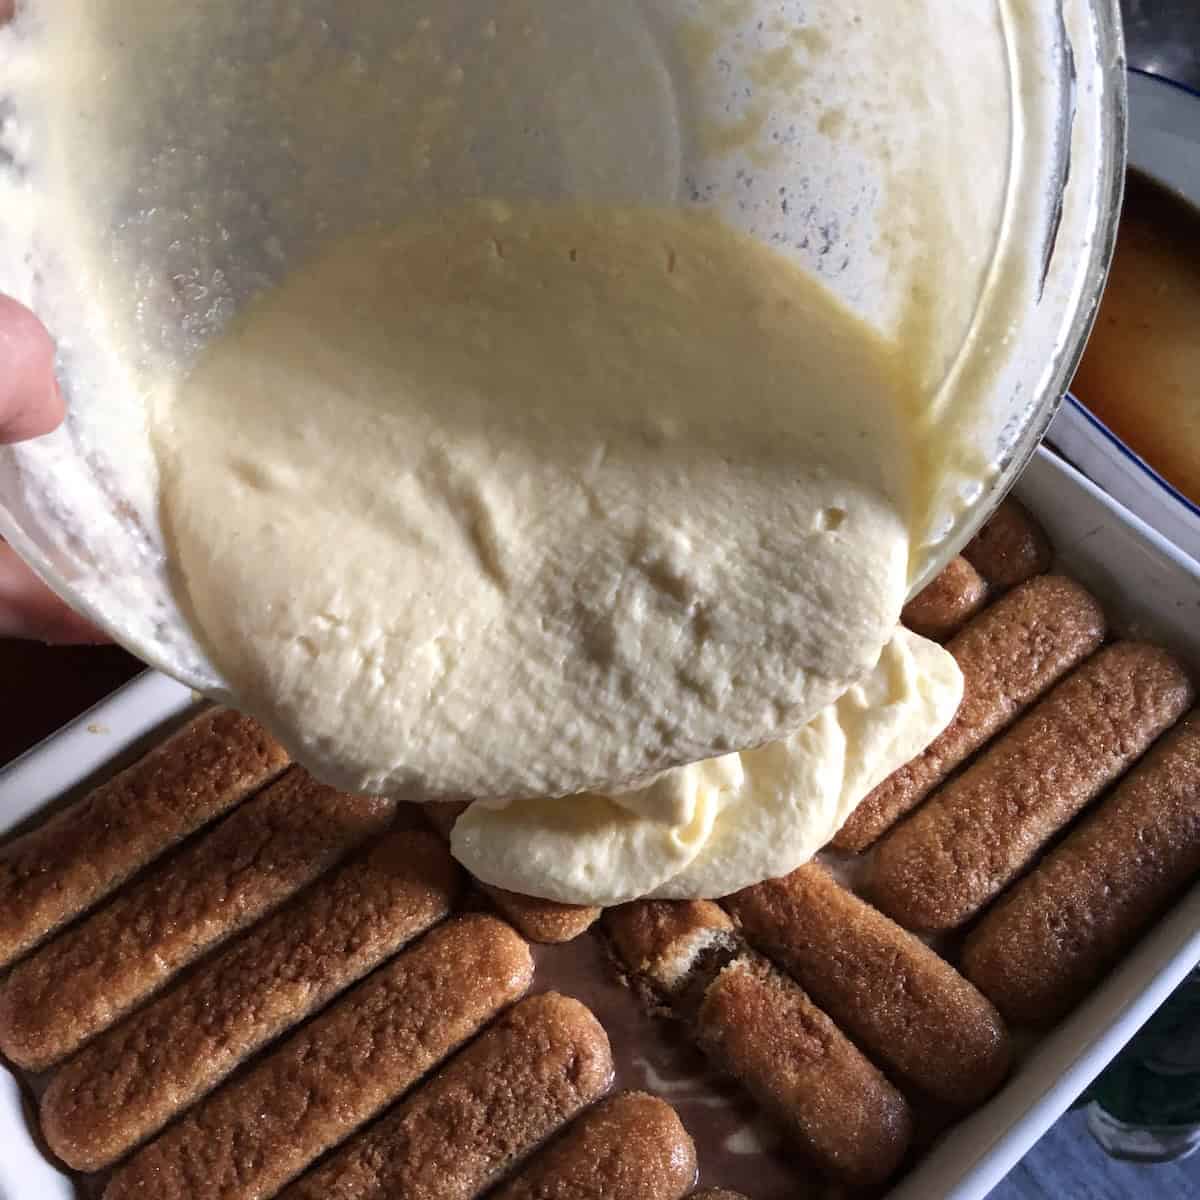
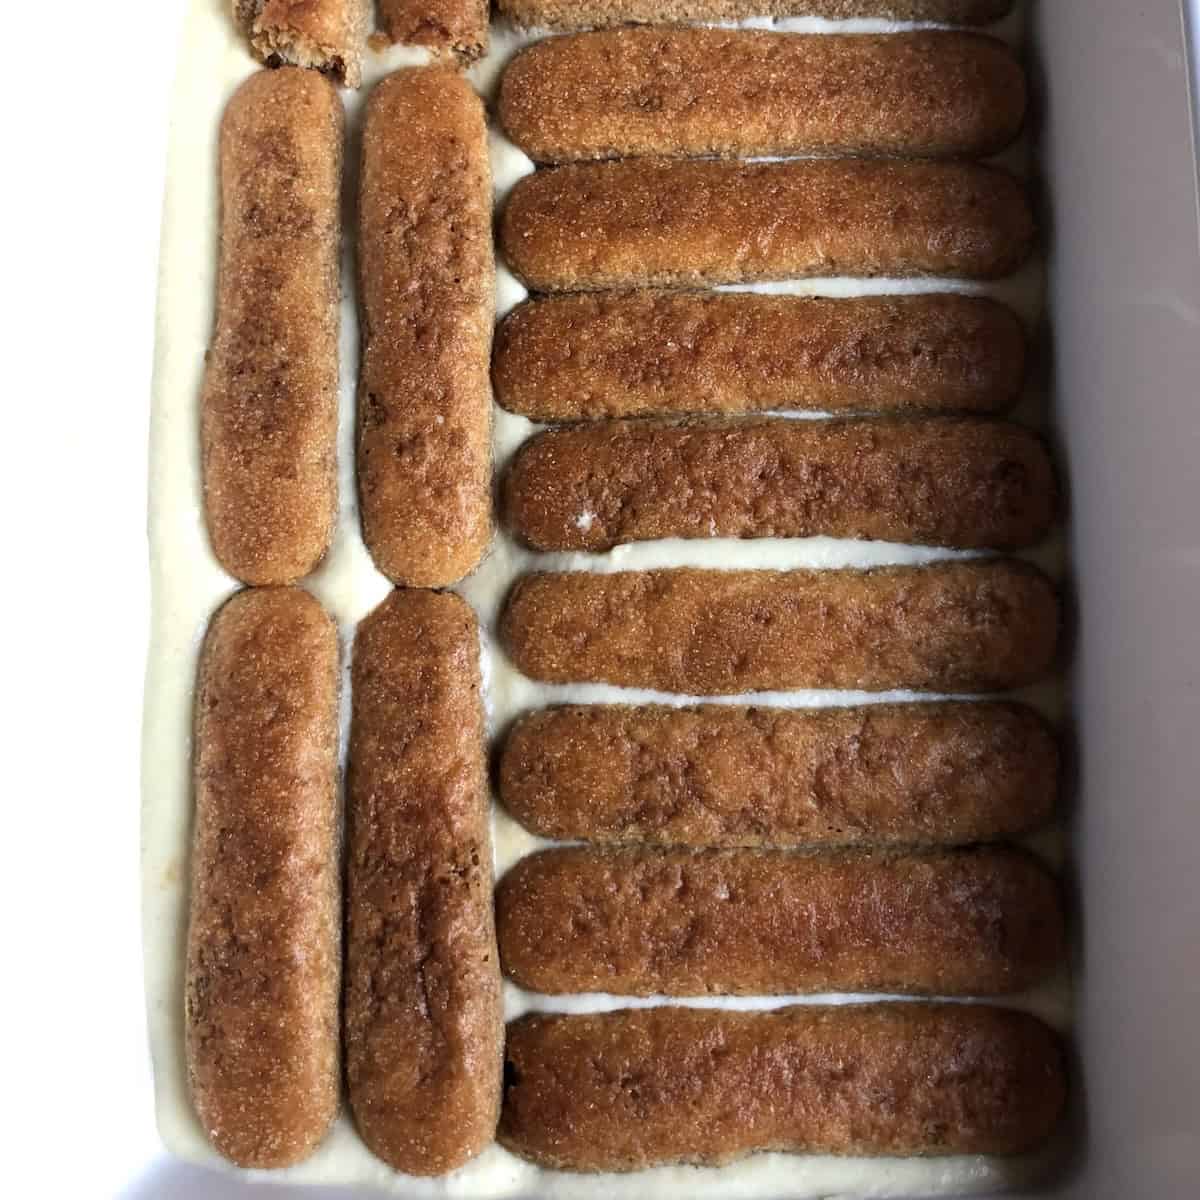
Step 8: First layer of ladyfingers (Flower Method)
There are multiple ways to layer tiramisu (see below for the alternate 'professional clean sides' method and the 9x13 casserole layering options). Here, we'll concentrate on the flower-look layering method.

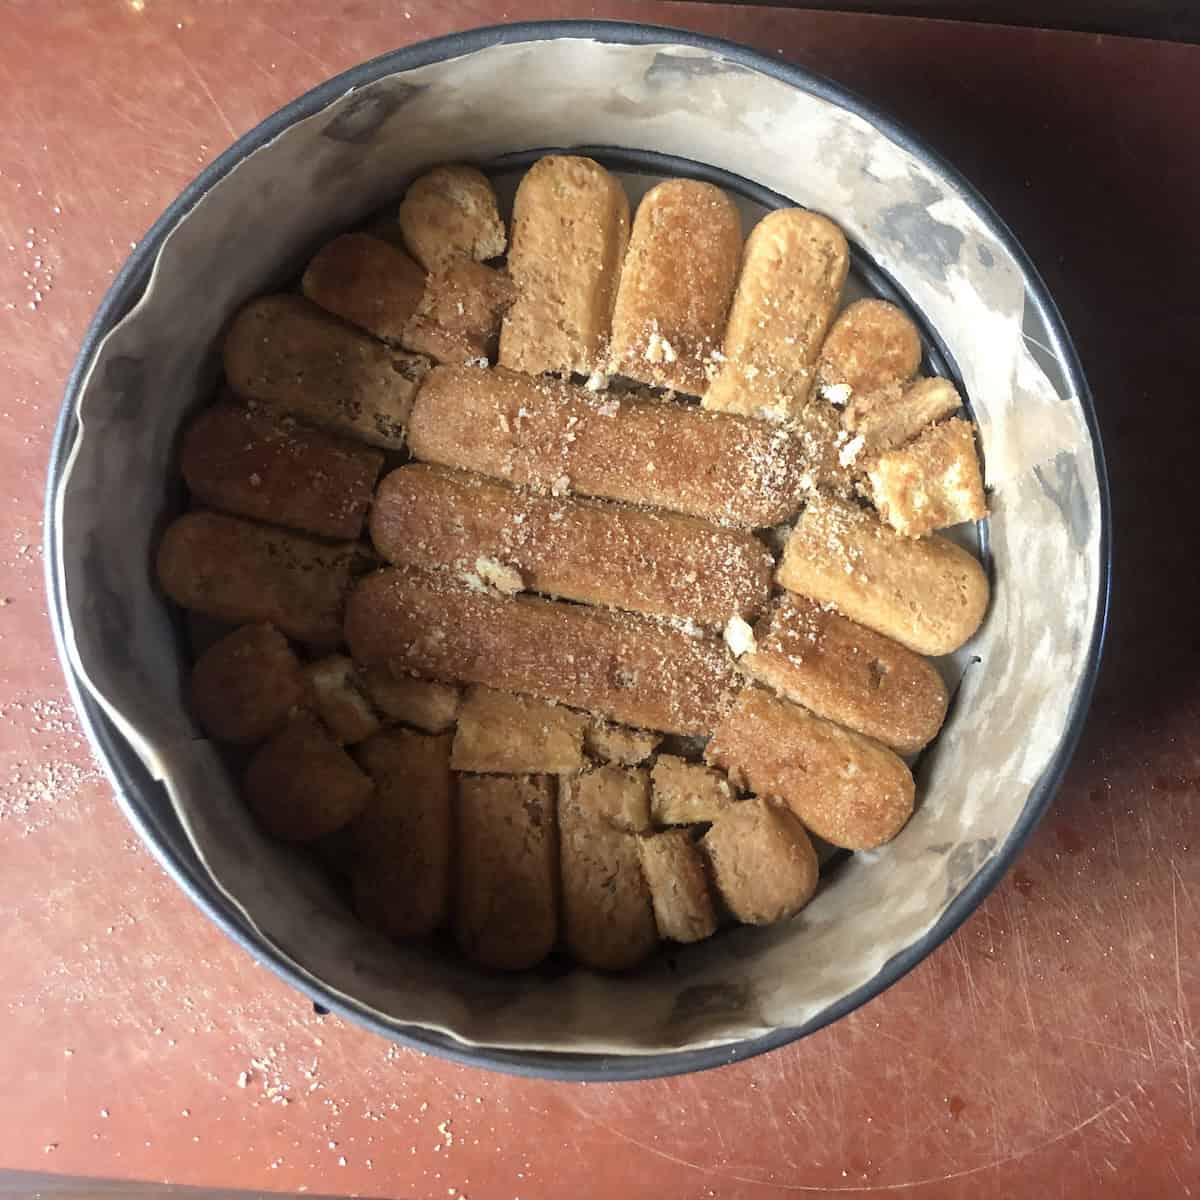
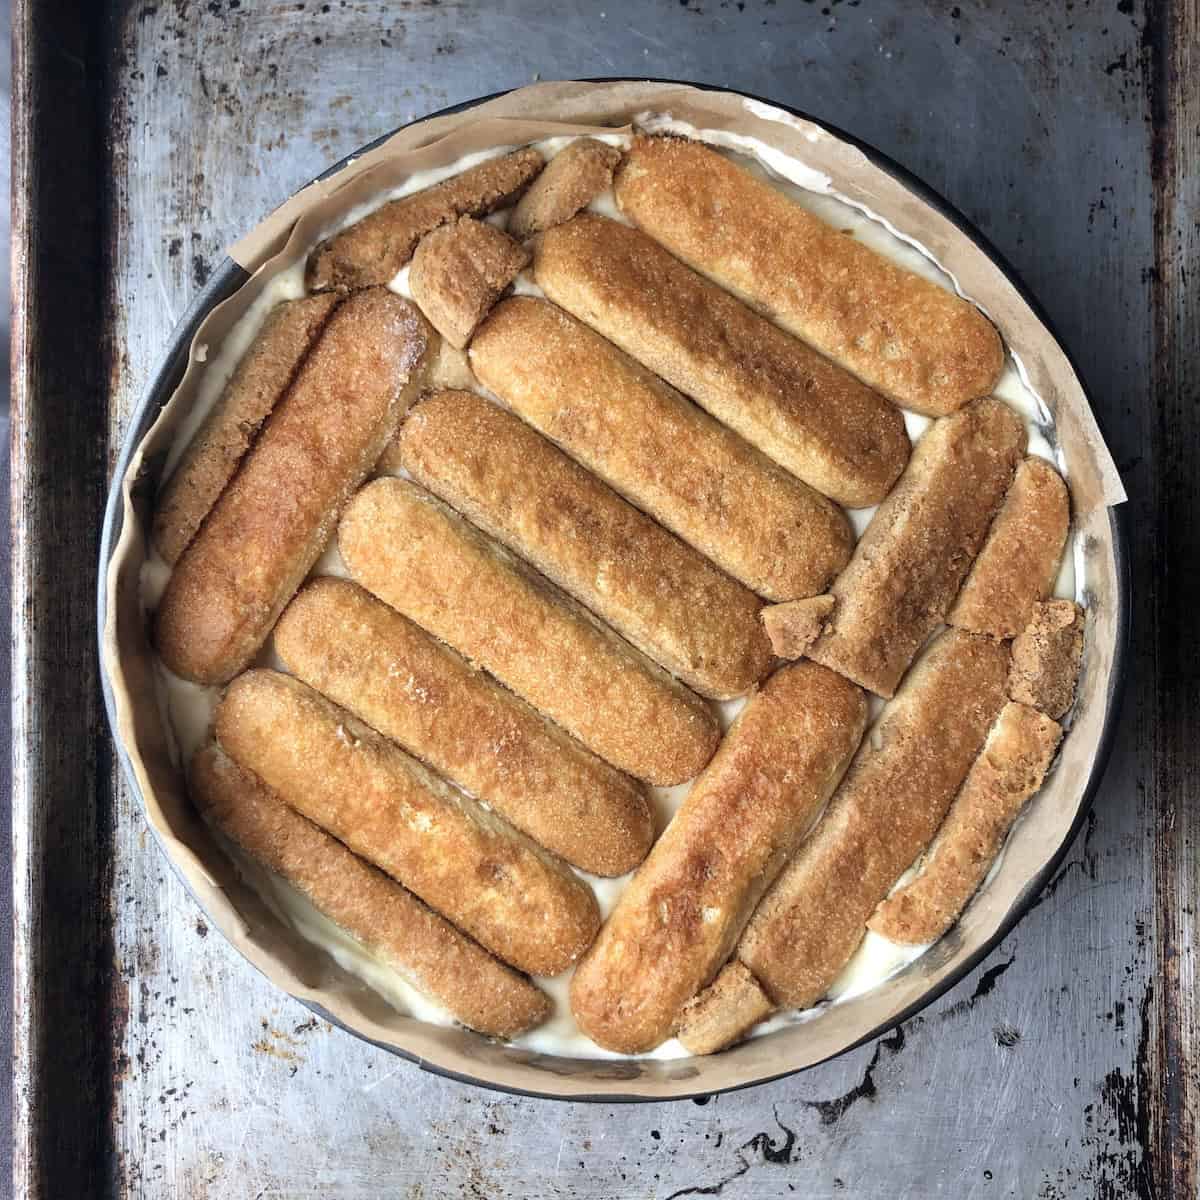
Open the first inner pack of savoiardi only and work with one pack at a time so the rest stay crisp. Cut 6 ladyfingers in half and set aside for the perimeter. Working one at a time, dip each of them in the espresso for no more than 1.5 seconds per side and place it immediately into the pan with the rounded edges facing out.
Add 3 whole ladyfingers across the center. Then work outward, fitting halved pieces and cut scraps around them, and tuck the more rounded ends cut to fit, around the perimeter with the curved edges facing outward against the parchment. Cut additional pieces as needed to fill every gap. No empty spaces. Sprinkle the sugar and crumbs from the lady finger package directly on the top of the layer (don't waste a single thing!).
It will look a little messy, and that's completely fine because no one will ever see this layer once the tiramisu cream is added when it's sliced. What matters is that every nook and cranny is filled. A tightly packed layer means better structure and more espresso flavor/balance in every bite.
Steps 9: Build the layers
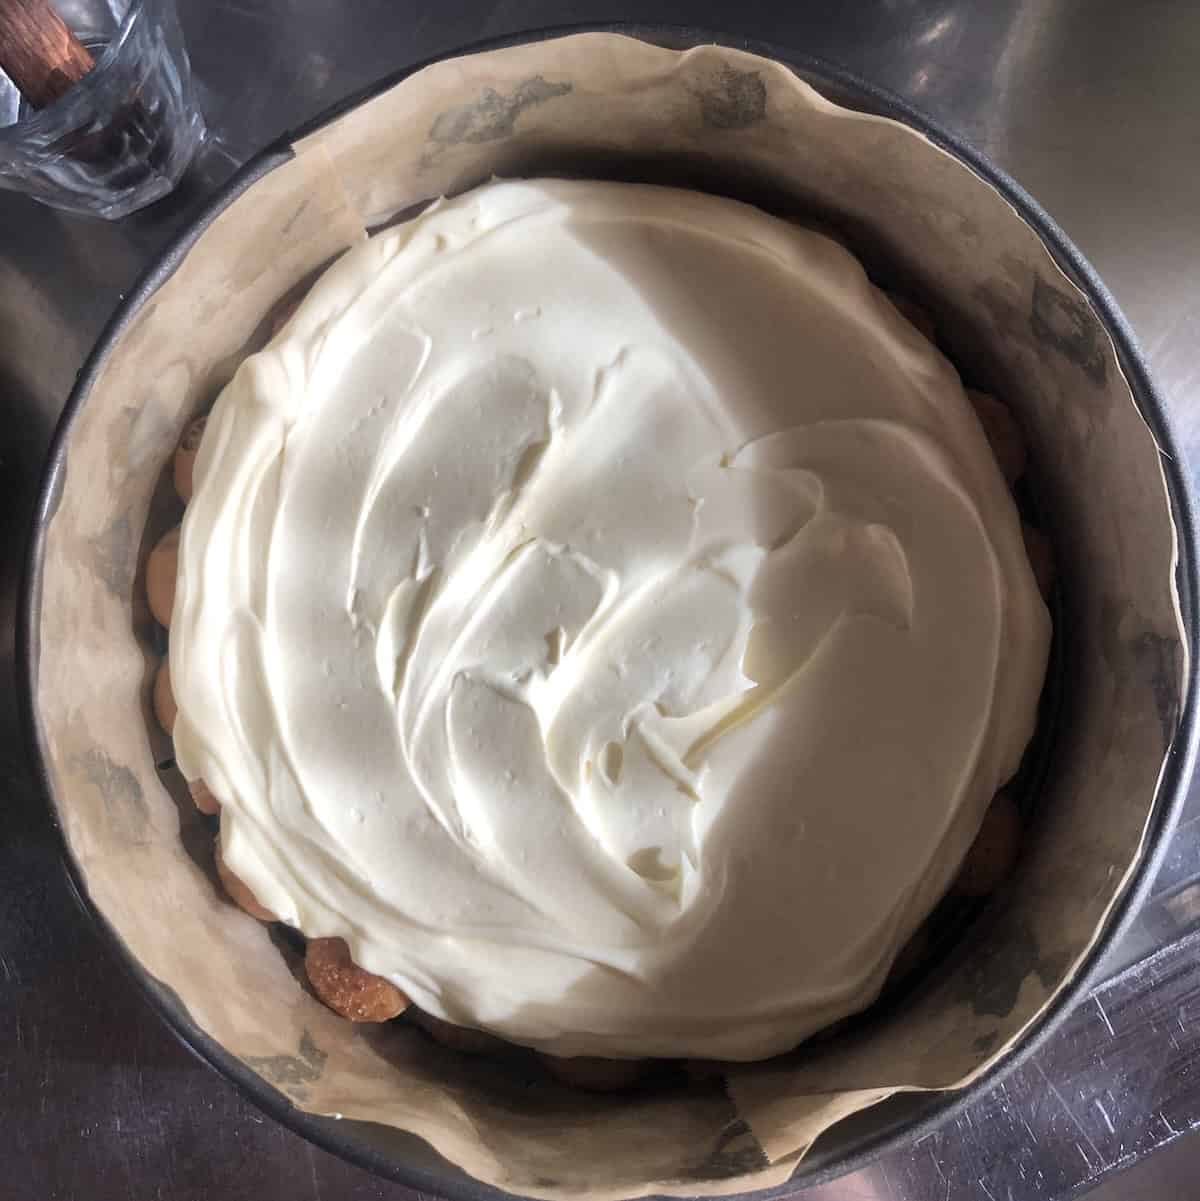
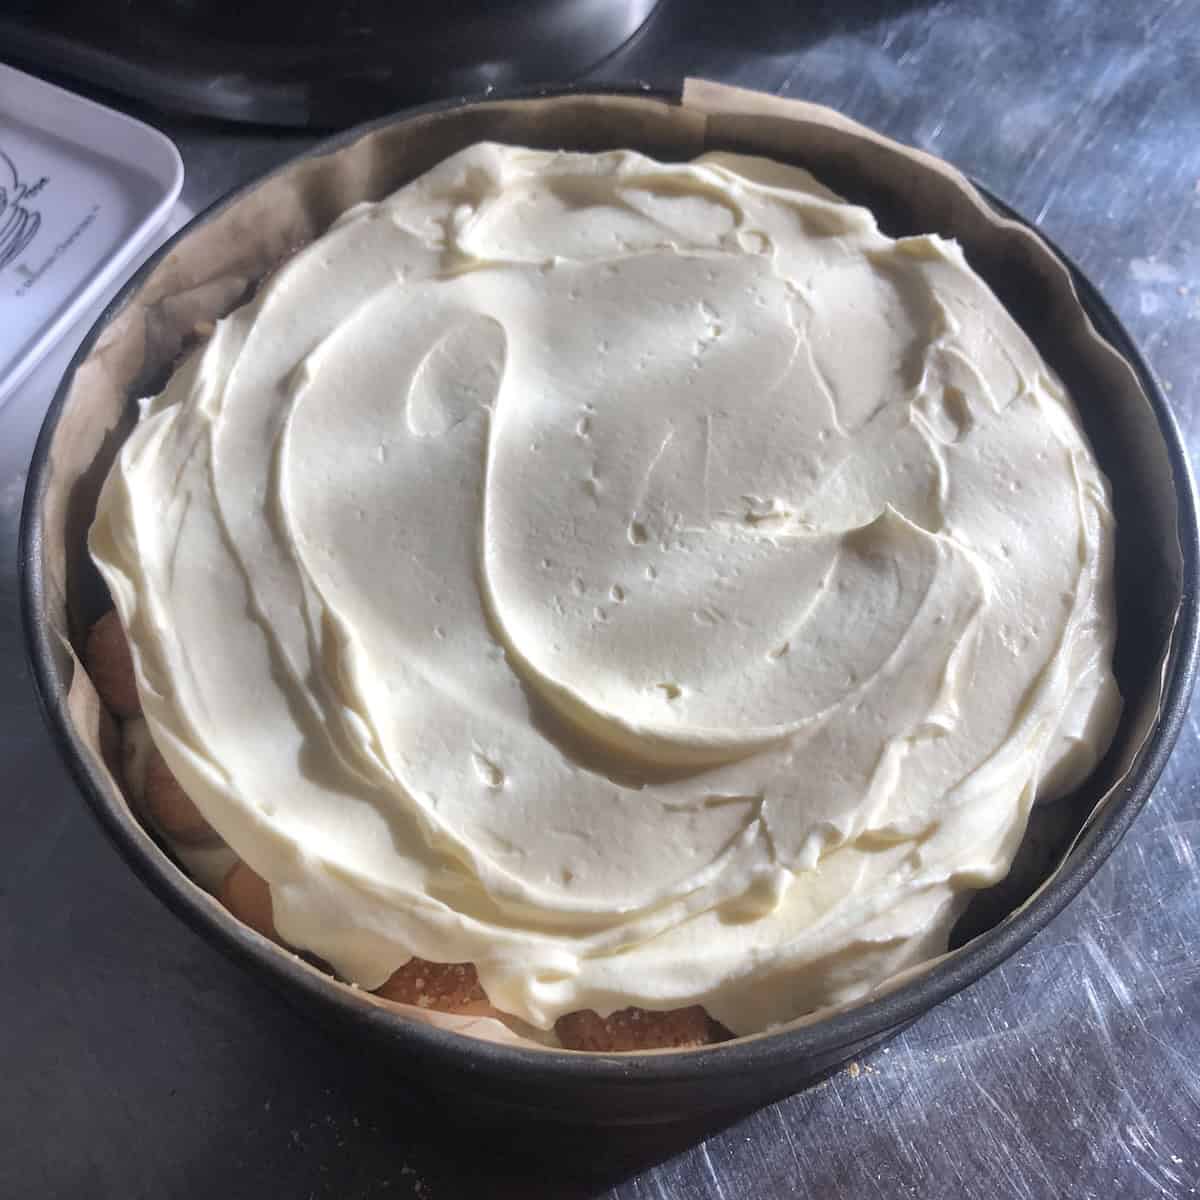
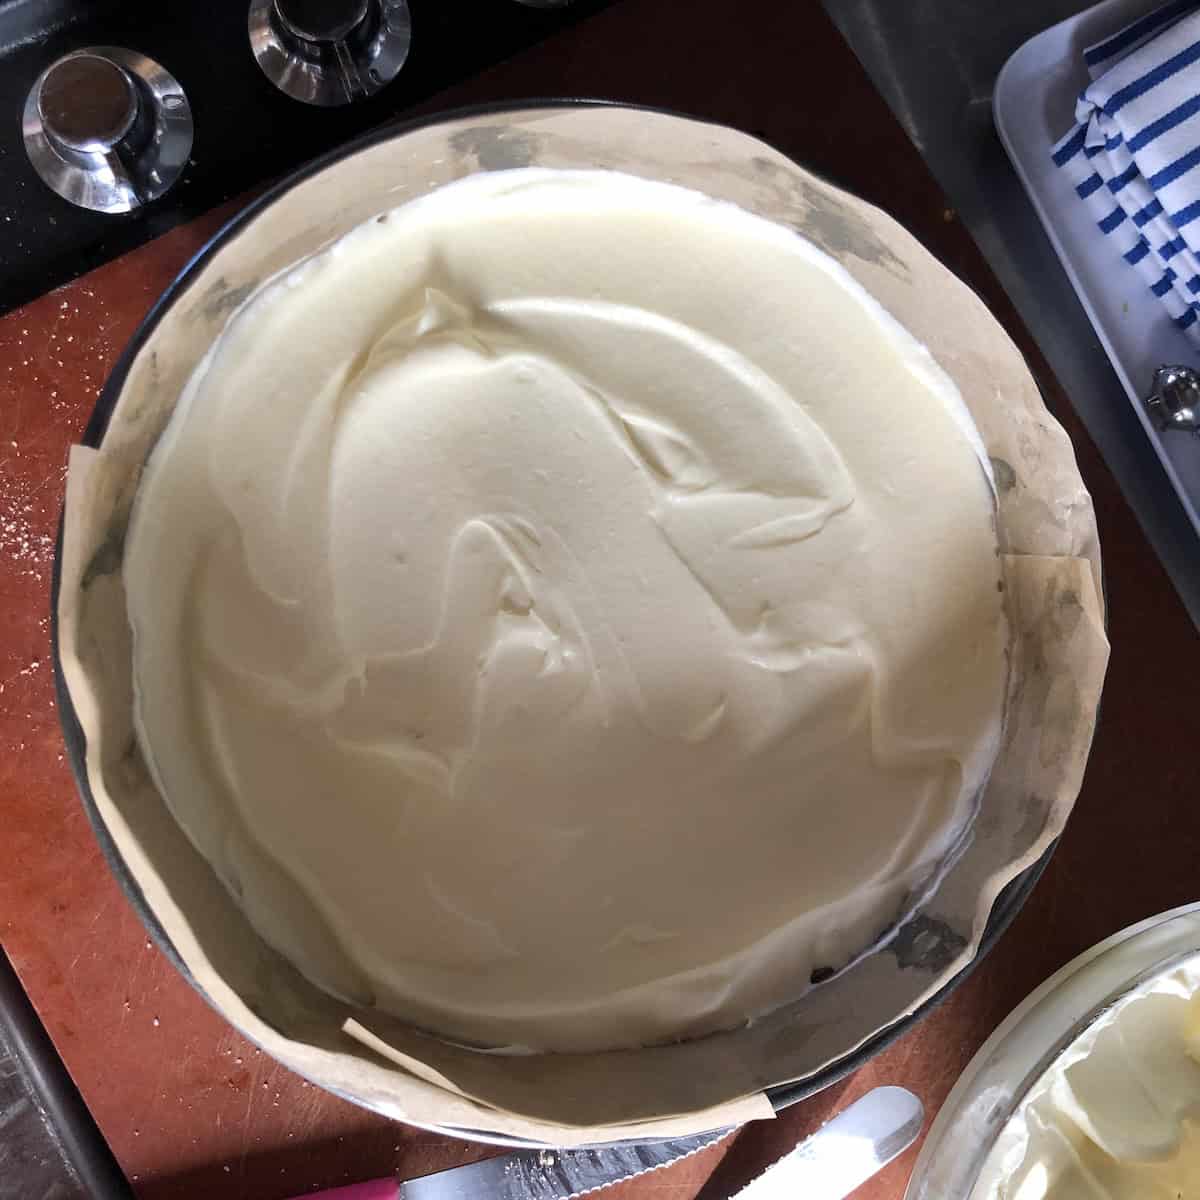
Spread one-third of the mascarpone cream evenly over the first ladyfinger layer, smoothing to about half an inch from the edges. Dip and arrange a second layer of ladyfingers over the cream, rotating them 90 degrees relative to the first layer for better structural stability.
Spread another third of the cream. Add a third layer of dipped ladyfingers, then top with the final third of cream, smoothed completely flat with a palette knife or offset spatula. You will have 3 ladyfinger layers and 3 tiramisu cream layers.
Step 10: Refrigerate
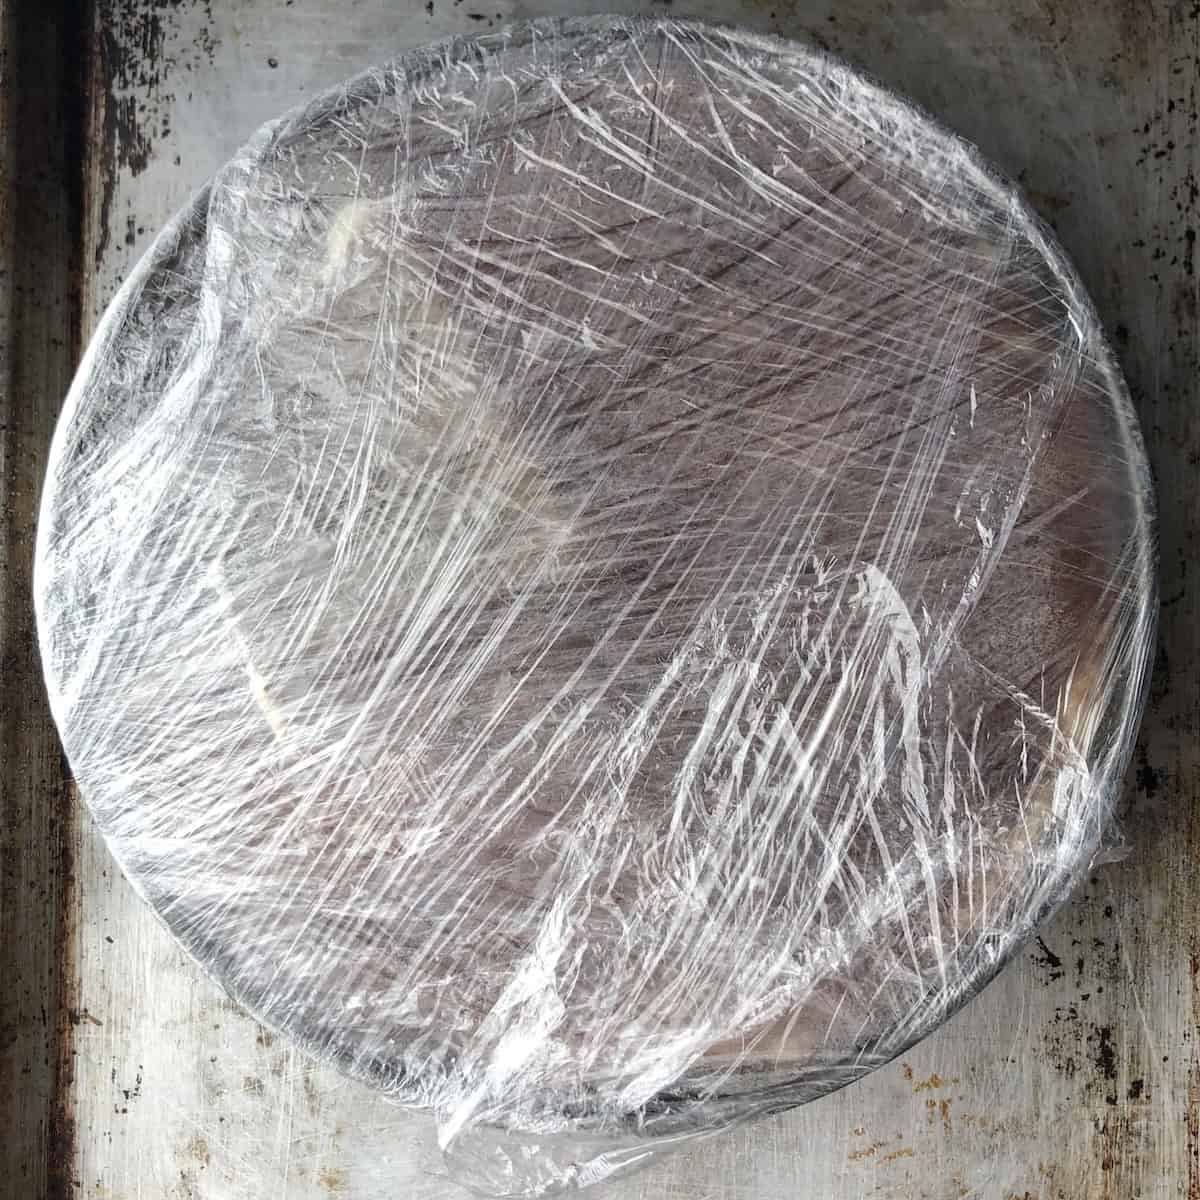
Wrap the entire cake pan without letting the sustainable cling film touch the tiramisu cream surface. Refrigerate it overnight. No matter what any other recipes tell you, 4 hours isn't enough to reach the ideal consistency and flavor. And refrigerating up to 2 days ahead is better still. This allows the flavors to integrate, the ladyfingers reach their ideal texture, and the cream firms up to perfection.
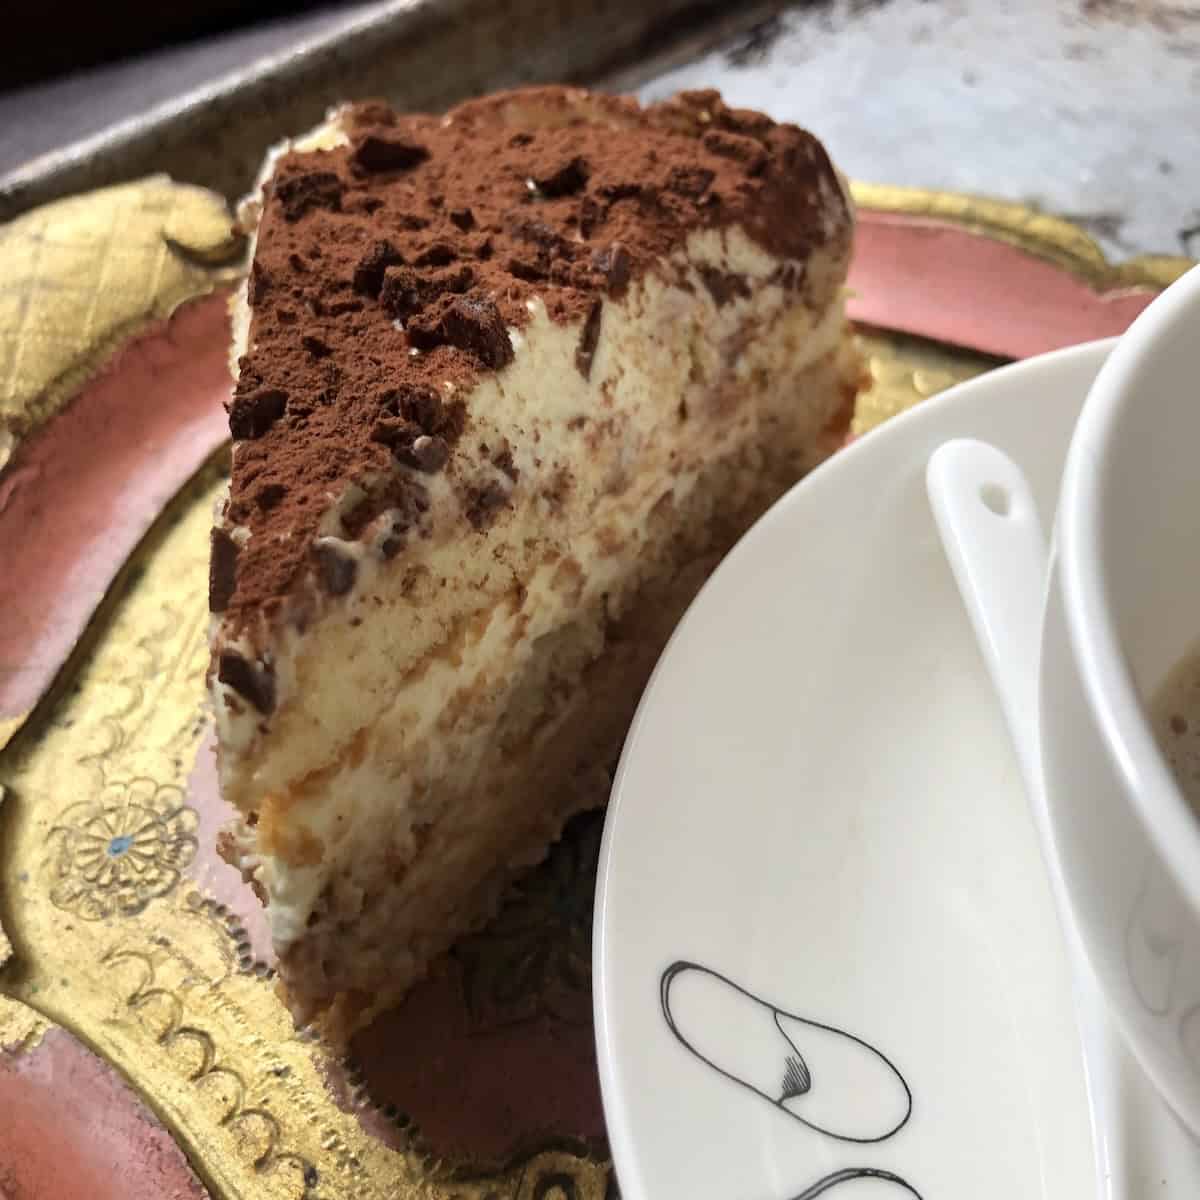
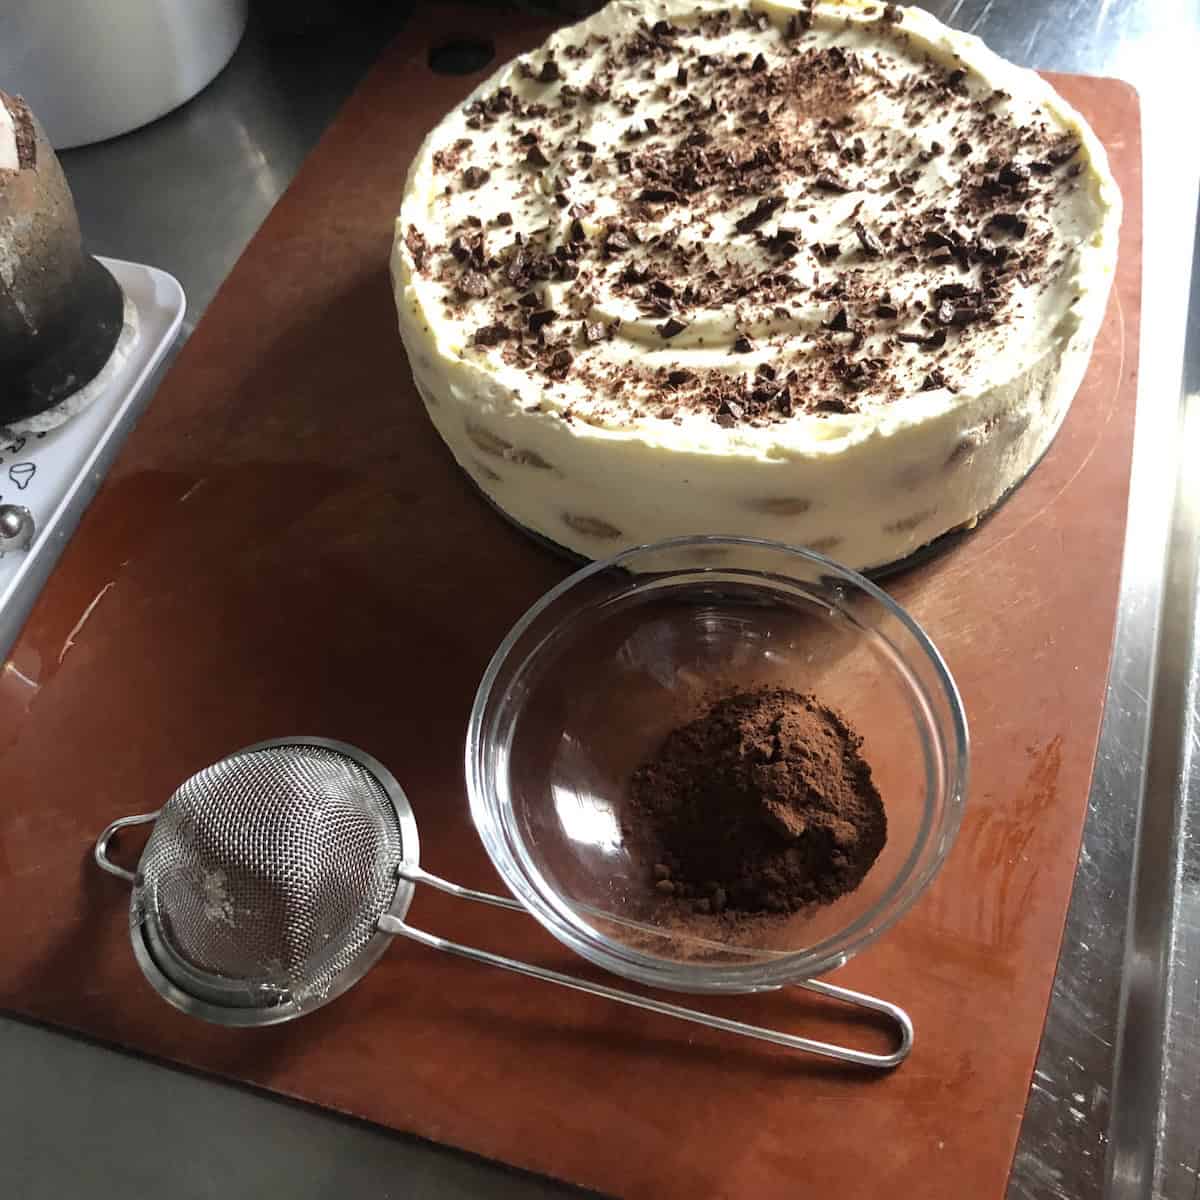
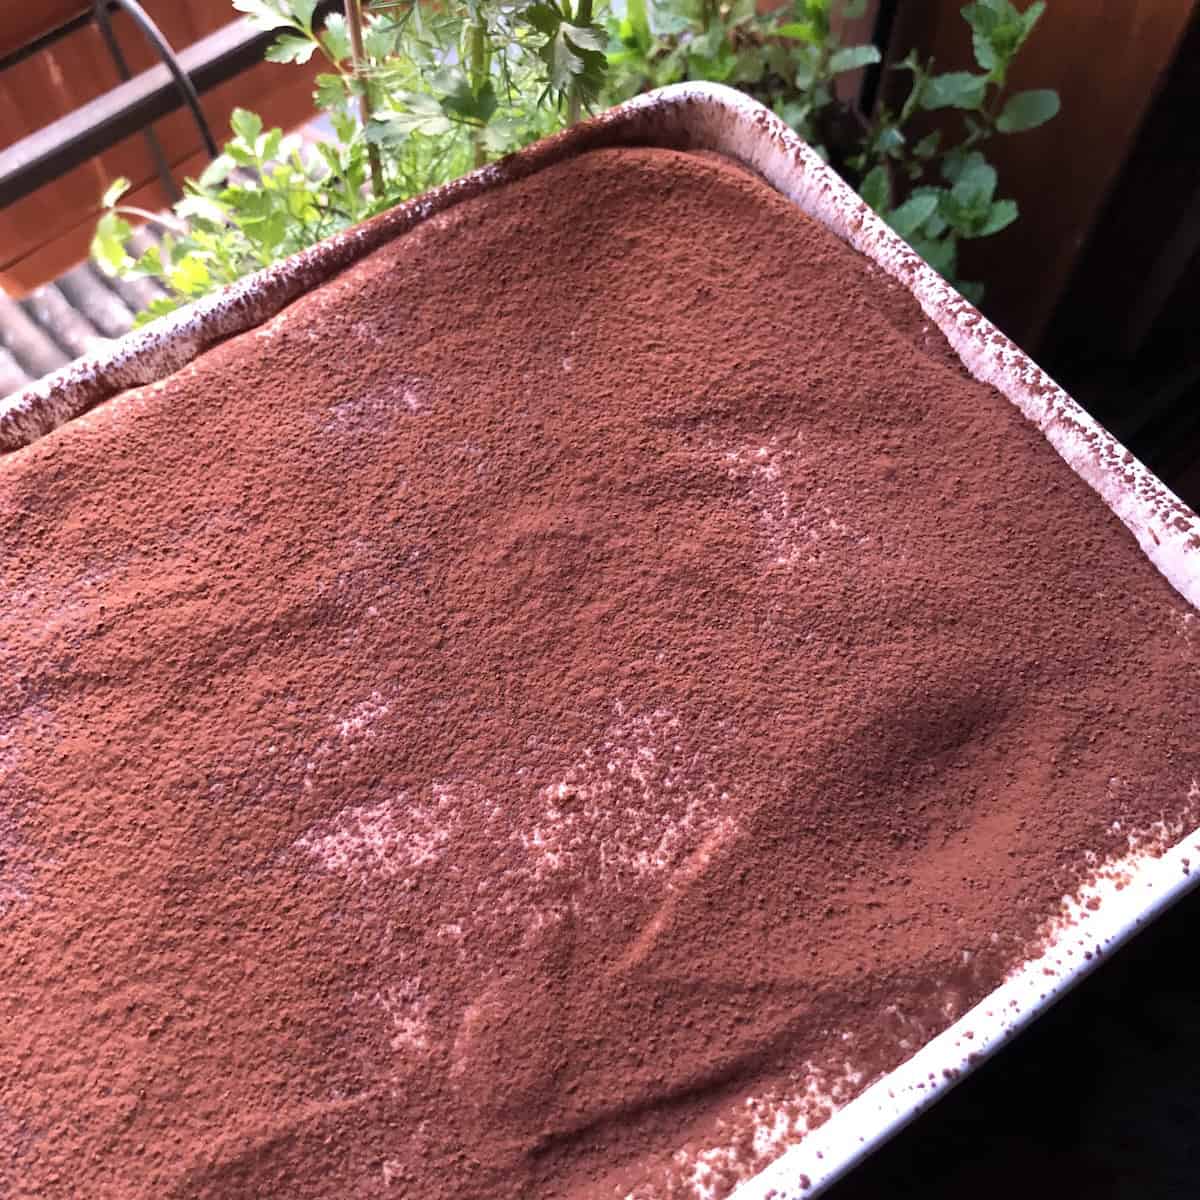
Step 11: Unmold, dust with cacao powder (and optional chopped chocolate), and serve
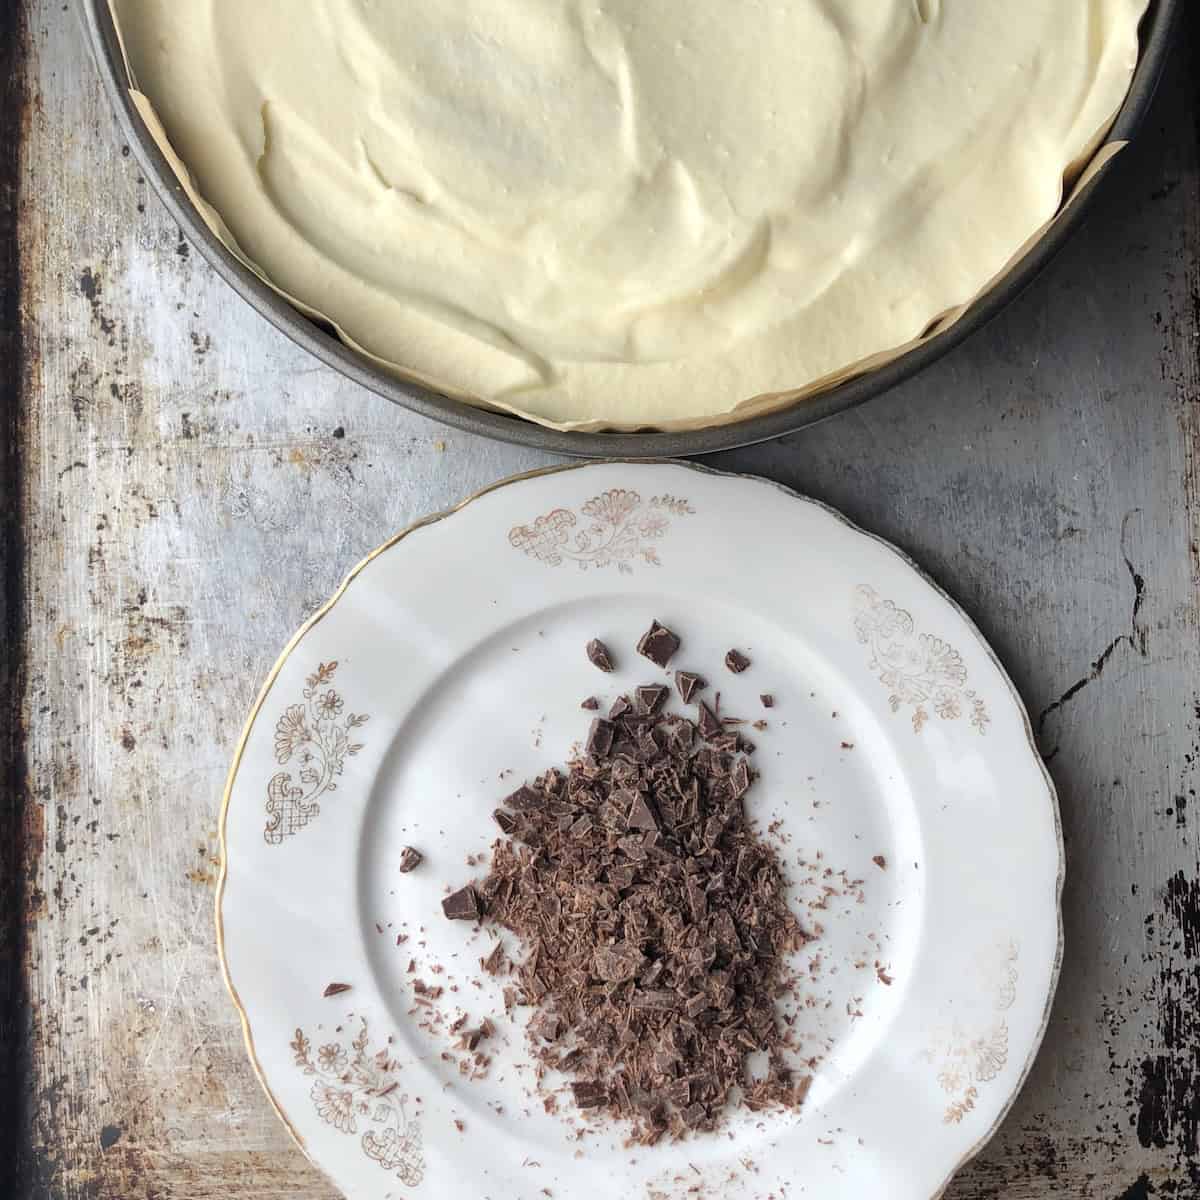
Just before serving, add chopped dark 78% or higher dark chocolate (optional) and dust generously with unsweetened cocoa powder through a fine mesh sieve held 8 to 12 inches above the surface for an even coating. Remove the springform ring carefully. Peel away the parchment from the sides.
Slice with a sharp non-serrated knife, wiping the blade clean between each cut. Serve immediately, cold from the fridge with a side of cold espresso for drizzling.
Find detailed instructions in the recipe card below.
What to Do if Your Tiramisu Cream Isn't Smooth
If, for any reason, the finished cream has any lumps from hardened sugar or mascarpone, pass it through a fine mesh sieve before folding in the whipped cream. It shouldn't happen if you follow the recipe precisely, but in the real world, sometimes "stuff" happens! So, if it does, this will ensure it's perfectly smooth.
What Makes This an Easy Tiramisu Recipe
From start to finish, making and assembling this dessert is about 35-45 minutes of active time (with most of that being dipping and layering in the ladyfingers).
And while the pâte à bombe method is a professional pastry technique, it's faster and way less work than the double boiler approach most recipes use. There's no risk of scrambling the eggs from direct heat and no need to constantly whisk by hand or stand over a pot of steaming water with an electric mixer.
You simply cook the syrup, pour it into whipped egg yolks as the mixer is running, and let the mixer do the rest of the work.
Three layers in a springform pan or cake ring also look dramatically more impressive than a casserole dish version, and it takes no additional skill. The pan does the shaping for you.

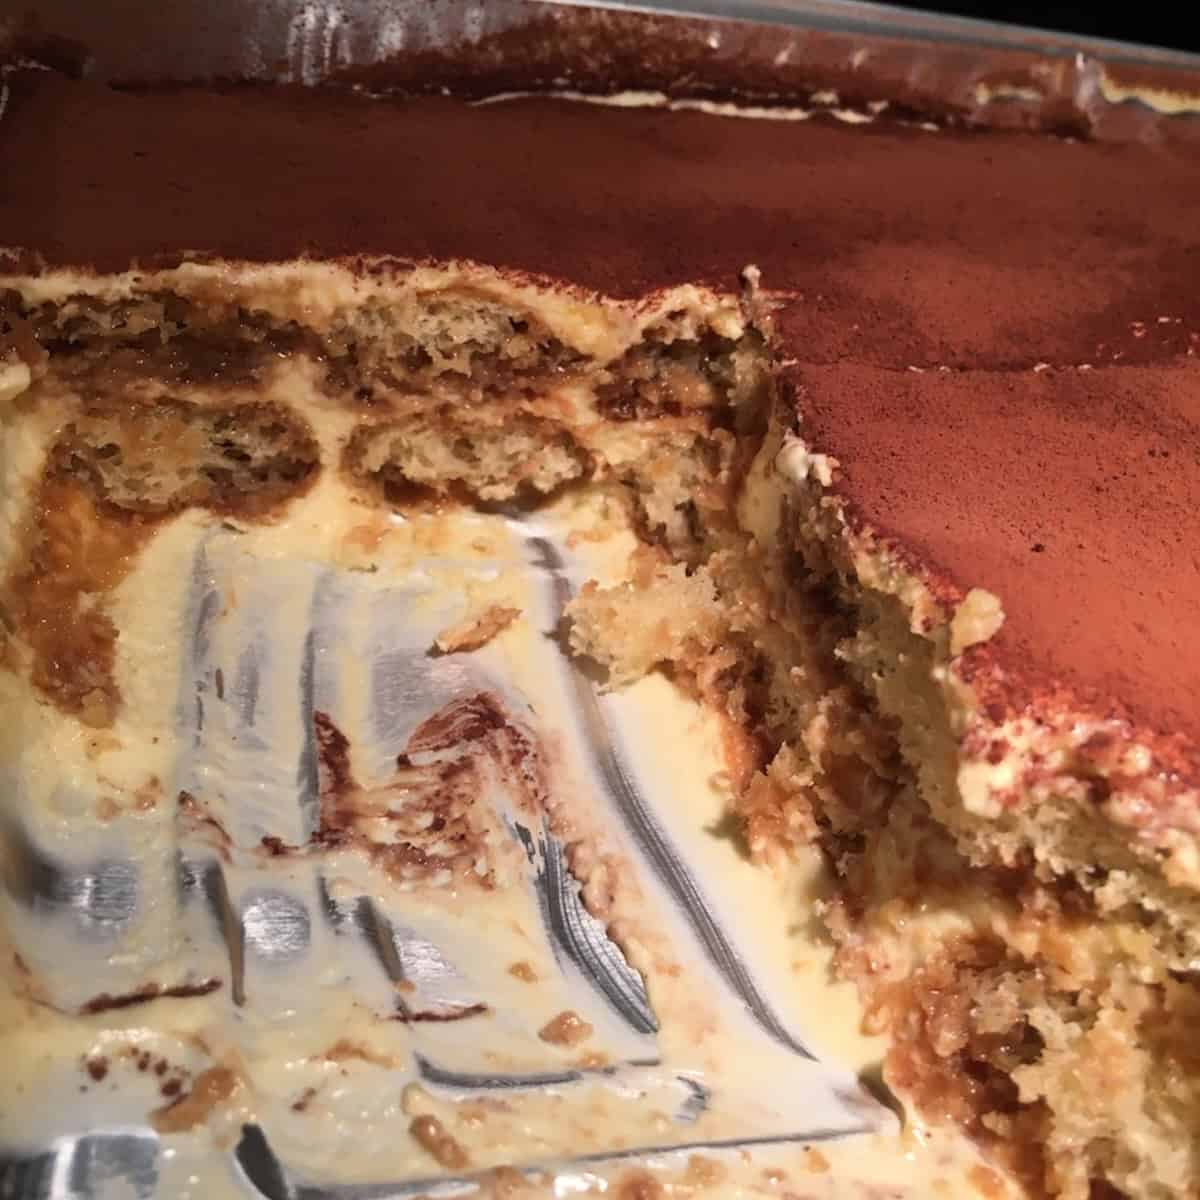
Never Soggy Ladyfingers (Ever)
One of the most common tiramisu complaints is soggy, falling-apart ladyfingers (see photo above). The fix: dip each savoiardo for no more than 1.5 seconds per side.
Savoiardi are engineered for quick liquid absorption. They don't need to be double-dipped or held in the espresso. 1.5 to 2 seconds per side is enough.
Alternatively, use the full pass-through method: fill a deeper bowl and pass each ladyfinger through the liquid in one continuous, fluid in-and-out motion. Let it dry completely before layering. This takes a little more practice but allows just the right amount of absorption, giving you full espresso flavor without a dry, cakey center.
For beginners, stick with the 1.5-second dip and serve the tiramisu with a small pitcher of cold espresso on the side for guests to drizzle over their slice. Luca and his family actually loved it served this way. It makes eating it slightly interactive and lets everyone dial in their own coffee intensity. No soggy ladyfingers, no dry centers, no complaints, ever!
This is also the best solution if your finished tiramisu has ladyfingers that taste underpowered or have dry centers. Serving it with a small pour of cold espresso at the table fixes it instantly.
Why Is My Tiramisu Cream Runny (and How to Avoid It)
5 things cause runny tiramisu cream, and all three are completely preventable.
1. The pâte à bombe wasn't fully cooled
The mixing bowl and the tiramisu cream itself must be completely cool to the touch (room temperature) before the mascarpone is added. Not warm, but totally room temperature. On a hot summer day or in a warm kitchen, this may take longer than the 10 to 12 minutes in the recipe. Keep whipping.
Touch the bowl. If there's any warmth at all, keep going. I promise, it'll get there. If you're using a handheld mixer, you can always set the bowl over a smaller bowl with ice in it to help cool it down more quickly if needed.
2. The mascarpone was over-beaten
Mascarpone is a fat emulsion. Beating it aggressively, or beating the finished cream mixture longer than needed, breaks that emulsion and produces a grainy, loose result. Add the cold mascarpone one or two heaping spoonfusl at a time on the lowest speed.
Mix only until smooth and streak-free. Then stop and add another spoonful. I usually do this in 3 waves.
3. The mascarpone had too much moisture
Some mascarpone brands are wetter and softer straight from the tub. If yours has visible liquid when you open it or after removing a scoop, drain it or pat it dry before using.
Even with reliable brands, you may still need to drain excess liquid (as you can see in the photo comparison above showing Galbani vs. Latterie Vicentine vs. my homemade mascarpone). Choosing a higher-fat, lower-moisture mascarpone like Polenghi helps reduce the issue.
4. Adding egg whites
Skip the egg whites entirely and use them for making cute meringue cookies instead:) No matter what other recipes say (yes, even some generic or well-meaning Italian recipes), egg whites add water to the cream. They dilute the mascarpone's fat structure and work against the set. They also aren't in the original recipe for a reason.
This recipe sets up perfectly even without the unsweetened whipped cream folded in at the end. But it does add a bit of lightness and fail-proof structure without any of those problems, helping reliably set the tiramisu cream every single time.
5. Adding alcohol to the tiramisu cream
Lastly, adding too much alcohol directly to the mascarpone cream introduces unwanted liquid and can affect both texture and flavor. If you're adding any alcohol at all, stir no more than 1 ½ to 2 teaspoons of dry Marsala into the espresso instead, not the cream.
Are Raw Eggs Safe in Tiramisu?
While plenty of Italian restaurants have made tiramisu with raw egg yolks for decades without issue, others use the pâte à bombe method or more laborious double-boiler method to allow more guests to enjoy it safely.
I've made it all three ways, and neither Luca nor I have ever gotten sick from the raw egg version, but it's not 100% risk-free. Like a classic caesar dressing, raw egg yolk is both functional and flavor-building, and most people eat it without a second thought.
That said, this recipe uses the pâte à bombe method, which pasteurizes the egg yolks reliably and efficiently. The hot sugar syrup cooked to 250°F/121°C is well above the pasteurization threshold of around 140°F/60°C and is poured directly into the whipping yolks, raising their temperature rapidly.
Compared to a double boiler, pâte à bombe is faster, less work, requires less hands-on monitoring, and produces a dramatically more voluminous and aerated yolk base that gives this cream its exceptional body and texture.
If you prefer to skip the hot syrup step entirely, pre-pasteurized egg yolks are available at many grocery stores. Simply whip them with the sugar in your stand mixer until pale, thick, and ribbony, then proceed with the rest of the recipe as written.
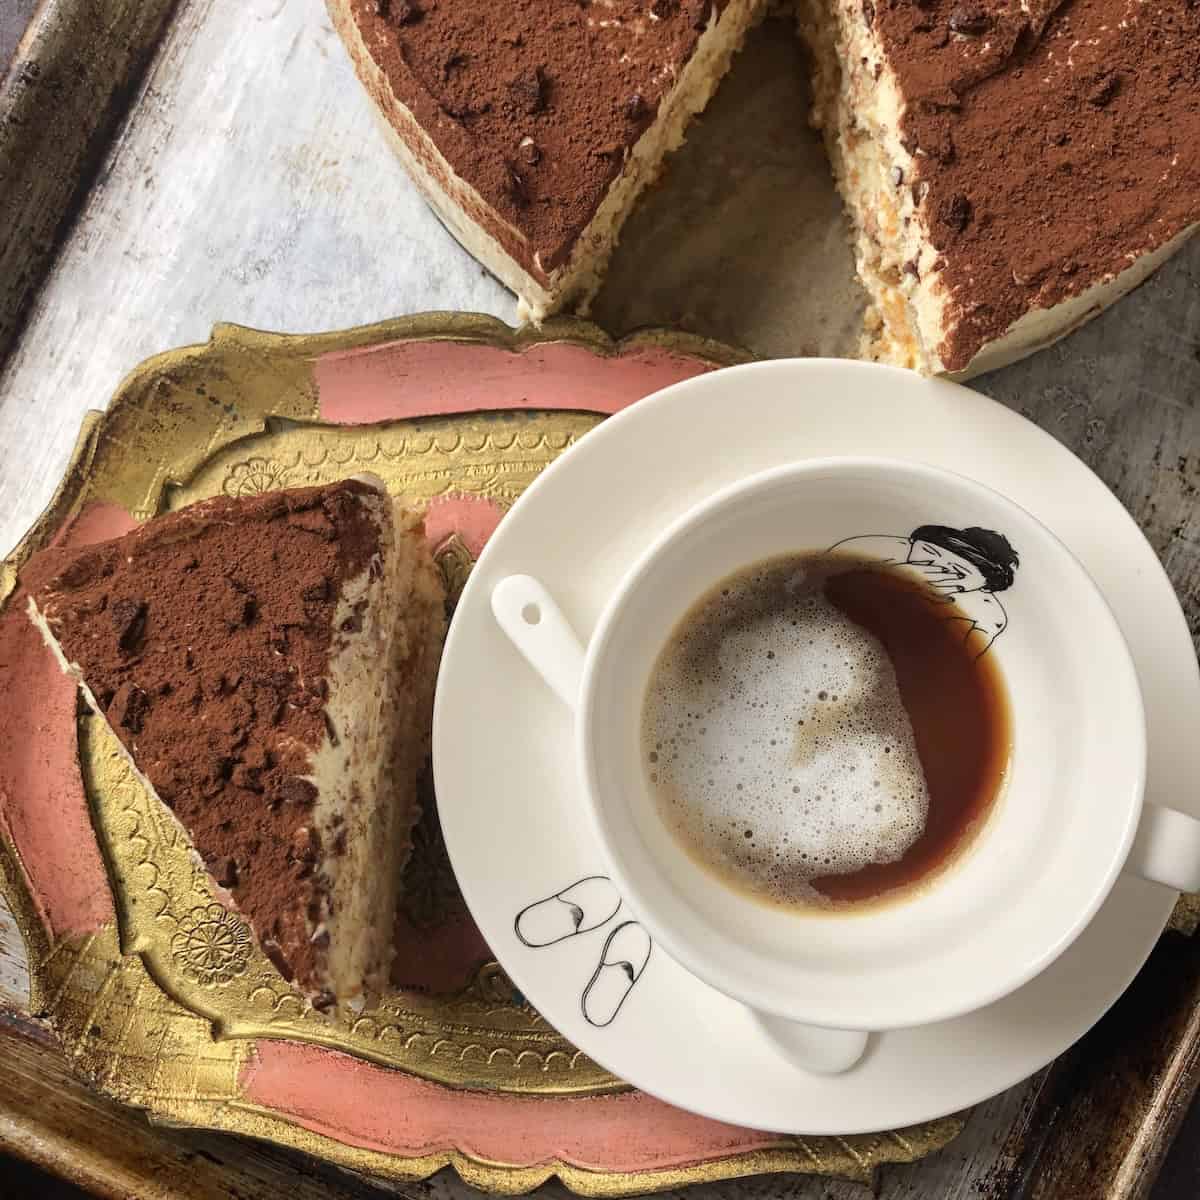
How to Serve Tiramisu
Serve it directly from the fridge, cold. Tiramisu served at room temperature loses the firm structure that makes the layers show cleanly, and the cream feels luxurious rather than loose.
We personally love it with bits of shaved or chopped dark chocolate curls or crispy dark chocolate balls added just before the cocoa powder for a little texture.
Assemble and serve it in any of the following ways that best suits your needs:
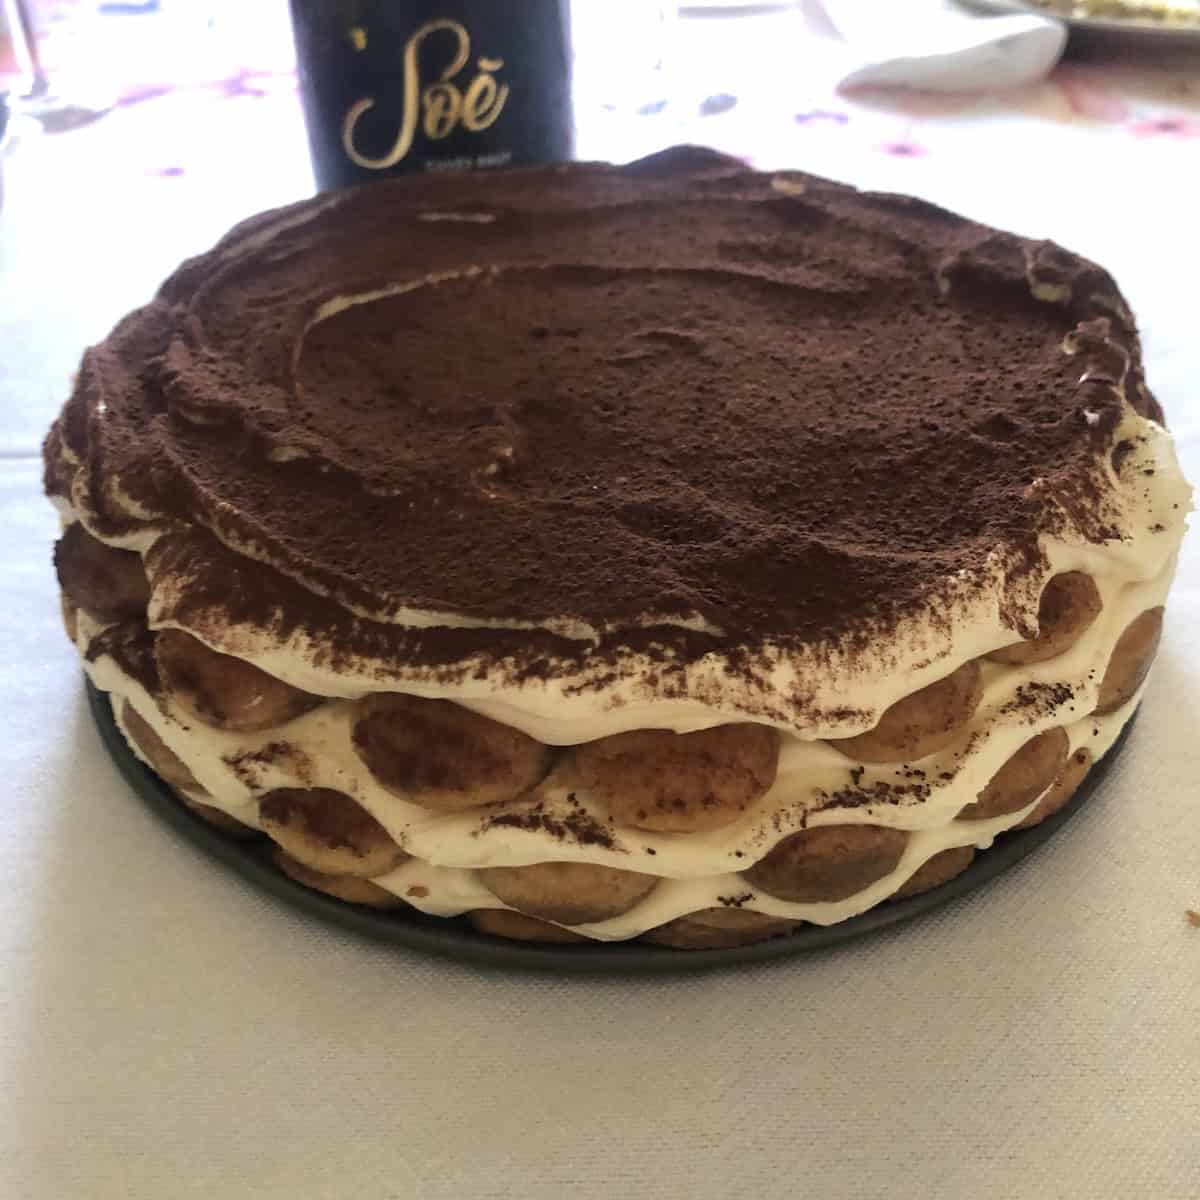
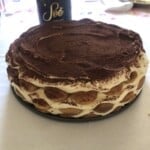
Tiramisu Cake (9-inch springform pan)
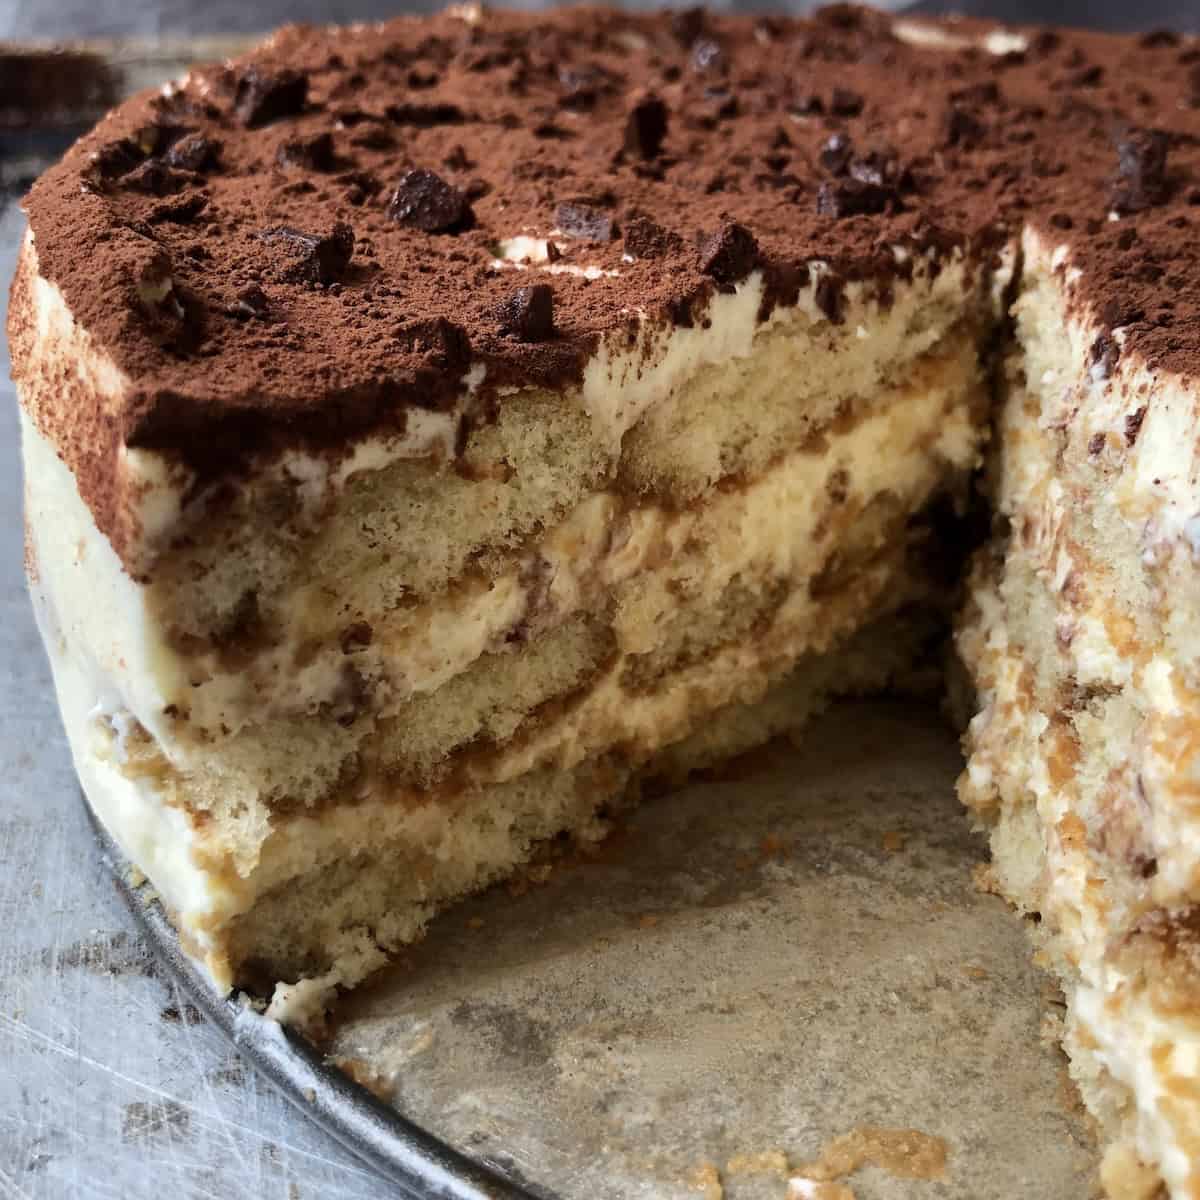
This is my favorite format. A springform pan with a removable bottom lets the sides come away cleanly, revealing the layers. Set it on a cake stand or large serving platter. You can use my flower scalloped edge layering method from above for scalloped edges or simply layer it in as seen in these images to get three full layers of tiramisu cream and ladyfingers for the 'clean sides' professional look:
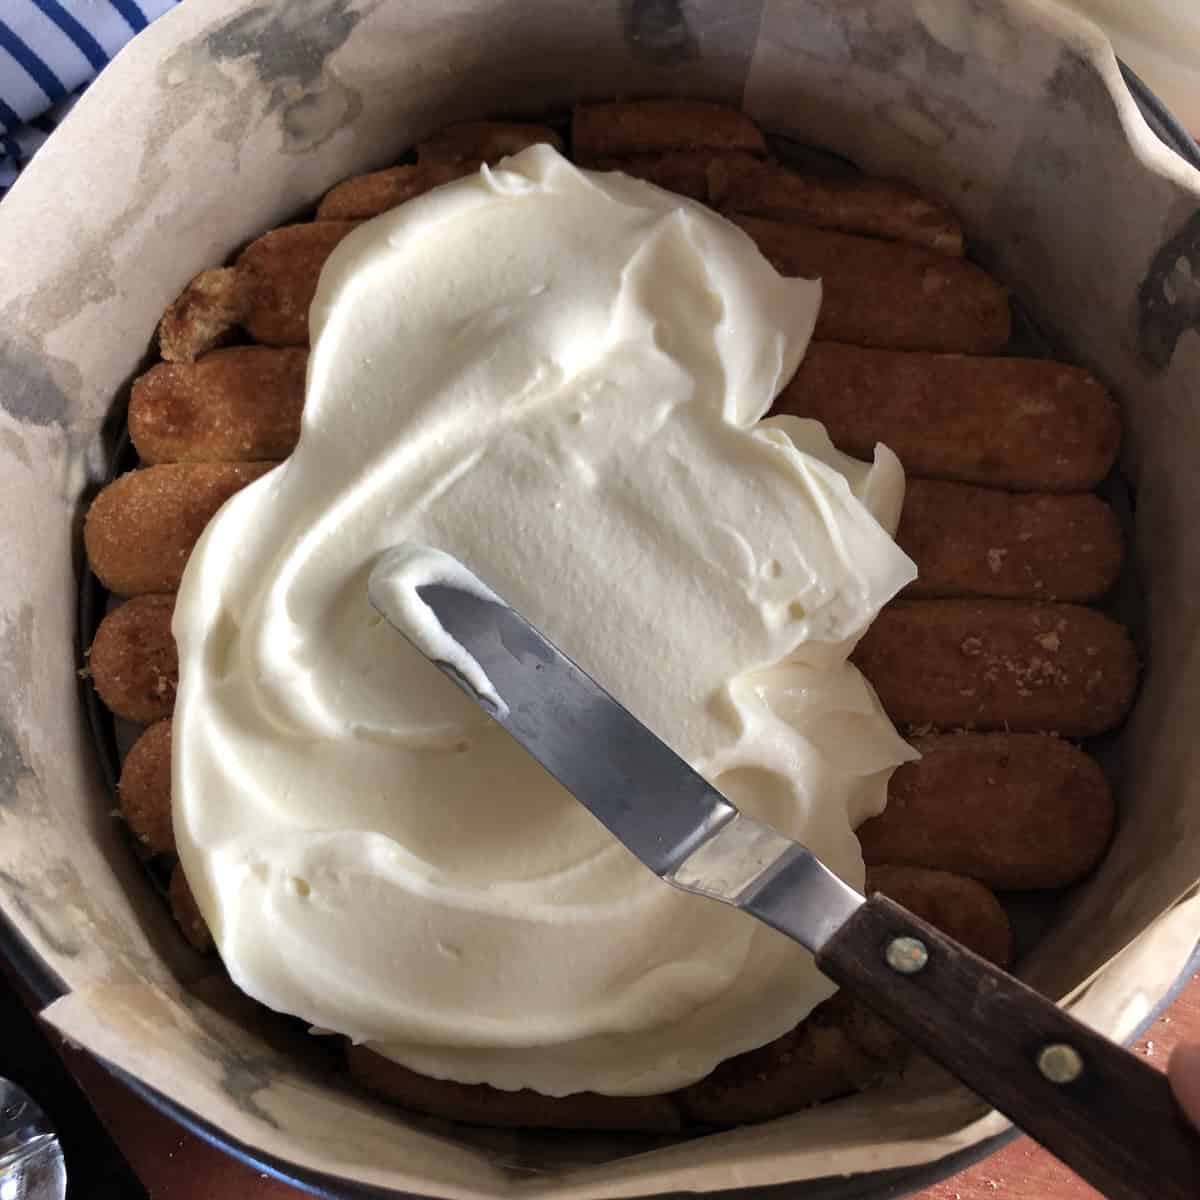
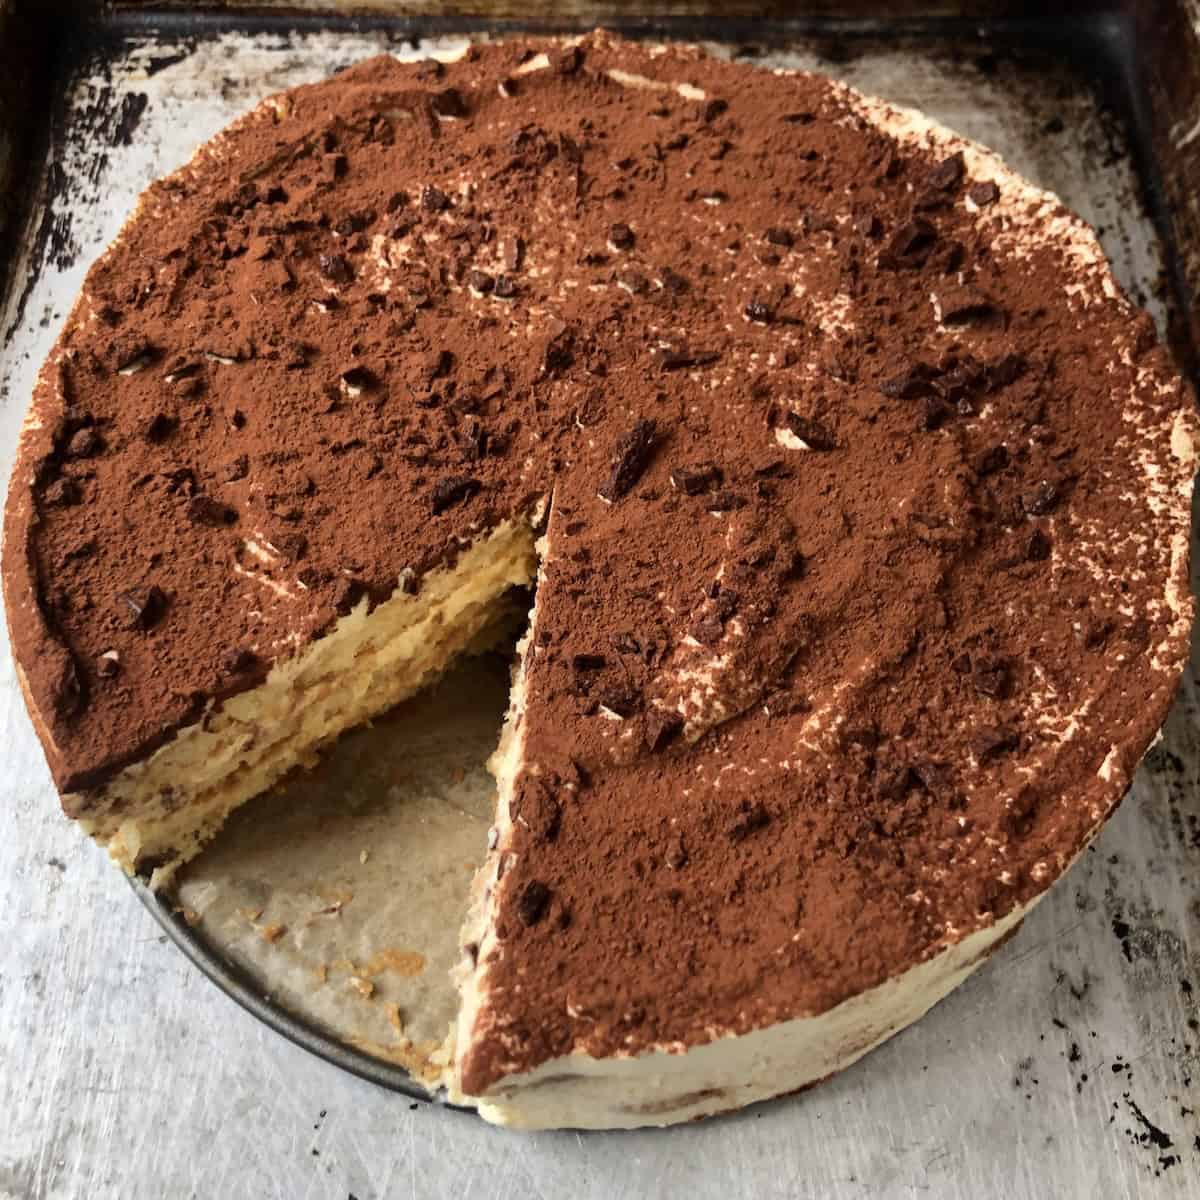
When ready to serve, slice with a sharp non-serrated knife, wiping the blade clean between cuts. It slices cleanly, shows the layers beautifully, and holds its shape perfectly once properly chilled.
Serve with a small pitcher or glass of cold espresso on the side so guests who want more coffee can drizzle it directly over their slice.
Casserole or baking dish
A 9×13-inch dish or similar works just as well and is slightly more casual. Spoon directly at the table or cut individual squares. 2 large loaf pans also work. An 8-inch square dish works for a half recipe.
Loaf Pan Tiramisu
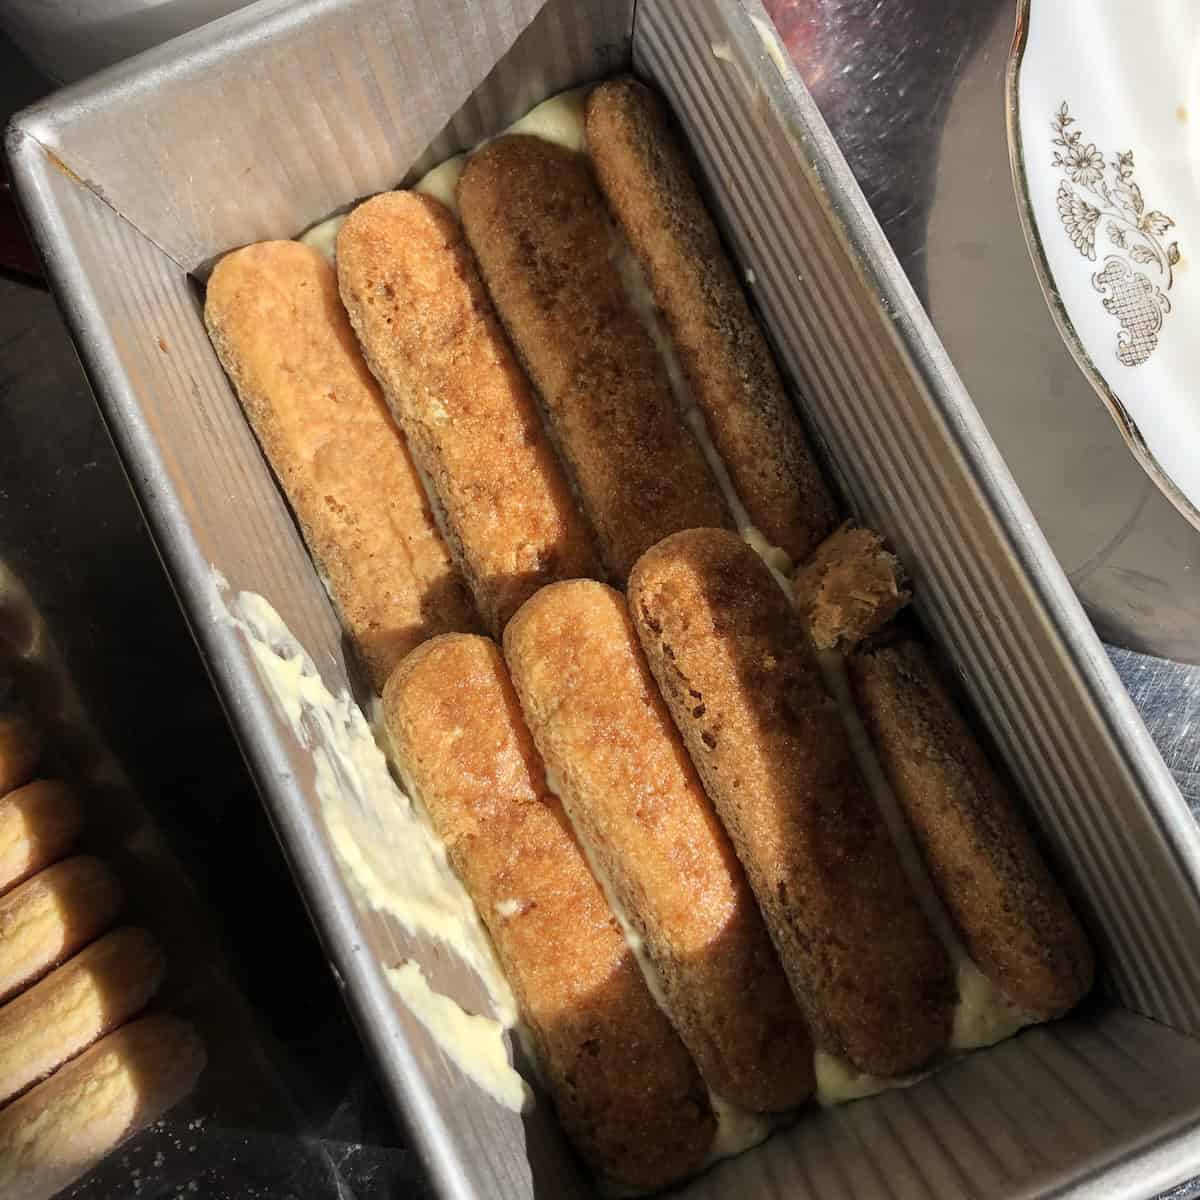
Two standard 8-inch loaf pans are a great option for smaller households or when you want to serve one now and freeze one for later. Layer each pan with two or three tight layers of espresso-dipped savoiardi, cutting pieces to fit the width, with cream below, then between, and as the final top layer.
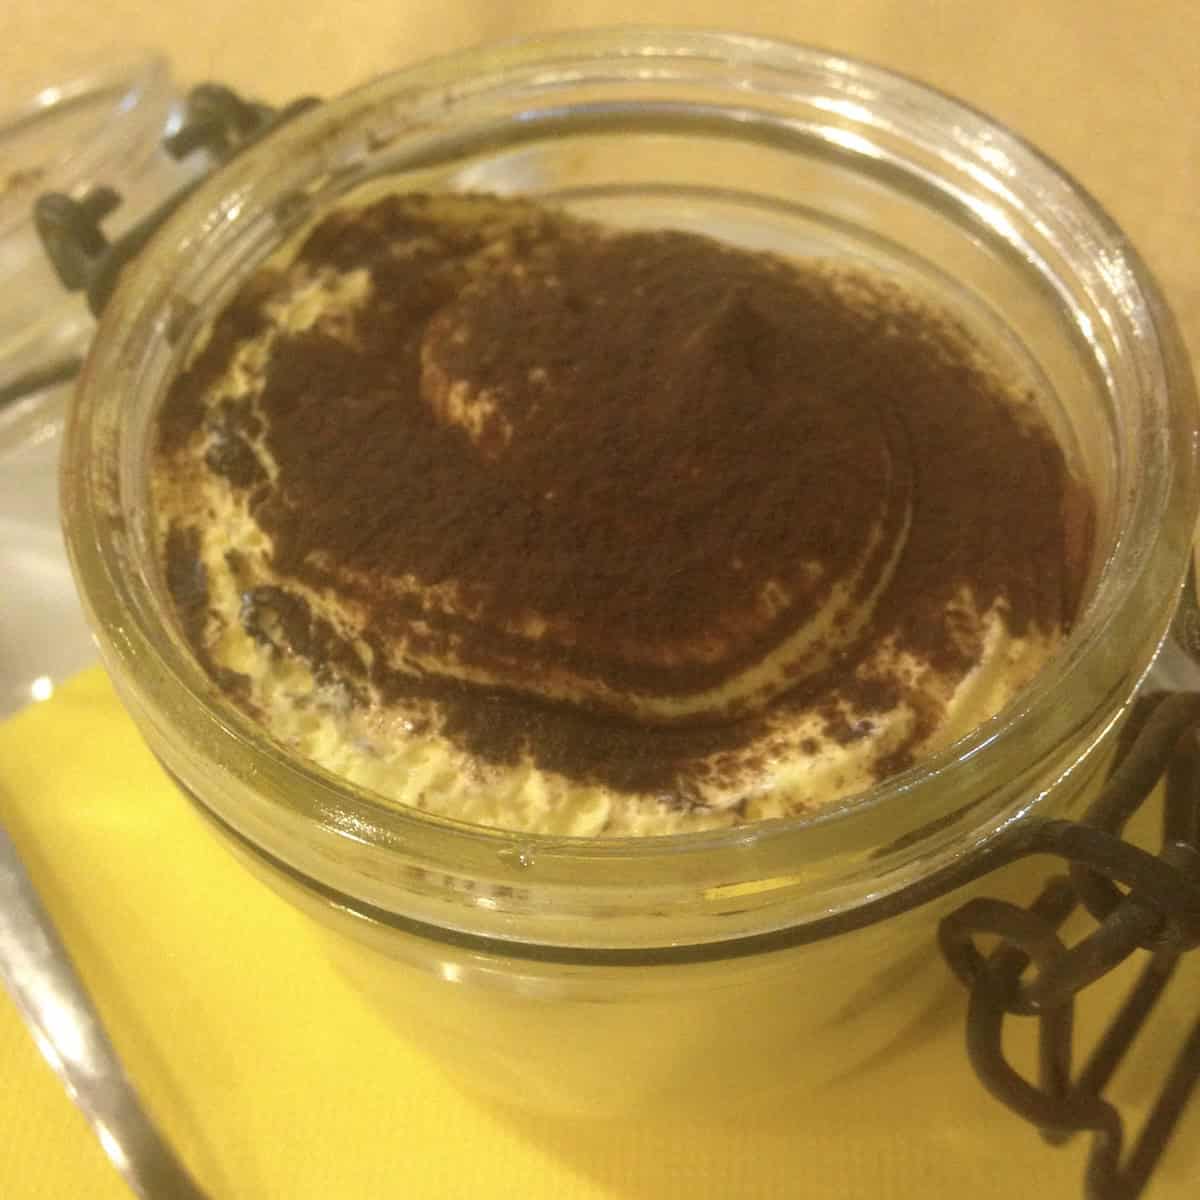
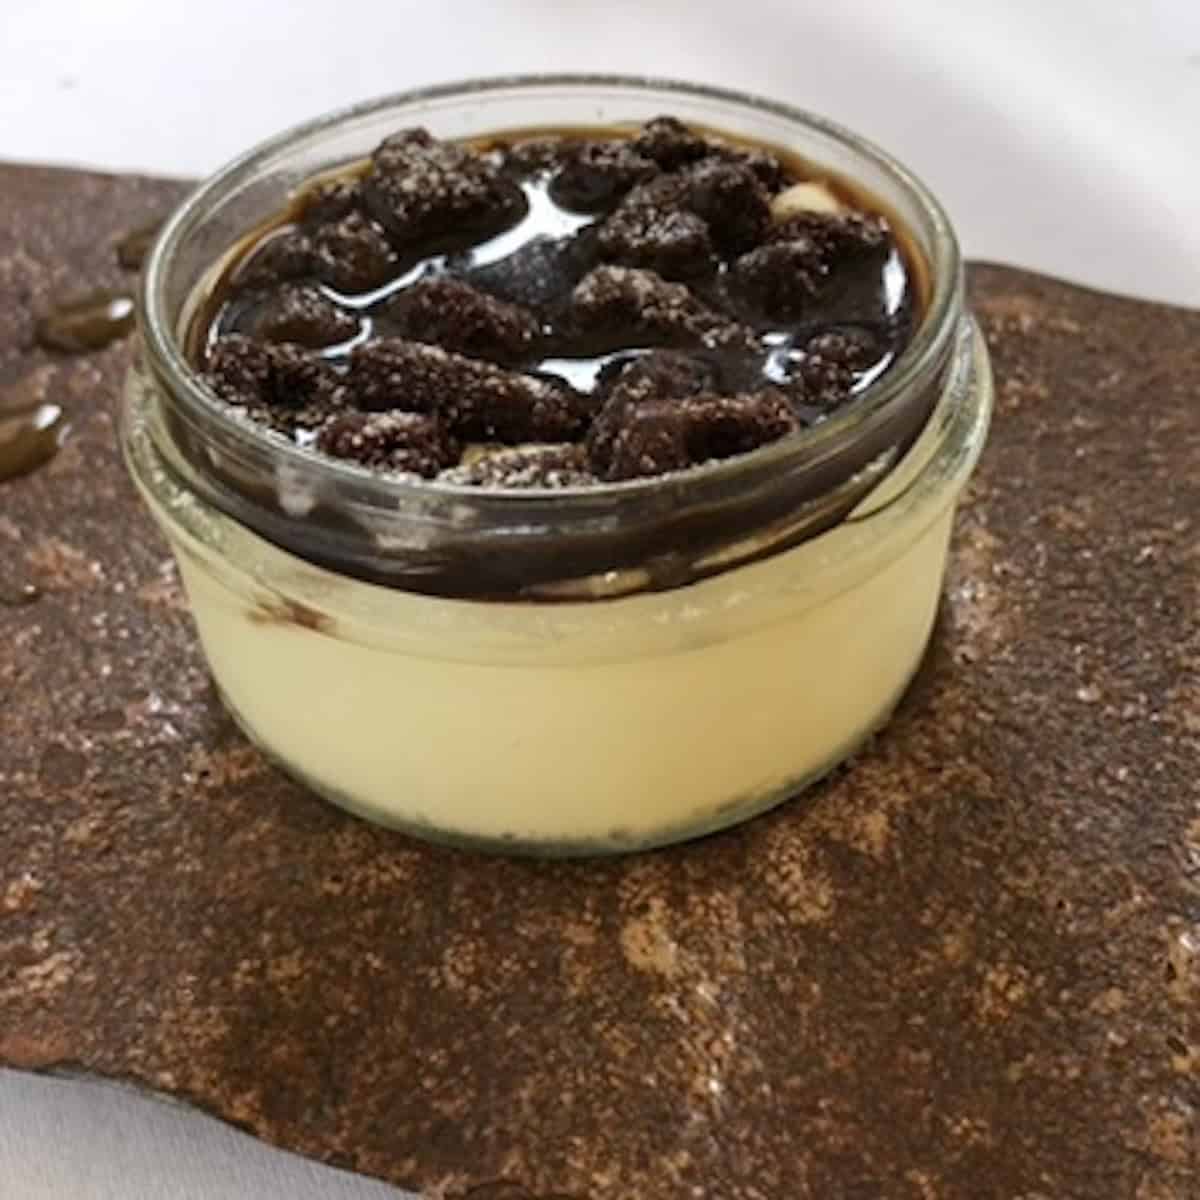
Individual cups, jars, or glasses (tiramisu cups)
As seen in the Italian restaurant tiramisu above, these are great for dinner parties, weddings, gifting, or controlled portions, and jars especially keep any odors from the fridge from compromising the flavor of the tiramisu cream. Martini glasses, small weck or mason jars, and dessert coupes all work. Cut or break the ladyfingers to fit the width of each vessel, and pipe in or spoon in the cream.
For a crowd
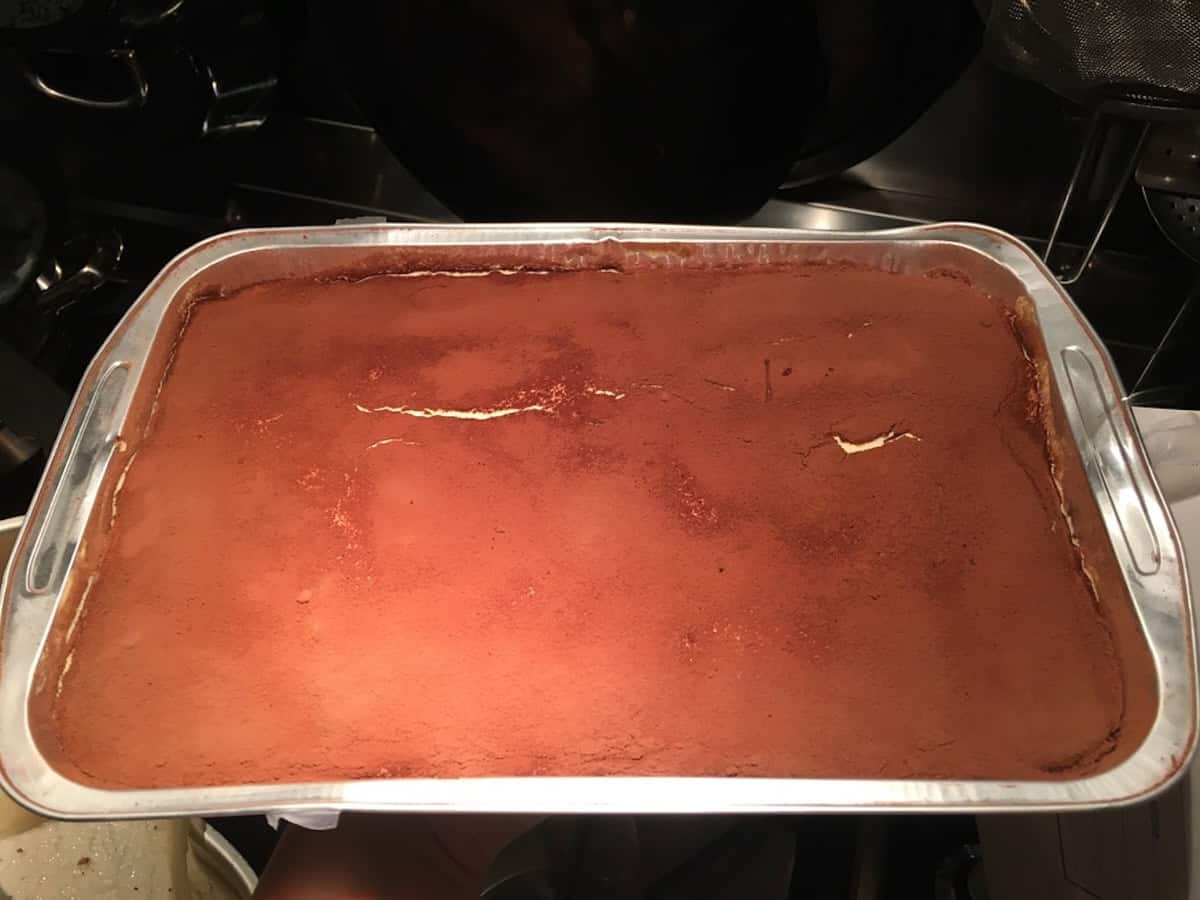
Aluminum disposable pans are perfect. They travel well, cover easily, go straight from fridge to table, and have no cleanup after. Aim for two ladyfinger layers. The recipe scales up freely. In fact, the pâte à bombe method actually becomes easier to execute the more egg yolks you're working with, especially in a stand mixer.
This is also the format our Italian friend brought us her homemade tiramisu as a housewarming gift in. She used an aluminum to-go pan. No one cares what it arrives in, so long as it's delicious 😉! Make it 1 to 2 days ahead, don't dust it with cocoa until serving.
Add shaved or chopped dark chocolate
Looking at the restaurant photos in this post and mine, shaved 78% to 90% dark chocolate on top of the cocoa layer, or layered between the cream and the savoiardi, appears regularly in Italian restaurant presentations. Milk chocolate would make it too sweet.
It adds visual contrast, extra texture, and an additional layer of chocolate flavor. Luca prefers it this way. Chocolate curls, rough shards, or chocolate pearls all work and are often added here in Italy!
Substitutions
- No espresso machine or moka pot: Use unsweetened canned Illy or Starbucks espresso, Starbucks VIA instant espresso packets brewed strong, or shots ordered from a coffee shop. Do not substitute drip-brewed coffee.
- No Marsala wine: Simply omit it. The tiramisu is excellent without it.
- Decaf: Use decaf espresso by any of the methods above. The flavor difference is minimal.
- Gluten-free: Substitute gluten-free savoiardi biscuits (they exist and work well). Everything else in this recipe is naturally gluten-free.

Equipment
- 9-inch springform pan: essential for the tiramisu cake format with clean unmolding, OR use a 9x13 casserole dish or a large mixing bowl to layer into
- Stand mixer or hand mixer: required for whipping egg yolks and pâte à bombe method; this cannot be done by hand
- Small heavy-bottomed saucepan: for making the sugar syrup
- Candy/deep fry thermometer: recommended but not required (see instructions for the no-thermometer method)
- Offset spatula, palette knife, or large spoon: for smoothing the cream layers flat
- Fine mesh sieve or flour sifter: for dusting the cocoa powder evenly
- Parchment paper or acetate strips: for lining the springform pan bottom and sides
- Moka pot: for making espresso the Italian way at home or use storebought
Storage, Make-Ahead, and Freezing Tiramisu
Tiramisu is one of the best make-ahead desserts that exists. It doesn't just hold well, it improves. Day two is genuinely better than day one. The flavors integrate, the ladyfingers reach their ideal texture, and the cream firms to exactly the consistency it should be.
In the fridge: covered tightly, tiramisu keeps well for 3 to 4 days. The caveat is that it's nearly impossible to leave alone for that long!
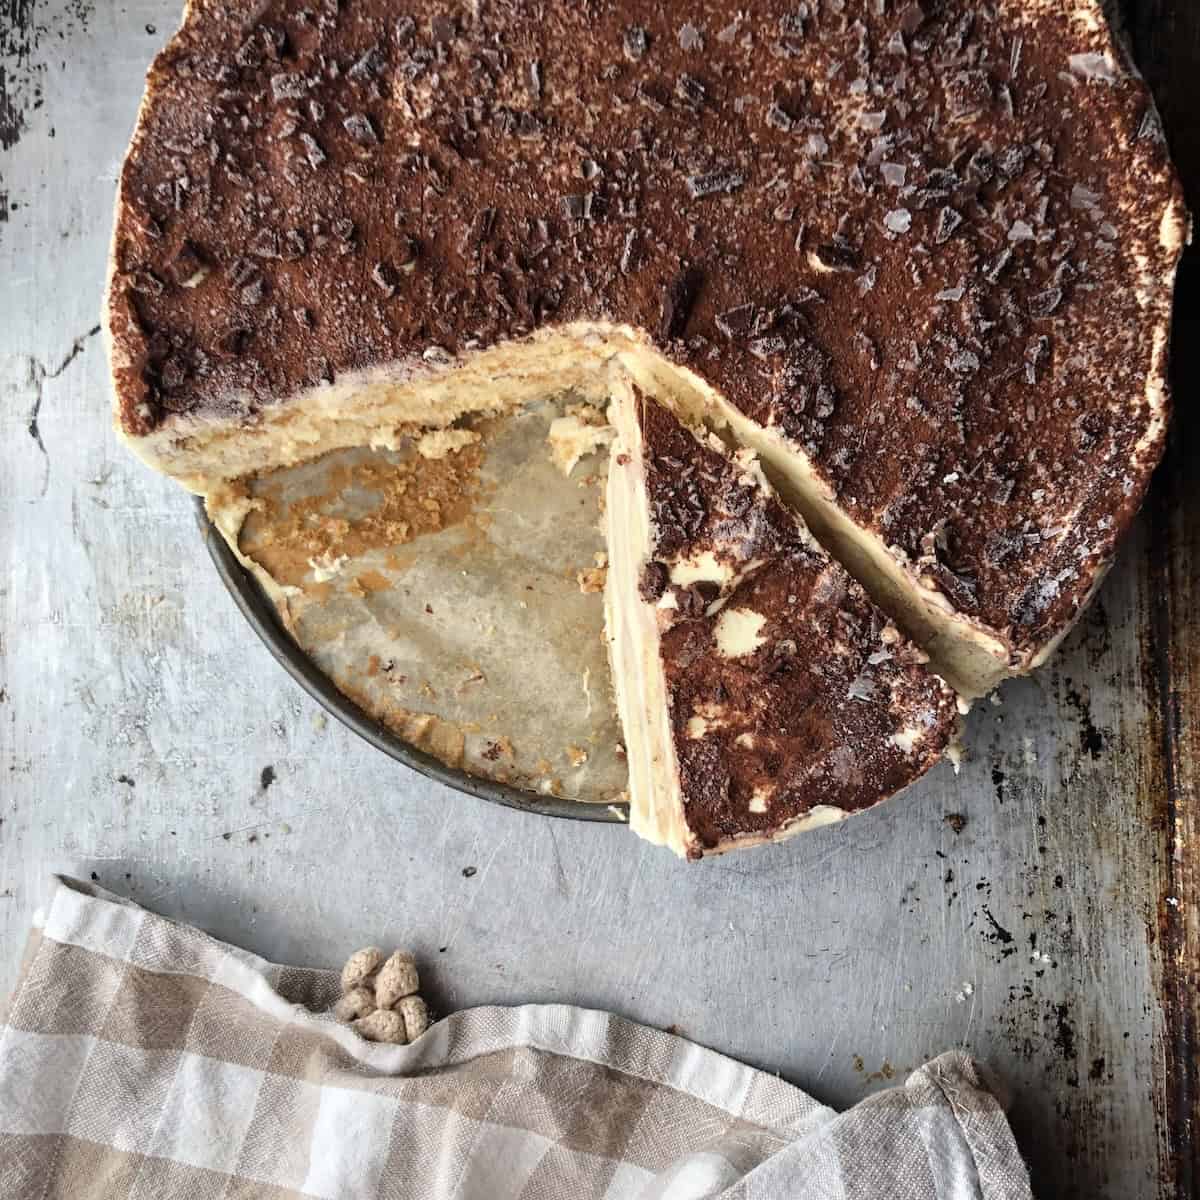

Freezing: Despite what you may have read, it works, and works really well, as you'll see by these photos of my frozen tiramisu. This is a good option for smaller households, for making the recipe in advance for a special occasion, or simply for having tiramisu available without eating an entire 12-serving pan at once.
If you can, freeze without the cocoa powder, covered first with a piece of parchment paper to fit over the top cream layer, then tightly with sustainable cling film, then wrap in a larger freezer bag or aluminum foil. Thaw in the refrigerator overnight or at room temperature.
Remove the parchment, dust with cocoa just before serving. You can portion and freeze, which is easier, but I wanted to show you that you actually freeze an entire tiramisu without any issue or change in flavor or texture. You can see that if you slice the tiramisu while still partially frozen, the slices look almost comically perfect.
Critical make-ahead rule: Don't dust it with cocoa powder until the moment it goes to the table. Cocoa applied hours in advance and then refrigerated absorbs moisture from the cream and turns dark and wet rather than staying dry and powdery. This applies to all formats.
Top Tips
- Cool the espresso completely before dipping. Warm coffee breaks the ladyfingers before they're even in the pan.
- The pâte à bombe must be cool and at room temperature to the touch before mascarpone is added (it's non-negotiable).
- Add mascarpone cold, one or two heaping spoonfuls at a time, on the lowest mixer speed (don't overmix)!
- Dip ladyfingers 1.5 to 2 seconds per side in the espresso. Don't second-guess it.
- Serve with cold espresso on the side so guests can customize the coffee level at the table
- Dust cocoa powder only at the last moment before serving, never in advance
- Don't serve it after just 4 hours of refrigeration. Plan ahead instead. One to two days in the fridge tastes even better than overnight.
- Rotate the direction ladyfingers 90 degrees opposite from the first layer for better structural stability when slicing
FAQ
Tiramisu is a classic Italian no-bake dessert made from layers of lightly espresso-soaked savoiardi biscuits (ladyfingers) and a rich, aerated mascarpone cream, finished with a dusting of unsweetened cocoa powder. The name means "pick me up" or "lift me up" in Italian, a reference to the caffeine kick from the espresso in the dish. It originated in Treviso, in the Veneto region of northeastern Italy, not far from where we live.
Tiramisu was invented in Treviso, a city in the Veneto region of northeastern Italy, in the late 1960s or early 1970s. The creation is most commonly attributed to Chef Roberto Linguanotto and his apprentice Francesca Valori at the restaurant Le Beccherie. Treviso is also the home of prosecco and is about an hour from where we live in Northern Italy.
The original recipe from Treviso contains no alcohol at all. Modern Italian interpretations often include a small amount, and this recipe follows that approach with 1½ teaspoons of dry Marsala wine stirred into the espresso, and it's completely optional. Some recipes call for 1 to 2 tablespoons, which we find overwhelms the coffee flavor and the mascarpone cream that this dessert is built around. A very small amount adds a subtle background depth that's barely discernible. Some recipes call for adding it to the mascarpone cream, but the cream is so perfect on its own, we never do that. If you don't have Marsala on hand, don't make a trip to the store to go get it (just leave it out). Rum, amaretto, and Kahlúa are popular American additions that probably taste good in non-classic tiramisu versions, but are not traditional to authentic Italian tiramisu.
In the original tiramisu recipe, there is no alcohol at all. The most traditional optional modern addition is dry Marsala wine (secco), used in a very small amount, stirred into the espresso and sometimes into the tiramisu cream itself, but we don't like it because it takes away from the amazing flavor of the mascarpone cream. Some modern recipes use dark rum, amaretto, Kahlúa, or Grand Marnier - these are mostly non-Italian additions that shift the flavor profile away from coffee-forward and are fun for different-flavored modern adaptations of tiramisu.
Traditional tiramisu contains very fresh raw egg yolks. This recipe uses the pâte à bombe method. All it is, is a hot sugar syrup made up of water and sugar cooked to 250°F/121°C that gets poured in a slow stream into the pale yellow whipped egg yolks as the mixer is running. The heat does the pasteurizing for you (no double boiler, no steam bath, no fussing). The result is both safer than raw eggs and produces a better cream than a double boiler. That said, no home pasteurization method is 100% guaranteed, and pregnant women, nursing mothers, young children, the elderly, and anyone with a compromised immune system should avoid dishes made with eggs that haven't been commercially pasteurized. For those groups, look for commercially pasteurized egg yolks at the grocery store. They can be used in this recipe following the same pâte à bombe technique, with no compromise to the texture or flavor of the finished cream.
No, absolutely not! Drip-brewed coffee lacks the concentration and depth that tiramisu requires. Use espresso from a moka pot, espresso machine, unsweetened canned espresso (Illy or Starbucks), Starbucks VIA instant espresso packets, or espresso shots from a coffee shop. Decaf espresso works perfectly for a less caffeinated version that still tastes the same.
Tiramisu can be made up to 2 days in advance and actually improves with time. The flavors integrate, the ladyfingers reach their ideal texture, and the cream firms to a perfect consistency. Don't dust with cocoa powder until just before serving, regardless of how far ahead it is made.
Overnight is the only way to go! While some recipes tell you four hours is long enough, it isn't, and any Italian chef will tell you so. One to two days is best of all, when the cream firms to its ideal sliceable consistency, the coffee flavor deepens from sharp to round, and the lady fingers are a perfectly cakey consistency. This is one of the rare desserts where more fridge time is always better.
Use unsweetened cocoa powder (never sweetened). Dutch-process cocoa powder is the best choice because it has a lower acidity than natural cocoa, a deeper chocolate color, and a smoother, less bitter flavor that complements the coffee without competing with it. Either will work, but Dutch-process is preferred.
Yes, you can (and should) freeze tiramisu! It works extremely well, as you can see by my frozen and then defrosted tiramisu photos. Freeze without the cocoa powder, preferably, with a parchment round on top, then covered tightly with sustainable cling film, then in a plastic freezer bag or wrapped well in foil. Thaw overnight in the refrigerator. Dust with cocoa just before serving. This is a great option for smaller households or for making a large batch in advance. It's easier to portion slices and then freeze unless you plan on serving it whole all at once.
Most commonly, the cream was too warm when assembled, the mascarpone was over-beaten, or it wasn't chilled long enough. Skip egg whites entirely; they add water and work against the set. The pâte à bombe, plus cold mascarpone, plus stiff-peaked whipped cream, sets reliably every time when the steps are followed correctly. This, plus giving it ample time in the fridge to set up (overnight is best) are all you need.
This recipe builds three layers in a springform pan: a base of espresso-dipped savoiardi, one-third of the mascarpone cream, a second layer of ladyfingers (rotated 90 degrees for stability), another third of mascarpone cream, a third layer of ladyfingers, and the final third of the cream mixture smoothed flat on top. Cocoa powder goes on last, just before serving.
Yes! Significantly. Day two is even better than day one (as long as it's not sitting next to a pile of chopped onions in the fridge absorbing off odors). The flavors integrate, the ladyfingers soften to their ideal texture, and the cream firms to exactly the right consistency for slicing. This is genuinely one of the best make-ahead no-bake desserts in existence.
Covered tightly, tiramisu keeps well in the refrigerator for 3 to 4 days. The flavors continue to develop over the first 2 days. After day 3, the texture begins to soften further, and the cocoa layer will need refreshing, but it will still taste amazing!
Technically, you can, but they aren't traditional, and this recipe deliberately omits them because they cause less structured (sometimes very runny as you can see by the photo comparison) tiramisu cream. Egg whites add water to the cream, which works against its setting power and can cause runniness. The unsweetened whipped cream folded in at the end provides lightness and structure without any of those drawbacks. But you can skip the heavy cream in this recipe because my tiramisu cream on its own sets up perfectly every time.
Mascarpone is a rich Italian soft cheese made from heavy cream that's been coagulated using an acid (traditionally lactic acid), but in homemade versions, lemon juice is often used. It has a smooth, dense, sweet to slightly sweet pure cream flavor and a texture similar to very thick cream cheese or thick crème fraîche. The texture and quality of different brands vary a lot. Lactic acid-produced mascarpone contains less water, has a sturdier, thicker, luscious texture, and tastes naturally sweeter and better. Here in Italy, we have a local Latteria (a cheese and milk producer) that we buy ours from, and it's noticeably better than many other versions made with citric acid (that said, for this recipe, I used a citric acid based mascarpone that's less sturdy and what you find in American grocery stores because I wanted you to have the most success with this recipe. Mascarpone is the defining ingredient of authentic tiramisu and cannot be substituted with cream cheese without fundamentally changing this Italian dessert into something other than tiramisu. Homemade mascarpone is also really easy to make if you can't find a good version where you are (recipe coming soon)!
Savoiardi and ladyfingers are the same cookie-like biscuit. Savoiardi is simply the Italian name for it. They're a crispy, light, dry, egg-based sponge biscuit with a characteristic elongated shape, a delicate air-bubble structure inside, and a sugar-dusted top. By Italian law, the name "savoiardo" is reserved for biscuits that meet a specific definition: the characteristic elongated shape, an airy bubble structure, sugar on top, and an egg content within a defined range. Vicenzovo by Matilde Vicenzi (made about 35 minutes from us in Verona) was the first Italian product to earn this certification, back in 2005, and it's what I use in my tiramisu recipe. For tiramisu, always use the dry, crisp variety. The soft, cakey ladyfingers sometimes sold in American supermarkets are a different product entirely. They absorb liquid almost instantly and produce the soggy layers this recipe is specifically designed to avoid. This biscuit is said to have originated for a French royal visit to the Dukes of Savoy, hence the name. Ladyfingers is the English name, a reference to their slender shape.
Yes, always serve it cold, directly from the refrigerator (heck, it's even good frozen!). Tiramisu served at room temperature loses some of the firm structure that makes the cream feel luxurious. Slice (or spoon it), and serve it cold.


Let's Get Started!
Made this recipe? I'd love for you to rate ⭐️ it and tell me how it went!
Print📖 Recipe
Tiramisu Recipe (Thick and Luscious Mascarpone Cream)
- Total Time: 8 hours 45 minutes
- Yield: 12 Servings
- Diet: Vegetarian
Description
The most authentic Italian tiramisu recipe you'll ever make, based on my favorite restaurant tiramisu served here in Italy! Thick, luscious mascarpone cream built on the (super easy) Italian pâte à bombe method and three layers of perfectly espresso-soaked Vicenzovo savoiardi ladyfingers in a 9-inch springform pan, and not a soggy ladyfinger in sight. No egg whites, no double boiler, about 45 minutes of active time. Plan to make it a day or two before because it only gets better.
I provide alternative layering methods in the main post: for an 8-inch springform pan, 9x13 casserole dish, two 8-inch loaf pans, individual glass jars, or any container you have on hand!
Ingredients
- 5 large egg yolks, at room temperature (100g)
- 130g granulated sugar (⅔ cup)
- 40g water (3 tablespoons)
- ⅛ tsp kosher salt
- 500g mascarpone, cold from the fridge
- 200g whipping cream, 35% fat, cold from the fridge (¾ cup + 1 tbsp)
For assembly:
- 300g Savoiardi ladyfingers (10.5 oz)
- 500g strong moka espresso, cooled completely to room temperature (2 cups)
- 7g dry Marsala wine, optional, added to the espresso (1.5 teaspoons)
- Unsweetened Dutch process cocoa powder for dusting
- Optional garnish: Chopped or shaved dark chocolate 78%-85% or higher
Instructions
1. Brew and cool the espresso. Pour into a wide shallow bowl and cool completely to room temperature or refrigerate. Stir in the dry Marsala (if using) and set aside. Do not skip this step - warm espresso will over-soak the ladyfingers.
2. Prep the springform pan. Line the bottom and the sides with parchment paper held in place with small dabs of butter which will act like "glue".
3. Whip the egg yolks. Place 5 egg yolks in a stand mixer bowl with the whisk attachment. Whip on high for 5 to 7 minutes until pale, thick, and holding ribbons. Keep the mixer running while you make the syrup.
4. Make the sugar syrup. Combine 130g sugar and 40ml water in a small heavy-bottomed saucepan. Stir once, place over medium heat, and do not stir again. Cook to 250°F/121°C (approximately 6 to 8 minutes from when it starts to simmer). Without a thermometer: the syrup is ready when the bubbles shift from large and lazy to small, fast, and vigorous, and the syrup looks thick, glassy, and nearly transparent. Test at the 6½ minute mark - drop a small amount into cold water. If it forms a firm but pliable ball, it's ready. If it dissolves, keep going. If it snaps, it's gone too far.
5. Make the pâte à bombe. Reduce the mixer to medium speed. Pour the hot syrup in a slow, thin, steady stream down the inside wall of the bowl, never directly onto the whisk. Add the ⅛ teaspoon kosher salt immediately. Increase to high speed and whip 10 to 12 minutes or until the bowl is completely cool to the touch and the mixture is pale, thick, and holds a ribbon. The pâte à bombe must be fully cooled before cold mascarpone is added or the cream will be runny.
6. Add the mascarpone. Briefly loosen the cold mascarpone with a spatula in a separate bowl. Reduce the mixer to its lowest speed. Add mascarpone to the pâte à bombe one or two heaping spoonfuls at a time, waiting for each addition to incorporate before adding the next. Mix only until smooth and streak-free. Stop immediately.
7. Fold in the whipped cream. In a separate cold bowl, whip the cold heavy cream to stiff peaks. Fold into the mascarpone mixture in two or three additions using slow bottom-to-top movements. Stop as soon as no white streaks remain. The finished cream should hold its shape on a spatula and look smooth and glossy.
8. First layer - flower scallop edged method. Open one inner pack of savoiardi. Cut 6 ladyfingers in half to be used around the perimeter. Working one at a time, dip each piece in the espresso for no more than 1.5 to 2 seconds per side. Add 3 whole ladyfingers across the center of the pan. Work outward, fitting halved pieces and cut scraps around them, and tuck the rounded ends around the perimeter with curved sides facing outward against the parchment. Fill every gap. No empty spaces. Sprinkle any sugar and crumbs from the pack directly over the layer.
9. Build the layers. Spread one-third of the mascarpone cream evenly over the first ladyfinger layer. Dip and arrange a second layer of ladyfingers over the cream, rotating them 90 degrees from the first layer. Spread another third of the cream. Add a third layer of dipped ladyfingers, then top with the final third of cream, smoothed completely flat. You will have 3 ladyfinger layers and 3 cream layers.
10. Refrigerate. Cover the pan without letting the wrap touch the cream surface. Refrigerate overnight minimum. One to two days ahead is better still.
11. Unmold, dust, and serve. Just before serving, add optional chopped dark chocolate (78% or higher), then dust generously with unsweetened cocoa powder through a fine mesh sieve held 8 to 12 inches above the surface. Remove the springform ring, peel away the parchment, and slice with a sharp non-serrated knife, wiping the blade clean between cuts. Serve cold with a small pitcher of cold espresso on the side.
Notes
Espresso: Use a moka pot, espresso machine, unsweetened canned Illy or Starbucks Doubleshot or VIA instant espresso packets, or coffee shop shots. Never use drip coffee. See the coffee section in the post for full options.
Marsala: Dry (secco) only, added to the espresso - never to the cream. Completely optional. See the alcohol section for details.
Mascarpone: Must be cold. Drain any visible liquid before using. See the mascarpone section for brand recommendations and what to avoid.
Ladyfingers: Dry and crisp only - never soft, cakey ladyfingers. One 300g/10.58 oz package of Vicenzovo is the exact amount for the flower scallop-edged layering method. See the ladyfingers section for brand recommendations and for alternative layering options.
Cocoa powder: Unsweetened, Dutch-process preferred. Dust only at the moment of serving.
Chilling: Overnight minimum. One to two days is significantly better.
Storage: Refrigerator up to 3 to 4 days. Freezes extremely well - see the storage section for full instructions.
Gluten-free: Substitute gluten-free savoiardi. Everything else is naturally gluten-free.
Egg safety: The Italian pâte à bombe method pasteurizes the yolks to 250°F/121°C. Pregnant women, nursing mothers, young children, the elderly, and immunocompromised individuals should use commercially pasteurized egg yolks instead. To use pasteurized yolks, whip them with sugar until pale and ribbony, then proceed as written.
- Prep Time: 35 minutes
- Refrigerating Time: 8 hours
- Cook Time: 10 minutes
- Category: Cakes + Tortes, Dessert, No-Bake
- Method: Mixer, No-Bake
- Cuisine: Italian
Nutrition
- Serving Size: 1/12
- Calories: 402
- Sugar: 21g
- Sodium: 59mg
- Fat: 28g
- Saturated Fat: 15g
- Unsaturated Fat: 13g
- Trans Fat: 0g
- Carbohydrates: 32g
- Fiber: 1g
- Protein: 7g
- Cholesterol: 130mg
Food Safety
- The pâte à bombe method heats egg yolks to 121°C / 250°F via hot sugar syrup, which pasteurizes them above the recommended food-safe threshold of 71°C / 160°F
- Tiramisu must be stored refrigerated at all times - it contains dairy and eggs and should not be left at room temperature for more than 2 hours
- Pregnant women, young children, elderly individuals, and those with compromised immune systems should use pasteurized eggs; pre-pasteurized egg yolks are available at many grocery stores
- Always use mascarpone and cream well within their use-by dates - older dairy breaks down more easily during mixing and increases food safety risk


Lanny says
Thanks for finally talking about > Authentic Tiramisu Recipe (Thick & Luscious Mascarpone Cream)
Kelly Leding says
Np, Lanny! We love it and as you can see by all the photos of tiramisu we've enjoyed around Italy, I really needed this recipe to be as good or better than those versions before I'd post it. It's much easier to research and develop a recipe when you're living in the country who invented the stuff😉. I hope you give it a try and love it as much as we do:) Thanks for stopping by to leave a comment!