In the mood for fried shrimp, but not sure how to coat them? If it's feather-light crispy fried shrimp you're after, we've got 4 ways to get you there all while allowing the flavor of sweet Argentinian red shrimp to remain front and center, not to mention tender -- A little salt and a simple dusting of your choice of Semolina, Stone Ground White Cornmeal, Bread flour, or Rice Flour and you're 2 minutes from a super tasty shrimp dinner. Red shrimp are fattier and sweeter than regular shrimp and they cook in less time which makes this fried shrimp recipe perfect for easy weeknight meals. Plus, we've got a few ideas to add even more flavor (or heat) if you like your shrimp spicy.


The Feather-Light Fried Shrimp Test
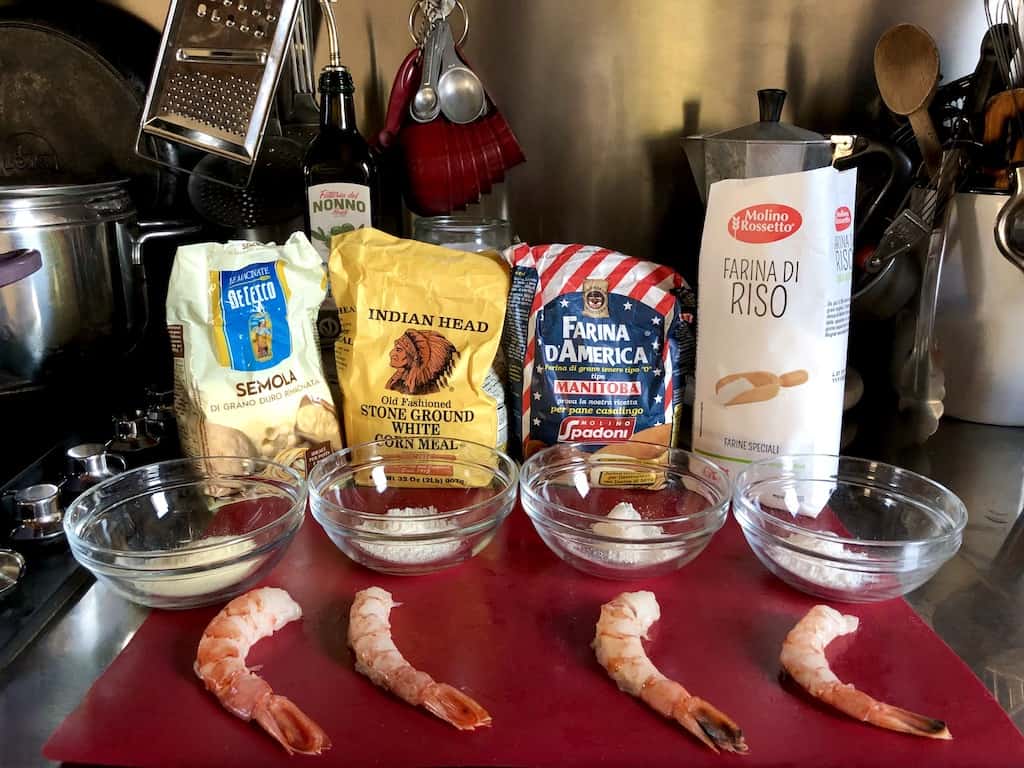
(Sweet Red Shrimp + 4 Different Coatings)
We love all kinds of shrimp including just about any kind of fried shrimp (i.e. panko-crusted, cracker-crusted, coconut-crusted, tempura battered, beer-battered, Italian fritto misto style...you get the idea). But more often than not, we're in the mood for shrimp that feels light, crispy, and really lets the pure taste of sweet shrimp shine. And sometimes we need it to be really QUICK.
THE GOAL: Cut out the typical egg wash many fried shrimp recipes call for and instead just compare the taste and textural differences between fried shrimp using 4 common types of flour and cornmeal to quick-coat the shrimp before frying.
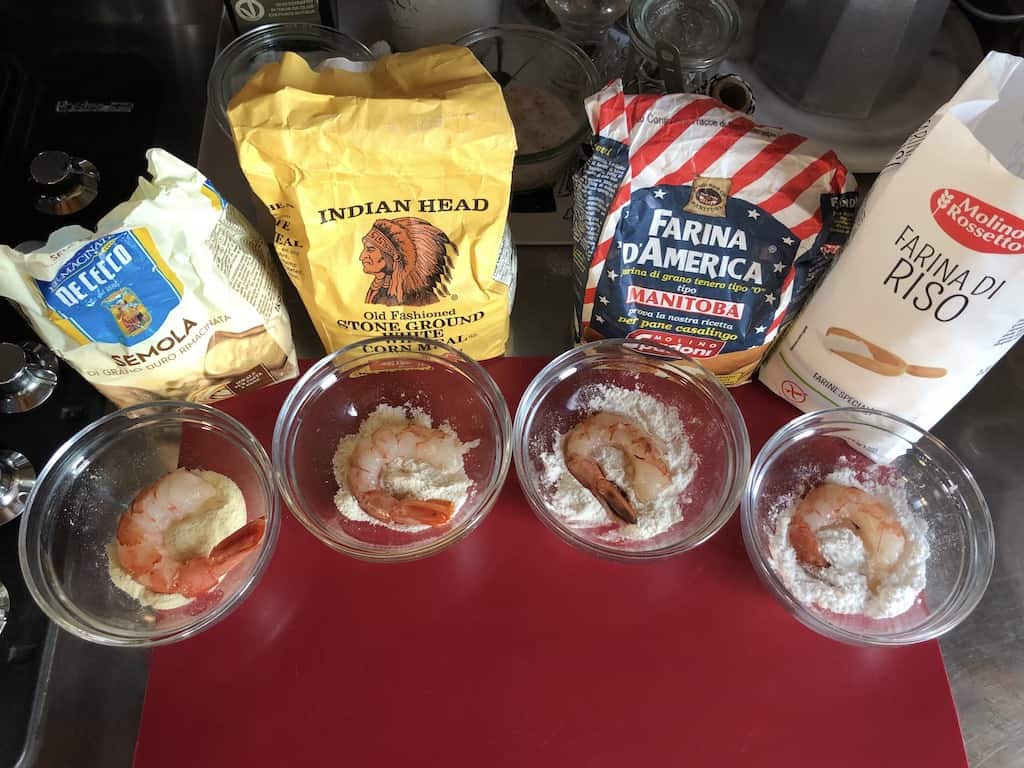
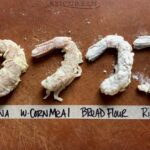
We cleaned and deveined the shrimp and didn't bother butterflying them (because again, we wanted this recipe to be quick), we then coated each shrimp and fried them until crispy and golden brown (just about 1 to 1 ½ minutes) in 375°F/190°F oil. Here's what we found.


Here Are the Winners + "Losers" of the Featherlight Fried Shrimp Test
Ok, so there really are no losers in this test because all of the shrimp was delicious, especially because we started with high-quality sweet Argentinian reds. That said, when we ate these shrimp all side by side you could really taste and feel the textural differences between them all. Before we started, I guessed that my favorites would be rice flour (because it would make the shrimp ultra-crispy) and cornmeal (I'm a southern girl and I love the taste and texture cornmeal lends to anything fried), but I also thought I'd really enjoy the semolina because of the harder and grainier texture it has compared to bread flour or even all-purpose flour. L didn't have a preference, he was just really ready to eat them.
- My top two favorite featherlight fried shrimp were: Semolina + Cornmeal
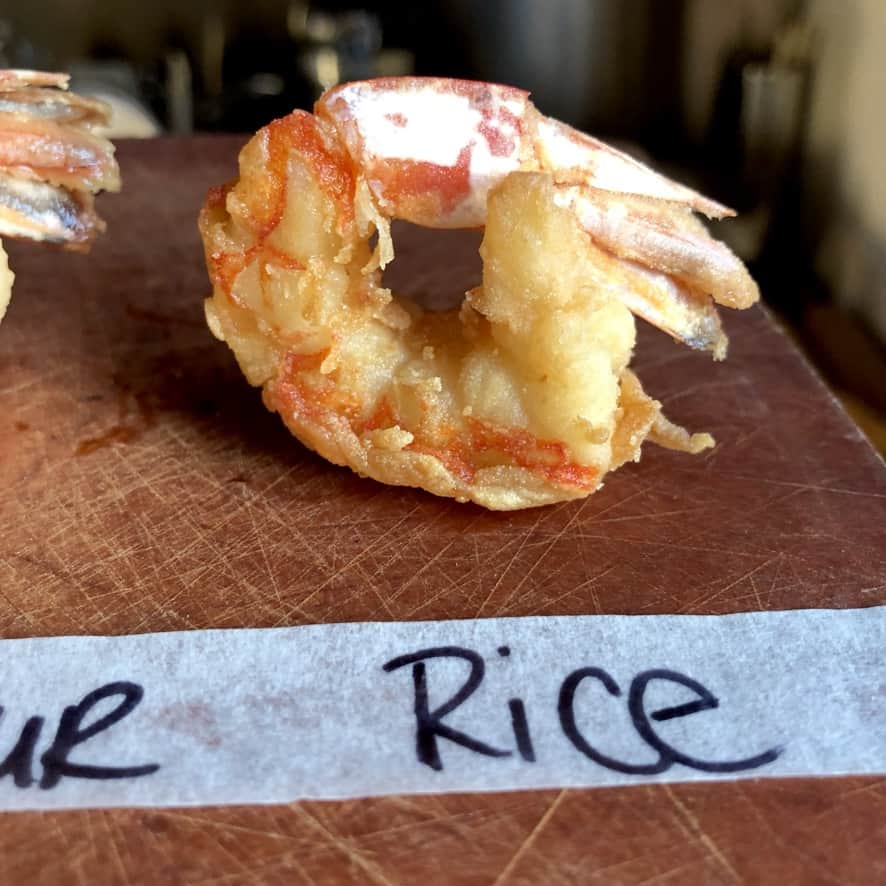
- My least favorite: Rice Flour
- L's top two favorite featherlight fried shrimp were: Cornmeal + Bread flour
- L's least favorite: Rice Flour
Cornmeal made it onto both of our "TOP-2 List." Mostly because it lends great texture and flavor to the fried shrimp. This is especially beneficial when you're not using anything else to coat the shrimp. They were super crispy and delicious. And the rice flour was at the bottom for both of us. For more specifics, see below for the PROs + CONs List for using each type of flour.


Pros + Cons of the Different Types of Flours Used in This Test:
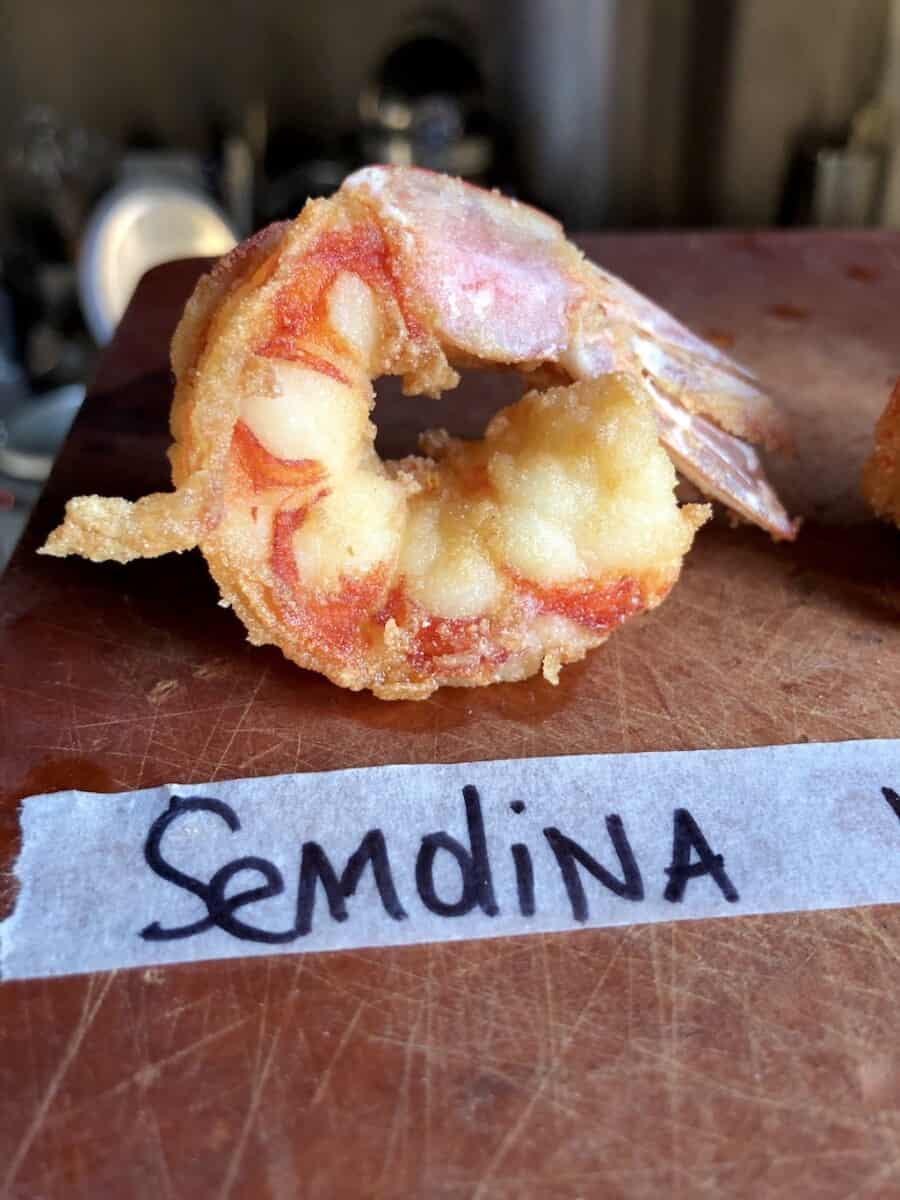
SEMOLINA:
-
- PROs: It creates a really well-balanced crispy fried shrimp with great texture and overall flavor.
- CONs: Unless you make pasta at home, you probably don't have this type of flour stocked in your pantry already.
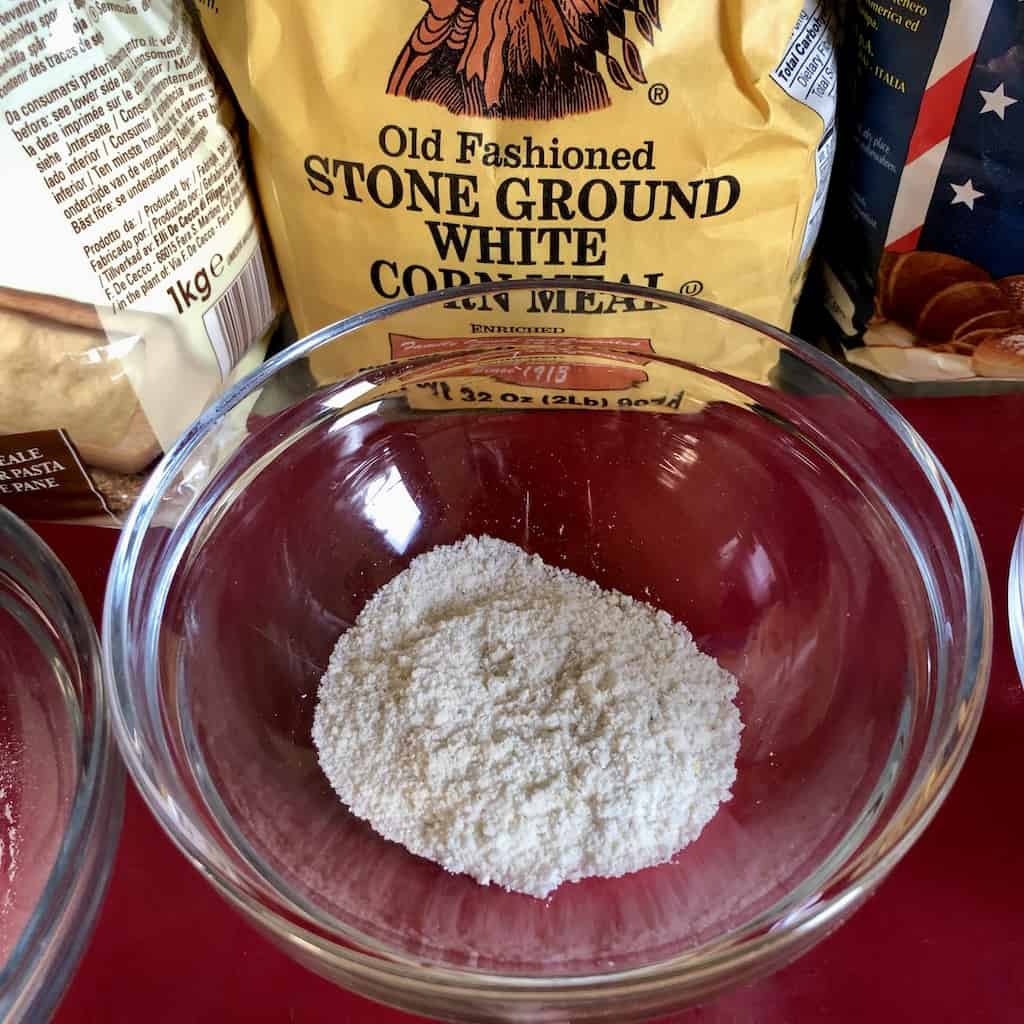
WHITE STONE GROUND CORNMEAL:
-
- PROs: It creates a super crispy texture and adds extra flavor from the corn and it's gluten-free.
- CONs: Unless you're sensitive or allergic to corn, we don't have any negatives to say about it.
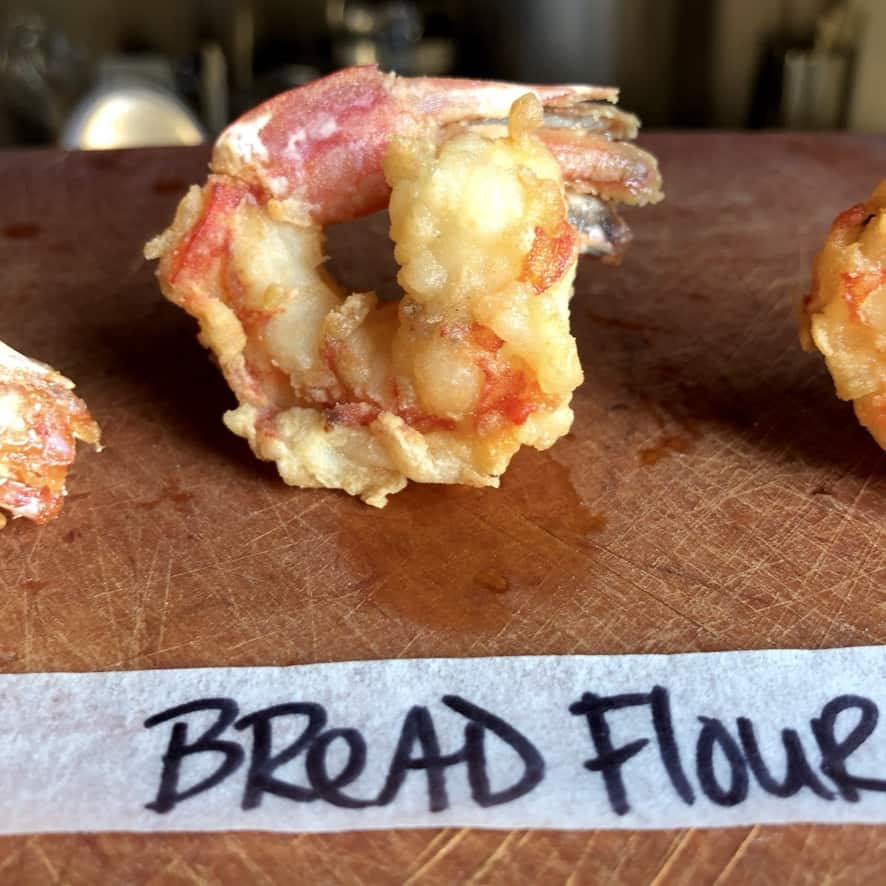
BREAD FLOUR :
-
- PROs: The shrimp had great flavor and seemed to be a little bit more tender on the inside than the rest of the shrimp in the test. The bread flour seemed to coat the shrimp really well and also hang on to the shrimp more than the other flours. So the fried shrimp seems like it has a slightly thicker coating than the other fried shrimp even if there were no eggs or breadcrumbs used.
- CONs: It crisped up nicely at first, but seemed to lose some of its crunchiness not too long after it cooled down enough to eat it. Eat it quickly and it's great.
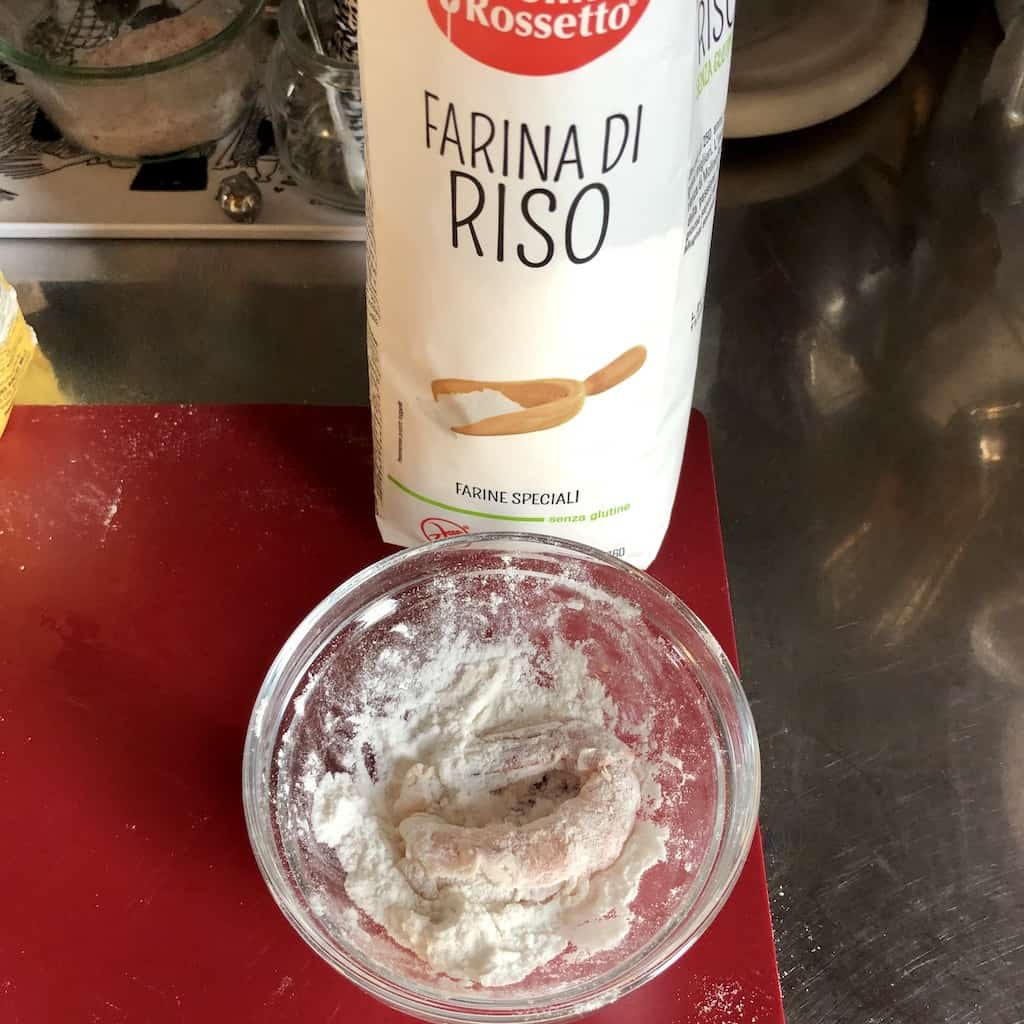
RICE FLOUR:
-
- PROs: It creates a super crispy texture, it's gluten-free, and generally absorbs less oil than the other flours.
- CONs: The rice flour seemed to dry out the shrimp a little more (maybe too much for this delicate fatty shrimp) than the other flours. It's still delicious though.

How to Devein a Shrimp
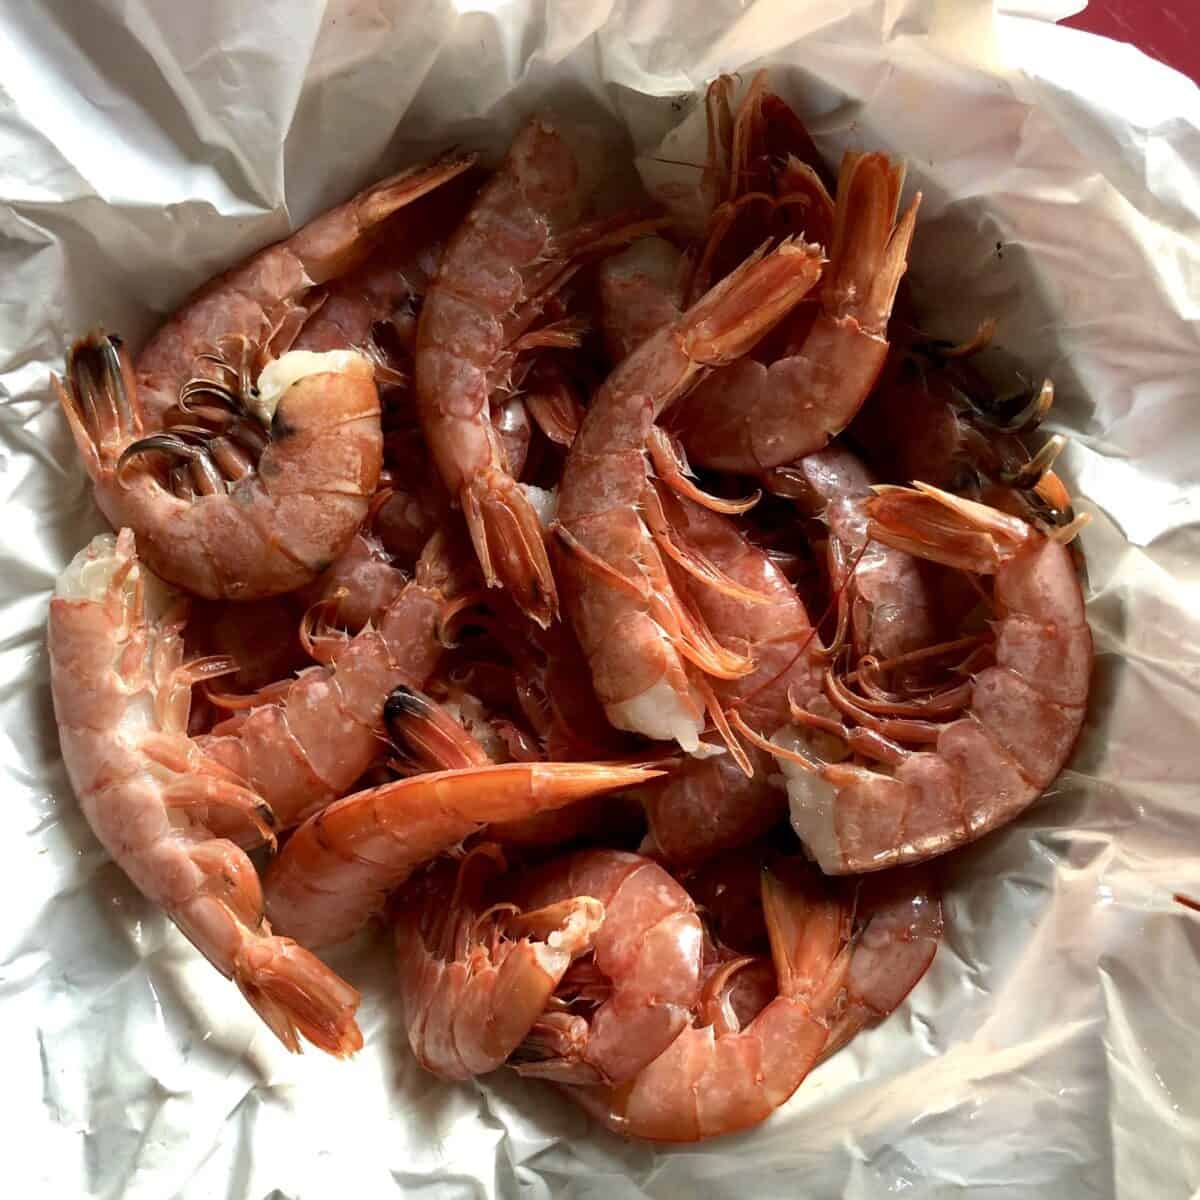
You may use frozen or fresh shrimp for this recipe. But unless you're starting with shell-off shrimp, you'll need to remove the shells and devein the shrimp before dredging them in the flour or cornmeal of your choice. I like to leave the tails on the shrimp because it makes them easy to pick up, and because I enjoy eating fried shrimp tails. Eating shrimp tails obviously isn't for everyone, but they're full of an entirely different kind of fried-shrimpy flavor that I happen to love and wholeheartedly welcome. My motto: Eat more shrimp tails, or give them to me.
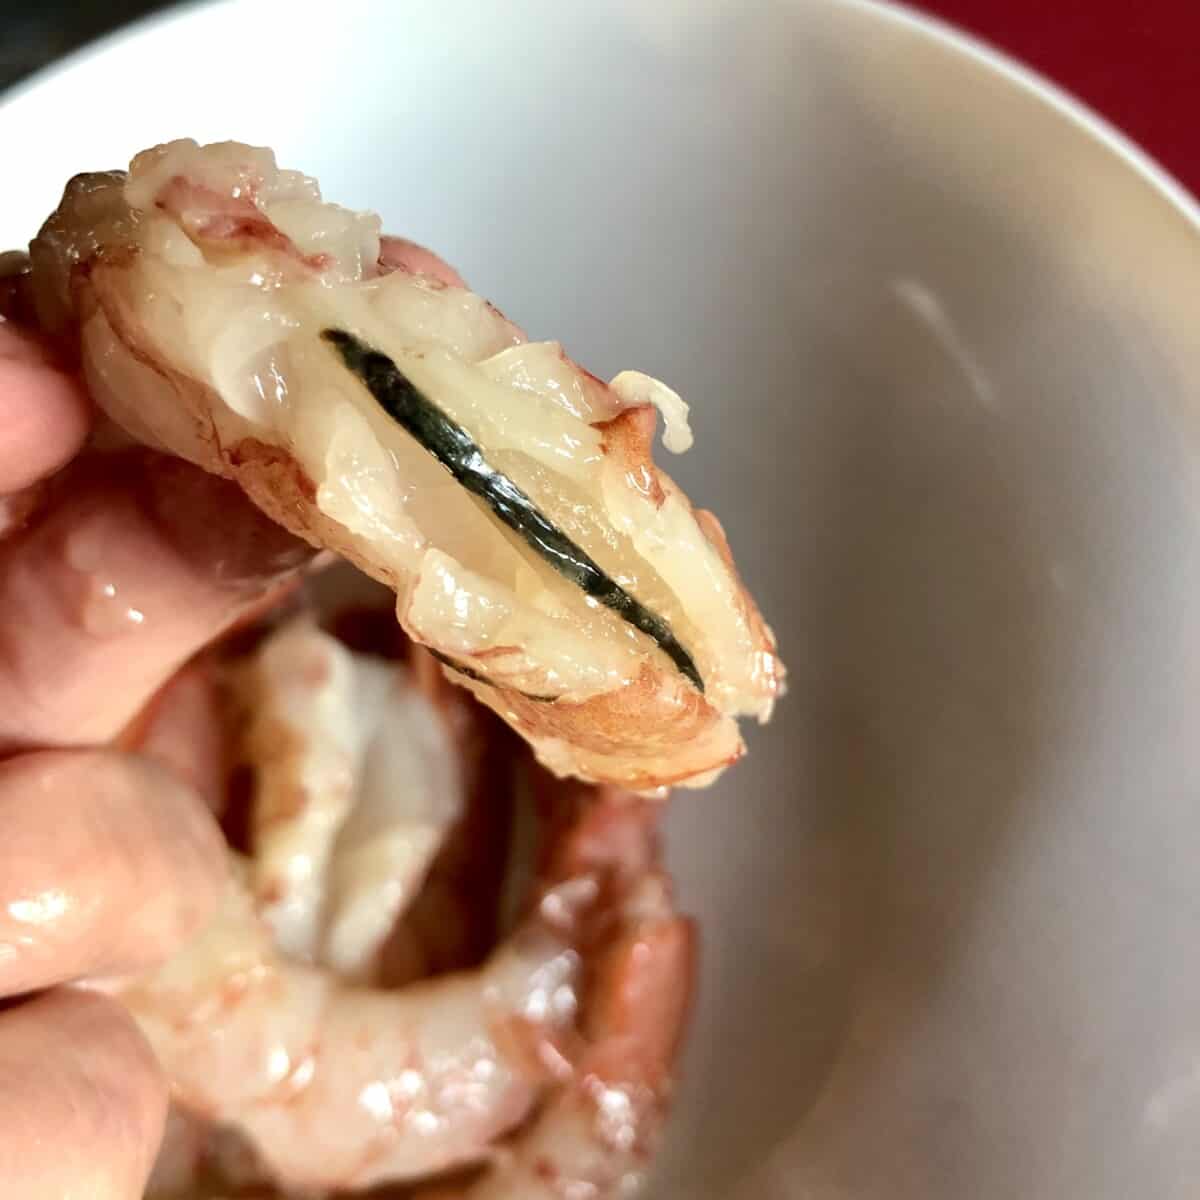
Shrimp Have 2 Veins: You only have to extract one of them.
-
- The "white vein" is on the underside of the shrimp which is the blood vessel and does not need to be removed from the shrimp unless you really want to. It's white because the shrimp's blood is white.
- The "black vein" is on the outside perimeter of the shrimp. This vein is the digestive tract also known as the "poop vein" or "the poop shoot'. This vein often needs to be removed depending on how big the shrimp are and what method you'll be using to cook them. For larger shrimp like the Argentinian reds I use in this recipe, I always remove this vein (you can see by the photo above how large it is). For really small shrimp, I often don't worry about removing the vein especially if they'll be fried. It's really up to you to decide how best to clean your shrimp.
- Using a small knife (or shrimp scissors) run the knife down the entire length of the outer perimeter of the shrimp, cutting just deep enough as you glide the knife, to reveal the black vein. Use the tip of the knife to extract the vein if it hasn't already been pulled away and discard it. Oftentimes, just running the knife down the back of the shrimp will release and extract the vein without any additional effort needed. Alternatively, you may make a very small slit on the top side of the shrimp (near the head) and extract the entire vein using the tip of your knife without butterflying the shrimp.


Easy Fried Shrimp Ingredients
You only need 3 ingredients to make these crispy fried shrimp (and that includes the salt). If you want to add extra flavor or spice to the shrimp, add the spice or seasoning of choice directly to the flour or cornmeal and stir to combine. We sometimes like to add powdered garlic, smoked paprika, onion powder, white pepper, Cajun or Creole seasoning, and always a little cayenne pepper. The possibilities are endless and the flavors are up to you. If you're making shrimp for one, you'll need a very small amount of flour or cornmeal and increase the amount for larger batches and family dinners.
- Argentinian Red Shrimp (or other sweet shrimp)
- ½ cup flour or cornmeal of your choice (60g)
- up to ½ teaspoon of kosher salt or Lawry's Seasoning Salt (1.5 to 2g)
- additional powdered spices, seasonings, and cayenne pepper to taste (optional)


How to Make Featherlight Fried Shrimp at Home
Frying shrimp at home should never be (or feel) complicated. And with this recipe, we think you'll agree, it'll likely be one of the easiest things you'll ever cook (also one of the tastiest). Use the fried shrimp to make shrimp sliders, or as a salad or pasta topper, or dip them into your favorite tartar sauce (or even ketchup if that's your thing). They taste great with just about anything and they're ready in under 2 minutes. That's hard to beat.
- Clean and devein the shrimp. Remove any shells from the shrimp, leaving the tail intact, and remove the black vein. Pat the shrimp dry. You may butterfly the shrimp if you like, but it's not necessary for this recipe.
- Preheat the oil to 375°F/190°C. In a deep fryer or heavy gauge pot, add enough oil for the amount of shrimp you'll be frying, Generally, you'll need at least about 1 to 2 inches of oil for deep frying, and less if you use a cast-iron skillet to shallow fry. *Alternatively, these shrimp can be made in the air fryer if you choose, just follow the instructions for guidelines.
- Prepare the shrimp coating. Add the flour or cornmeal of choice to a medium-sized bowl and add salt to taste. Add any spices or seasonings to taste (if using). Set the
- Cook the Shrimp. Working in batches carefully add the coated shrimp to the hot oil being sure not to over-crowd the fryer or pot with too many shrimp at once. Fry for 1 to 2 minutes, or until super crispy and golden. Strain shrimp on a paper towel-lined plate, or directly on a metal cooling rack. Serve immediately and Enjoy!
Air Fryer Fried Shrimp Method: Place coated shrimp into the air fryer in a single layer leaving plenty of space in between each one. Do not to over-crowd the shrimp. Doing so will steam them instead of crisping them up. Spray the shrimp with olive oil spray, or another cooking spray, flip them over by the tails, and spray on the other side. Cook the shrimp about 5-7 minutes, or until golden brown and crispy. Repeat with any remaining shrimp.


Looking for More Easy Shrimp Recipes to Make for Dinner?
If you're in the mood for shrimp, we have a few other tasty recipes we think you'll enjoy. Here are some we make a lot here at home.
Let's get started!
Print📖 Recipe
How to Make Featherlight Fried Shrimp 4 Ways (using four types of flour)
- Total Time: 7 minutes
- Yield: 4 servings
- Diet: Gluten Free
Description
This is the quickest 2-Minute fried shrimp recipe that actually tastes (really) great and makes the whole family happy. If you love fried shrimp, you won't find an easier recipe to get dinner on the table for your hungry bunch. Light, crispy, and tender sweet Argentinian red shrimp are the star of this dish, but feel free to swap them out for your favorite local variety. Frozen shrimp works really well too.
Ingredients
- Argentinian Red Shrimp (or other sweet shrimp)
- ½ cup flour or cornmeal of your choice (60g)
- up to ½ teaspoon of kosher salt or Lawry's Seasoning Salt (1.5 to 2g)
- additional powdered spices, seasonings, and cayenne pepper to taste (optional)
Instructions
- Clean and devein the shrimp. Remove any shells from the shrimp, leaving the tail intact, and remove the black vein. Pat the shrimp dry. You may butterfly the shrimp if you like, but it's not necessary for this recipe.
- Preheat the oil to 375°F/190°C. In a deep fryer or heavy gauge pot, add enough oil for the amount of shrimp you'll be frying, Generally, you'll need at least about 1 to 2 inches of oil for deep frying, and less if you use a cast-iron skillet to shallow fry. *Alternatively, these shrimp can be made in the air fryer if you choose, just follow the instructions for guidelines.
- Prepare the shrimp coating. Add the flour or cornmeal of choice to a medium-sized bowl and add salt to taste. Add any spices or seasonings to taste (if using). Set the
- Cook the Shrimp. Working in batches carefully add the coated shrimp to the hot oil being sure not to over-crowd the fryer or pot with too many shrimp at once. Fry for 1 to 2 minutes, or until super crispy and golden. Strain shrimp on a paper towel-lined plate, or directly on a metal cooling rack. Serve immediately and Enjoy!
Notes
- Air Fryer Fried Shrimp Method. Place the coated shrimp into the air fryer in a single layer leaving plenty of space in between each one. Do not to over-crowd the shrimp. Doing so will steam them instead of crisping them up. Spray the shrimp with olive oil spray, or another cooking spray, flip them over by the tails, and spray on the other side. Cook the shrimp for about 5-7 minutes, or until golden brown and crispy. Repeat with any remaining shrimp.
- If you want to add extra flavor or spice to the shrimp, add your seasoning of choice directly to the flour or cornmeal and stir to combine with the salt. Add powdered garlic, smoked paprika, onion powder, white pepper, Cajun or Creole seasoning, or even a little cayenne pepper. The possibilities are endless and the flavors are up to you.
- Don't add too many shrimp to the hot oil all at once, this results in the oil temperature dropping too much, too fast, and results in soggy, greasy shrimp. Shrimp fries so quickly that even having to cook them in batches takes no time at all.
- Prep Time: 5 minutes
- Cook Time: 2 Minutes
- Category: Fish + Seafood
- Method: Deep Fried or Air Fryer
- Cuisine: American
Nutrition
- Serving Size: 6 shrimp


Made the Recipe? Tell Us What You Think!