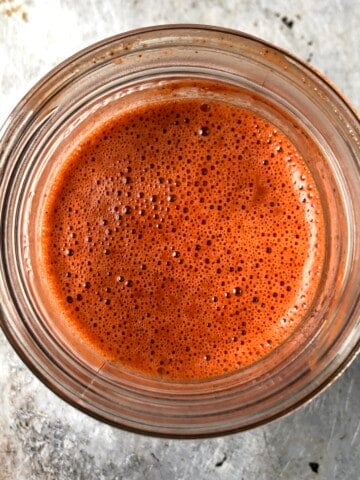
Black Italian chickpeas from Puglia and black Japanese sesame paste are the base for this beautifully dark, smooth, and creamy hummus. It tastes just as good as regular hummus but is a bit more dramatic-looking. I created this recipe to close out our "Go Gray in May for Brain Cancer Research". It's healthy and tasty. Plus, I had plenty of black sesame paste left over from making black sesame triple coconut cream pie recently and this was a great way to use it. Check out the tips and techniques below for how to make the smoothest, creamiest homemade hummus.


The Difference Between Black Chickpeas and Regular Chickpeas
I've obviously been living under a rock because I only recently found out black chickpeas existed and there are two varieties -- one from India and one from Italy. I don't mind admitting that because I'm always learning and it's part of what makes cooking and traveling so exciting. Regular chickpeas and black chickpeas are both great for making hummus so if you're considering which one to use, here are a few (minor) things to consider.
- Color. Regular chickpeas are white to light cream or tan-colored, and black chickpeas (aka Desi or ceci neri) are brown to black in color.
- Size. Black chickpeas tend to be smaller than regular chickpeas. And between the two different types of black chickpeas (the Indian variety and the Italian variety from Puglia), the Italian black chickpea (ceci neri -- pronounced "chetchy nairy") is larger than the Indian variety and usually a bit darker too.
- Shape. Black chickpeas are more irregular in shape and can even resemble dried corn kernels.
- Flavor. Black chickpeas have a slightly nuttier flavor than regular chickpeas, but that's really about the only discernable difference in flavor.
- Nutritional value. Black chickpeas have higher fiber content and more iron than regular chickpeas, but they share a similar protein and carbohydrate content.


Black Chickpea Hummus Ingredients
Feel free to substitute dried cooked black chickpeas for the canned chickpeas in this recipe.
- 1 (14-ounce) can of black chickpeas, drained and lightly rinsed (400g)
- 1 teaspoon baking soda(5g)
- 2 tablespoons extra virgin olive oil (30g)
- 2 tablespoons lemon juice, freshly squeezed, (plus more to taste) (30g)
- 3 tablespoons black sesame paste (or regular tahini) (30g)
- 1 to 2 drops of toasted sesame oil, (optional but recommended)
- 1 medium garlic clove, middle shoot removed (3 to 5g)
- 1 teaspoon pink Himalayan salt (or sea salt) (6g)
- 2 ½ tablespoons ice-cold water (plus more as needed) (40g)


How to Make Black Chickpea Hummus (using canned chickpeas)
When making hummus, I like to first mash the garlic with the salt on a cutting board (using the blade of a knife) to create a paste that will incorporate better into the hummus without leaving small garlic pieces in an otherwise smooth hummus. You don't have to do this if you're short on time, or using a Vitamix to blend the hummus, but I think it's worth the extra 15 seconds to do it otherwise.
- Warm up the chickpeas. Add the drained and rinsed chickpeas to a small pot, add enough water to cover them, add the baking soda, and bring the mixture to a boil. Reduce the heat and simmer for about 6 to 7 minutes, or until the beans are heated through and the skins have softened. Strain the chickpeas and add them to the bowl of a food processor or blender.
- Make the garlic paste (optional step). Place the garlic on a cutting board, and sprinkle the salt over it. Using the back of a knife scrape and press down at the same time in one motion to create a garlic paste (see photos). This will help the garlic incorporate better into the hummus.
- Blend the hummus. To the chickpeas, add the lemon juice, olive oil, black sesame paste, salt, and garlic paste (or chopped garlic), and process until smooth. With the food processor still running add the ice-cold water, until you reach the desired texture.
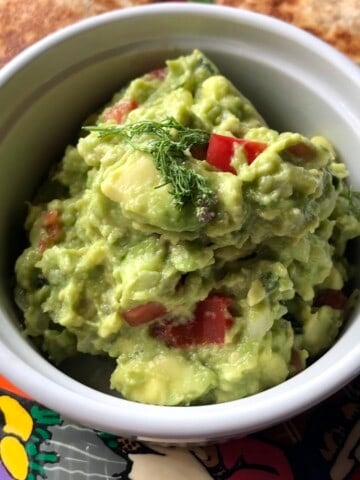
- Adjust the hummus for taste and texture. Taste the hummus, and adjust the seasonings adding more salt and lemon juice as needed, blend, and taste. If the texture is still a bit too thick, turn back on the food processor and add more ice water about 1 tablespoon at a time until you reach the desired consistency. Feel free to add a pinch or two of cumin if you like. Serve with raw or pan-seared veggies, pita bread, naan bread, or on a Mezza platter with pickled vegetables, Enjoy!
Black Chickpea Hummus step-by-step recipe photos


How to Make a Completely Smooth Hummus (without needing to remove the shells)
Below are some easy techniques to ensure the hummus you make will be smooth and fluffy like your favorite restaurant.
- Add baking soda to the water when you reheat the canned chickpeas. If you're using dried chickpeas, soak them with ½ teaspoon of baking soda and then cook them with ½ teaspoon of baking soda. This helps soften the shells so you don't have to remove them.
- Add the drained and rinsed canned chickpeas to a small pot, add enough water to cover them, add baking soda, and bring the mixture to a boil. Reduce the heat and simmer for about 4 to 7 minutes until the beans are heated through and the skins have softened.
- Add ice-cold water to the chickpeas as they're being processed in the food processor or blender with all of the other ingredients (Do not use room temperature water, hot water, or chickpea cooking water. Just use ice-cold H²O.

Hummus Tips & FAQs
- Where does hummus come from and is hummus Greek or Middle Eastern? The first recorded history of hummus in a form similar to how we eat it today dates back to the 13th century in Cairo, Egypt where there were abundant chickpea crops. And although the Greeks and the Israelis also lay claim to having invented the dish, the word hummus means chickpea in Arabic. No one can be sure of the origin of Hummus but historians agree that it's likely a carryover dish and cooking technique dating back to the Ottoman Empire shared between Egypt and Greece.
- Is hummus considered hummus if you use a bean other than chickpeas? As you know, "hummus" means chickpeas in Arabic, but that doesn't mean you can't substitute other beans and still call it hummus or a hummus-style dip. You can substitute black-eyed peas, white beans, black beans, yellow lentils, fava beans, etc. for chickpeas in hummus recipes. Just know that the amount of bean to liquid ratio may change depending on what type of bean you use to replace chickpeas.
- Can you freeze hummus? Yes, you can definitely freeze hummus! It's as easy as portioning it into batches (I prefer smaller 2-4 person serving size portions otherwise it can take forever to defrost a larger "brick" of frozen hummus). Be sure to leave room in the container so that as the hummus freezes, it can expand without pushing out of the container. Let it thaw in the refrigerator overnight and give it a good stir to re-incorporate any liquid that may have separated during the defrosting period.


Looking for a Few Tasty Pairings for Black-Eyed Pea Hummus?
If you're wondering what to eat with this hummus, here are a few of our favorite ways to enjoy this easy dip.
- Perfect Pan-Seared Zucchini
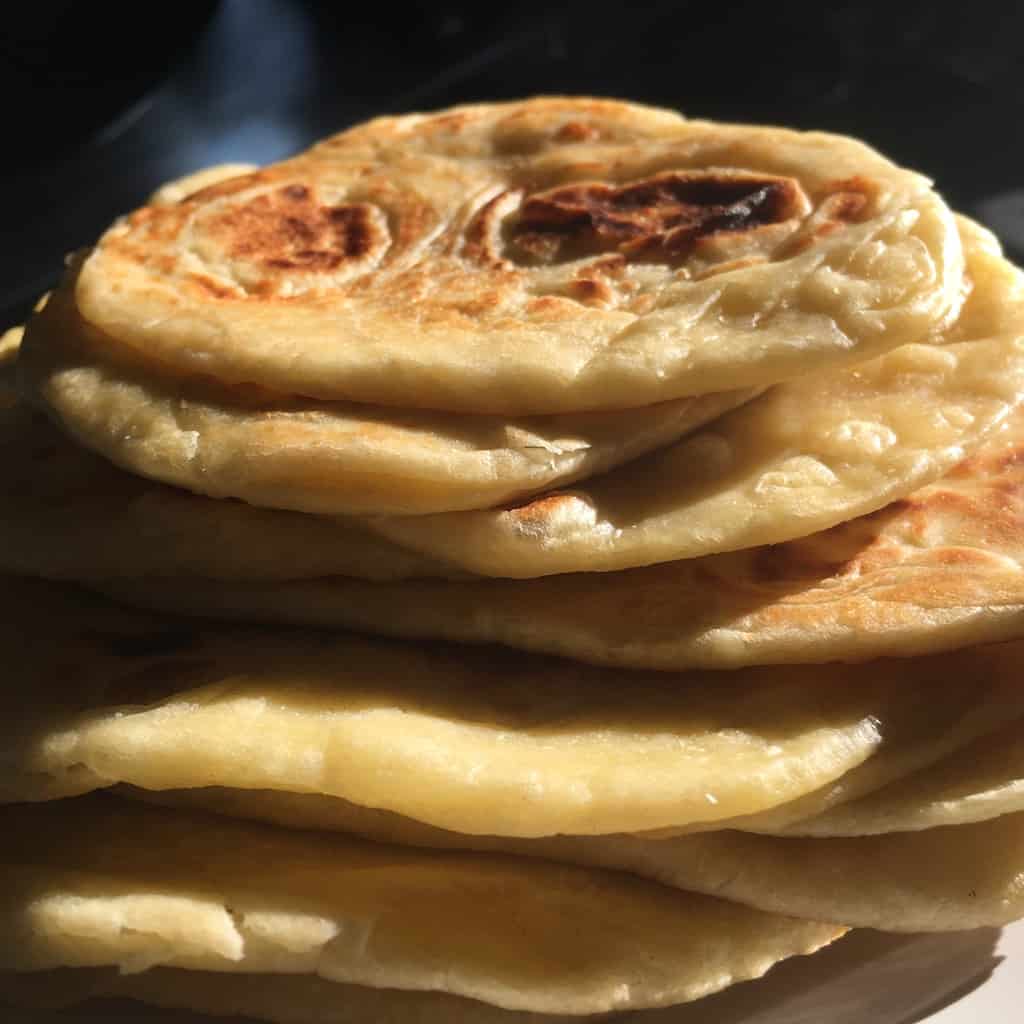
- Fluffy Cast-Iron Skillet Naan Bread
- Perfect Pan-Seared Sweet Carrots
- Pan-Seared Purple Cauliflower Sesame Steaks
- Serve it with your favorite Spring salad
- Burrata, Mozzarella, Prosciutto, and Grilled Zucchini Platter
Let's get started!
Print📖 Recipe

Black Chickpea Hummus (using Italian canned black chickpeas)
- Total Time: 15 minutes
- Yield: 4 to 6 servings depending on hunger level
- Diet: Vegan
Description
Black Italian chickpeas from Puglia and black sesame paste are the base for this beautifully black, smooth, and creamy hummus. It tastes just as great as regular hummus but comes with a striking cement-gray color, making it a perfect recipe to share during Go Gray in May for Brain Cancer Awareness.
Ingredients
- 1 (14-ounce) can of black chickpeas, drained and lightly rinsed (400g)
- 1 teaspoon baking soda(5g)
- 2 tablespoons extra virgin olive oil (30g)
- 2 tablespoons lemon juice, freshly squeezed, (plus more to taste) (30g)
- 3 tablespoons black sesame paste (or regular tahini) (30g)
- 1 to 2 drops of toasted sesame oil, (optional but recommended)
- 1 medium garlic clove, middle shoot removed (3 to 5g)
- 1 teaspoon pink Himalayan salt (or sea salt) (6g)
- 2 ½ tablespoons ice-cold water (plus more as needed) (40g)
Instructions
- Warm up the chickpeas. Add the drained and rinsed chickpeas to a small pot, add enough water to cover them, add the baking soda, and bring the mixture to a boil. Reduce the heat and simmer for about 6 to 7 minutes, or until the beans are heated through and the skins have softened. Strain the chickpeas and add them to the bowl of a food processor or blender.
- Make the garlic paste (optional step). Place the garlic on a cutting board, and sprinkle the salt over it. Using the back of a knife scrape and press down at the same time in one motion to create a garlic paste (see photos). This will help the garlic incorporate better into the hummus.
- Blend the hummus. To the chickpeas, add the lemon juice, olive oil, black sesame paste, salt, and garlic paste (or chopped garlic), and process until smooth. With the food processor still running add the ice-cold water, until you reach the desired texture.
- Adjust the hummus for taste and texture. Taste the hummus, and adjust the seasonings adding more salt and lemon juice as needed, blend, and taste. If the texture is still a bit too thick, turn back on the food processor and add more ice water about 1 tablespoon at a time until you reach the desired consistency. Feel free to add a pinch or two of cumin if you like. Serve with raw or pan-seared veggies, pita bread, naan bread, or on a Mezza platter with pickled vegetables, Enjoy!
Notes
How to Make a Completely Smooth Hummus (without needing to remove the shells)
Below are some easy techniques to ensure the hummus you make will be smooth and fluffy like your favorite restaurant.
- Add baking soda to the water when you reheat the canned chickpeas. If you're using dried chickpeas, soak them with ½ teaspoon of baking soda and then cook them with ½ teaspoon of baking soda. This helps soften the shells so you don't have to remove them.
- Add the drained and rinsed canned chickpeas to a small pot, add enough water to cover them, add baking soda, and bring the mixture to a boil. Reduce the heat and simmer for about 4 to 7 minutes until the beans are heated through and the skins have softened.
- Add ice-cold water to the chickpeas as they're being processed in the food processor or blender with all of the other ingredients (Do not use room temperature water, hot water, or chickpea cooking water. Just use ice-cold H²O.
- Is hummus considered hummus if you use a bean other than chickpeas? As you know, "hummus" means chickpeas in Arabic, but that doesn't mean you can't substitute other beans and still call it hummus or a hummus-style dip. You can substitute black-eyed peas, white beans, black beans, yellow lentils, fava beans, etc. for chickpeas in hummus recipes. Just know that the amount of bean to liquid ratio may change depending on what type of bean you use to replace chickpeas.
- Can you freeze hummus? Yes, you can definitely freeze hummus! It's as easy as portioning it into batches (I prefer smaller 2-4 person serving size portions otherwise it can take forever to defrost a larger "brick" of frozen hummus). Be sure to leave room in the container so that as the hummus freezes, it can expand without pushing out of the container. Let it thaw in the refrigerator overnight and give it a good stir to re-incorporate any liquid that may have separated during the defrosting period.
- Prep Time: 5 minutes
- Cook Time: 10 minutes
- Category: Sauces + Spreads + Dips
- Method: Food Processor or Vitamix
- Cuisine: Middle Eastern
Nutrition
- Serving Size: ¼ cup


Made the Recipe? Tell Us What You Think!