Strawberry-Rhubarb hand pies are one of the best things spring has to offer! Made using my favorite buttermilk fried pie dough filled with a quick and easy homemade strawberry-rhubarb pie filling. If you enjoyed our Southern Fried Cherry Pies, we think you're going to really love this version too.
This light and flaky buttermilk pastry dough becomes bubbly and crispy from a "secret" ingredient I like to add that makes it superiorly crispy on the outside.
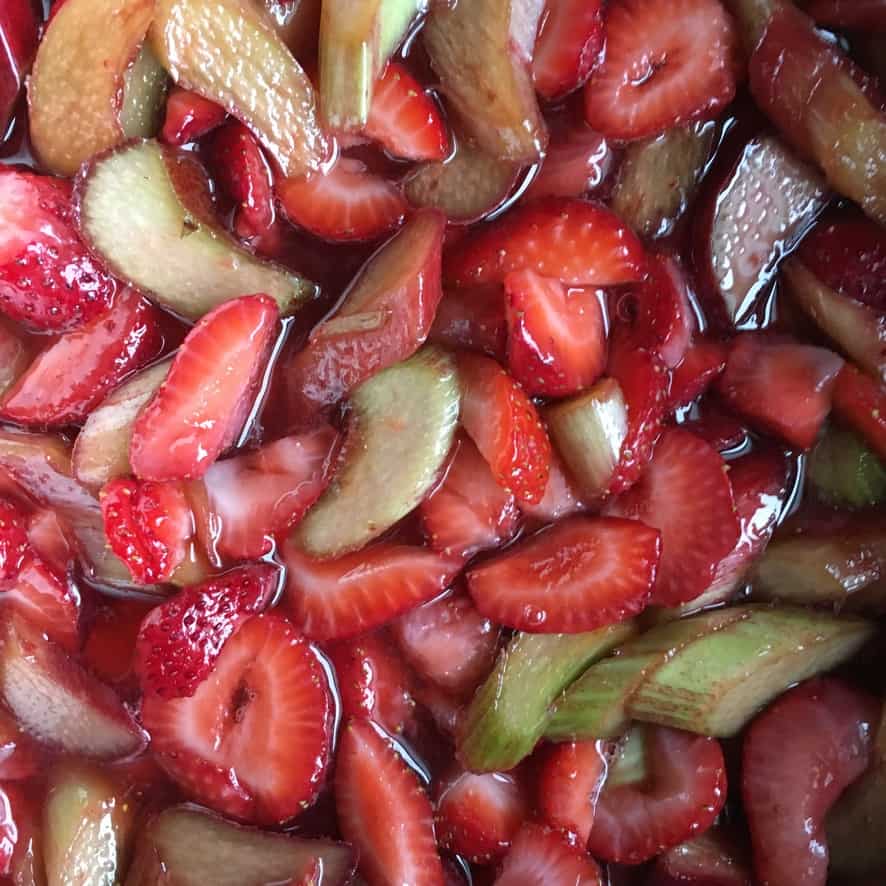
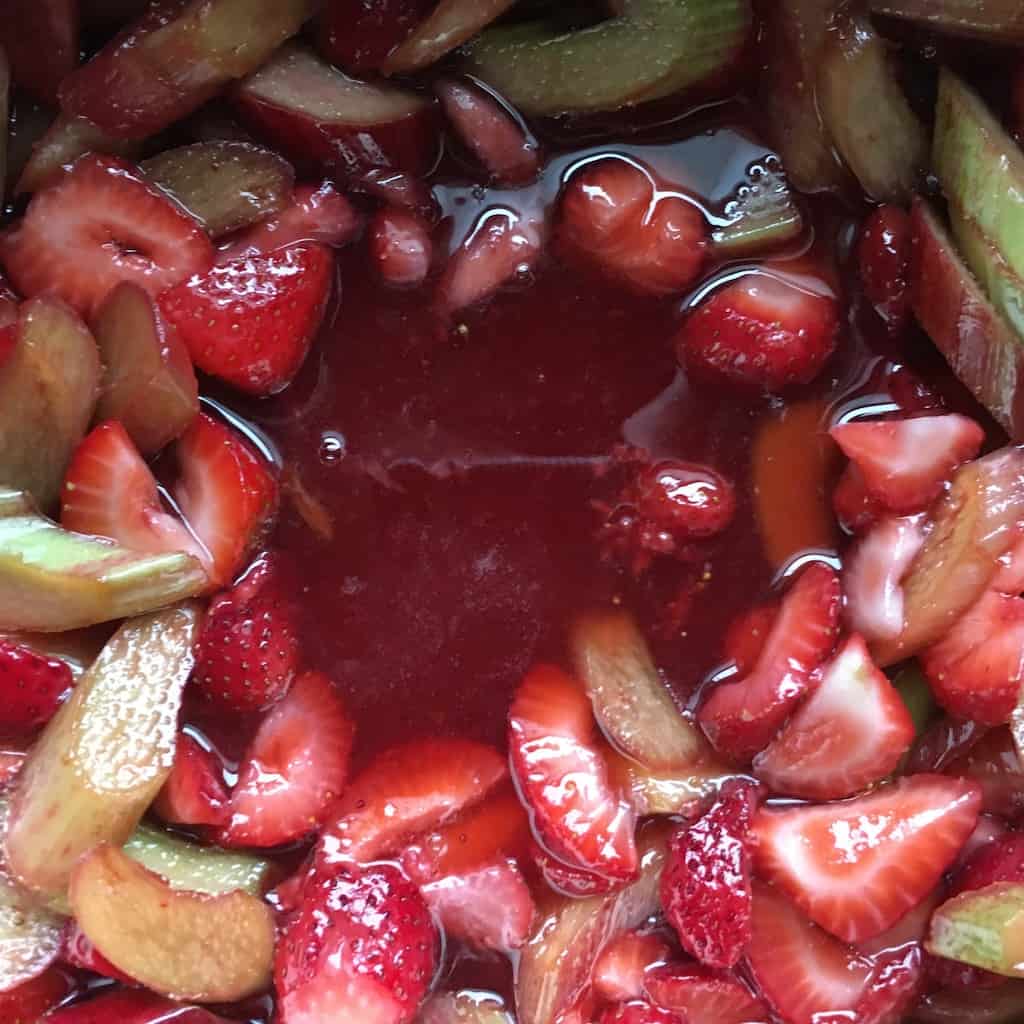
For the homemade pie filling, it's incredibly easy and takes just a few minutes to cook, which allows it to maintain its full summer strawberry fruit flavor with a hint of tart rhubarb instead of tasting like a tin can (and you know exactly what's in it so you can feel good about feeding it to your family).
Jump to:
- The Origins of Fried Pies (Hand Pies)
- Strawberry-Rhubarb Fried Pie Ingredients
- How to Make Homemade Strawberry-Rhubarb Fried Pies
- Strawberry-Rhubarb Fried Pies Step-by-Step Photos
- Tips: How to Roll Out and Cut Dough for Fried Pies
- Do Not Overfill Fried Pie Dough
- The Secret to Making the Crispiest Flakiest Fried Pie Dough
- Correct Oil Temperature is Key to Fried Pie (Hand Pie) Success
- FAQ's & Top Tips
- Let's get started!
- 📖 Recipe


The Origins of Fried Pies (Hand Pies)
Fried pies filled with fruit or cream mixtures are a traditional Southern dessert and ubiquitous throughout the American South. In fact, my home state of Arkansas is synonymous with this dessert.
They've been a part of the culinary heritage there for well over a century (check out what Saveur had to say about it). And everyone's granny, Mama, or aunty swears they have "the best recipe" (which, of course, is only sometimes true).
When made well, fried pies can be one of the best desserts you'll ever eat, or they can be tough, greasy, and often made with low-quality, cheap ingredients.
This fried pie recipe might just be one of the best things to ever come out of the South. So, if you've never had the pleasure of eating a genuine scratch-made Southern hand pie, give them a try. You'll be happy you did!


Strawberry-Rhubarb Fried Pie Ingredients
This traditional southern dessert is 100% made from scratch using two of our favorite seasonal spring combos -- rhubarb and strawberries. Made with just a few basic ingredients, this is a quintessential Southern dessert worth making while fresh strawberries and rhubarb are in season.
For the dough
- 1 ½ cups all-purpose flour (225g)
- 1 ½ tablespoons pure cane sugar, or granulated sugar (23g)
- ¼ teaspoon kosher salt (2g)
- 1 teaspoon baking powder
- ¼ cup lard, pinched off into small pieces (95g)
- ¼ to ½ cup buttermilk, room temperature (88-121g) *see recipe notes for how to make a faux buttermilk substitution
- 2 to 3 cups neutral vegetable oil for frying (450g-675g)
- powdered sugar for dusting fried pies
- a pinch of cinnamon (optional, but recommended)
For the pie filling
For the all-natural strawberry sugar (optional)
NOTE: I use 00 flour when I'm in Italy for this recipe (and King Arthur flour when I'm in the States), and the weight of different flours varies based on the humidity content and absorption potential of the flour you're working with. Just be sure to use the 'scoop and level' method to measure your flour into measuring cups and spoons and the recipe works perfectly every time.
How to Make Homemade Strawberry-Rhubarb Fried Pies
This dough comes together quickly using just a fork. And it only takes about 15 minutes to make the homemade strawberry-rhubarb pie filling. If you happen to have a dough cutter or food processor to help mix the dough, feel free to use it.
But it's not necessary because the fat in this recipe is combined at room temperature, which makes it really easy to get everything blended properly with a fork. If you have kids, they can definitely help with this part.
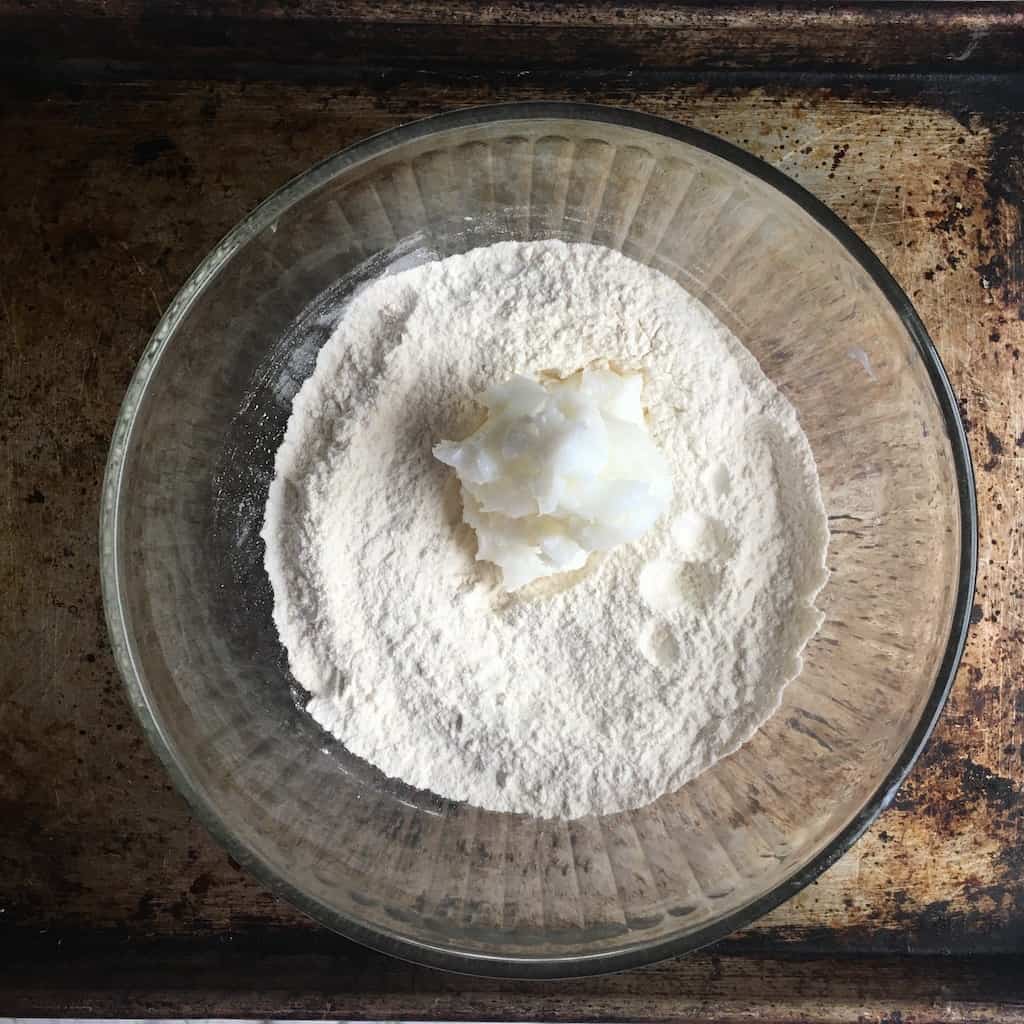
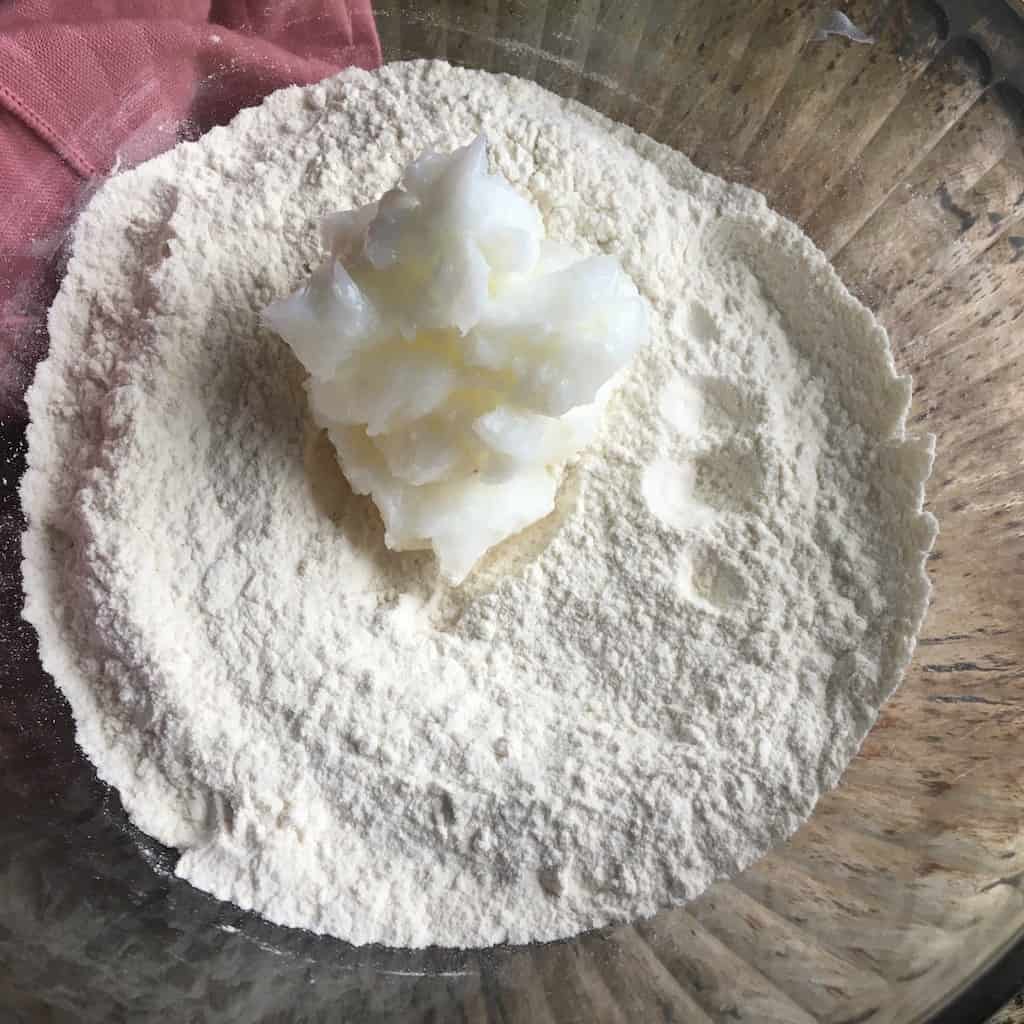
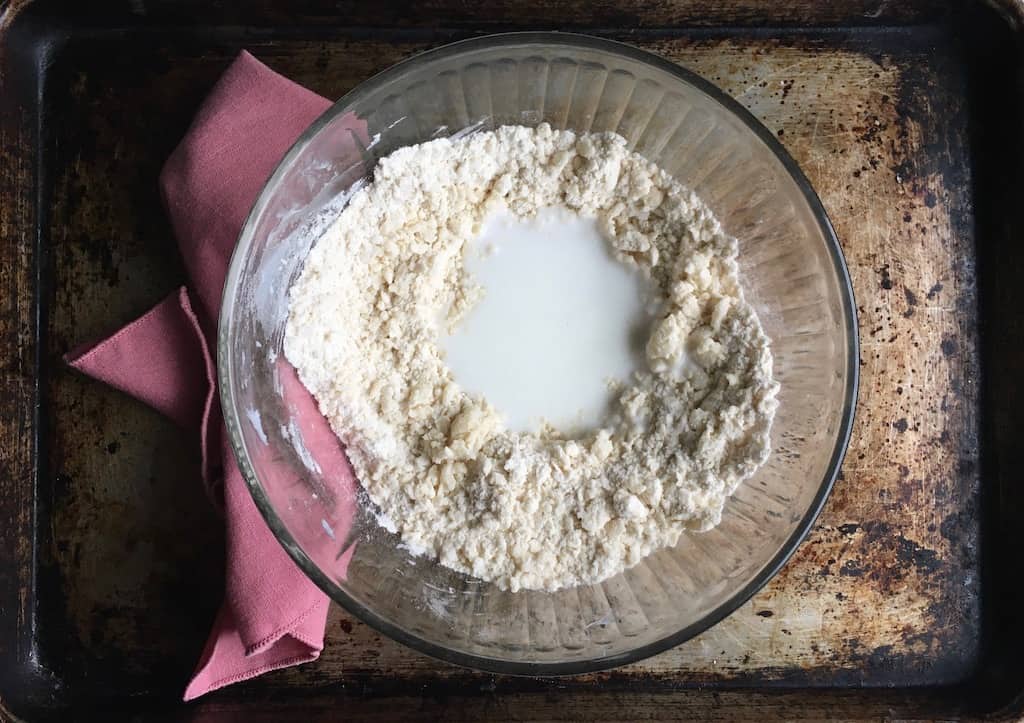
- Mix the dry ingredients together using a whisk until combined.
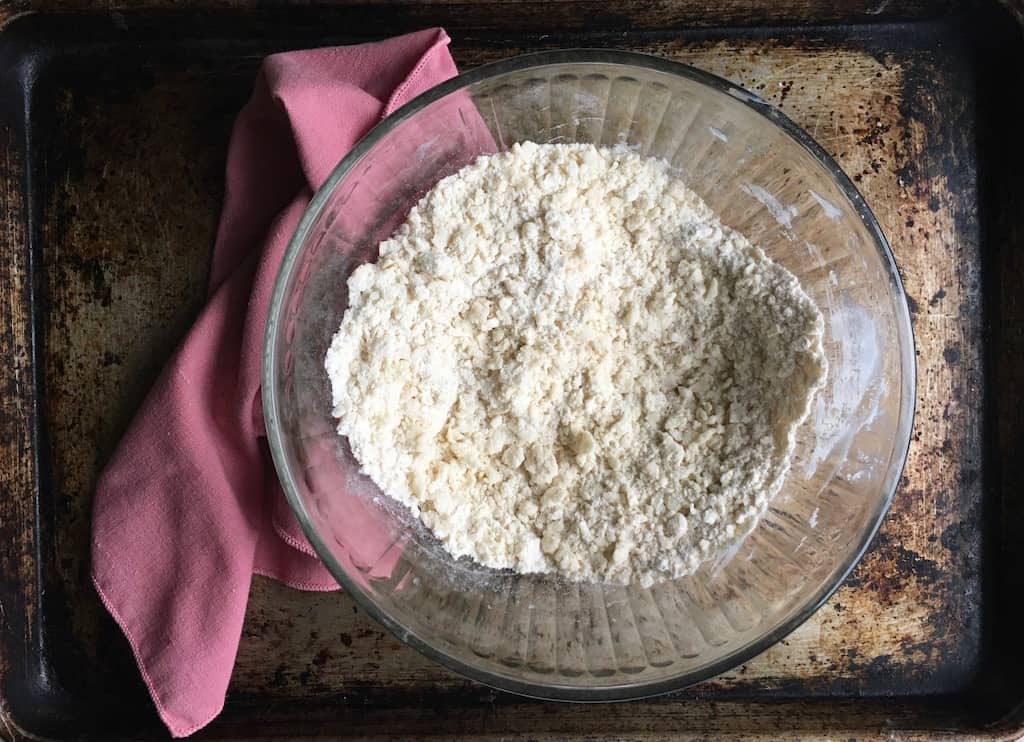
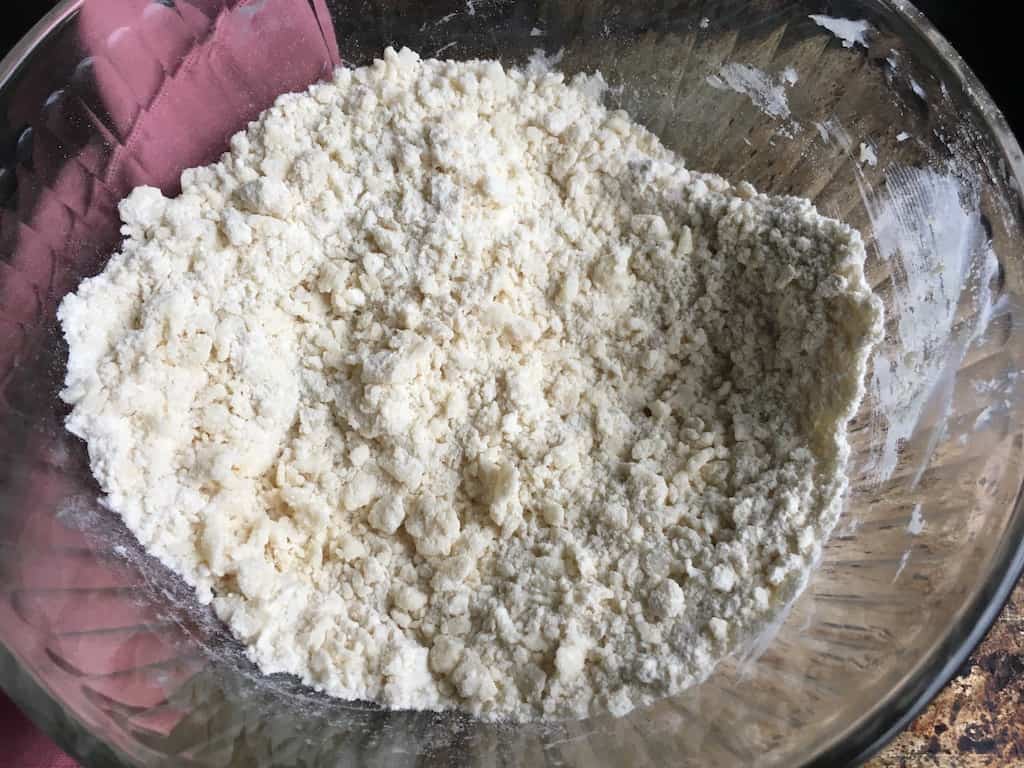
- Add the lard in ½" (1cm) pieces to the dry ingredients and use a fork to cut the fat into the flour mixture.
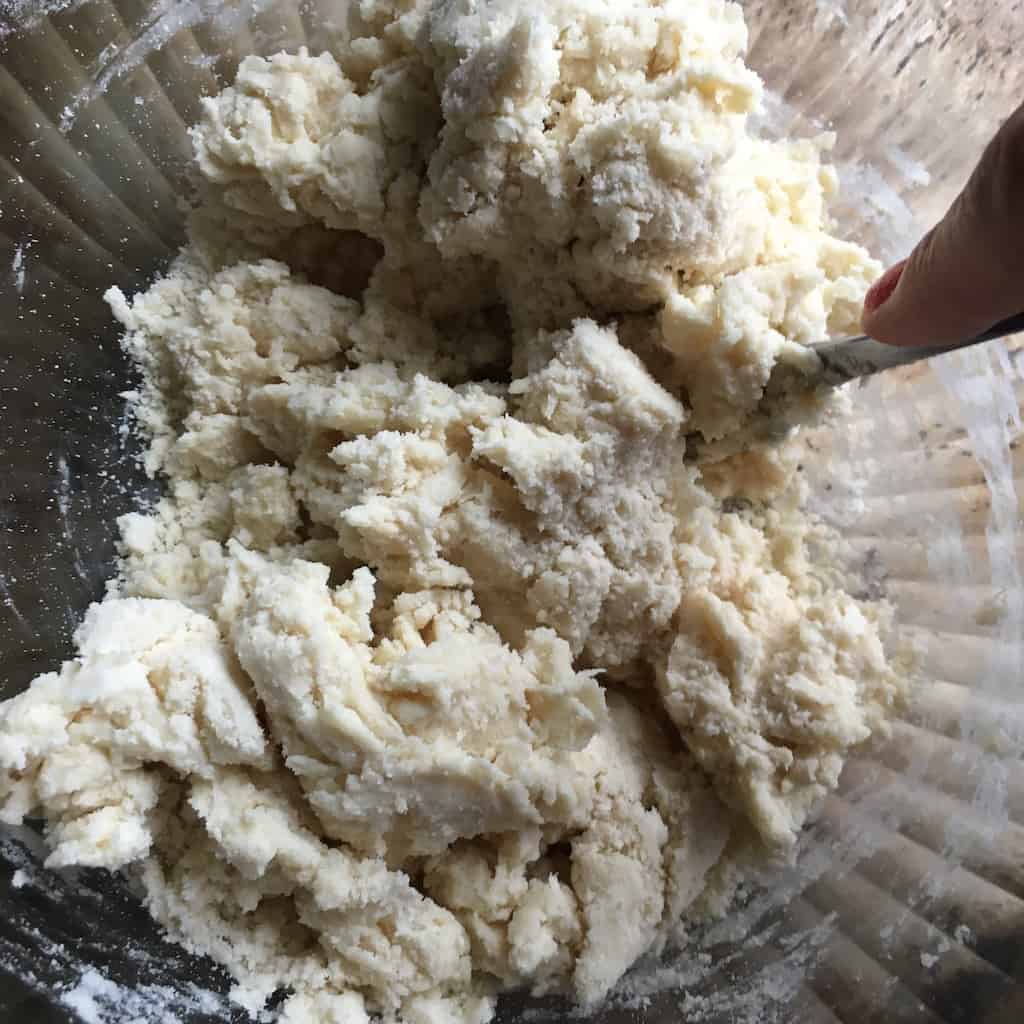
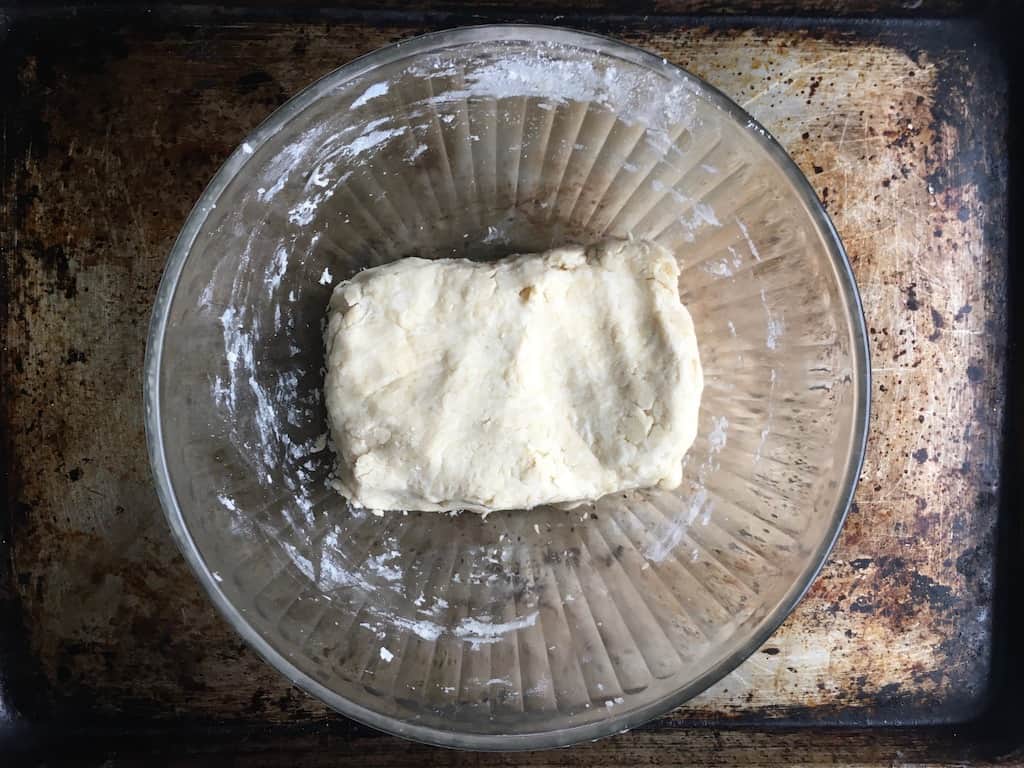
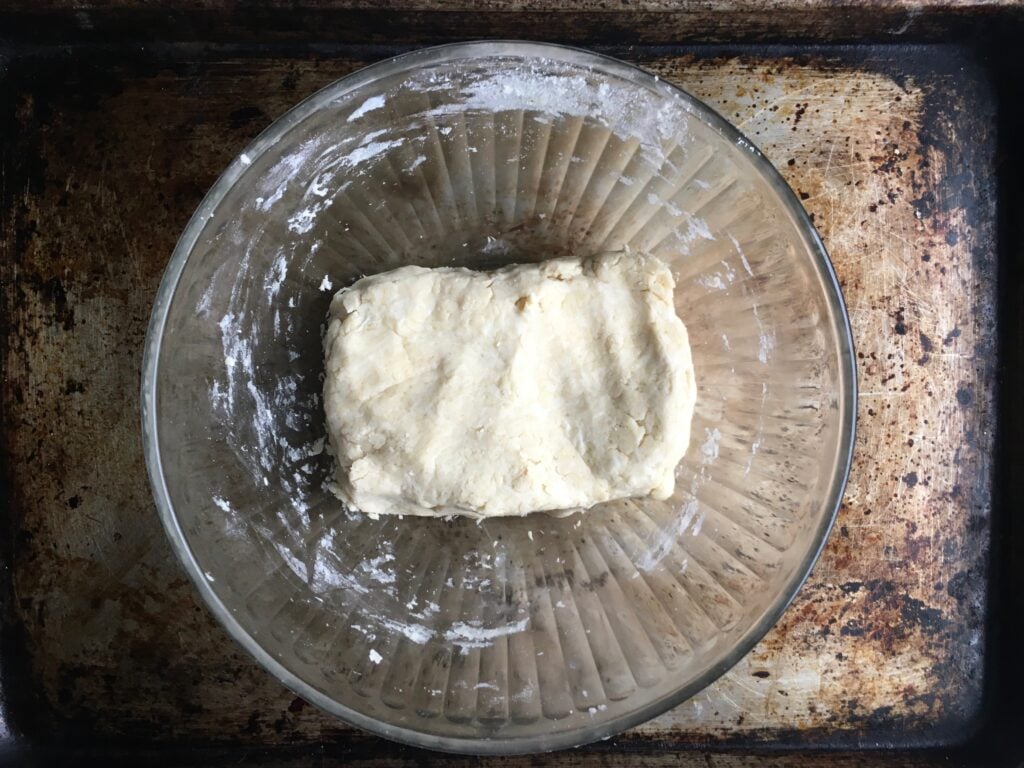
- Add the buttermilk ¼ cup at a time until the dough leaves the sides of the bowl. Form the dough into a disc, fold it over itself 3-4 times and wrap with plastic wrap, and rest in the fridge.
- Roll out the dough.
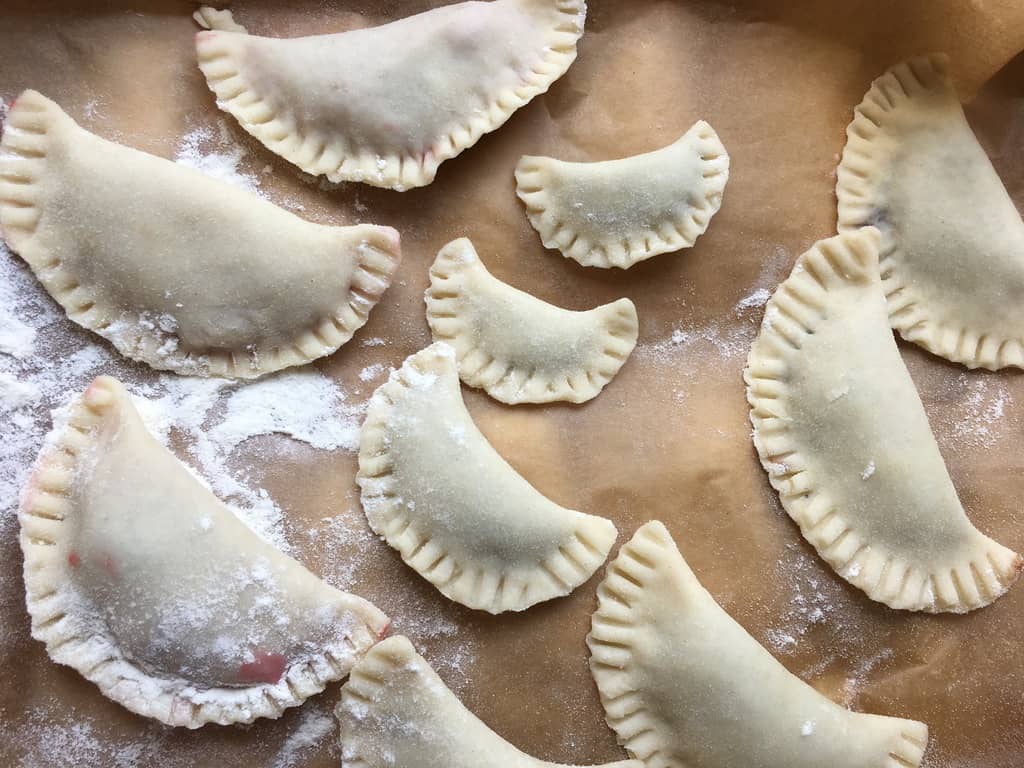
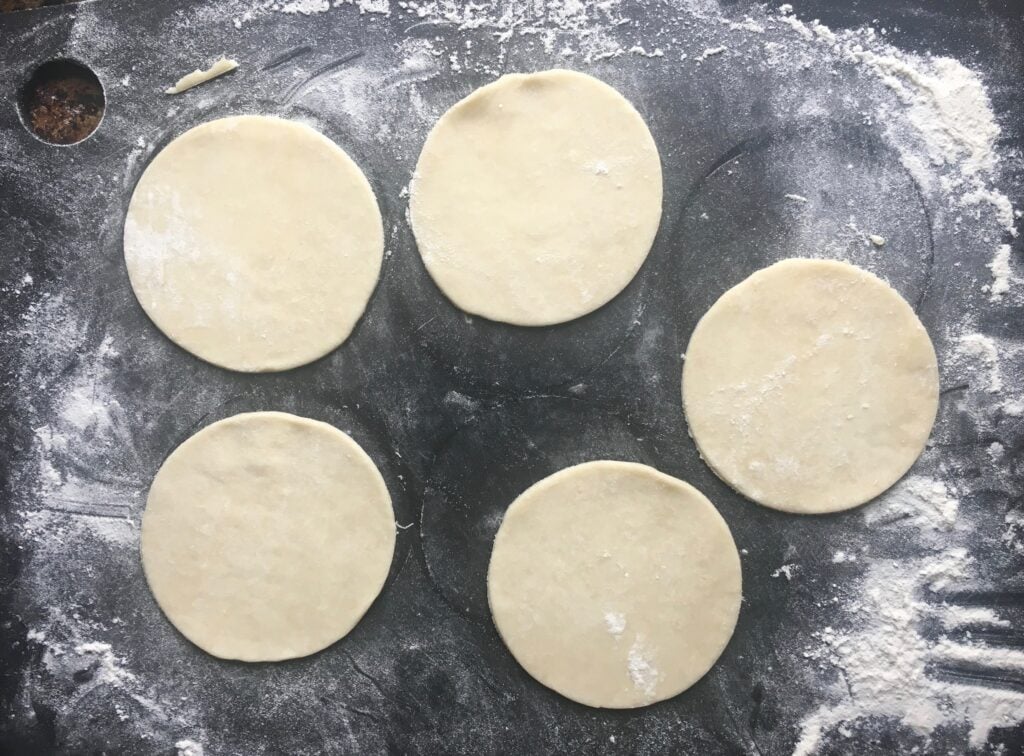
- Cut out dough circles and fill.
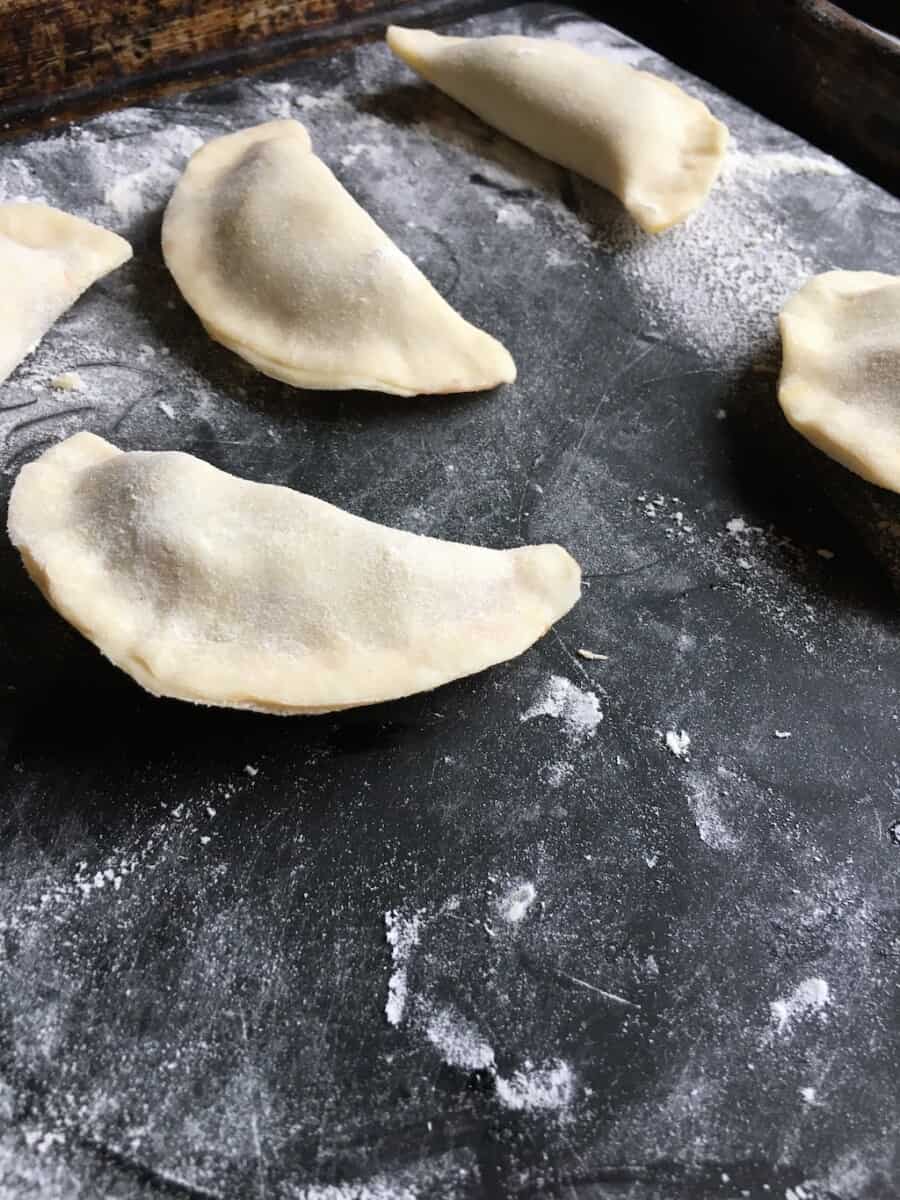
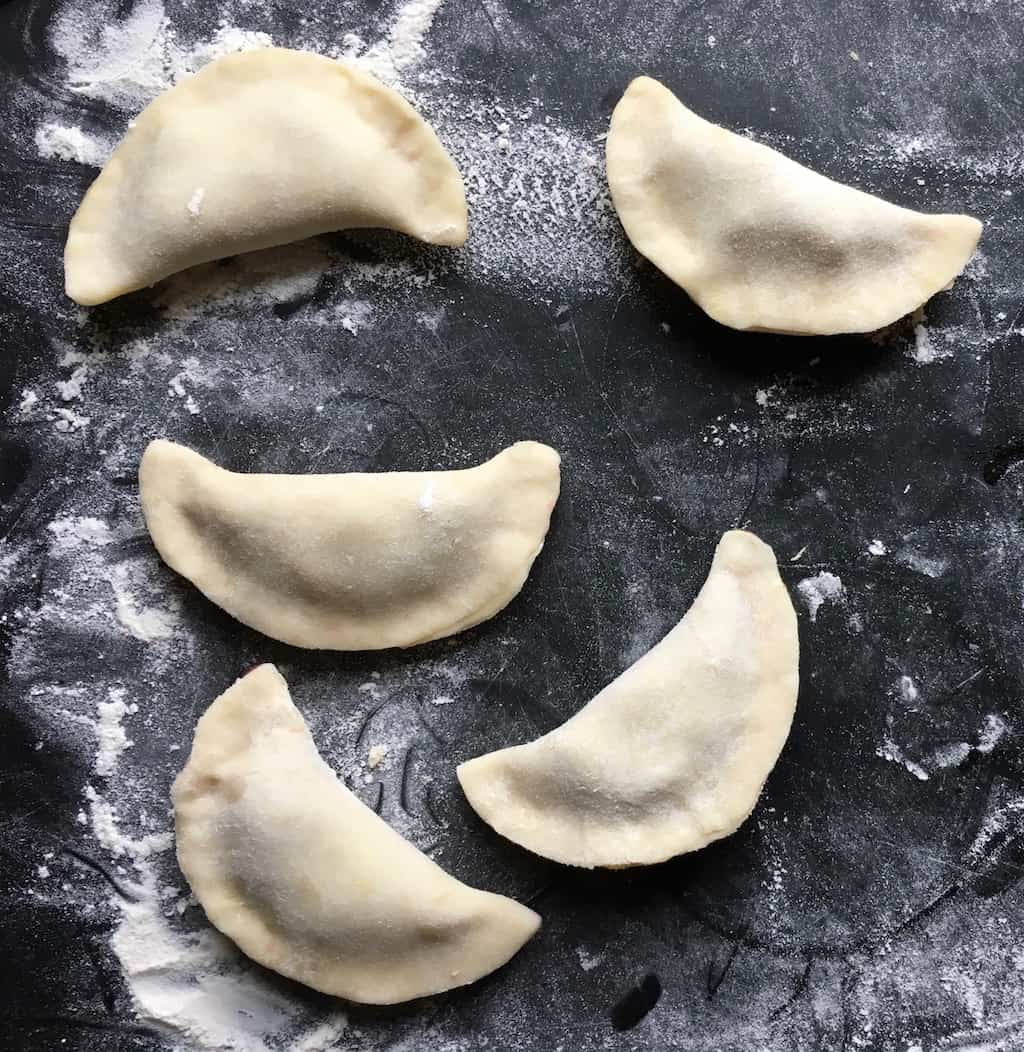
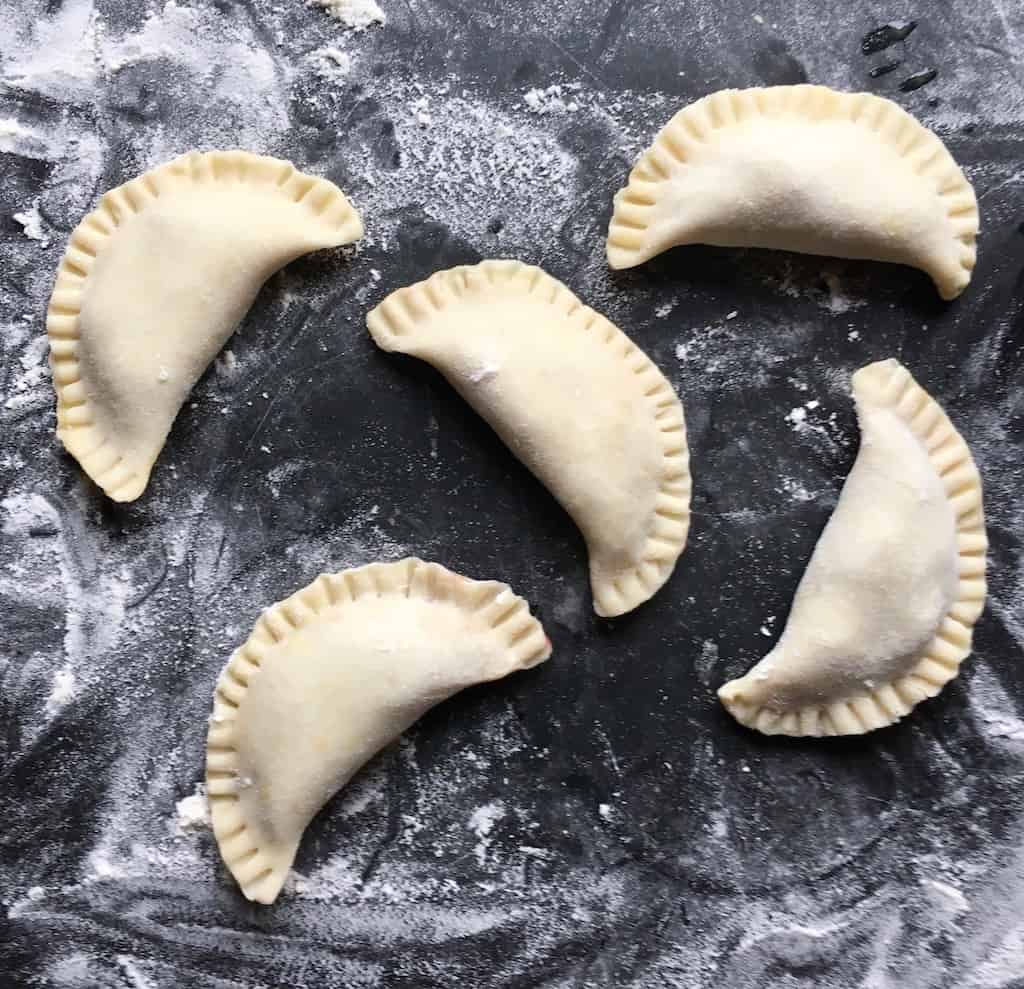
- Seal the dough.
- Fry the dough and dust with powdered sugar.
- Dust pies with powdered sugar.
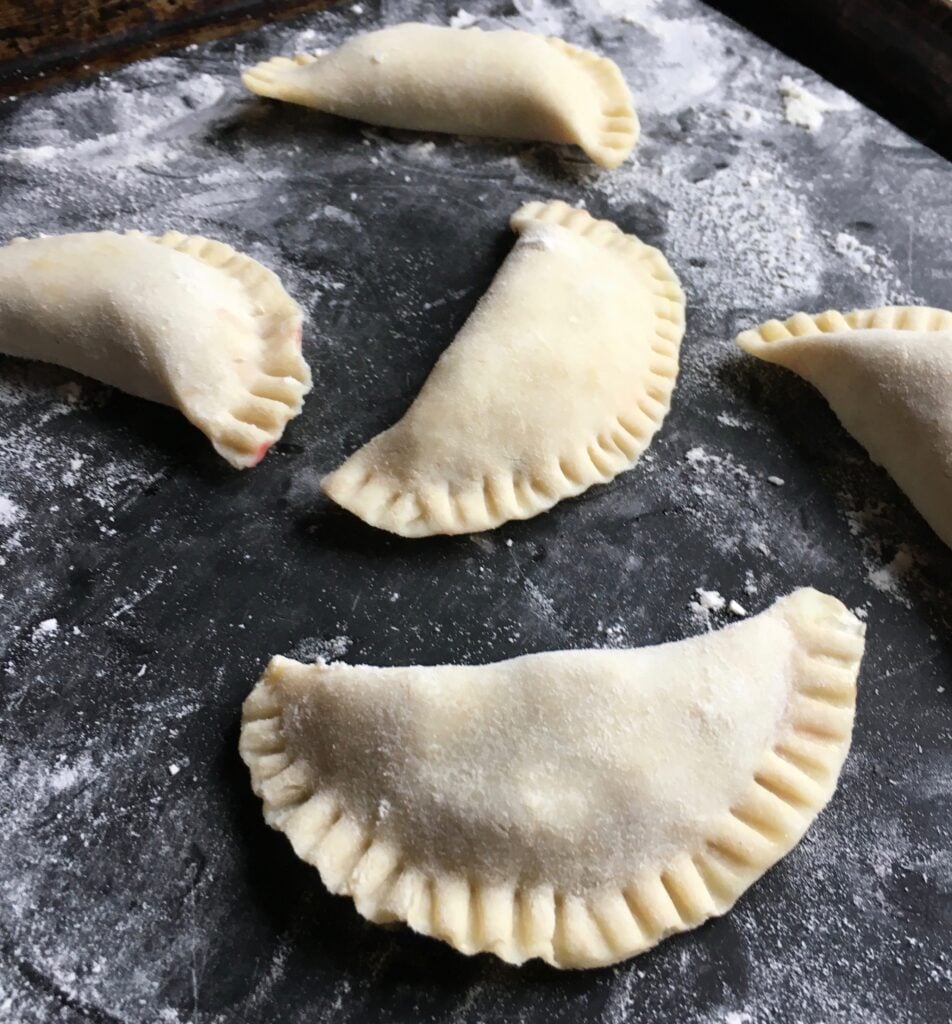
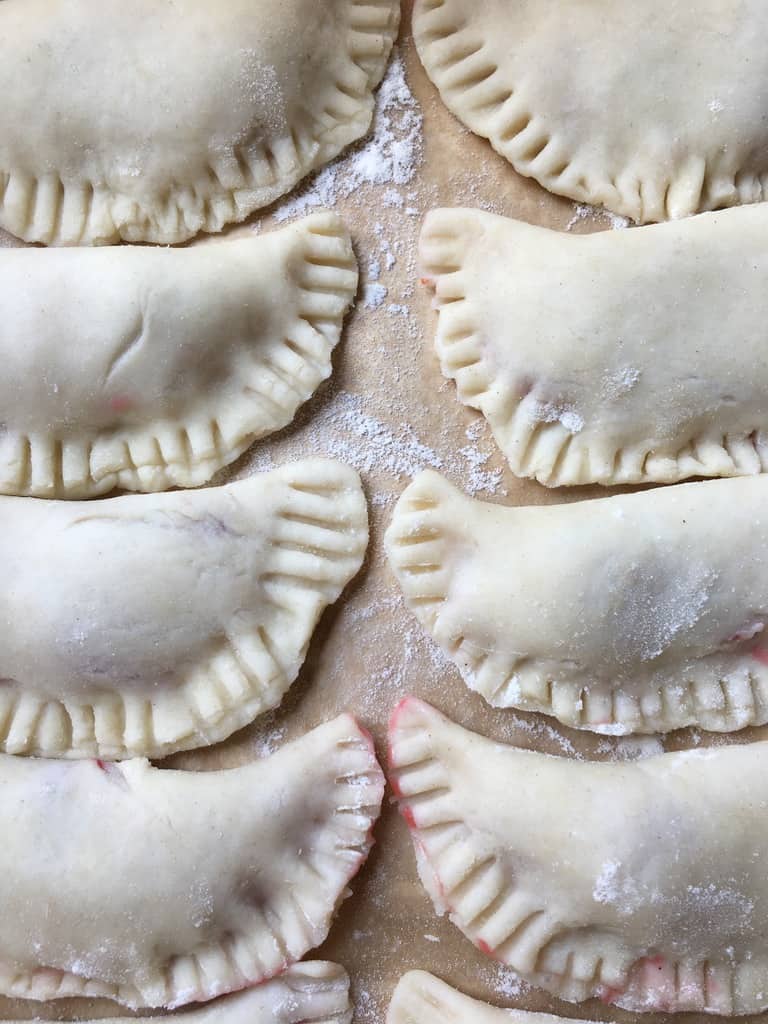
Strawberry-Rhubarb Fried Pies Step-by-Step Photos


Tips: How to Roll Out and Cut Dough for Fried Pies
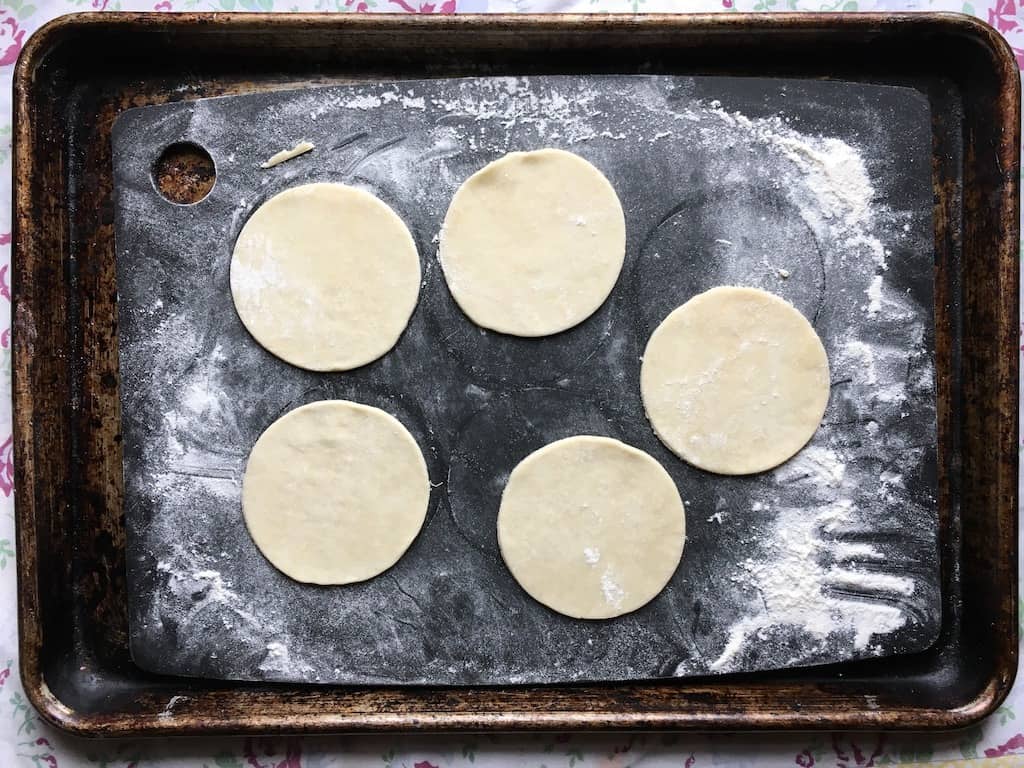
When rolling out fried pie dough, be sure to dust the surface of the countertop and the rolling pin with a little flour to keep the dough from sticking. Try not to add too much flour.
Roll out the dough using even pressure until it's about ¼ inch thick. Once you've got it rolled to the desired thickness, use a floured 3 or 4-inch round cookie cutter to cut circles.
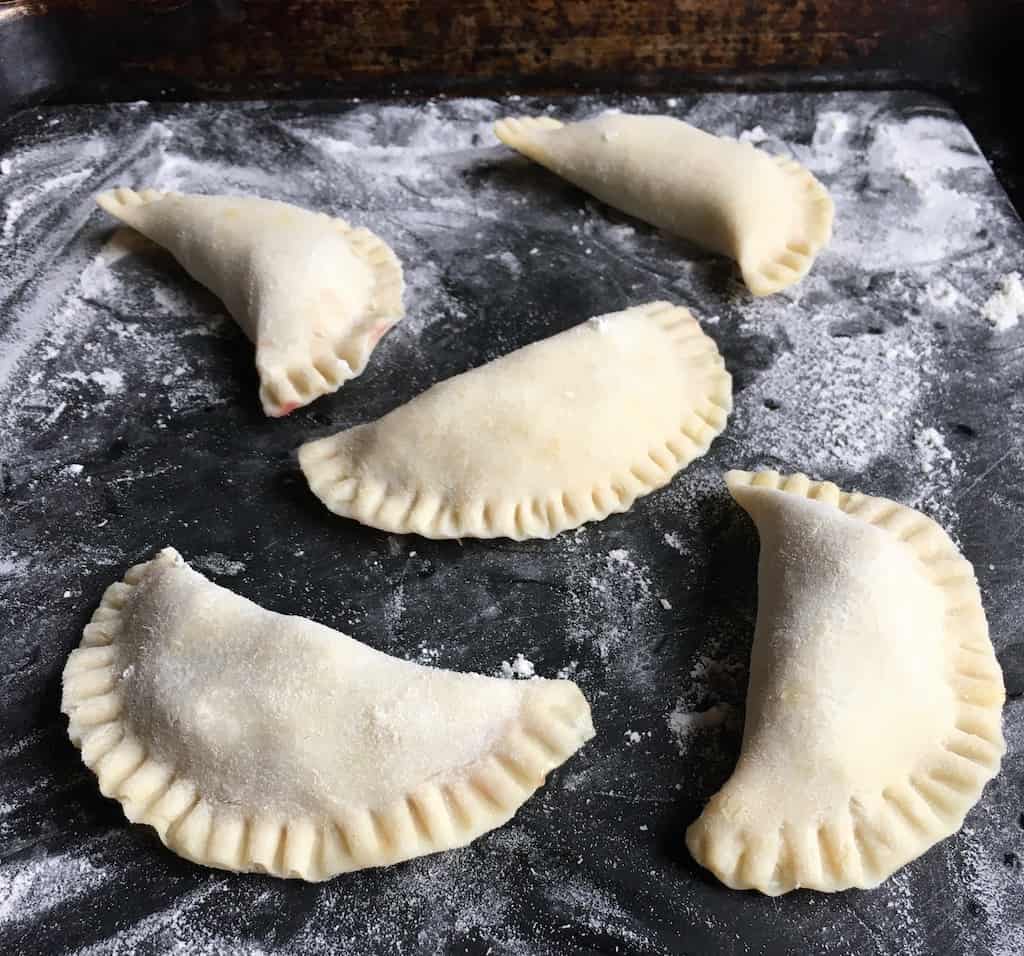
If the dough circles become too warm while you're working with them, place them on a floured or parchment-lined tray, cover loosely with plastic wrap, and pop them into the fridge for a few minutes to chill and firm up slightly before adding the filling and sealing the edges.
Keeping the dough nice and cool or cold but still malleable is key to being able to easily fill the dough without it becoming too messy.
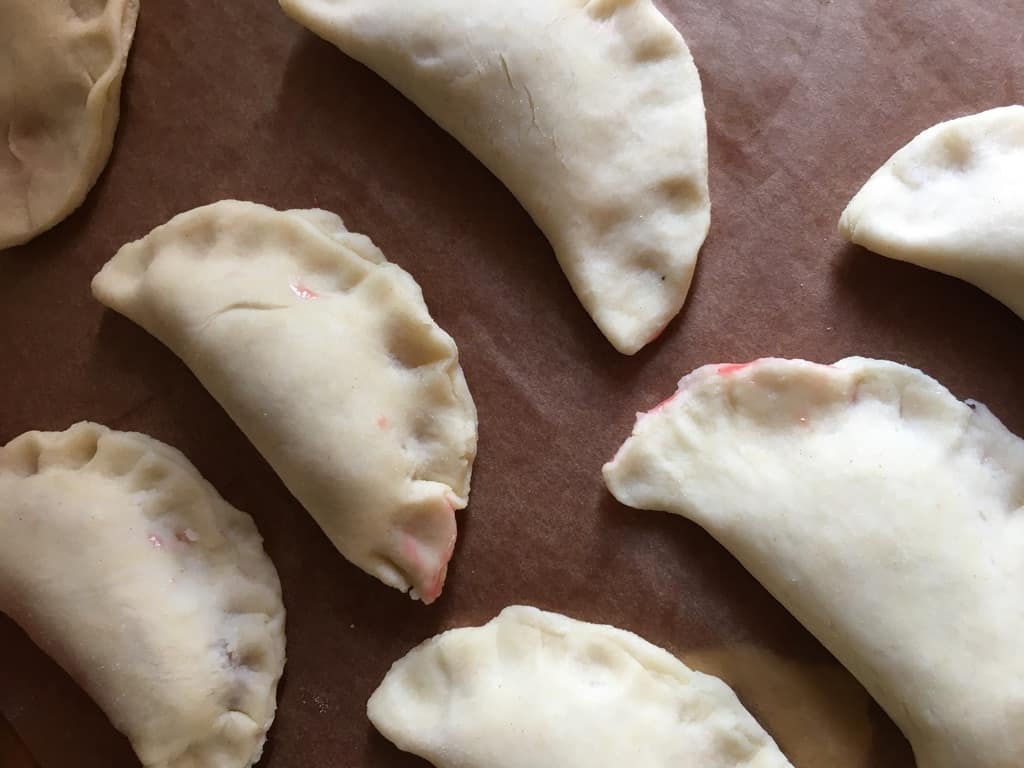
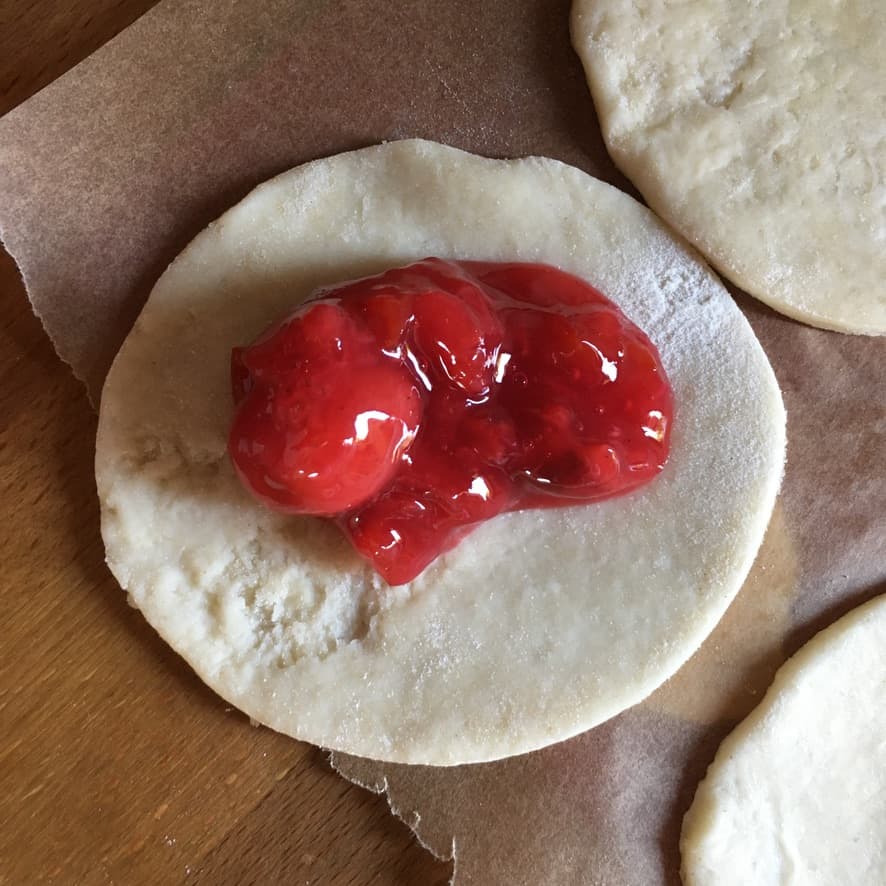
Do Not Overfill Fried Pie Dough
As tempting as it is, do not overfill the pie dough. It's easy to want to put in "just a little more", but if you overstuff the dough, it can tear and split apart when you're sealing it or while it's frying.
When filling fried pie dough, the goal is to get a good dough-to-filling ratio and fill it without the pie filling seeping out from the edges. Plus, a little filling goes a long way.
Once you add the filling, close the circle by pressing down with your fingers to remove any air bubbles all the way around the perimeter. Then use a fork to create a closed seal. This process can be a little messy but it's still quick and easy.
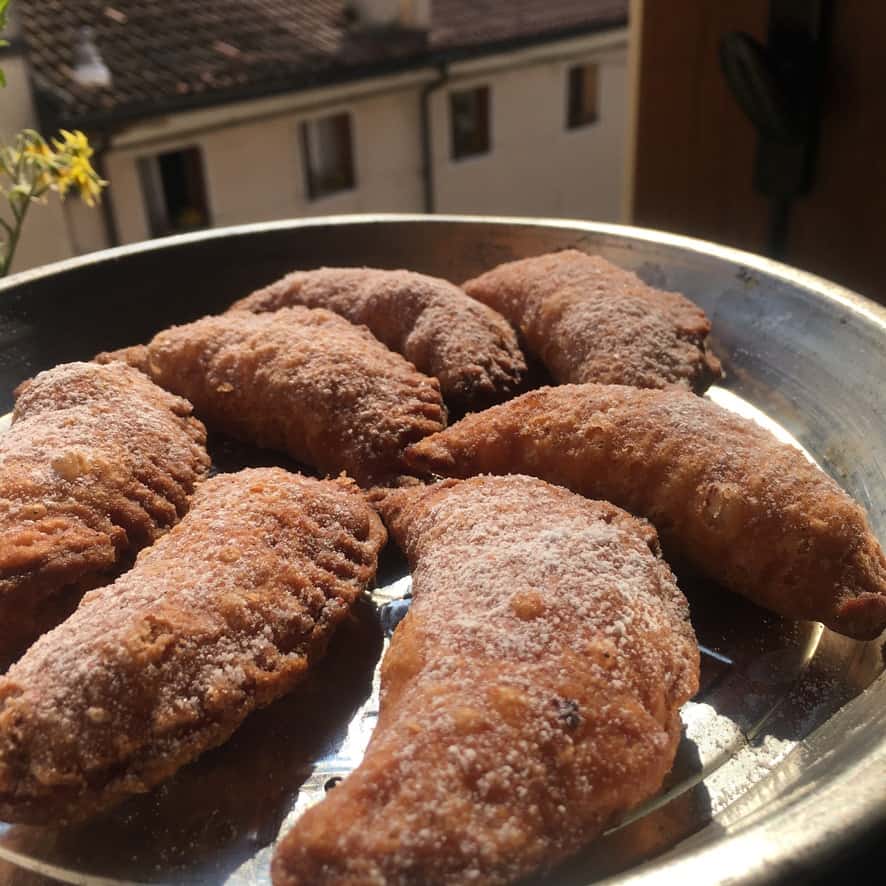
The Secret to Making the Crispiest Flakiest Fried Pie Dough
Baking powder is my "secret" ingredient in this fried pie dough recipe. It's a leavening agent that, when combined with a liquid in a flour-based recipe, allows for the escape of carbon dioxide gas, adding lightness and unbeatable crispiness to the final fried pies.
You can see from the photos below how light, bubbly, and crispy this fried dough is. These bubbles equal crispy-crunchy flaky goodness.
Correct Oil Temperature is Key to Fried Pie (Hand Pie) Success
Always make sure the oil is at the right temperature before frying. If the oil is too hot, it'll brown the outside before the inside has time to cook through.
If the temperature is too low, the pies will absorb too much oil and become greasy.
The temperature should stay between 350°-375°F (176°C-190°C) when you first drop the pies into the oil. Try to maintain an oil temperature of 325-350°F (163-176°C) throughout the frying time.
Don't overcrowd the pies while cooking. Doing so can lead to a rapid drop in oil temperature, which leads to greasy fried pies. If you're new to deep-frying, test-fry one pie or a small leftover piece of dough to get the hang of it first, or buy a cheap thermometer. You can always check to see if the temperature of the oil is ready by placing a wooden chopstick into the hot oil, being sure the chopstick touches the bottom of the pan. If you see bubbles coming up around the chopstick, the oil is ready.
FAQ's & Top Tips
Can I freeze fried pies? Yes, you can freeze filled uncooked fried pies for up to 6 months before frying. After filling the pies and sealing them, lay them out in a single layer (not touching) on a parchment-lined sheet pan and pop them into the freezer for 1 to 2 hours, or until the pies have firmed up. At this point, they may be placed inside an airtight container or freezer bag and sealed.
How to cook frozen fried pies? When you're ready to fry the frozen fried pies, remove them from the freezer for about 15 minutes to allow some of the chill to come off. Alternatively, you may place frozen pies in the refrigerator for 2 hours before frying, which also helps take the chill off. Fry them for about 8 minutes, being sure to turn them occasionally, or until cooked through and golden brown.
If you don't have buttermilk, make faux buttermilk by adding 1 tablespoon (13g) of freshly squeezed lemon juice to a liquid measuring cup, then pour in whole milk until it reaches the ½ cup mark on the measuring cup. Stir the mixture and allow it to rest at room temperature to thicken for 5 to 10 minutes before adding to the flour mixture.
This fried pie dough recipe can easily be doubled and frozen. Wrap the extra dough and seal it in a freezer bag for up to 3 months.
Substitute vegetable shortening for the lard if you prefer. You may also use a mixture of half butter and half lard. Using butter only will yield a slightly different texture but wonderful flavor.
Let the pie dough rest. Do not skip this step. It's very important to let the dough relax so that it's more pliable and easier to roll out.
Use a scale to weigh the ingredients for more consistent measurements, but feel free to use measuring cups and spoons if that's what you have.
For this recipe, I use a 4-inch round cutter for this recipe. But you can make mini fried pies using a 2 or 3-inch cutter. For a 4-inch round cutter, I fill the dough with no more than 1 ½ to 2 tablespoons of filling. Doing so helps ensure the pies will seal and fry properly. If you make larger or smaller pies, be sure to adjust the amount of filling. Whatever you do, resist the urge to overfill them, or they may bust open while frying.
Dust the pies with powdered sugar twice. Sprinkle the fried pies as soon as they finish frying, which allows the sugar to melt into the hot pies. Then dust them a second time after about 10 minutes so you can see the powdered sugar on top.
Add extra flavor to the powdered sugar by adding a pinch or two of cinnamon to it before dusting the pies. This is especially good for peach, cherry, and apricot fried pies.
Use this pie dough with other fillings. Try chocolate, peach, cherry, lemon cream, apricot, vanilla-bean cream, wild blackberry, sweet potato, pecan, or even coconut.
Let's get started!
Print📖 Recipe

Flakiest Southern Strawberry-Rhubarb Fried Pies (Hand Pies)
- Total Time: 4 hours 24 minutes
- Yield: 4-6 (4-inch) Fried pies or 8-9 (3-inch) Fried Pies
Description
Tender and crispy on the outside, this homemade fried pie dough is filled with homemade strawberry-rhubarb pie filling that takes just minutes to prepare. If you enjoy my Southern Fried Cherry Pies, try this late spring version!
Ingredients
for the dough
- 1 ½ cups all-purpose flour (225g)
- 1 ½ tablespoons pure cane sugar, or granulated sugar (23g)
- ¼ teaspoon kosher salt (2g)
- 1 teaspoon baking powder
- ¼ cup lard, pinched off into small pieces (95g)
- ¼ to ½ cup buttermilk, room temperature (88-121g) *see notes for buttermilk substitution
- 2 to 3 cups neutral vegetable oil for frying (450g-675g)
- powdered sugar for dusting fried pies
- a pinch of cinnamon (optional, but recommended)
for the pie filling
for the all-natural strawberry sugar (optional)
*I use 00 flour when I'm in Italy for this recipe (and King Arthur flour when I'm in the States), and the weight of different flours varies based on the humidity content and absorption potential of the flour you're working with. Just be sure to use the 'scoop and level' method to measure your flour into measuring cups and spoons and the recipe works perfectly every time.
Instructions
- Mix the dry ingredients. Add the flour, sugar, salt, and baking powder into a medium bowl and whisk to combine.
- Add the lard. Pinch the lard off into ½" (1cm) pieces and add them to the dry ingredients. Use a fork (or dough cutter) to cut the lard into the flour mixture until you have pea-sized crumbles.
- Add the buttermilk. Next, slowly add the buttermilk to the mixture, approximately ¼ cup (40g) at a time, stirring the mixture with a fork to incorporate the buttermilk into the flour until the mixture leaves the sides of the bowl. Form the dough into a disc and turn it out onto a floured surface, and sprinkle it with a little more flour. Fold the dough over itself 3-4 times. Wrap with plastic wrap and rest the dough in the fridge for at least 4 hours and up to 2 days.
- Roll out the dough. After the dough has rested, remove it from the fridge and place it on a lightly floured surface. Roll the dough into an 8x7 inch (20x17cm) rectangle approximately ⅛" thick (or just slightly thicker).
- Cut the dough and fill. Using a 3 to 4-inch (7- 10 cm) round cookie cutter, cut circles out of the dough and fill with 1 to 2 tablespoons of filling.
- Seal the dough. Fold one half of the dough over the filling to create a half-moon shape and press down using your fingers to seal the edges. Use a fork to crimp the edges and ensure the pies are sealed. Set filled pies aside on a parchment paper-lined sheet pan, and if they start to get too warm, place the filled pies into the fridge to keep them cool while you fill the remaining pies.
- Fry the dough. Preheat oil to 350°F/176°C and fry the pies in batches. Add pies one at a time very carefully to the hot oil. Cook the pies for about 3 to 4 minutes, or until light golden brown, turning the pies over every 30 seconds or so to ensure even browning.
- Dust pies with powdered sugar. Remove pies from the oil onto a cooling rack or paper towel-lined platter and lightly dust with powdered sugar (or homemade strawberry sugar). After the pies have cooled for about 10 minutes, sprinkle them once more with powdered sugar and serve hot or at room temperature. Enjoy!
Notes
For a complete list of fried pie tips, see the main post.
If you don't have buttermilk, make faux buttermilk by adding 1 tablespoon (14g) of freshly squeezed lemon juice to a liquid measuring cup, then pour in whole milk until it reaches the ½ cup mark on the measuring cup. Stir the mixture and allow it to rest at room temperature to thicken for 5 to 10 minutes before adding to the flour mixture.
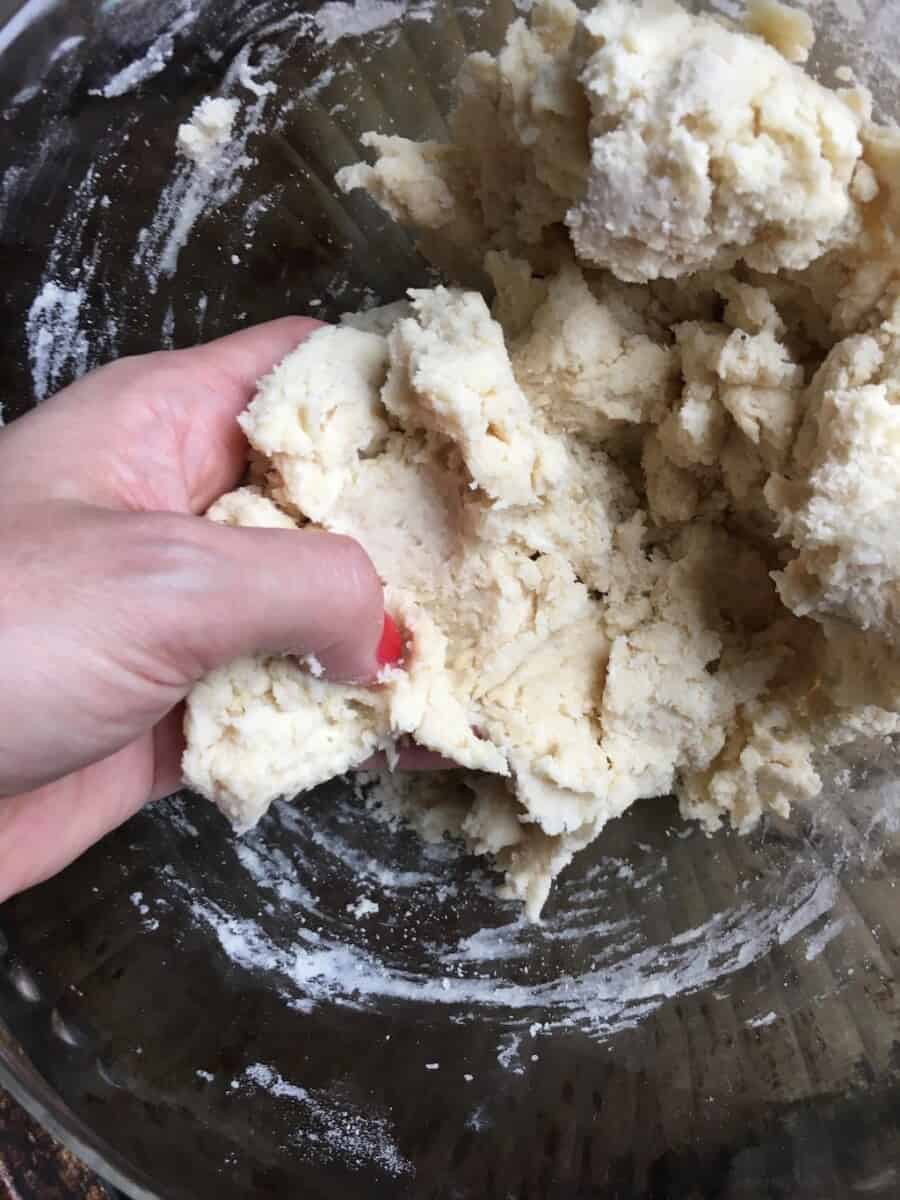
How do I know if I've added enough buttermilk? You'll know the dough is ready to be formed into a 'brick" when you can squeeze a handful of dough together, and it holds. If the dough crumbles, add just a bit more buttermilk, one teaspoon (5g) at a time, until the mixture just holds together. Avoid adding too much buttermilk, or the dough will be wet and sticky. Never add all of the buttermilk all at once. Instead, add it in increments so you can be sure to use just the right amount.
Make vegan fried pies by substituting vegetable shortening for the lard. You may also use a 1:1 mixture of half butter and half lard. Using butter only will yield a slightly different texture, but a wonderful flavor.
Let the pie dough rest. Do not skip this step. It's important to let the dough relax which makes it more pliable and easier to roll out.
I use a 4-inch round cutter when I'm just making these for a few people, but the 3-inch round cutters are better for parties and larger groups.
- Prep Time: 20 minutes
- Rest Time: 4 hours
- Cook Time: 4 minutes
- Category: Pies + Cobblers + Crostate
- Method: Deep Fried or Air Fryer
- Cuisine: Southern
Nutrition
- Serving Size: 1 Fried Pie


Marla P. says
These need a "just like Meemaw used to make" stamp! The crust gets so golden and flaky, and that strawberry-rhubarb filling is the perfect sweet-tart combo. As good as any of the best fried pies I've ever eaten (or made) anywhere in the South. I'm going to try them with your homemade cherry pie filling next❤️.
Kristen says
These were SO good! The dough is crispy, flaky and grandma-GOOD! I'm not sure why I've ever bought pie filling before but I won't be anymore. I added an extra spoonful of sugar bc the rhubarb was extra tart and as a southerner, we like our desserts sweet. I won't be making any fried pie doughs except this one from now on...can't wait to try your cherry pie filling next🤗❤️.
Allison says
Best fried pies I've ever made! The filling was just as easy and quick as promised (sometimes recipes exaggerate how easy something is, but this was actually easy). I'll be making peach fried pies with these later in the summer! Thanks for the recipe❤️.
Imougene V. says
This is the best fried pie dough! I grew up eating my mawmaw's fried pies with different fillings depending on the time of year but I think even she'd say these were just a little better than hers or at least as good. I used frozen strawberries and rhubarb I put up last summer to make the filling and it was just as good. From one southerner to another, well done! and thanks for the recipe.